This article will teach you how to change Eternus DX90 storage disk. A failed disk force between the disk drives takes you as far as a RAID volume. To replace the failed disk with a new disk of the same capacity.
We have one disk broken, and we have brought the disk from our vendor. Follow the below steps to replace the new disk with the broken one. You can perform the replacement of the Fujitsu Siemens Eternus DX90 S2 broken disk with a new one.
Table of Contents
You can visit Fujitsu’s official website to read about the Eternus DX92 S2 Guide.
Replacing Fujitsu Siemens Eternus DX90 R2 Storage Disk
The correct process for replacing a storage disk in a storage system depends on a number of components. Including the data protection level of volumes, the RAID configuration, snapshots, and the number of disks that were replaced. Replacing a disk in the storage that is in your cluster requires rebuilding data on the replaced disk.
Replacing a disk in an Eternus DX90 R2 storage system includes the following basic steps:.
Planning for rebuilding/copyback data on the disk.
Replacing a physical disk in the storage system.
Rebuilding RAID on the storage system.
When RAID is normal (RAID 1, RAID 5, or RAID 6), all drives indicate they are safe to replace. Though you must only replace one drive at a time,. If it is necessary to change more than one drive, please always check the disk status carefully again. You need to wait two minutes for the status to be fully updated. If the status indicates that the second drive is safe to remove, then you can replace it.
Eternus DX90 Drive Replacement
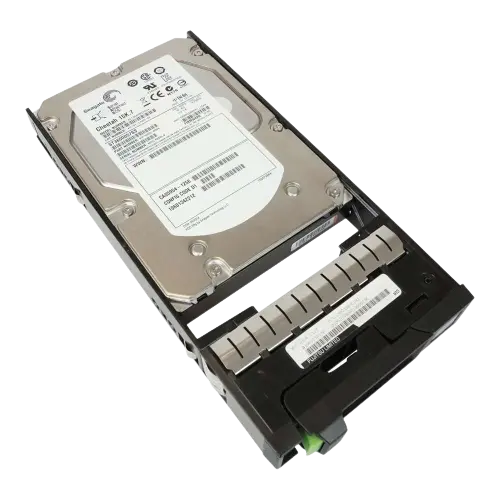
SAS 600GB 15K 3.5 CA07339 E103 CA05954 1256. Before purchasing a SAS disk, you need to confirm the disk capacity, serial number, and same vendor disk.
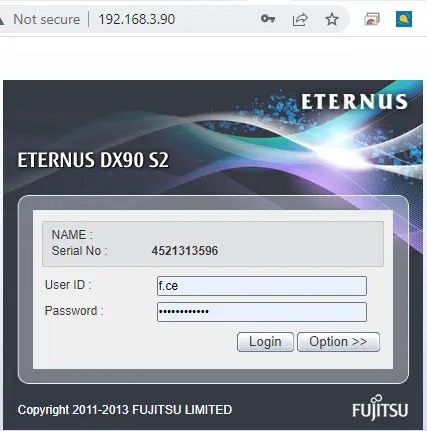
Open any browser (Chrome) and enter your Eternus DX90 S2 IP address, then press enter.
Log in with your user ID and password.
Username – f.ce
Password – (check-code + Storage Serial Number) You can check from the back side of your storage.
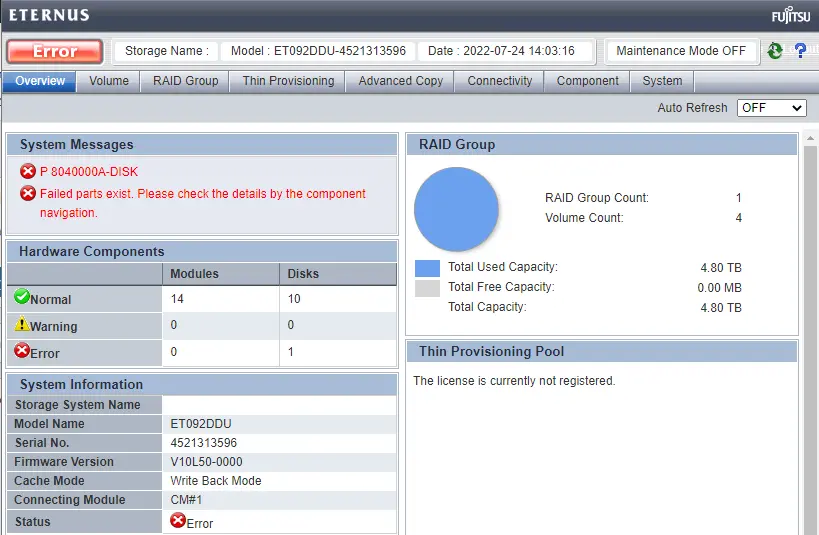
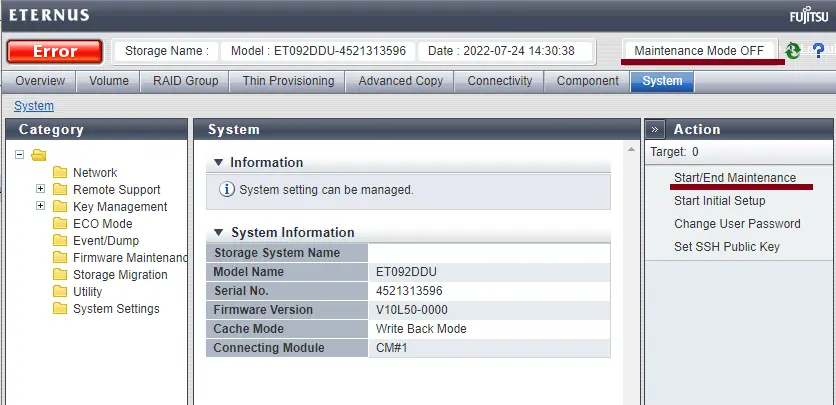
Once you log in with your Eternus DX92 storage, the error will appear.
Disk number
Failed parts exist
Hardware Components disk error
Status
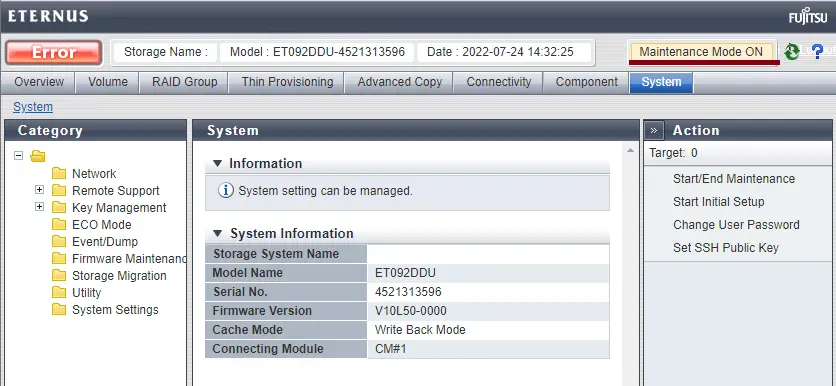
Enable Maintenance Mode
Click on the System Menu
Under the Action menu, click Start/End Maintenance.
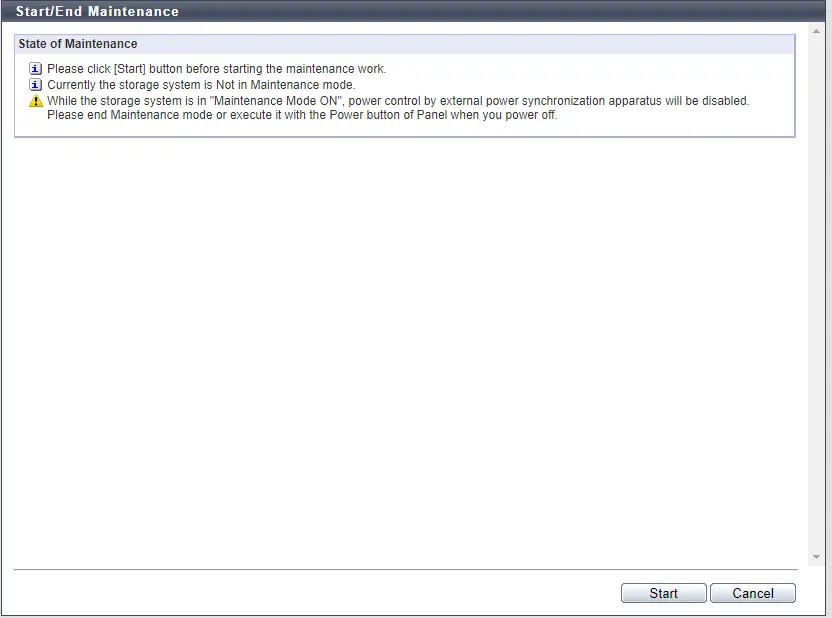
Start/End maintenance; click start.
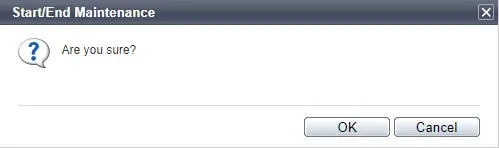
Click ok
The operation was completed successfully; click done.
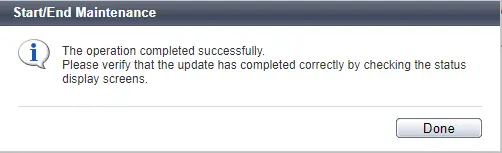
Now you can see the maintenance mode on.
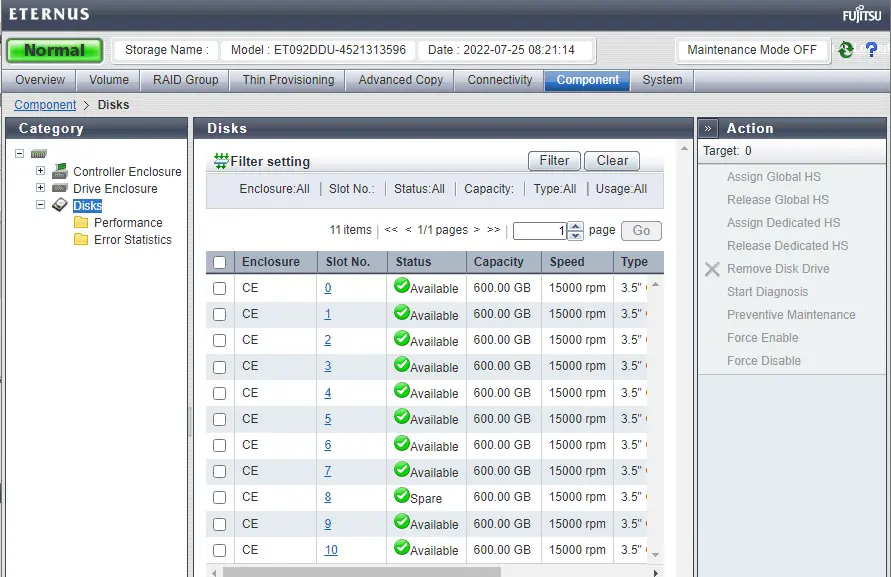
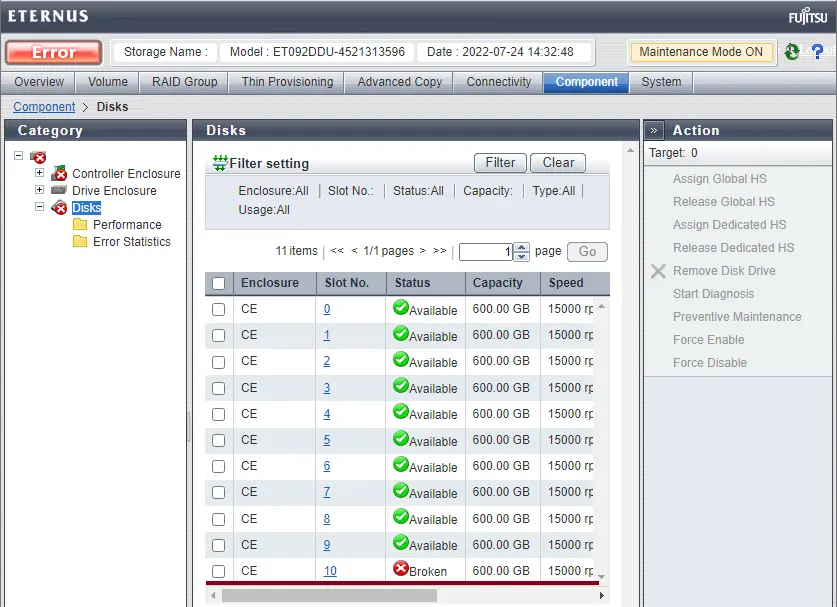
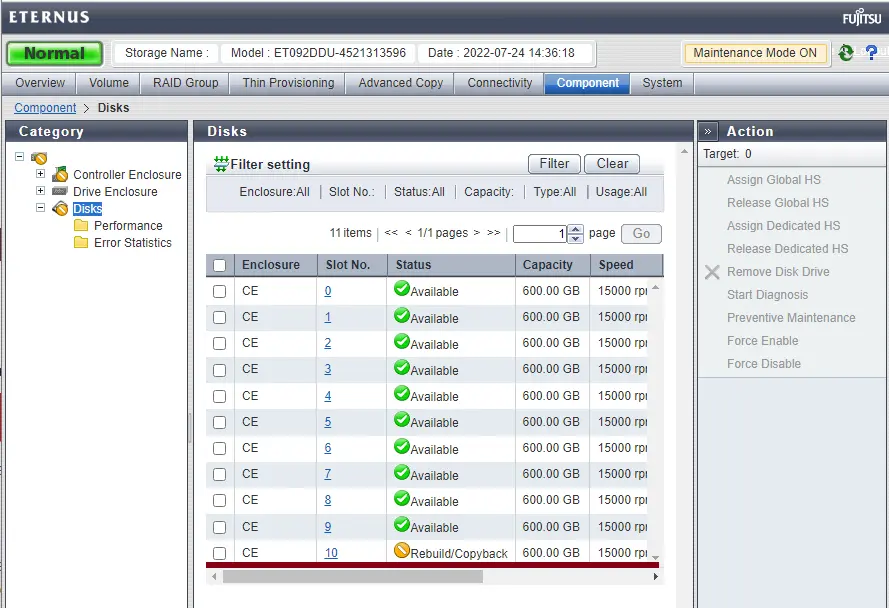
Click on Component Menu, and then click on Disks. Here you can find the # of Broken Disk. Click on Brocken’s disk.
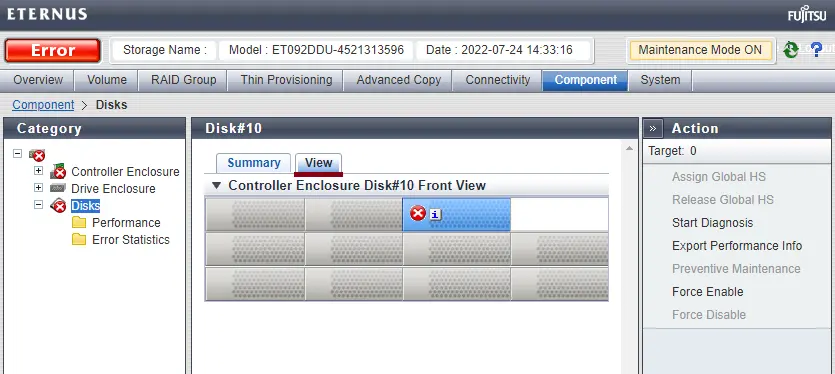
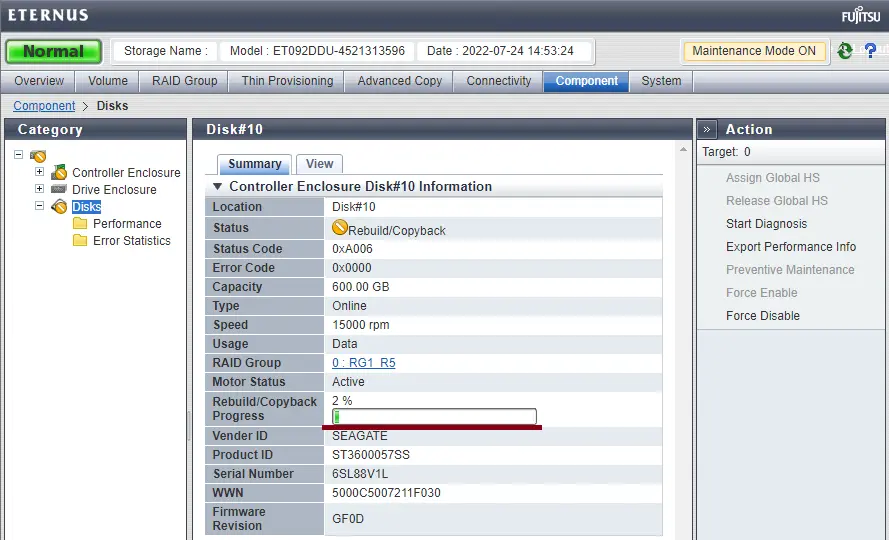
To replace the Eternus DX90 R2 broken disk, under the broken disk, click on View. Here you can find your Broken disk Slot front view.
Change Eternus DX90 Storage Disk
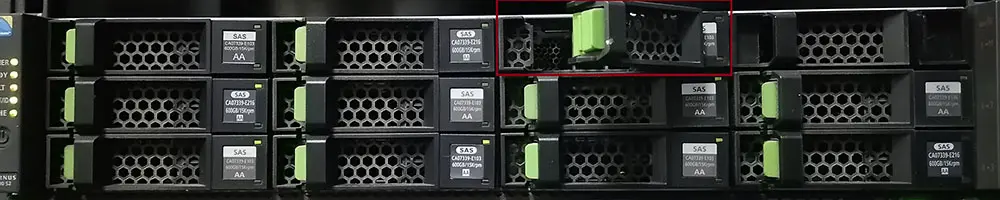
Now you can remove the drive and then replace it with a new one.
After changing the disk, it’s automatically started Rebuild/Copyback data.
Click on the Disk Slot # the replaced one and view the summary.
Finally, storage is at normal status.