
This article will explain how to use the extract utility for Microsoft Windows Veeam Backup & Replication. Veeam Backup comes with an extract utility that can be used to restore machines from the .vbk backup files. The extract utility doesn’t need any interaction with Veeam Backup & Replication, and you can use it as an independent tool on Microsoft Windows and Linux machines.
The Veeam extract utility can be helpful, for instance, if it is written to the tape next to machine backup files. In this situation, you get the possibility to recover systems from backups at any point in time, even if backups are removed from Veeam Backup or Veeam Backup & Replication isn’t installed.
Do you know those tools that everyone should have close by and available as an administrator? The Veeam Extract Utility must be one of these tools; you can download it for free.
Table of Contents
Note:
The extract utility will not work with backups that are saved on scale-out backup repositories.
You can use the extract utility on two interfaces:
Graphic user interface
Command-line interface
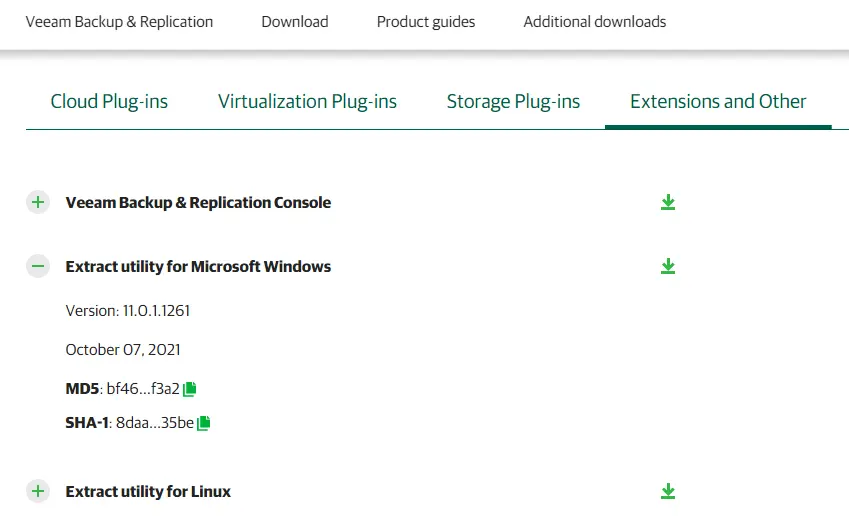
Download Extract Utility Veeam Backup & Replication
You need to log in to download the extract utility for Windows and Linux.
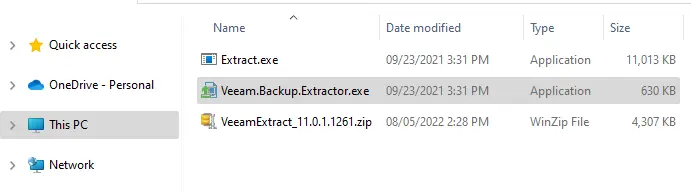
Now you can extract the zip file you downloaded for Windows.
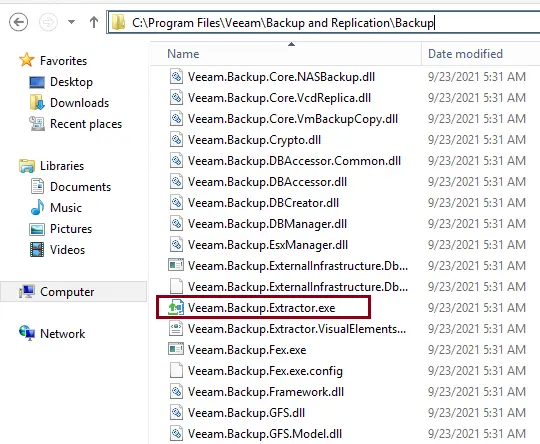
The Veeam extract utility for Windows is located in the installation directory of Veeam; by default, it is located at C:\Program Files\Veeam\Backup and Replication\Backup
The directory includes three files for the extract utility:
The Veeam.Backup.Extractor.exe file works in the GUI on Microsoft Windows machines only.
extract.exe file Veeam utility is working in the command prompt for Microsoft Windows, and the extracted file is working in the command prompt for Linux.
Run Veeam.Backup.Extractor.exe.
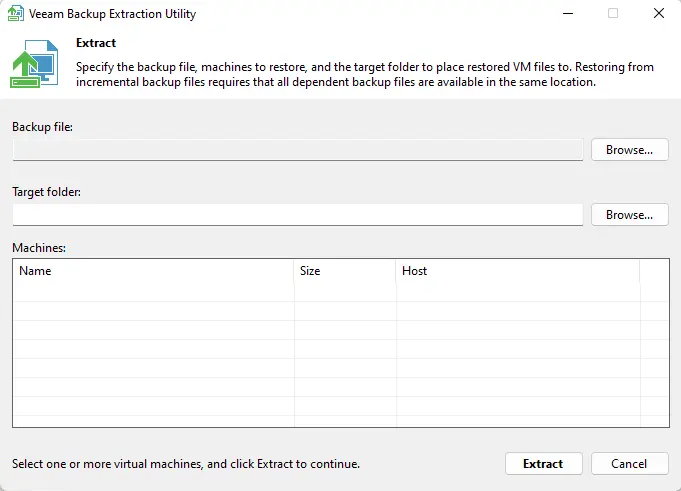
Extract Utility for Microsoft Windows Veeam GUI
Restore Virtual Machine data via Veeam Extract Utility GUI
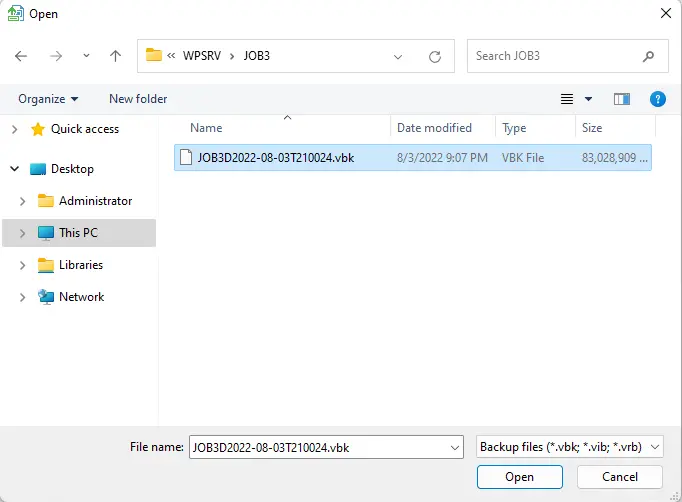
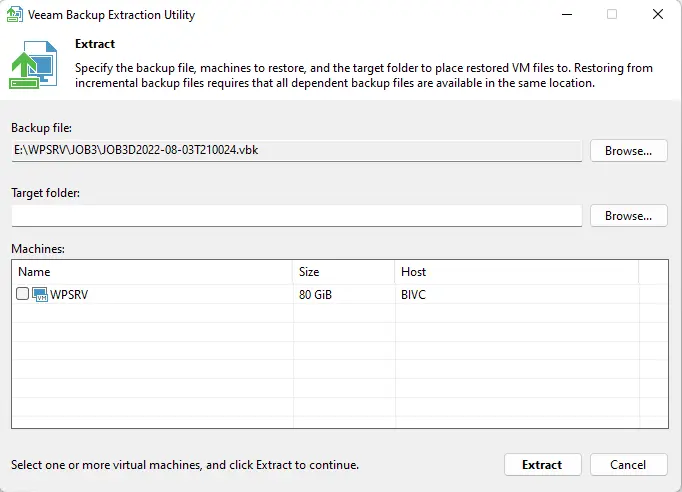
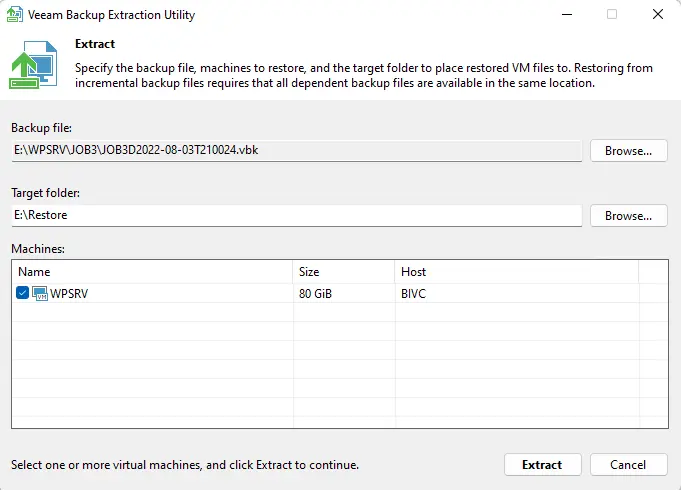
On the Veeam Backup Extraction Utility page, next to the backup file, click on the browse button.
Specify a Veeam backup & replication .vbk backup path.
If the backup file .vbk is encrypted, the extract utility will require you to provide a credential to unlock the backup file.
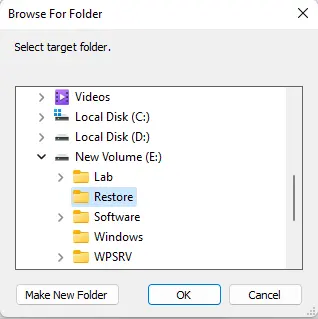
Next to the target folder, specify a path to the destination folder where you wish to restore virtual machine data.
Select the folder, and then click OK.
Under the Virtual Machines list, choose a virtual machine whose data you need to restore. Click on the Extract button, and virtual machine data will be restored to the specified folder.
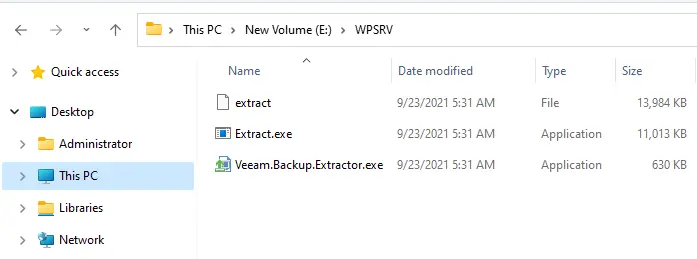
The extract utility Veeam can be started on Microsoft Windows machines only.
If you plan to run the extract utility for Microsoft Windows on that machine where Veeam Backup is not installed,.
You need to copy the extract.exe and Veeam.Backup.Extractor.exe files from the Veeam installation directory and store these two files on the destination machine.
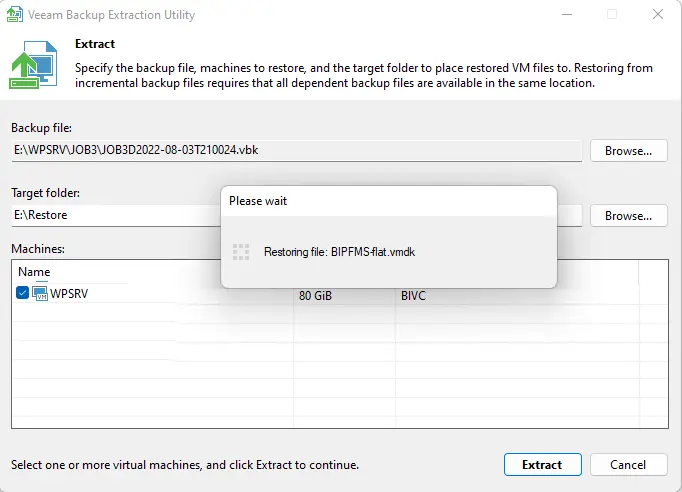
Restoring files, please wait
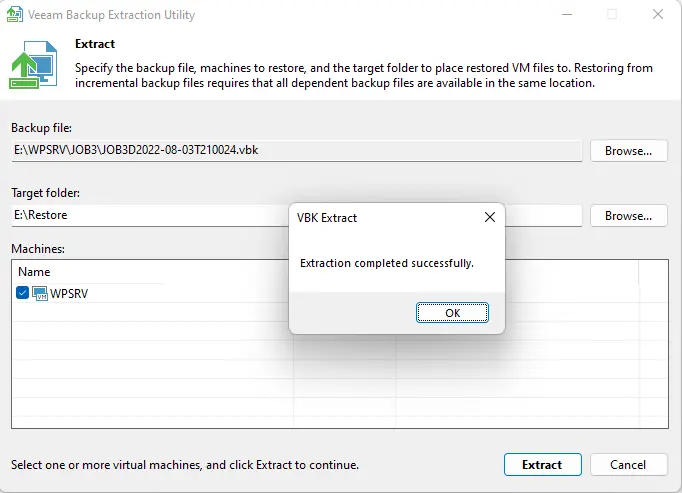
Veeam .vbk extraction was successfully completed.
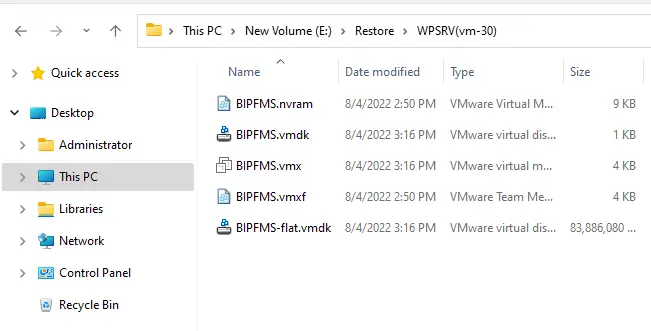
Now you need to go to the extracted backup folder. You will see all of our extracted image-based backup files associated with them, including disk and configuration files. You can then copy these files and import them. In this instance, go back into your VMware datastore and get that machine up and running. In my example, I have used only one VM, but you could handle many virtual machines as part of the extraction process.


Thanks