This article summarizes the steps to install and configure Fortigate Firewall VM on the VMware workstation for lab testing. Fortinet provides both physical and virtualized (VM) security appliances to secure special data. Fortigate VMs (virtual appliances) allow you to control threats by implementing critical security controls within the virtual infrastructure. They also permit you to quickly provision security infrastructure wherever and whenever required. Fortigate VM firewalls feature all the security and networking services common to conventional hardware-based Fortigate appliances. In this article, we will see how to deploy a Fortigate VM and configure a Fortinet VM series firewall.
Table of Contents
Install and Configure Fortigate VM Firewall
Download Fortigate VM Firewall
You can find the FortiGate-VM deployment packages on the Support Fortinet site.
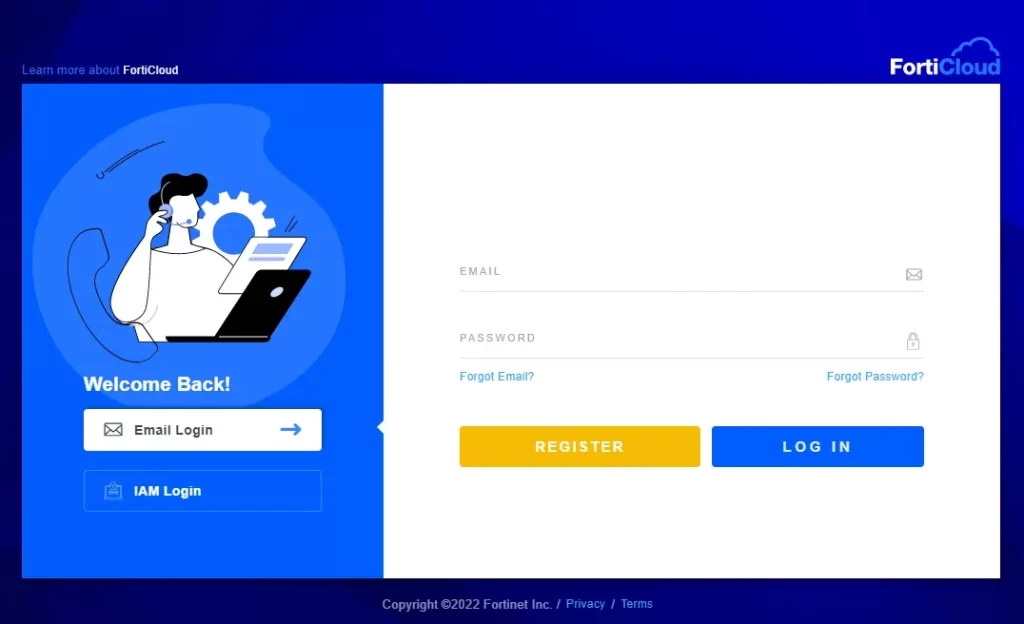
Log in with the Forti Cloud account to access the VM packages.
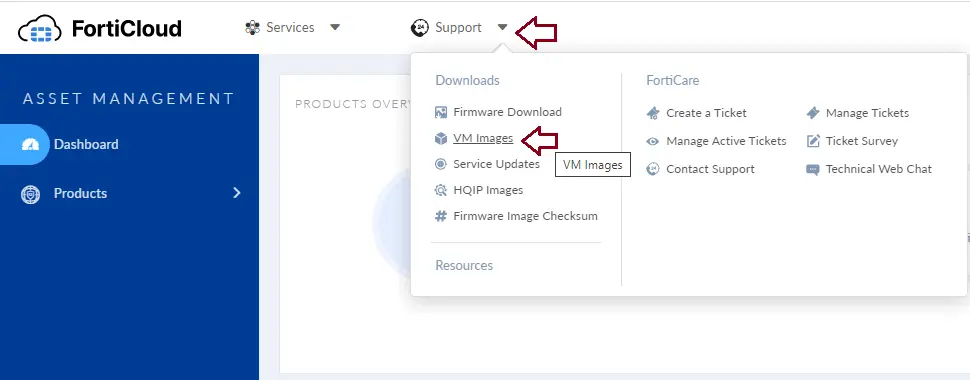
In the support drop-down menu, choose VM Images to download the Fortinet VM deployment packages.
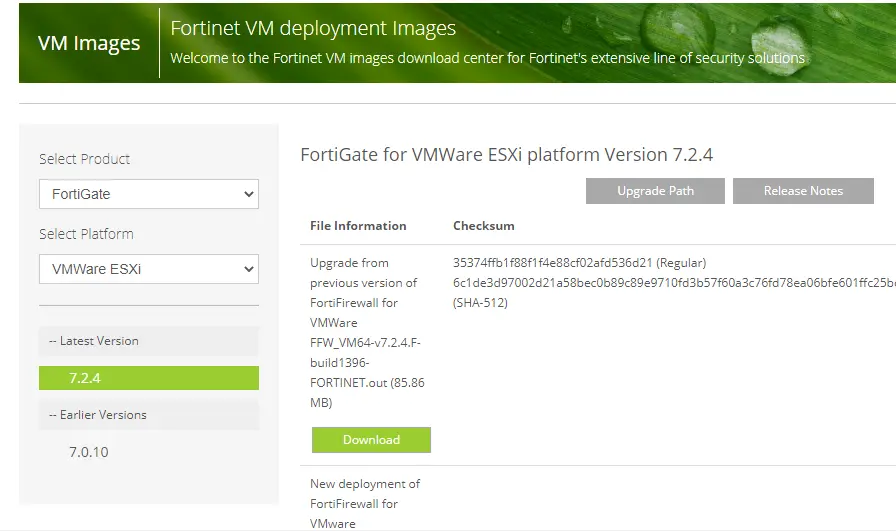
On the Fortinet VM deployment image page, you can download different Fortinet VM products.
Install Fortgate VM Series
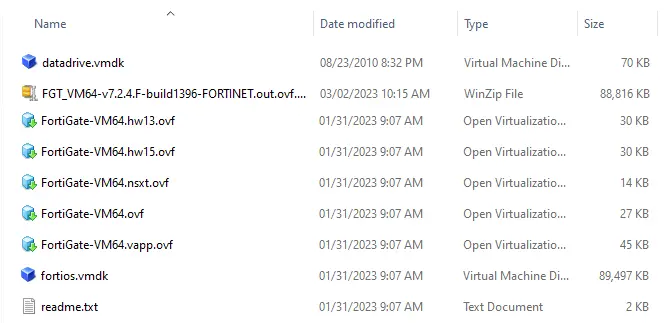
Once you have downloaded the VM Series firewall and deployed Fortigate VM in a VMware Workstation environment,. Extract the zip or RAR file you have downloaded, and then you will see the FortiGate VM series deployment files.
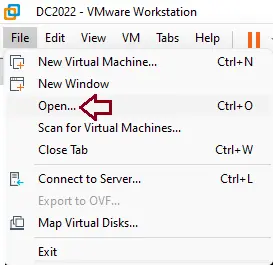
Run the VMware workstation, click on the file tab, and then choose open.
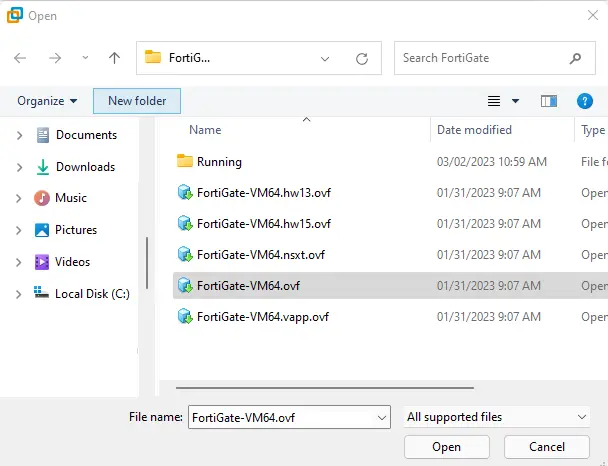
Click on the FortiGate-VM64.ovf file and then choose open.
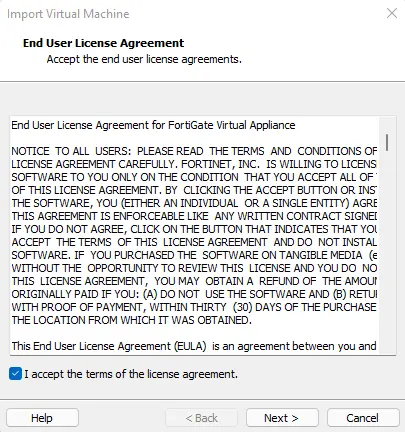
Accept the Fortigate License Agreement, and then choose next.
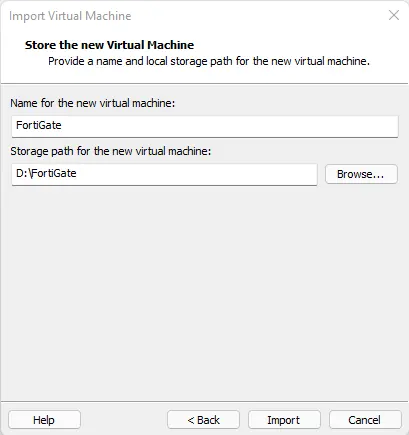
Provide the virtual machine name and path where you want to save the VM files, and then choose Import.
This will import the FortiGate VM into the VMware Workstation and you can see the console below.
Power on the appliances after completing the virtual hardware configuration.
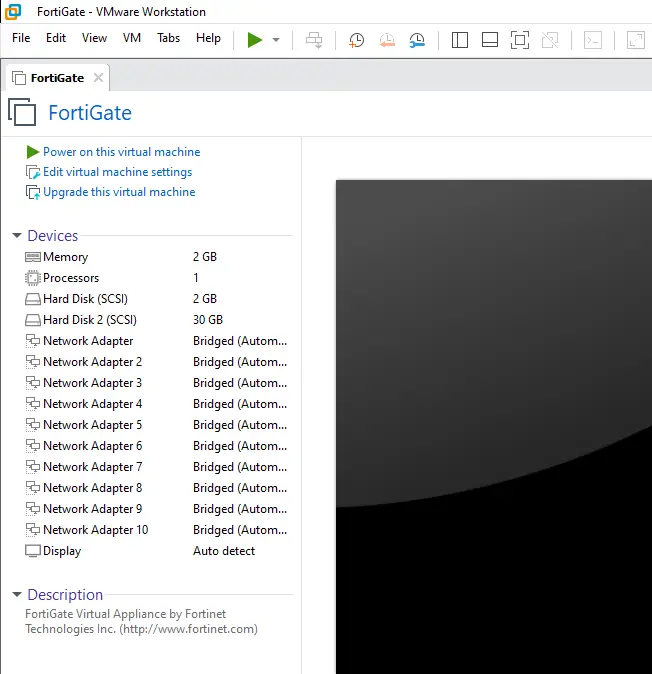
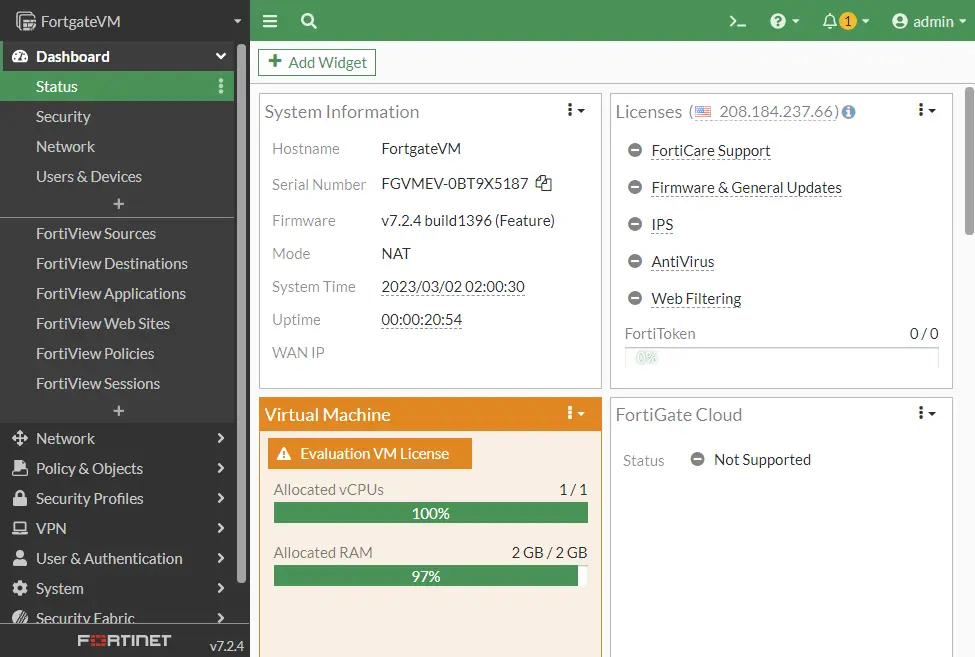
FortiGate VM Series firewall was successfully deployed, and now we can proceed with further configuration.
Configure FortiGate VM Firewall
In the configuration process, you will see how to configure the IP address, default gateway, and DNS before we access the Web GUI.
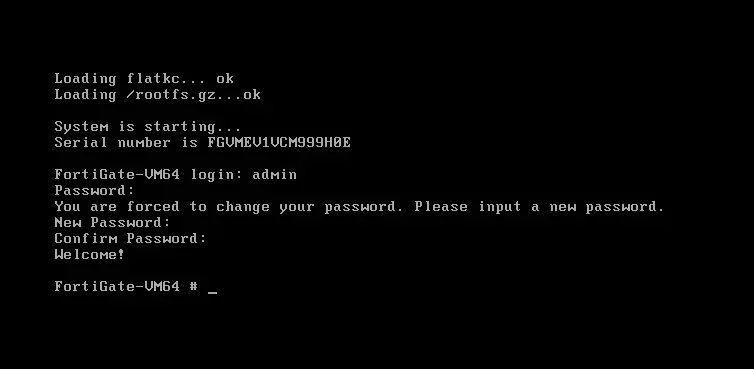
To start with, configure the Fortinet VM to access the console. The default credential is
Username – admin
Password – no password
This will permit you to set a new password for the FortiGate firewall.
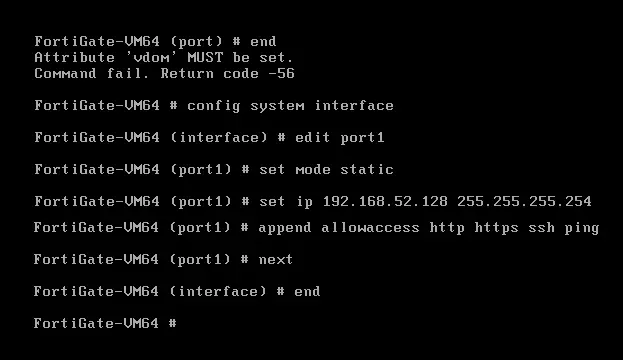
To configure the 1st Uplink interface, follow the below commands.
config system interface
edit port1
set mode static
set ip 192.168.52.128 255.255.255.254
append allowaccess http https ssh ping
next
end
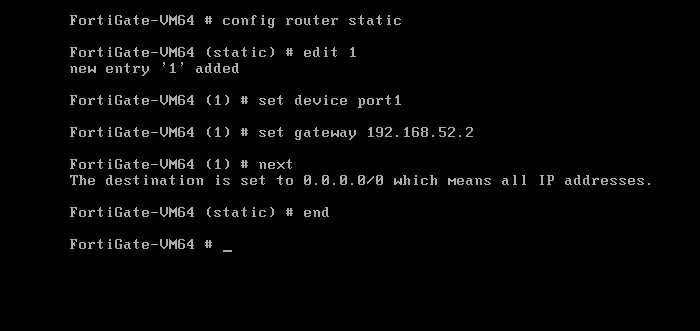
To configure the default gateway
config router static
edit 1
set device port1
set gateway 192.168.52.2
next
end
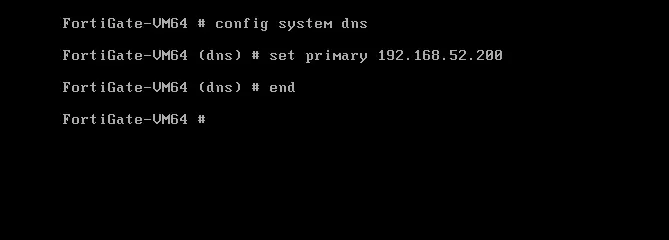
To configure your DNS servers, enter the following CLI commands:.
config system dns
set primary <Primary DNS server>
set secondary <Secondary DNS server>
end
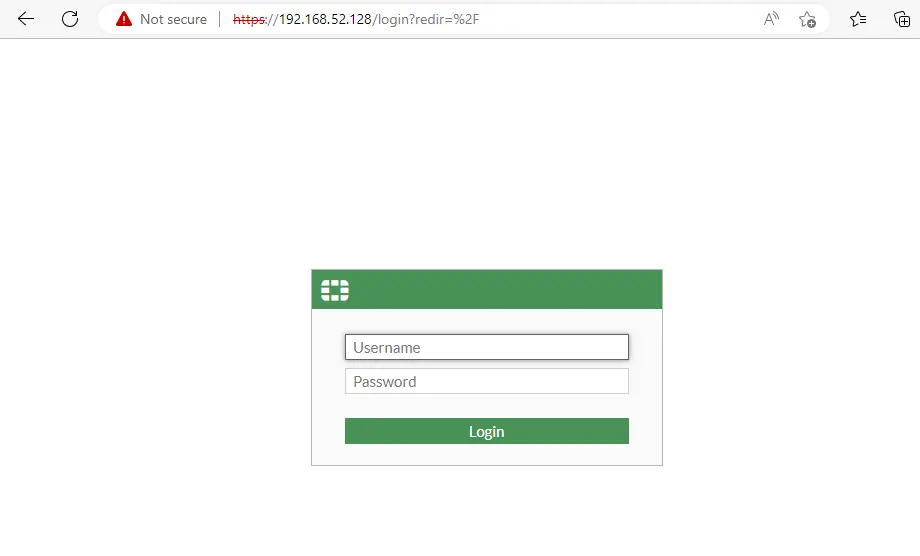
Configure the remaining settings in the GUI. To access the Fortigate Firewall GUI, use the following URL and use the same credential you created in CLI.
https://<IP Address>
Upload FortiGate VM License
Two options are available: a full license or an evaluation license.
A stable evaluation VM license exchanges the 15-day evaluation period for FortiGate VM. The evaluation license of Fortigate VM applies to all private clouds (KVM, VMware ESXi, etc.), and all bring their own license to public cloud instances.
When running up a new FortiGate-VM, you have to log in to FortiCare to activate the trial or upload a new license.
Limitations of the Fortigate VM
Limitations of the Fortigate VM evaluation license include the following:
One free evaluation copy per FortiCare account
Support for low encryption operating only, except for GUI access and Forti Manager Correspondence
1 CPU and 2 GB Ram
Three interfaces, routes, and firewall policies
No FortiCare support
No FortiGuard support
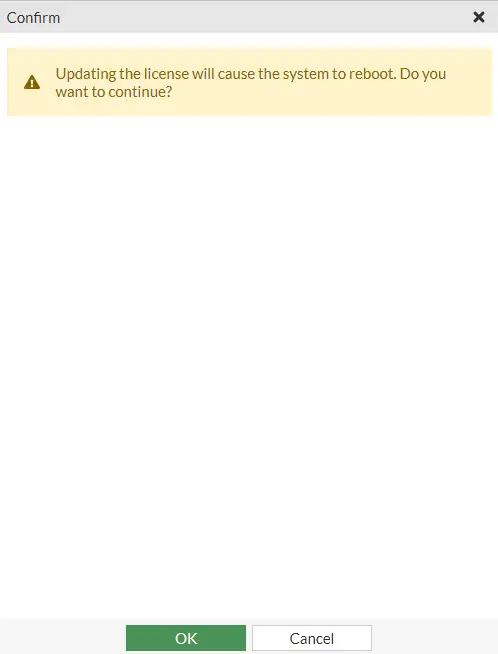
Click on upload to upload a Fortigate VM license, and then choose OK.
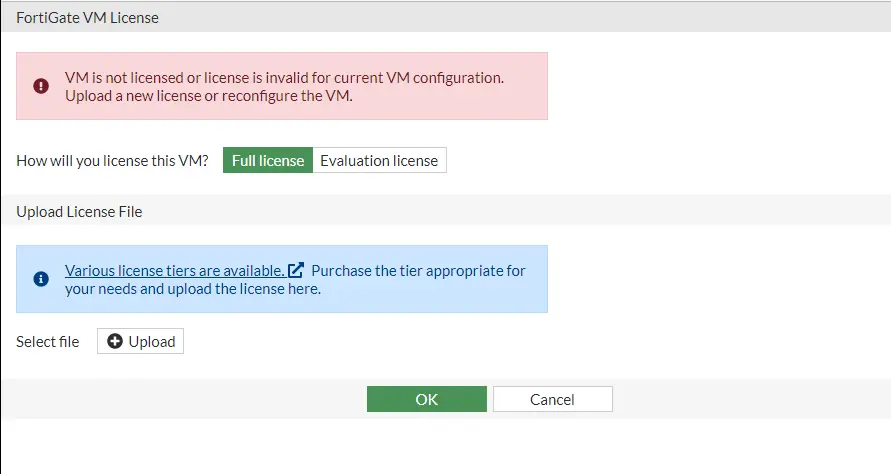
Click OK to confirm.
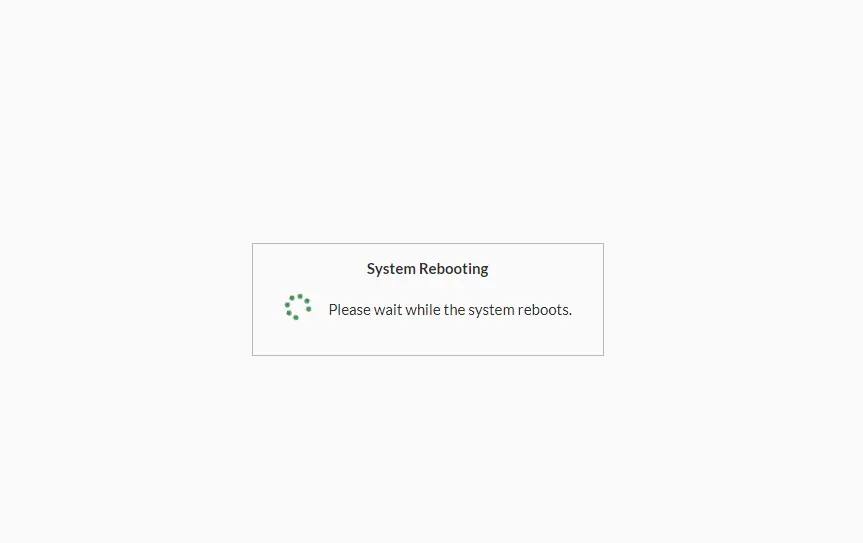
Updating the license
I am using the Evaluation copy
Once the system is up, we are able to access the FortiGate GUI and then start with the remaining configuration.