Let’s have a look at how to change mouse cursor color in Windows 11. Here is how to change the mouse size settings and how to change the pointer color and size in Windows. You can also increase the cursor’s mouse size and color in Windows 10. Want a green mouse cursor instead? You can select that! Wish for a large red cursor that’s simpler to see? You can pick that, too! Read this article for more information.
Table of Contents
Change Mouse Cursor Color and Size
Open the “Mouse pointer and touch” settings in Windows 11
In Windows 11, change the mouse pointer color, size, or width. First, you will need to get to the page from Settings. Right-click on the Windows key and then select Settings.

Click on the Accessibility menu from the list. Select the mouse pointer and touch settings.
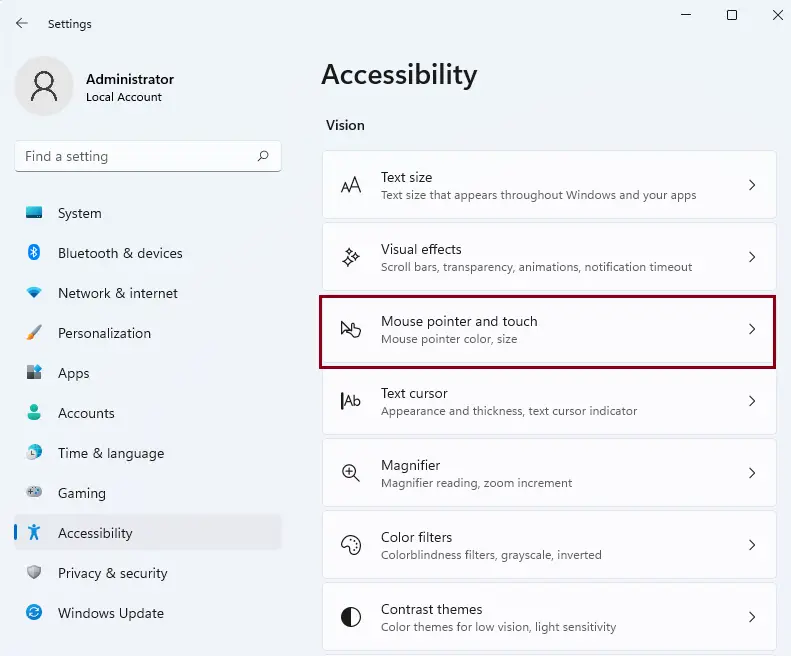
How to Change the Mouse Pointer Color
All you have to do to change the mouse cursor color is select one of the four available options.
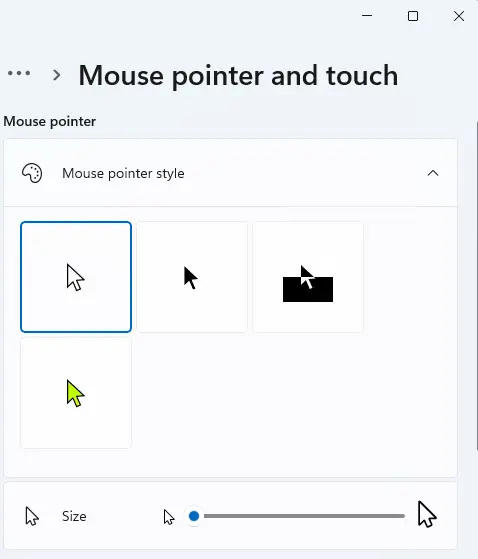
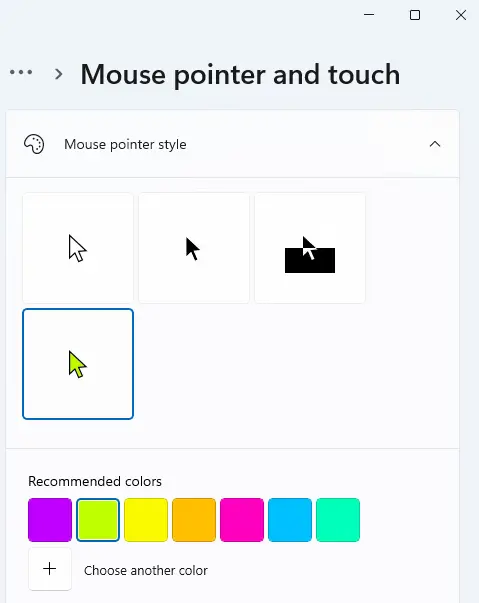
By default, the line color will be selected when we click on the cursor custom option. You can select any other color from the list below. Or choose other colors from those that are not listed below.
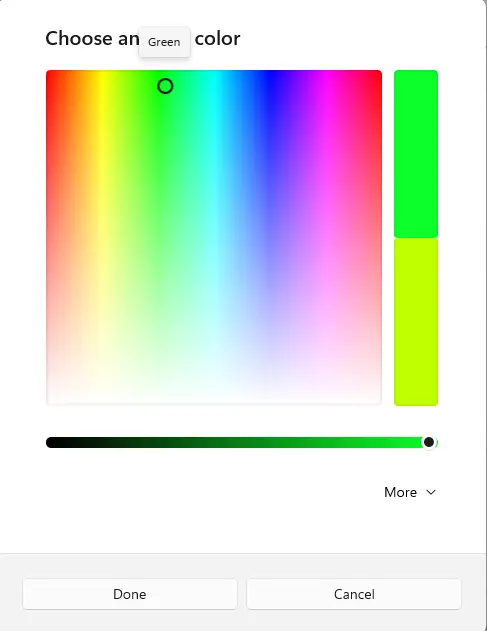
Here, you can select the custom cursor color that you wish for the pointer. Choose a particular portion in the box, and then use the below slider to adjust the color. Choose the Done button to apply the changes to the mouse pointer color.
Change the Mouse Cursor Size
By default, the mouse cursor size is set to 1, which is the minimum size. You can increase the mouse size up to 15. To increase the size, just drag the slider next to the size on your right.
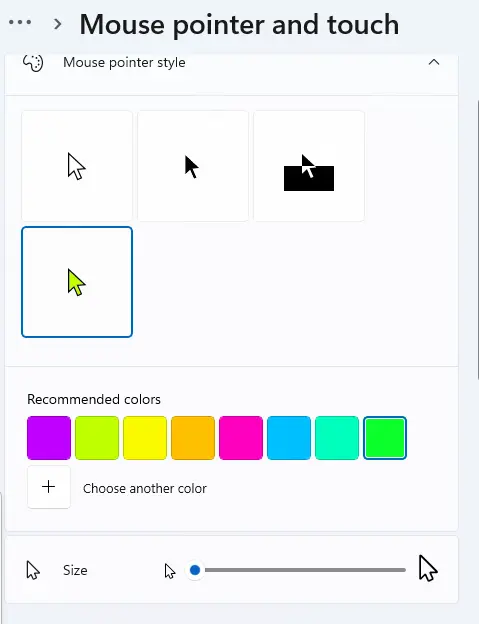
The volume numbers referred to by her wouldn’t make much sense unless we dragged the slider itself. Also, the cursor for mouse size will change while dragging the slider, and you can stop crawling further when it reaches the desired size.


