
This article covers the steps for how to add NAS backup repository in the Veeam backup. The Veeam backup repository is just a storage location where we store the Veeam backup software backup files, virtual machine copies, and metadata for replicated virtual machines.
Let’s follow the steps on how to add NAS volumes as a Veeam backup repository.
Open the Veeam backup console and connect to add the new NAS volume for the backup repository. You can use Veeam backup software to back up your physical computers, virtual machines, and applications into the NAS backup repository. This article demonstrates the setup of the Veeam backup infrastructure for NAS storage on a Windows computer. Click here to learn more about how to add a NAS repository in Veeam.
Table of Contents
Add NAS Backup Repository
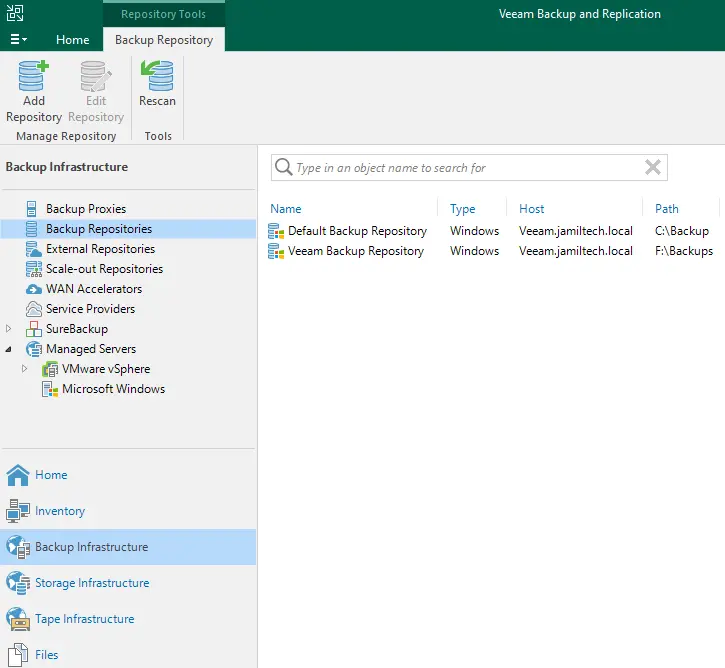
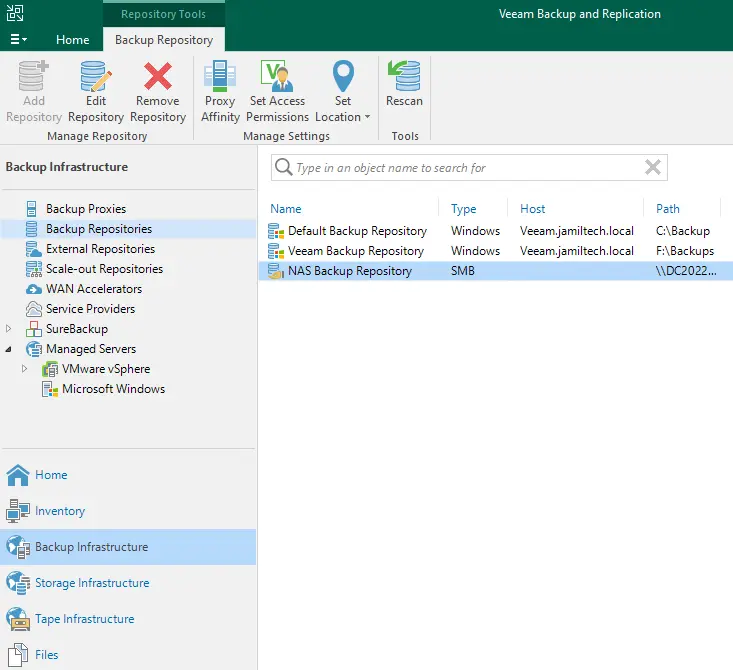
Click on the Backup Infrastructure menu, and then click on the backup repositories. Click on the Add repository tab.
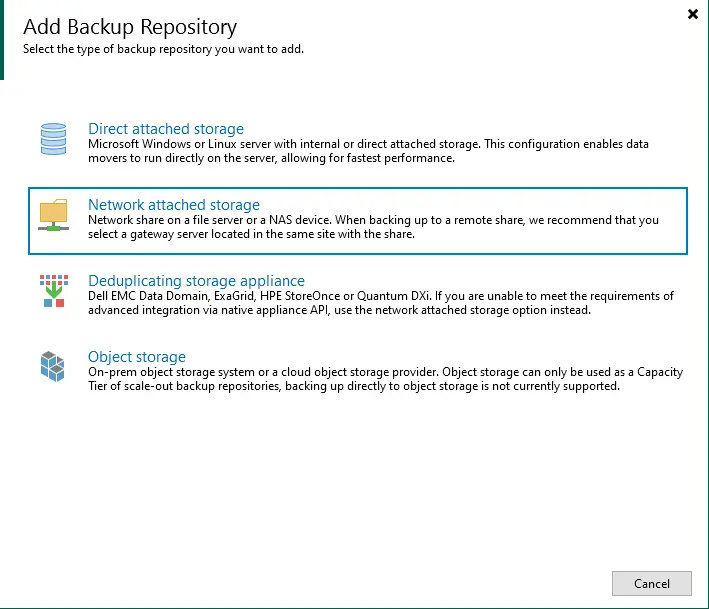
Add backup repository wizard and click on network attached storage.
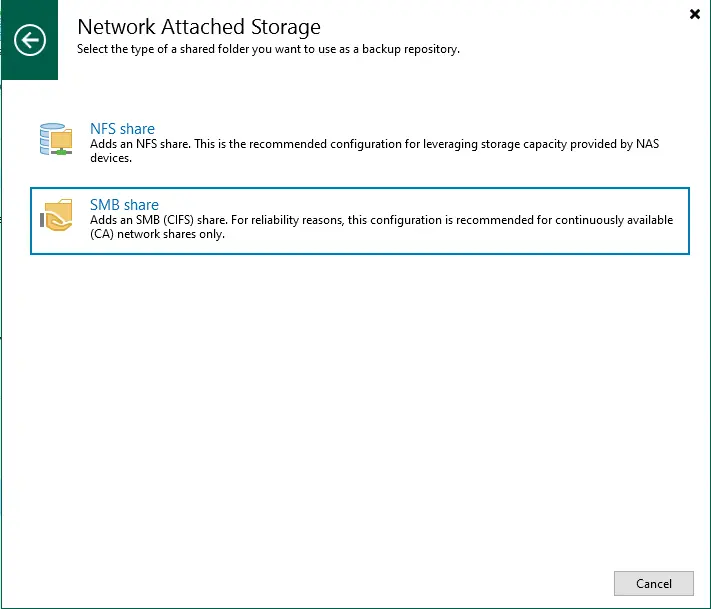
In the network-attached storage window, click SMB share.
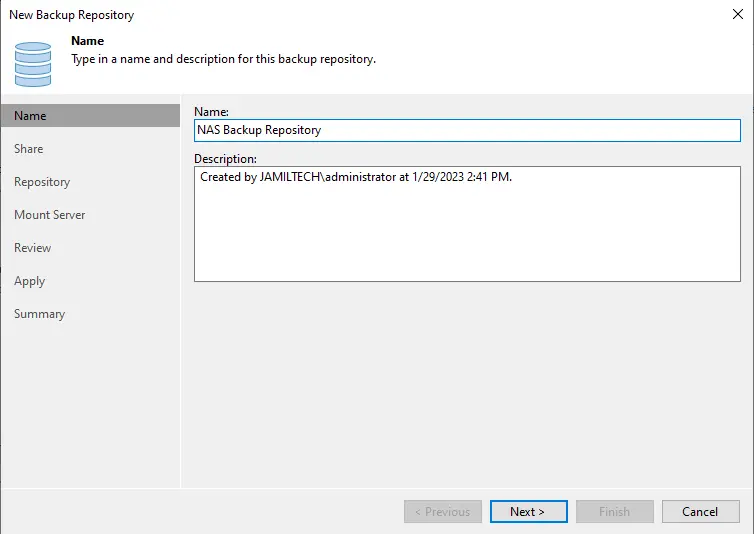
Type a NAS backup repository name and then choose Next.
Add NAS Server Credentials
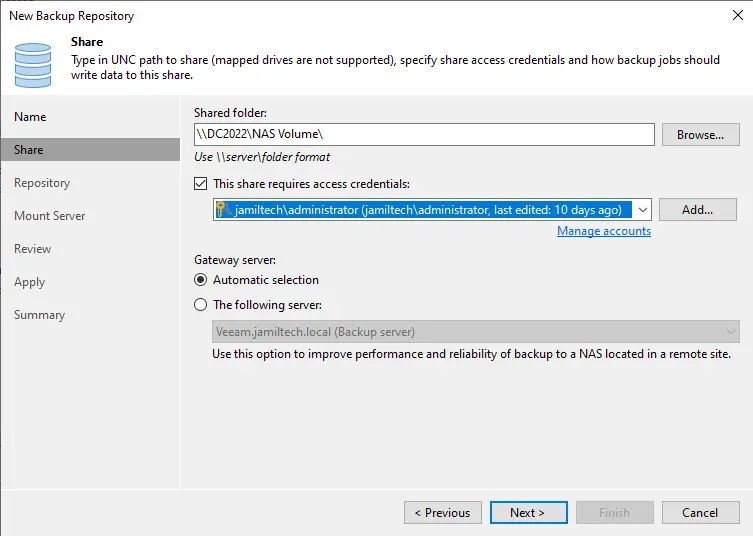
Type the path of the SMB shared folder, select the shared required credentials, and then click next.
Enter the path of the folder (SMB share) and then choose next.
Specify a server to mount, and then click on the next button.

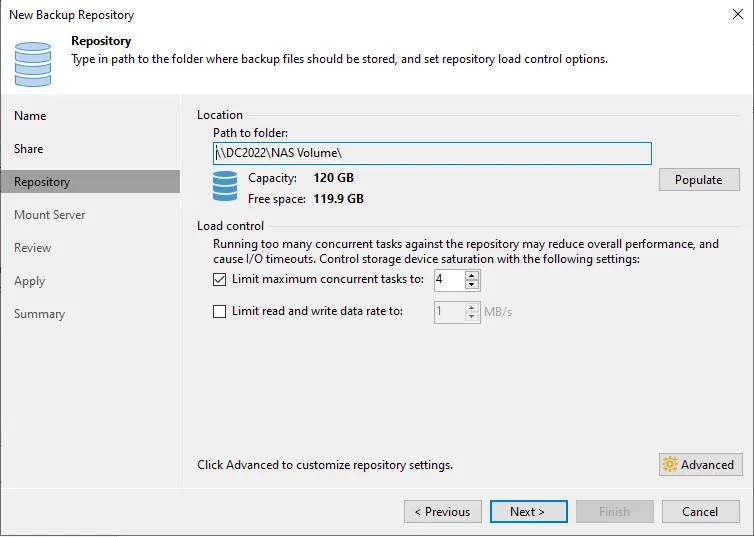
You can review the NAS backup repository settings and then click on the Apply button to create the SMB backup repository.
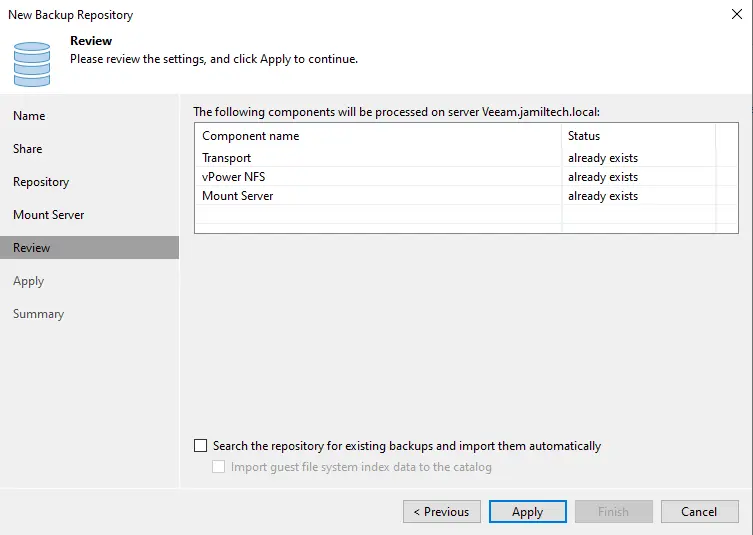
Once we click on the Apply button, Veeam will display the details of each step being performed. Choose next.

Upon completion of the backup repository, you will see the message that the SMB backup repository has been added as a Veeam backup repository.
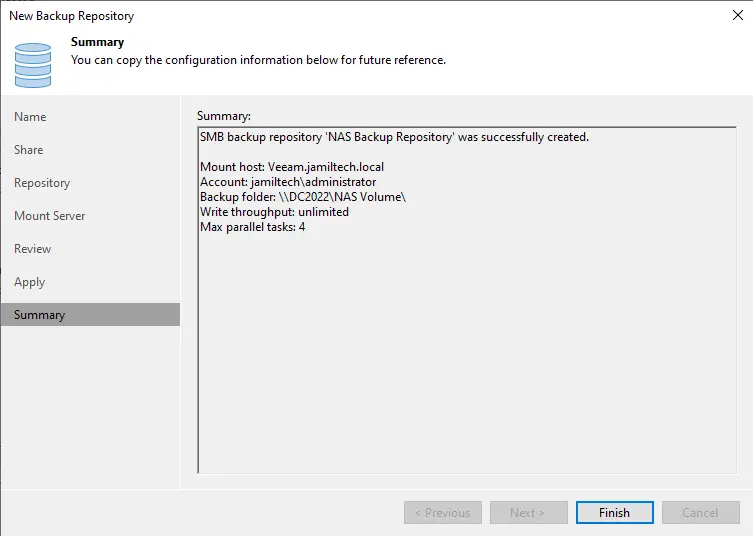
The new SMB backup repository is now ready to use.
After you create the NAS backup repository, you can create backup jobs to back up data to your NAS backup repository storage.

