In this article, we will learn how to set Chrome default browser on Windows 11. Save yourself the shock when another browser pops up instead of Google Chrome when you click on a link. Every Windows device comes with default apps to cover all your essential needs. Also, default apps frequently have a very light footprint and deliver better overall performance for your machine relative to their third-party equivalent.
However, Microsoft Edge is the default browser in Windows 11. Microsoft Edge isn’t a very popular choice with users. Most users prefer Chrome as their default option since it is much faster. Since you may be reading this on your favorite browser, let’s not waste time. I will show you how to make Google Chrome the default browser in Windows 11.
Table of Contents
Install Google Chrome on Windows 11
First, launch Microsoft Edge from the Windows start menu on your PC, and then download and install Google Chrome browser.
Set Chrome as Default using Chrome Settings
If you aren’t very familiar with Windows 11 settings and do not want to dive deep into them, you do not have to. Google’s Chrome offers you a useful solution for it from inside the browser itself.
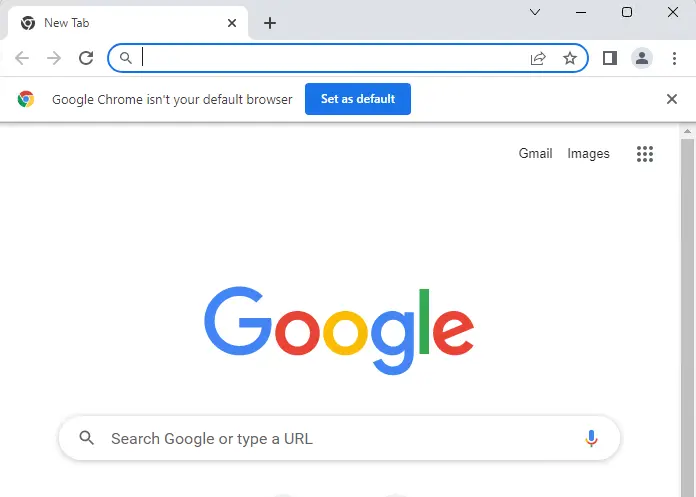
Open the Chrome browser and then click on set as default.
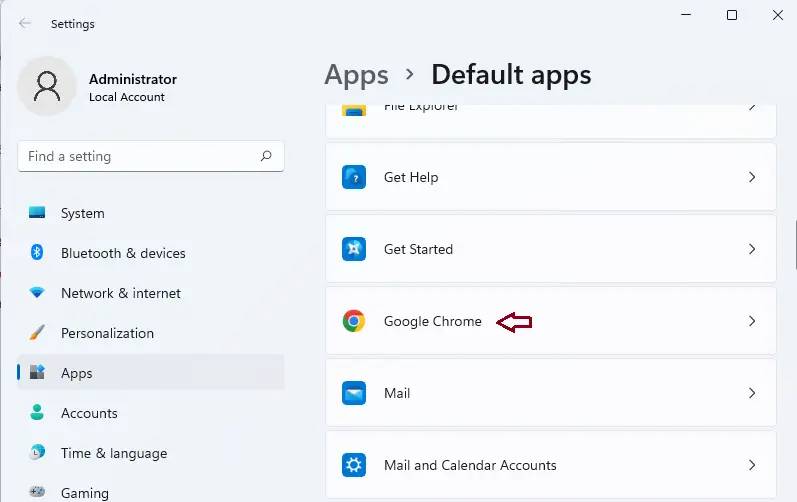
Now, from the Settings screen, select the Apps option from your left panel, and then click on Google Chrome.
Then, choose the Default Apps tile present on the Apps settings screen.
Open Chrome from your desktop
Then, click on the… menu in the upper right corner of your screen and click on the Settings option from the overflow menu.
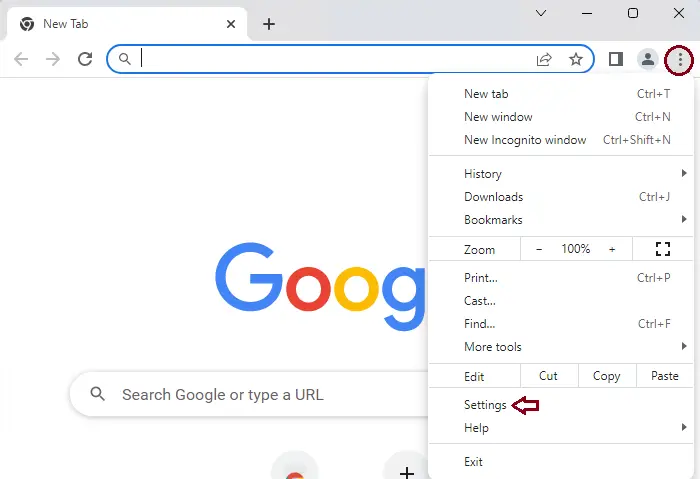
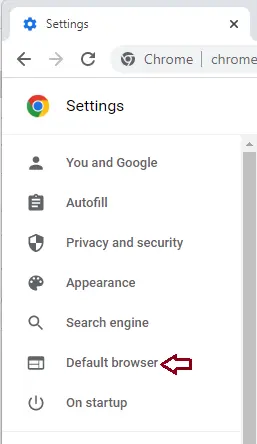
Under Chrome settings, click on the default browser.
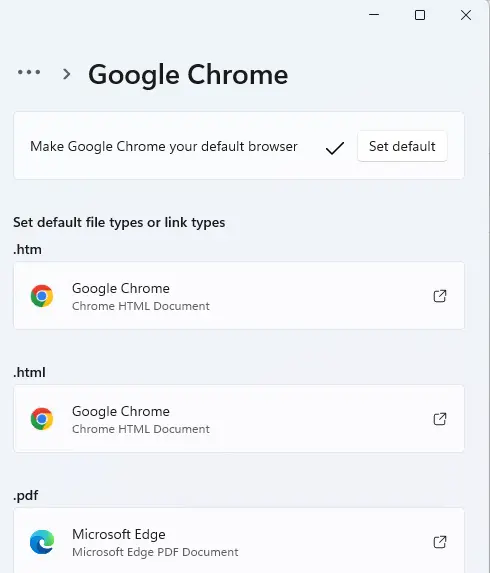
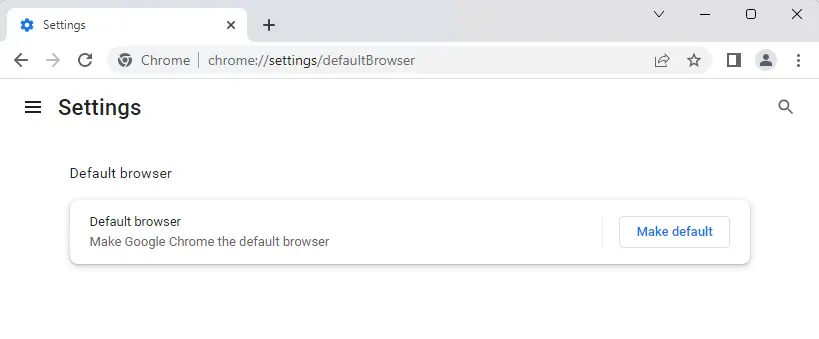
Now, click on the Make default button.
Once you click on the Make default button, the Default Apps page in the System Settings will open.
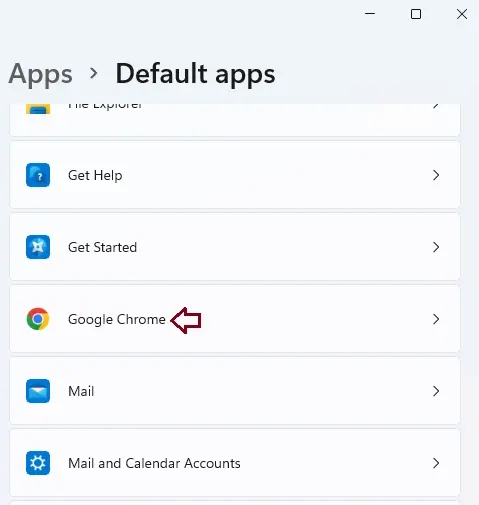
You can choose to set Chrome to be your default browser.
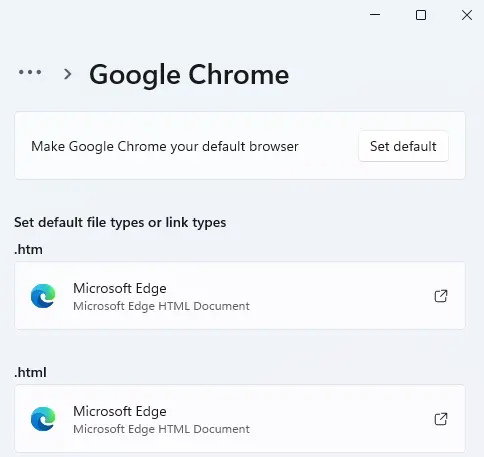
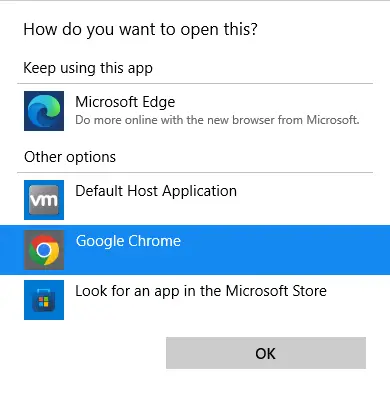
Select Google Chrome, and then click OK.
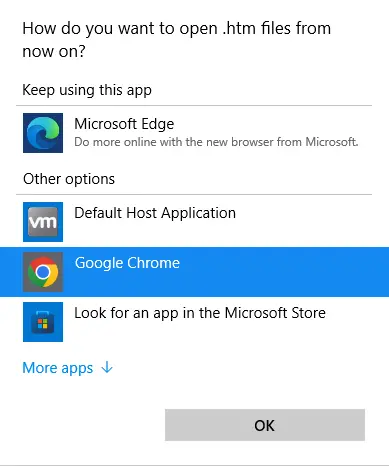
Now your Google Chrome is set to the default browser.
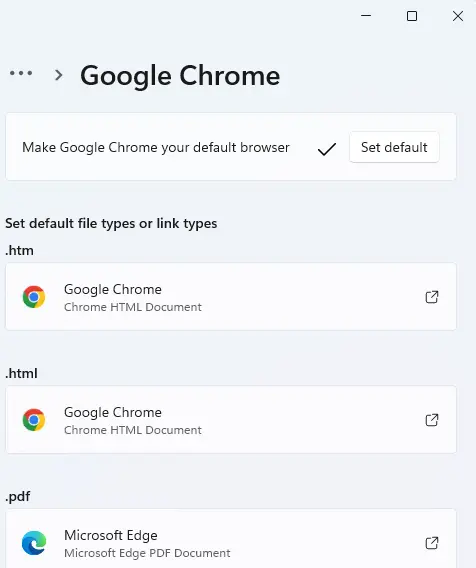
Set Chrome Default Browser using Windows Settings
Windows 11 has definitely made it easier to change your default apps by bringing them together in a single place. Once you know where to go, it is as plain sailing as it can get.
Right-click on the Windows 11 start button, and then click on the Settings app. Additionally, you can also hold the Windows + I keys on your keyboard to directly open the Settings app.
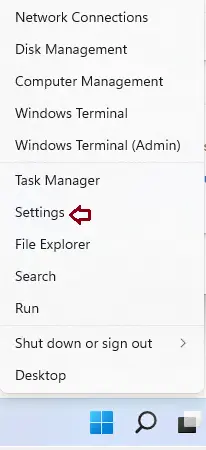
Next, from Settings, click on the Apps menu from the left panel.
Select the Default Apps option on the Apps settings screen.
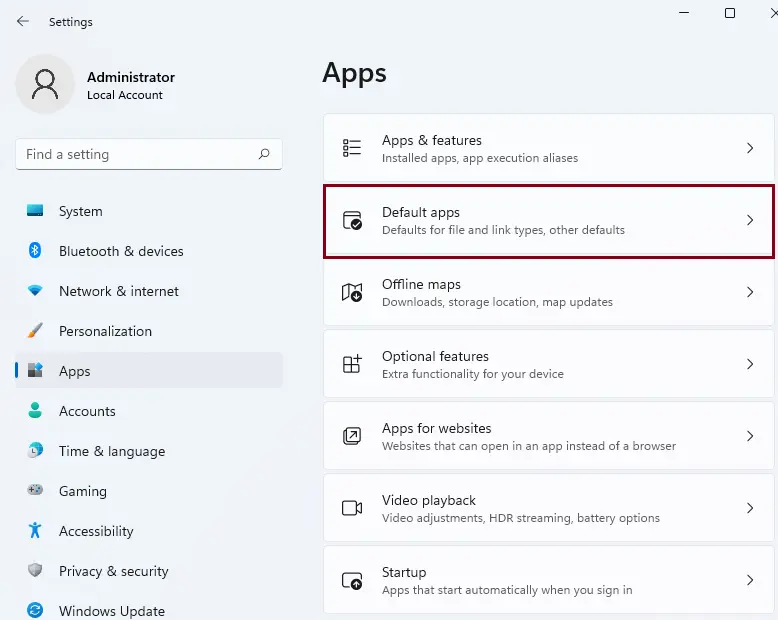
To Change the Default App to Google Chrome
Click on the search bar at the top of the window and type your desired file type. To change the default app type .html first, click on the current default app make for the file type right under the search bar.
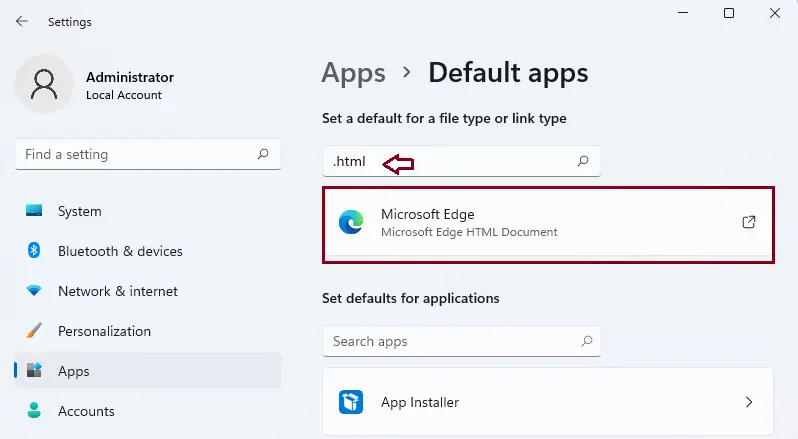
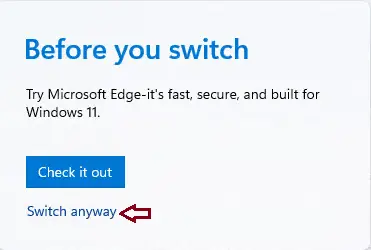
Click on the switch anyway
Choose Google Chrome from the menu, and then click OK to confirm and apply.
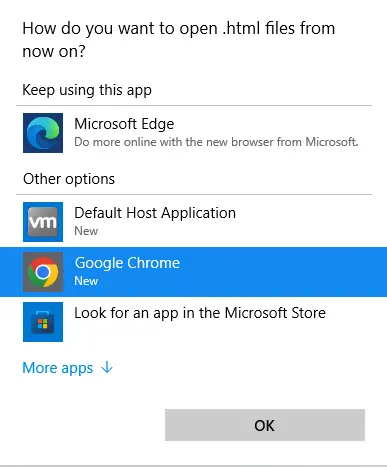
You can see the default app.
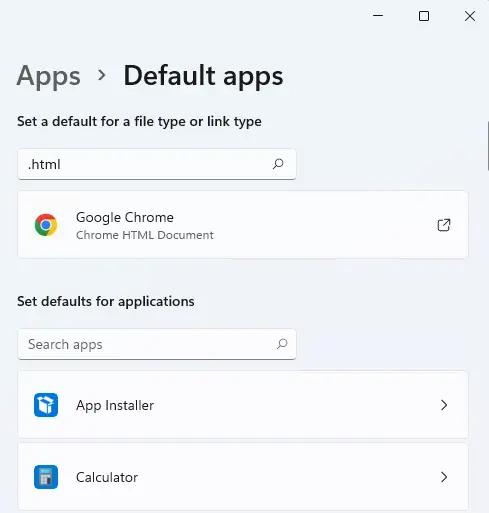
However, this is the quick way to change the default app if you wish to keep different default browsers for the same family of file types. This isn’t the best pick if the agenda behind changing the default browser is to cover the full blanket of file types supported by it.
To change the Default Browser to Chrome for all of the Supported Link Types
You can likewise search for the Chrome application using the search bar on the ‘Default Apps’ settings window or scroll down and locate it manually.
After searching the Chrome app, click on it to see the several file types it supports. For a sample, we scrolled down and located the ‘Google Chrome app from the list.
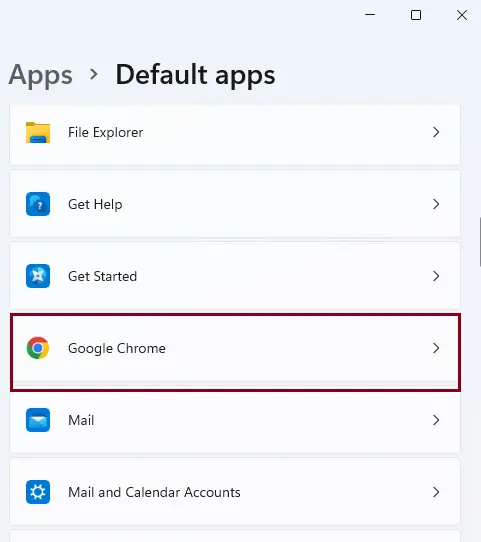
Click on the default app option.
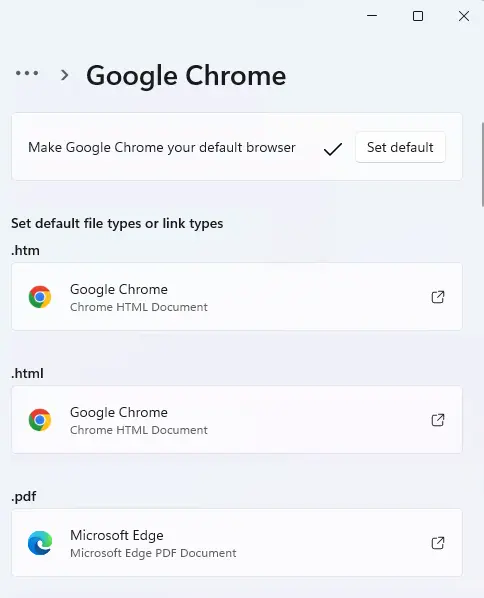
Then choose the ‘Google Chrome’ app from the overlay menu and click on ‘OK’ to confirm and apply.
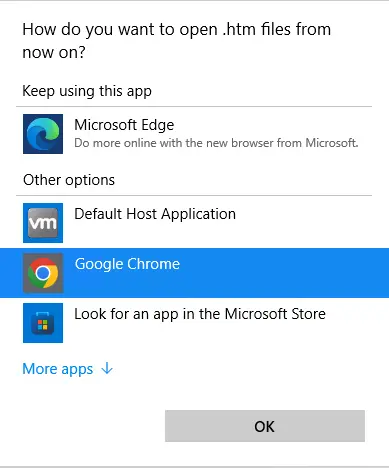
To Make Chrome the Default App use HTTPS
Type the https link, which covers almost all links you might click on to reach a website.
Now, choose the current default app under the search bar.
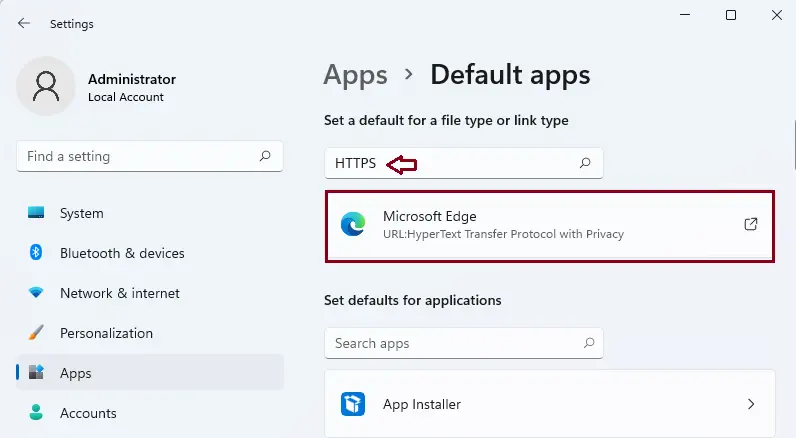
Now, select Google Chrome from the menu, and then click OK.
