This section shows how to connect iSCSI Target Server to Server 2022. Windows Server includes a built-in tool called the iSCSI initiator that we can use to connect to an iSCSI target server. In order to attach an iSCSI target, however, you want to enable and configure the initiator.
Table of Contents
To read more about it, please click here iSCSI Target Server Overview
Connect iSCSI Target Server
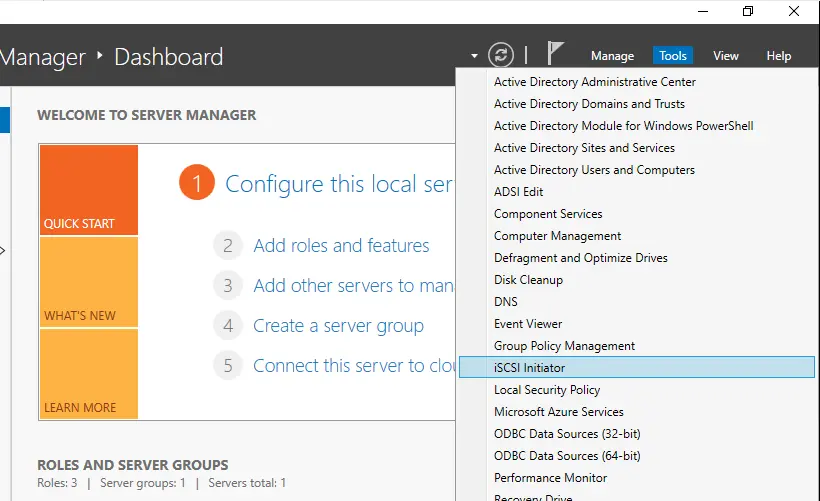
To get started, launch the Server Manager and then select the iSCSI Initiator option from the Tools menu.
As you can see, Microsoft iSCSI indicates that the Microsoft iSCSI service is not running. The iSCSI service must be started if the iSCSI initiator is to function correctly. Click the Yes button to enable the service, and it will ensure that it starts automatically every time Windows is restarted.
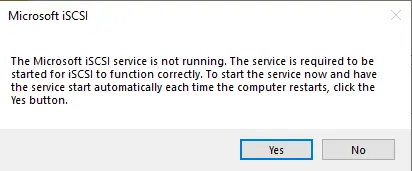
The iSCSI Service Must be Enabled
The iSCSI service is running now; we will have to collect a little information before we can finish configuring the iSCSI initiator.
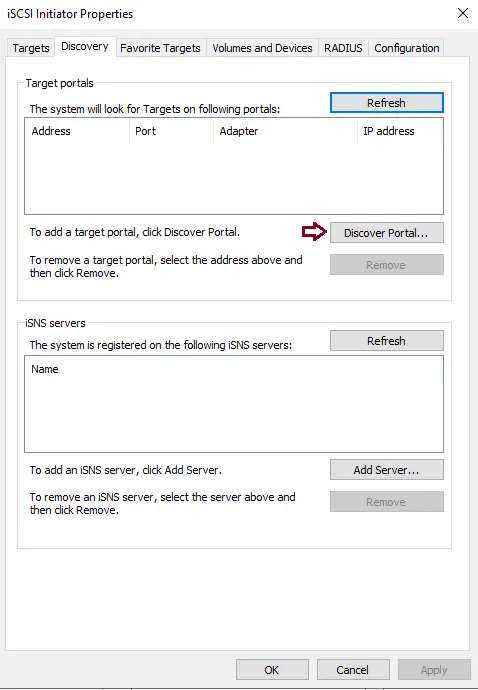
The first step in establishing connectivity to the iSCSI target server is to select the Discovery tab on the iSCSI Initiator Properties window. Click on the Discover Portal button.
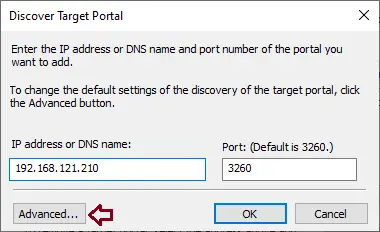
In the discovery target portal, type the IP address (the default port is 3260). Click on the Advanced button.
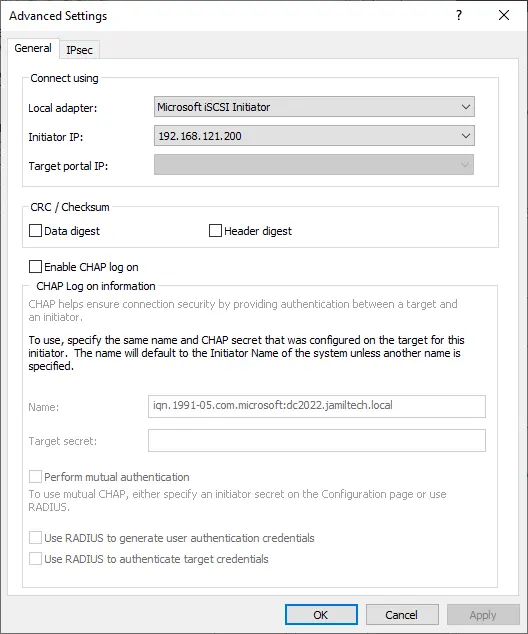
Make sure the Local Adapter settings are Microsoft iSCSI Initiator, and the Initiator is Target IPs. Click ok twice
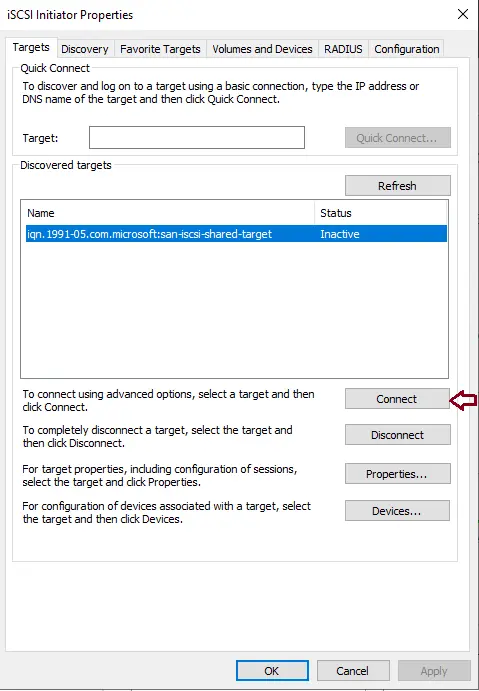
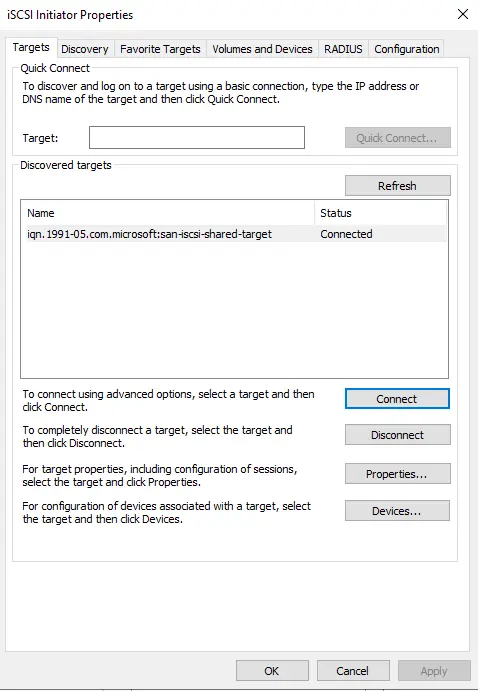
Select the iSCSI initiator, and then select the Connect button.
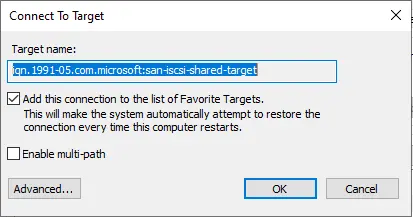
The iSCSI initiator should discover the iSCSI target, and then click OK.
Now the iSCSI target is connected.
How to Enable iSCSI Initiator using PowerShell
We can also enable the iSCSI initiator by using the PowerShell command to start the Microsoft iSCSI service, and then change the service startup type to automatic by running the below commands:
Start-Service msiscsi
Set-Service msiscsi -startuptype “automatic”
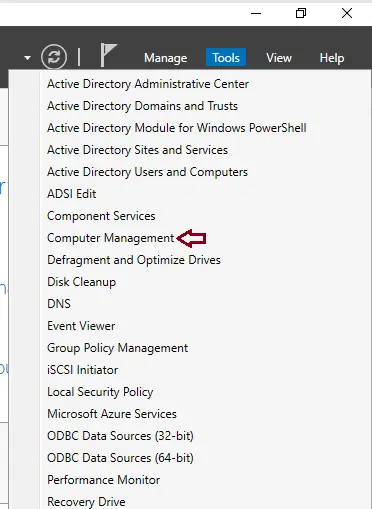
Now, open the Computer Management console by clicking on Tools and then computer management.
Or you can type compmgmt.msc in the run command to open it.
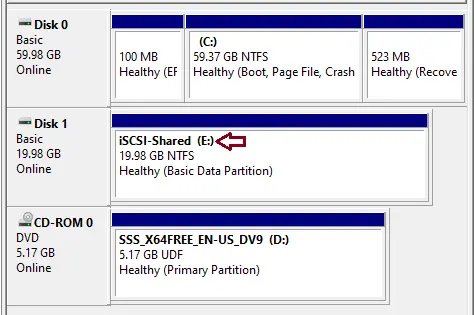
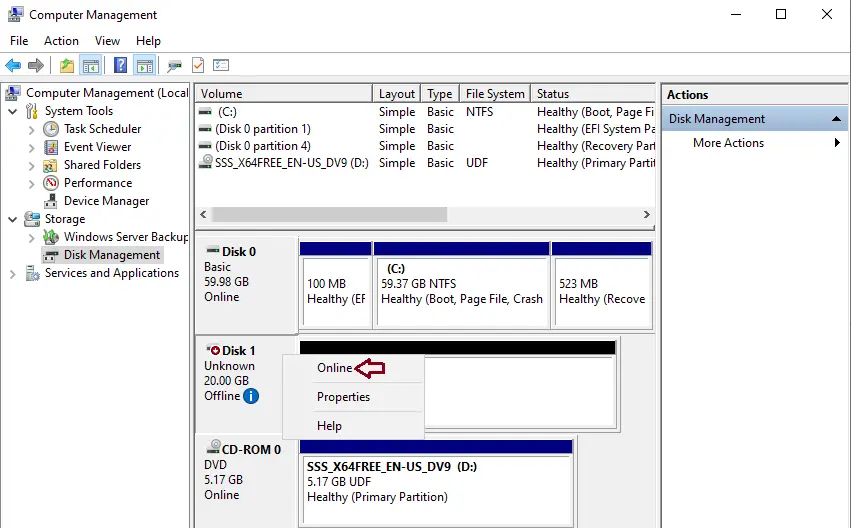
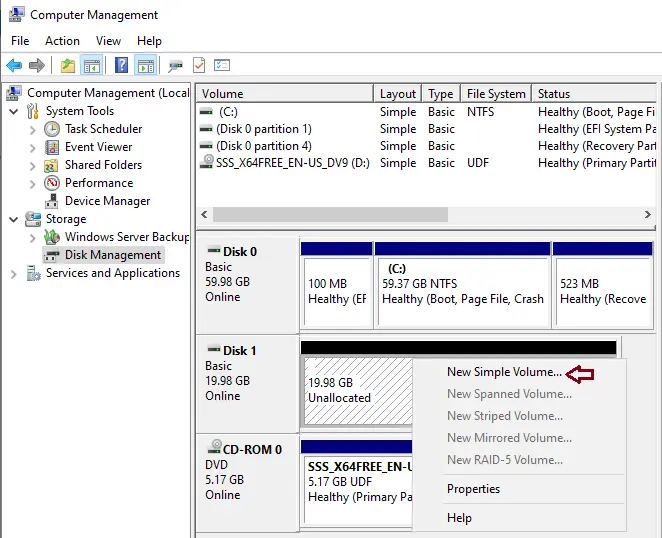
Click on Disk Management from the left panel. Right-click on the disk whose size equals that of your LUN, and then select Online.
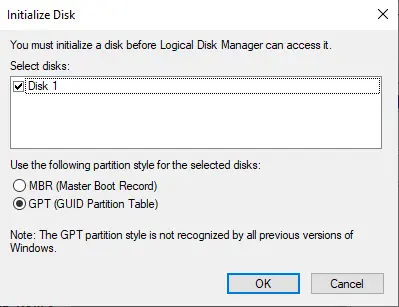
Again, right-click on the disk, and then select Initialize Disk.
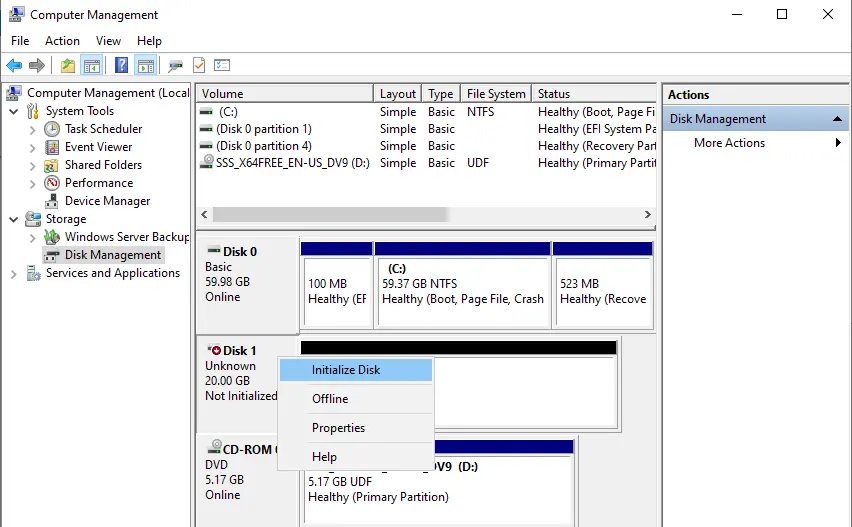
Click OK, and the disk status will become online.
Right-click on the volume and choose New Simple Volume.
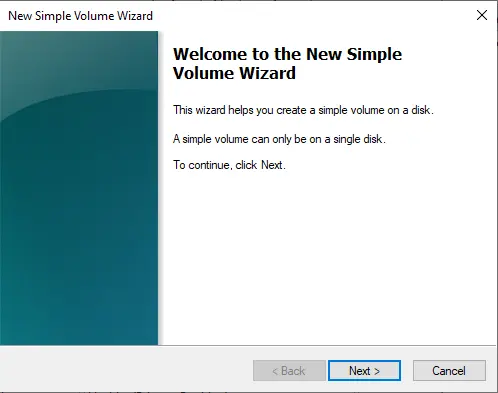
Click next
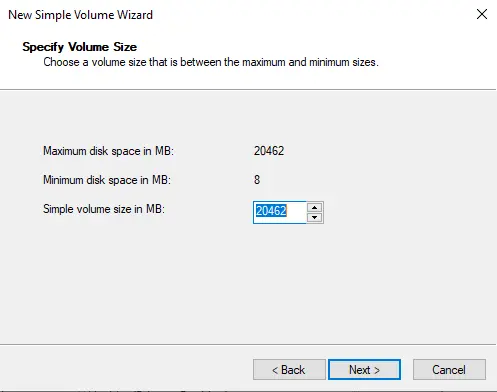
Click next
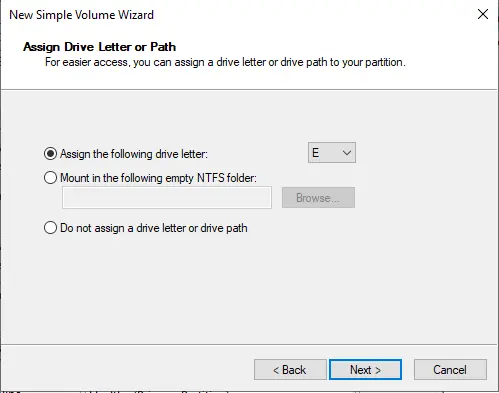
Assign the drive letter, and then click next.
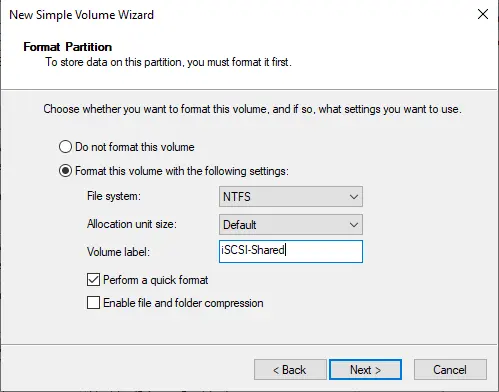
Type a volume label and click next.
Click Finish

Now Windows has an additional volume with the drive letter as extra storage.