Creating a restore point in Windows 11 is an essential task to ensure that your system can be reverted to a previous state in case of issues. Restore points can be especially useful when making changes to the system, such as installing updates or modifying registry entries. In this guide, you’ll learn how to enable and create restore points in Windows 11.Visit Microsoft to learn what a restore point is.
Step 1: Enable System Restore on Windows 11
By default, System Restore is not enabled on Windows 11, so you’ll need to activate it before creating restore points.
- Open System Properties:
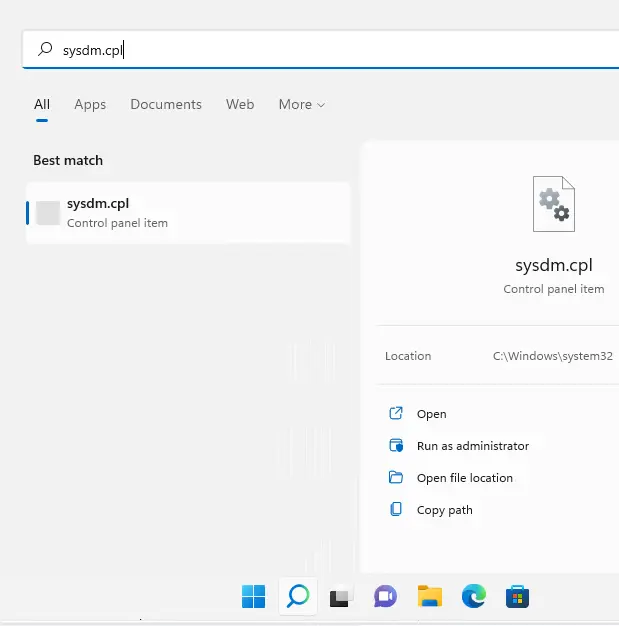
- Click on the Windows Search bar and type sysdm.cpl, then press Enter.
- Alternatively, press Windows + R to open the Run dialog, type sysdm.cpl, and hit Enter.
- Enable System Protection:
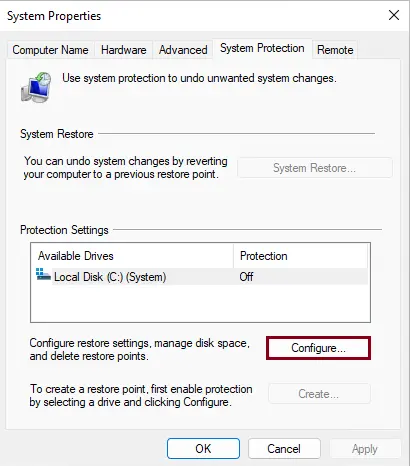
- In the System Properties window, go to the System Protection tab.
- If the protection for your local disk (C:) is turned off, click on the Configure button.
- Turn On System Protection:
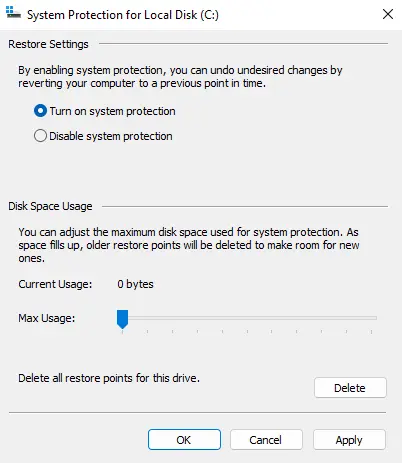
- In the configuration window, select the option Turn on system protection.
Click Apply and then OK to confirm.
Step 2: Create a Restore Point
With System Protection enabled, you can now create a restore point.
- Create a Restore Point:
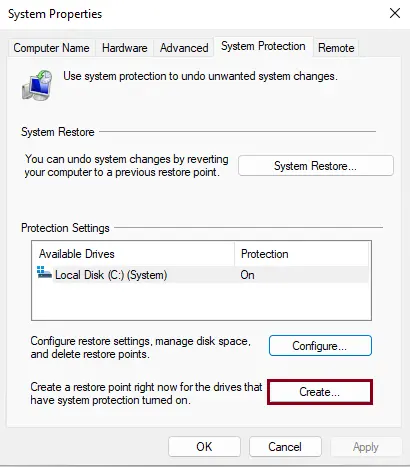
- In the System Protection tab, click on the Create button.
- Enter a name for the restore point (e.g., “Before Registry Changes”).
- Click Create to start the process.
- Completion:
- Windows will notify you once the restore point is created successfully.
- Click OK to finish.
On the System Properties page, select the System Protection tab. If you see “Protection Off” for your local disk (C:) (System), click on the Configure button.
Turn on the system protection box, click Apply, and then OK to confirm the changes. This will enable system protection on the local system drive.
Once system protection is turned on, click on the Create button to create a restore point.
Enter a restore point name and then choose to create.
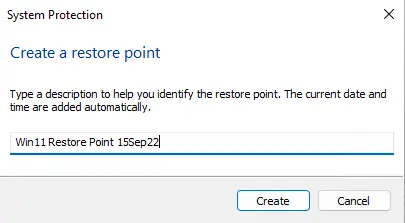
Creating a restore point.

A Windows 11 system restore point was successfully created for the device, which you can restore in case the system becomes unstable.
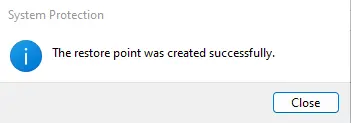
Click ok.
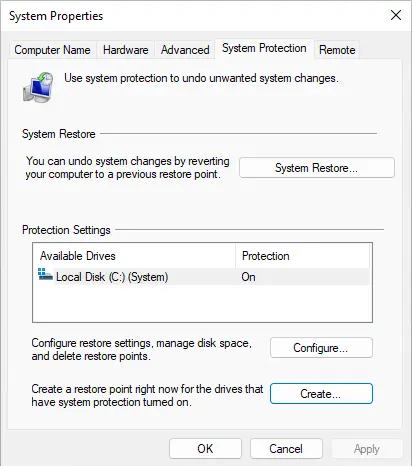
Step 3: Create Restore Point Using Command Prompt
You can also create a restore point using the Command Prompt with administrative privileges.
- Open Command Prompt:
- Click on the Windows Search bar, type cmd, right-click on Command Prompt, and choose Run as administrator.
- Enter the Command:
Type the following command and press Enter:
wmic.exe /Namespace:\\root\default Path SystemRestore Call CreateRestorePoint “Restore Point Name”, 100, 7
- Replace “Restore Point Name” with your desired name for the restore point.
- Confirmation:
If successful, you will see the message Method execution successful and ReturnValue = 0.
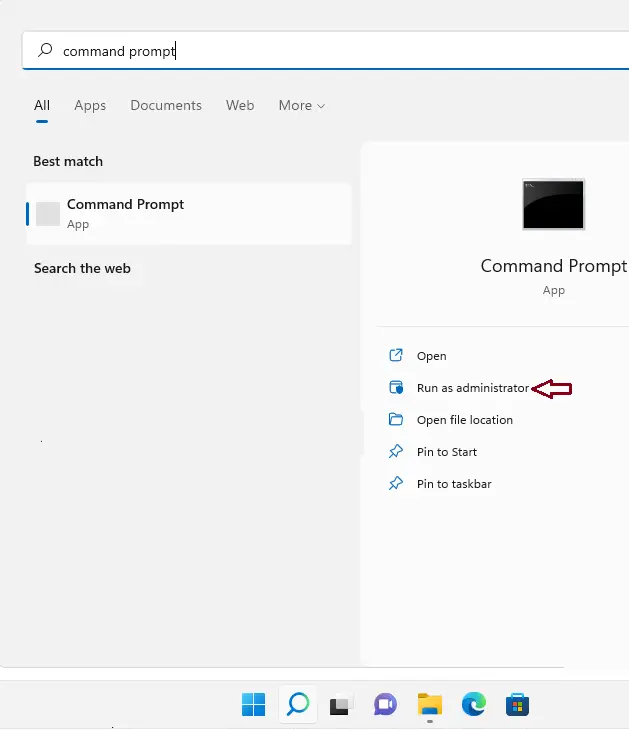
Enter the below command:
wmic.exe /Namespace:\\root\default Path SystemRestore Call CreateRestorePoint "Restore Point Name", 100, 7
Change the Restore Point Name to whatever you want to name the restore point, and then press enter.
For example,
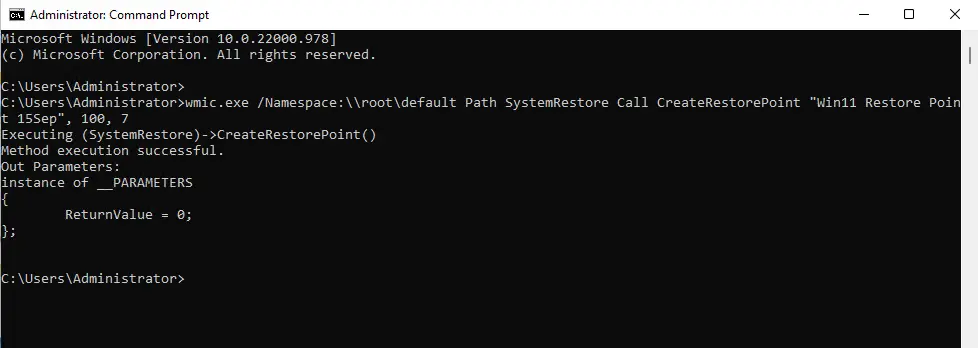
wmic.exe /Namespace:\\root\default Path SystemRestore Call CreateRestorePoint "Win11 Restore Point 15Sep", 100, 7

If you receive “Method execution successful” and ReturnValue = 0;” it means the system restore point was created successfully.
Step 4: Create Restore Point Using PowerShell
PowerShell offers another method to create a restore point.
- Open PowerShell:
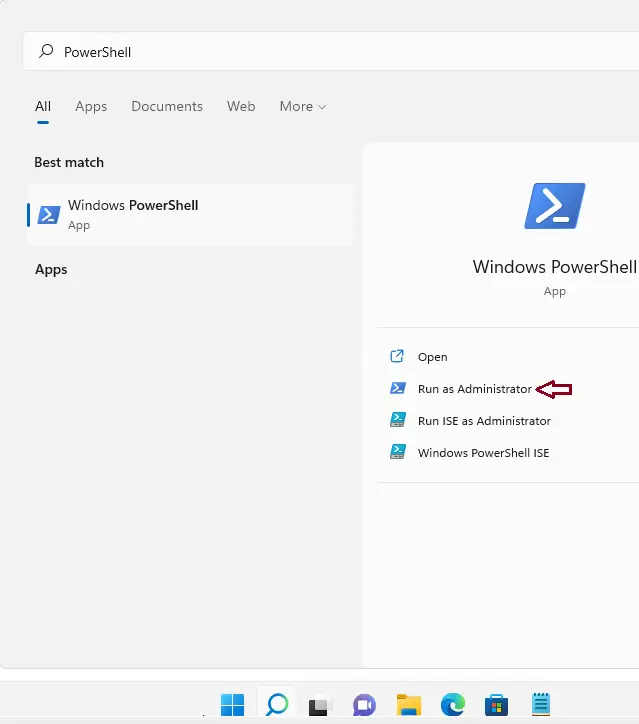
- Click on the Windows Search bar, type PowerShell, right-click on Windows PowerShell, and choose Run as administrator.
- Enter the Command:
Execute the following command:
powershell.exe -ExecutionPolicy Bypass -NoExit -Command “Checkpoint-Computer -Description ‘Restore Point Name’ -RestorePointType ‘MODIFY_SETTINGS'”
- Replace ‘Restore Point Name’ with your preferred name for the restore point.
- Addressing Restore Point Frequency:
- If you see a warning that you cannot create more than one restore point within 24 hours, you can adjust this setting via the Registry Editor.
Now enter the below command:
powershell.exe -ExecutionPolicy Bypass -NoExit -Command "Checkpoint-Computer -Description 'Restore Point Name' -RestorePointType 'MODIFY_SETTINGS'"
Change the restore point name.
It might be that PowerShell displays a warning (picture this) saying that you can’t create more than one system restore point within 24 hours. Providing steps below.

Step 5: Adjust Restore Point Frequency in the Registry Editor
To create multiple restore points within a 24-hour period:
- Open the Registry Editor:
- Press Windows + R, type regedit, and press Enter.
- Navigate to the Key:
Go to the following path:
Computer\HKEY_LOCAL_MACHINE\SOFTWARE\Microsoft\Windows NT\CurrentVersion\SystemRestore
- Create a New DWORD:
- Right-click on the right pane, select New > DWORD (32-bit) Value.
- Name it SystemRestorePointCreationFrequency.
- Modify the Value:
- Set the value to 0 to disable the 24-hour frequency limit.
- Close the Registry Editor.
Step 6: Enable System Restore via Group Policy Editor (Optional)
You can also enable System Restore using the Group Policy Editor:
- Open Group Policy Editor:
- Press Windows + R, type gpedit.msc, and press Enter.
- Navigate to System Restore Settings:
- Expand Administrative Templates > System > System Restore.
- Ensure that both Turn off Configuration and Turn off System Restore are set to Not Configured.
Step 7: Ensure Volume Shadow Copy Service is Enabled
If you encounter issues creating a restore point, ensure that the Volume Shadow Copy service is enabled:
- Open Services:
- Press Windows + R, type services.msc, and press Enter.
- Check Volume Shadow Copy:
- Find Volume Shadow Copy in the list, right-click, and choose Properties.
Ensure the Startup type is set to Manual or Automatic.
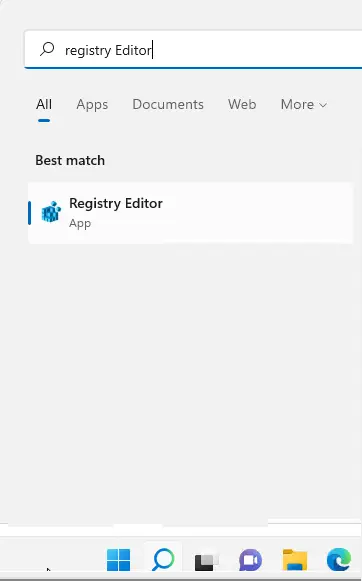
Now, navigate to the following address:.
Computer\HKEY_LOCAL_MACHINE\SOFTWARE\Microsoft\Windows NT\CurrentVersion\SystemRestore
Right-click New, and then DWORD (32-bit) Value.
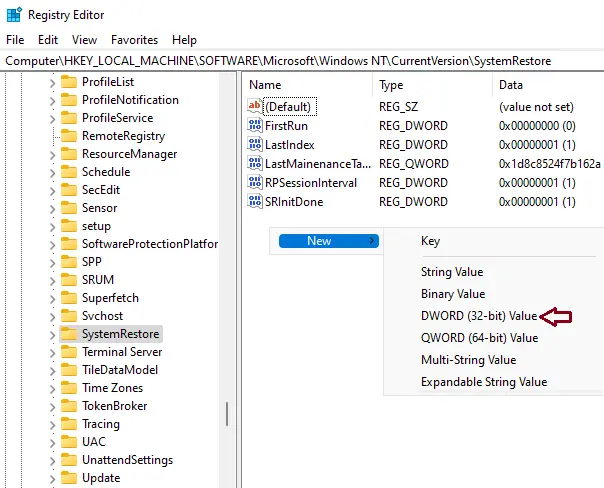
Copy SystemRestorePointCreationFrequency and paste it.
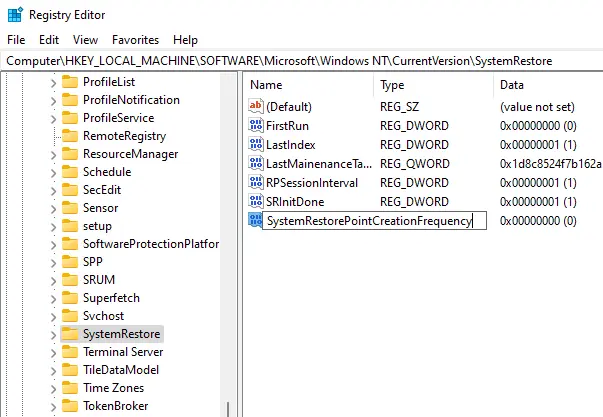
Leave it default and close the registry editor. Now we are able to create a snapshot manually without considering any frequency limitations.
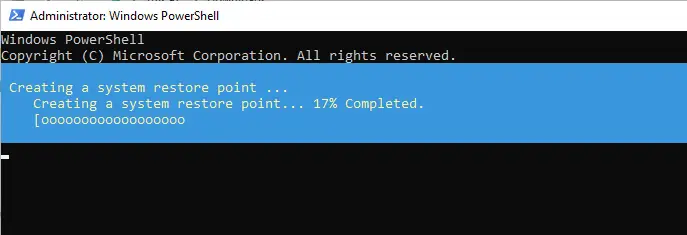
You can see the progress of the restore point creation.
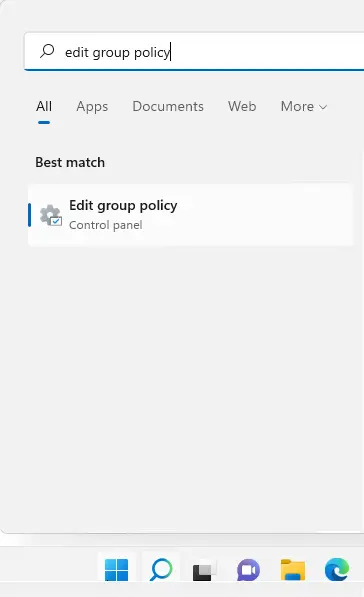
Enable System Restore Point using Group Policy Editor
Press the Windows key + R to open RUN, type gpedit.msc, and then press enter.
The Group Policy Editor window will pop up. From your left side, expand Administrative Templates, System, and System Restore.
On your right side, these two settings should be set to not be configured.
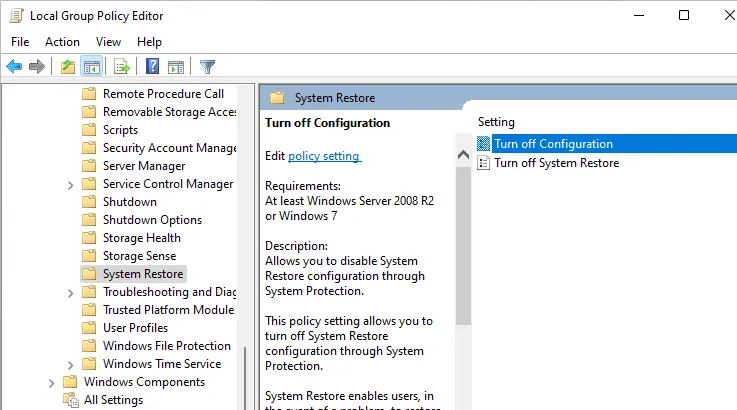
If any of them are enabled, double-click on them to launch, and then set them to not configured.
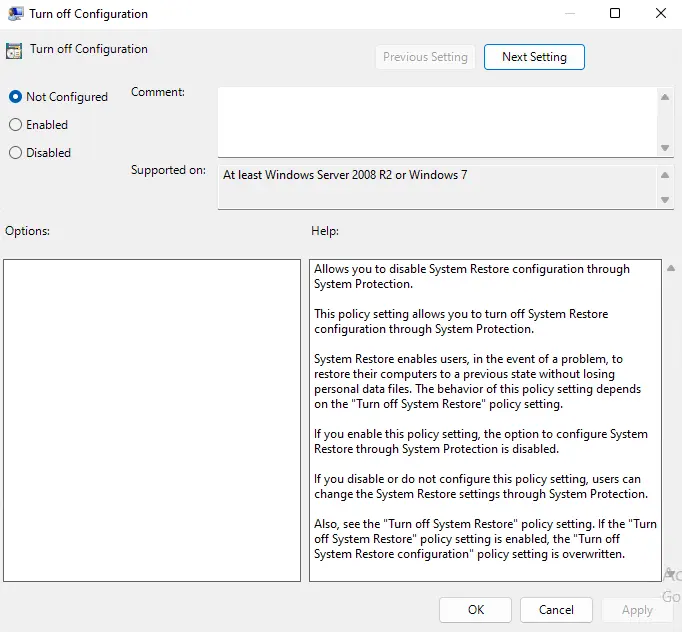
Now you are eligible to create a system restore point.
Turn on the Volume Shadow Copy service
When you are unable to create a system restore point, here is another solution that you may want to apply to turn off the Volume Shadow Copy service.
In the Windows search box, type services, and then press enter.
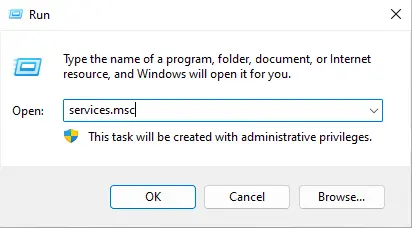
Conclusion
Creating a restore point in Windows 11 is a crucial step to safeguard your system from potential issues. Whether using the System Protection interface, Command Prompt, or PowerShell, having restore points ensures you can easily revert to a stable state if needed.
For more information, please visit this article.
Frequently Asked Questions FAQs – System Restore Point
What happens when we create a restore point?
Windows takes a snapshot of your device’s data as it is at a particular time. The explanations of the operating system are thereby saved so that you can go back to them in case things go wrong.
Why did the system restore points disappear?
The most common reason is that the Windows system restore option was disabled manually. The system restore points are deleted, every time the system restore option is disabled. Also, this condition may be caused by important updates or the accidental deletion of the disk cleanup utility.
How long does Windows 11 keep restoring points?
The retaining restore point is 90 days, and if the previous restore points increase, this date will be removed automatically to make room for a new one.
Will System Restore bring back deleted files?
A system restore only works for files or system programs. If you delete any particular data, such as documents, videos, pictures, etc., it will not help.
Does Windows 11 create automatic restore points?
Yes, by default, Windows has its System Properties fix to automatically create system restore points from time to time, for instance, when we make important changes or any Windows update to your system.
How long does a system restore point take?
It depends on how much data needs to be saved; creating a system restore point can take anywhere from a few minutes to a few hours. Although, after four to five hours, you find that a restore point is still being processed, it is probable that your Windows has run into some problems. In such a case, you need to cancel the whole process and then start again.
Can I undo the changes in System Restore?
Yes, every time we use System Restore, a restore point is created before the operation, so you can undo the changes if they do not fix the issue. If you use System Restore when the computer is in safe mode or System Recovery Options, you cannot undo the restore procedure. Even so, you can start System Restore again and then select a different restore point, if one exists.
What kinds of changes occur during a system restore?
System Restore affects programs, registry settings, and Windows system files. It can also make changes to scripts, batch files, and other kinds of practicable files created under any user account on the system. System Restore does not affect personal data, such as documents, emails, or photos, so it cannot help you recover a deleted file. If you have a backup of your data, you can restore the files from a backup.
If your system restore does not fix the issue,?
If System Restore does not fix the problems, you can undo the restore processing or try choosing a different restore point. The system restore does not show any restore points to choose from; please make sure you have system protection turned on and that you have free space on your hard disk. If System Restore does not fix your issues, you can also try an advanced recovery method.


