In this article, we will guide you through the process of creating a volume in Acronis Disk Director. This powerful disk management tool allows you to manage disk partitions and volumes with ease. Before performing any operation, you must first select the partition, disk, or unallocated space you want to work on. This selection enables the operations necessary for creating a new volume.
Table of Contents
Step 1: Select the Unallocated Space
- Open Acronis Disk Director:
- Launch the Acronis Disk Director software on your system.
- Select the Unallocated Space:
- Locate the unallocated space on your disk where you want to create the new volume.
Right-click on the unallocated space, or navigate to Actions and Tools in the top menu and select Create Volume.
(Note: Image links are placeholders and should be replaced with actual screenshots if needed.)
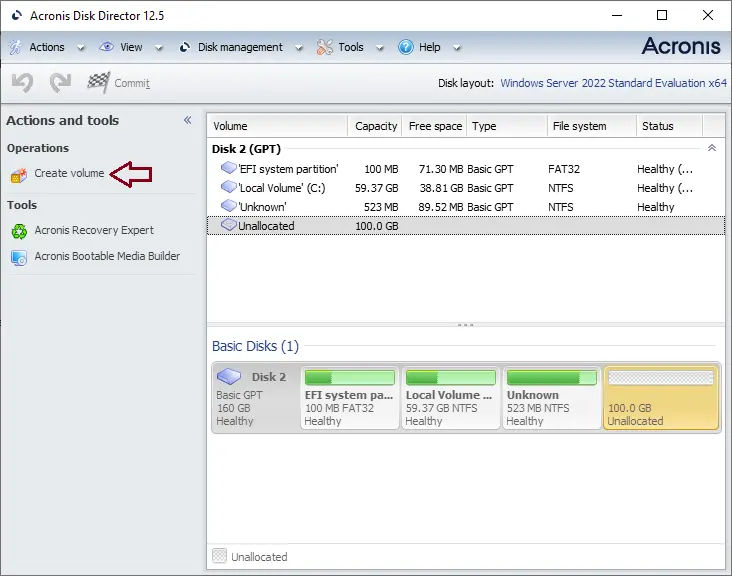
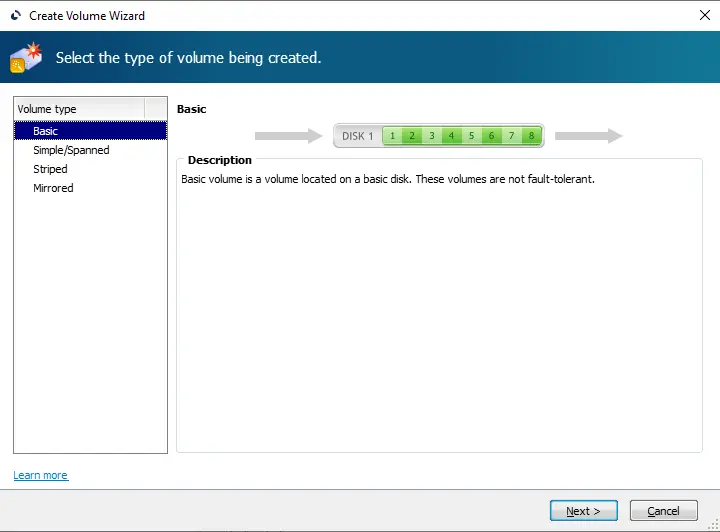
You will then need to specify the volume type. You will see a list of types of volume that are supported by your operating system, as well as a short description to help you better understand the advantages and limitations of those volume types.
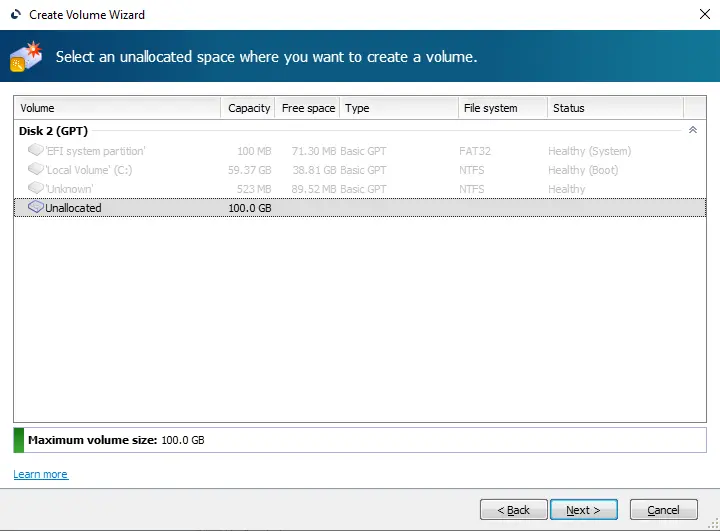
Depending on the type of volume being created, you will need to choose the disk where it will be placed. A basic volume, for instance, requires you to choose a basic disk, specify the unallocated space you will be using, and then click next.
Now choose an unallocated space where you need to create a volume, and then click Next.
Step 2: Choose the Volume Type
- Specify the Volume Type:
- A window will appear asking you to choose the type of volume you want to create. The options listed will depend on your operating system, with each option offering a brief description of its advantages and limitations.
- Select the appropriate volume type for your needs and click Next.
Step 3: Select the Disk and Unallocated Space
- Select the Disk:
- If your selected volume type requires it, choose the disk where the volume will be created.
- Choose the Unallocated Space:
After selecting the disk, you’ll need to choose the specific unallocated space that you want to use for the new volume. Select it and click Next.
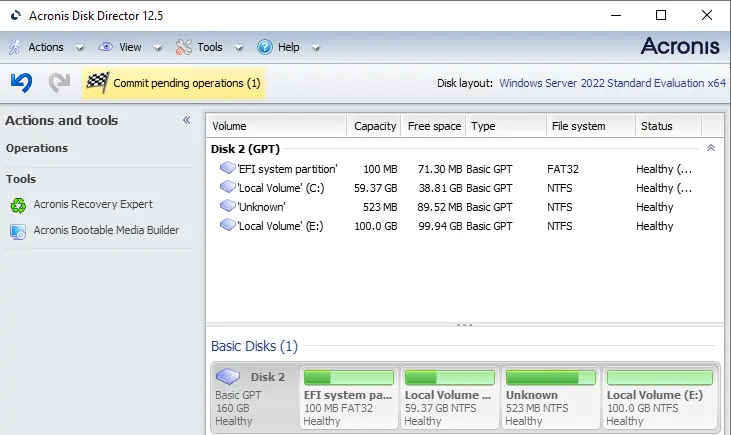
Now click on the Commit pending operations button to start the process.
Step 4: Specify the Volume Size
- Set the Volume Size:
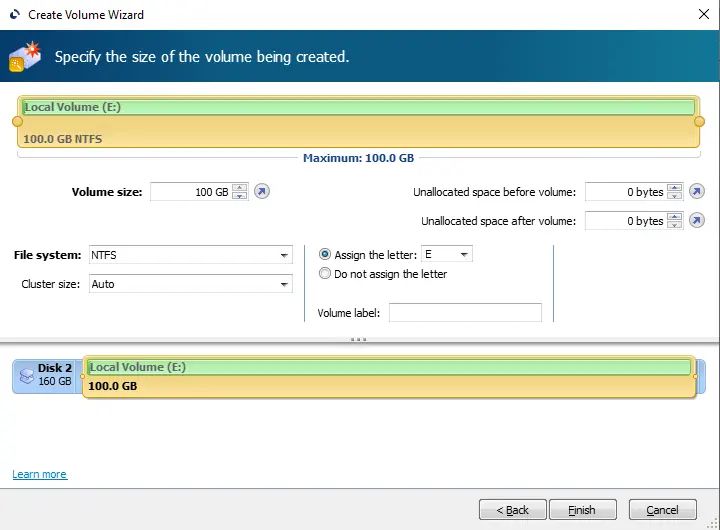
- By default, the size of the new volume will be set to the maximum available space. If you need a smaller volume, you can adjust the size by moving the slider or manually entering the desired size in the volume size field.
- After setting the size, click Finish to proceed.
Step 5: Commit the Pending Operations
- Review and Commit:
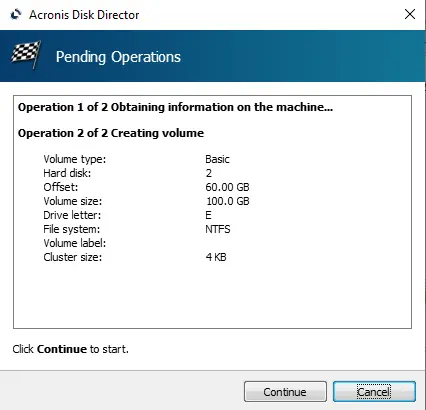
- Before the new volume is created, review the details of the pending operations. If everything looks correct, click on the Commit pending operations button.
- Start the Process:
- Click Continue to begin the creation process. The operation may take some time, depending on the size of the volume and the performance of your system.
Step 6: Volume Creation Complete
- Volume Created:
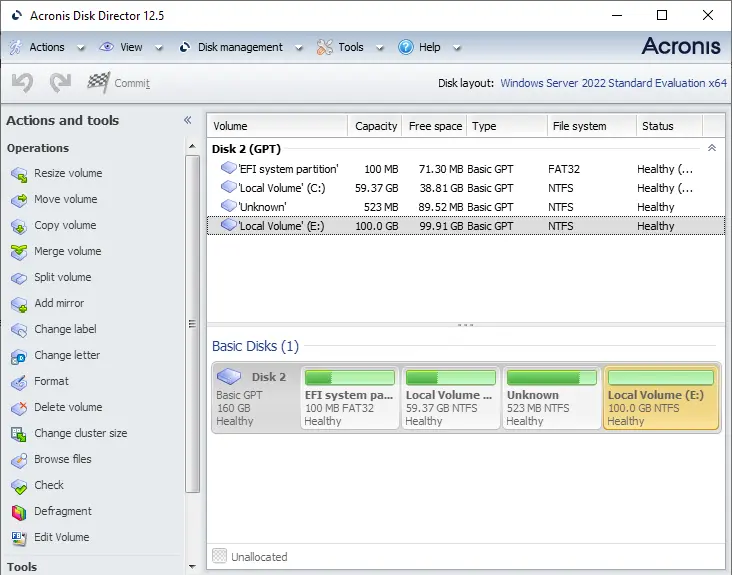
- Once the process is complete, your new volume will be successfully created and available for use.
Volume created successfully.
Conclusion
Creating a volume in Acronis Disk Director is a straightforward process, allowing you to efficiently manage your disk space. Whether you’re setting up a new system or reorganizing your current partitions, this tool offers a user-friendly way to handle your disk management needs. For more advanced operations, such as merging volumes, refer to additional resources or guides provided by Acronis.
Visit Acronis to download Acronis Disk Director.
Related: How to Merge Volumes in Acronis Disk Director.
Refer to this article for more information about creating volume in Acronis Disk Director.


