
This article will cover how to restore computer with Veeam Recovery Media. Using a recovery media, learn how to recover the crashed operating system of your desktop or laptop (Windows 11 and Windows 10), along with all installed software and data. In my previous article, I covered how to take backups of a laptop or desktop device and protect data using Veeam Agent for Microsoft Windows. Insert your How to Create Veeam Recovery Media” Veeam recovery media into a CD/DVD drive or bootable USB drive, and then restart your computer.
Table of Contents
Restore Computer with Veeam Recovery Media
Boot your system using Veeam recovery media, and then press any key…
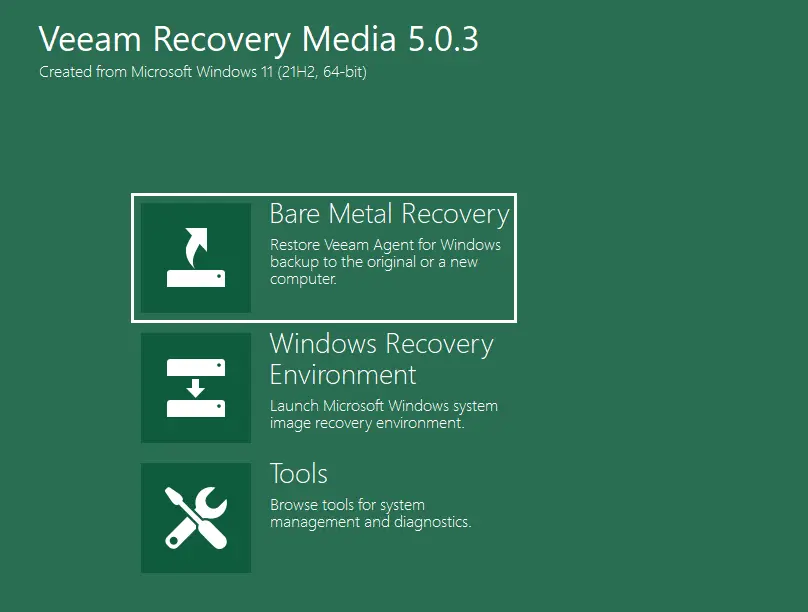
In the Veeam Recovery Media window, click on Bare Metal Recovery.
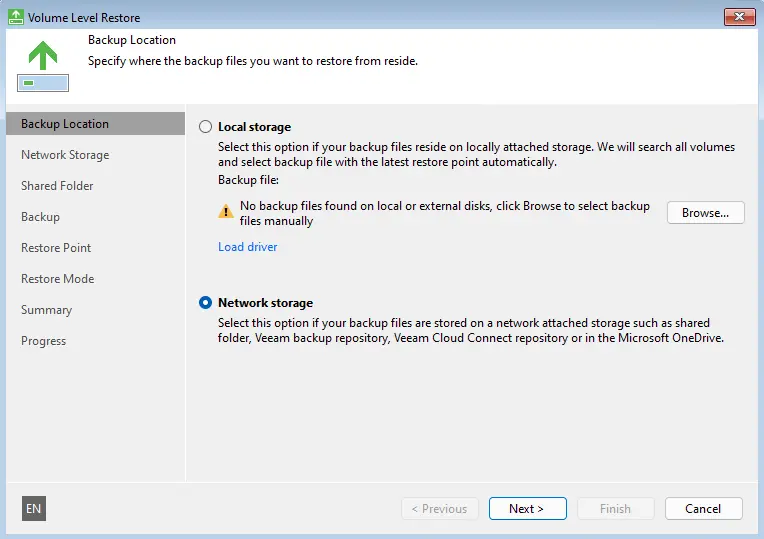
Veeam volume level restores the backup location.
Local storage: select this option if your Veeam backup resides on your local PC drive or external drive. So, choose the Browse button, and then select a Veeam backup metadata image (VBM).
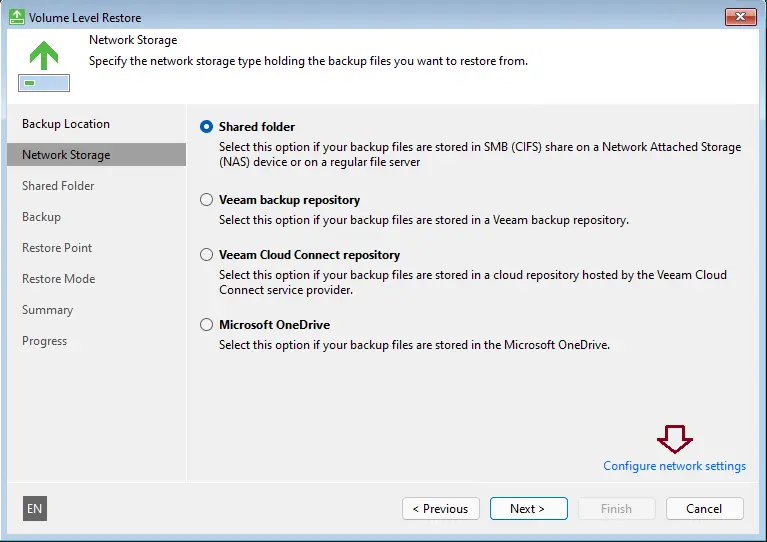
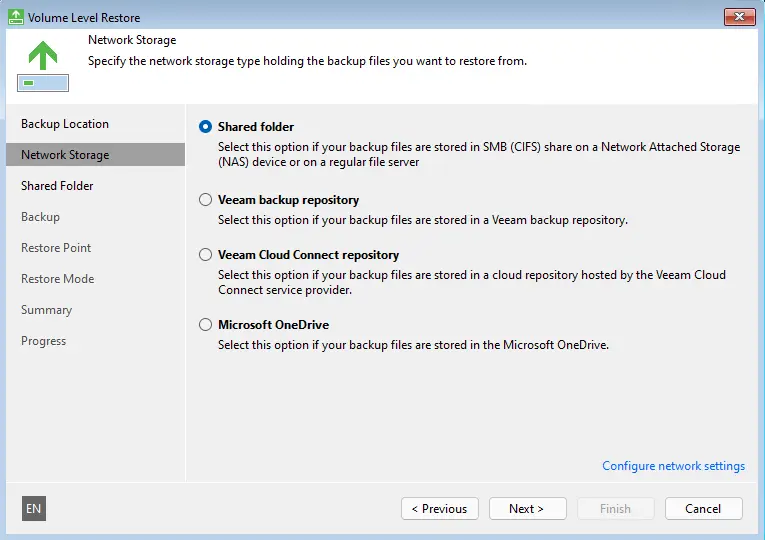
Network storage: Select this option if your Veeam backup resides on a network shared folder, cloud storage, One Drive, a Veeam cloud repository, or a Veeam backup repository. In my case, we have Veeam Backup (VBM) at a shared location. Choose network storage, and then choose next.
Click on Configure network settings.
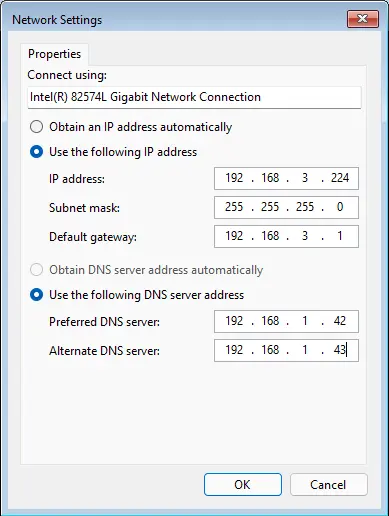
Configure Network Settings
In the Network Settings window, choose a network adapter or wireless network and click on Properties.
Note: If the network adapter is not showing, then we have to install network adapter drivers. Click the Load network adapter driver link, and then install the network driver.

Please type your network IP address and then choose OK.
Click next
Specify settings for your network shared directory.
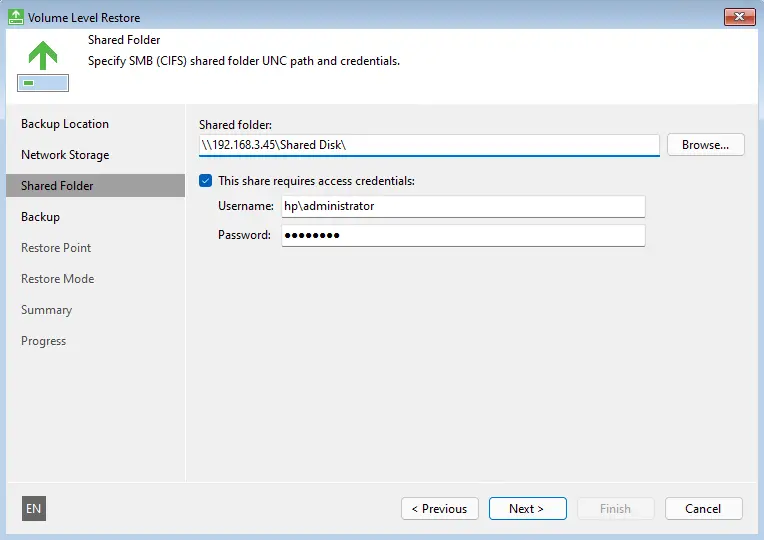
In the Shared Folder field, enter a shared folder network address.
Tick the box Network Shared Folder Credentials, type your network share credentials, and then click Next.
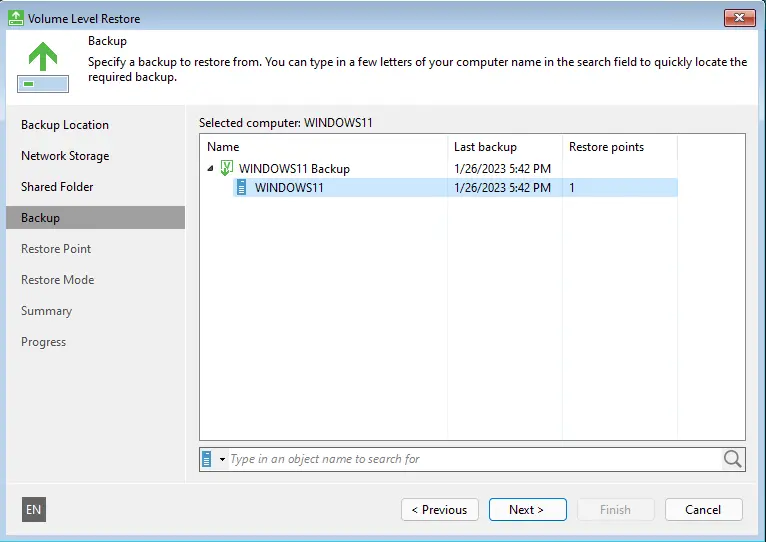
Specify a backup to restore from and click next.
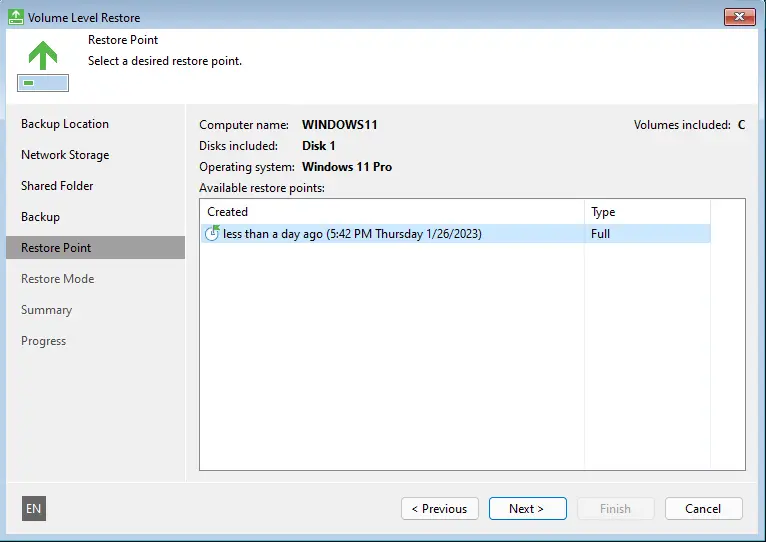
Select a desired restore point, and then choose next.
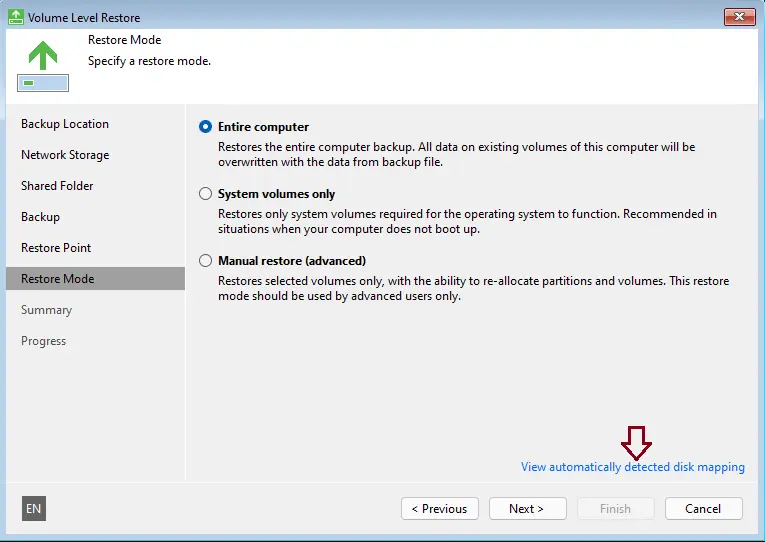
Select restore mode “entire computer” and then click on automatically detected disk mapping.
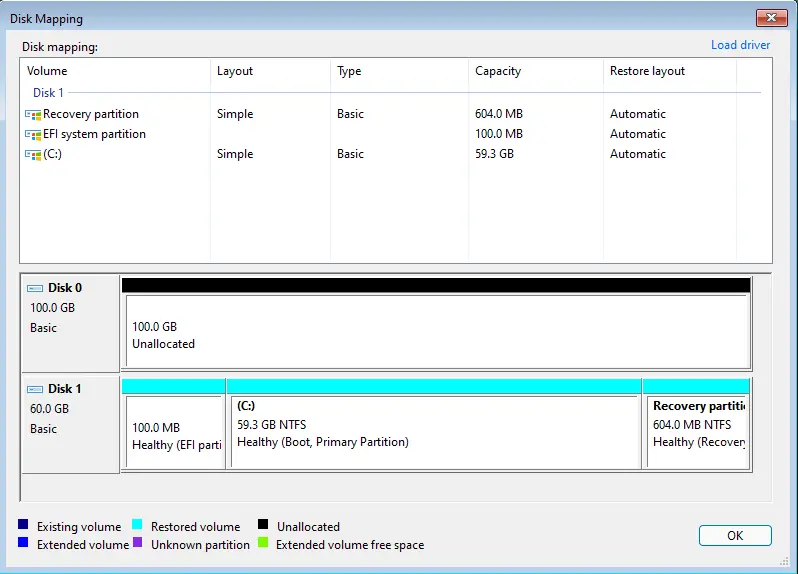
Disk mapping
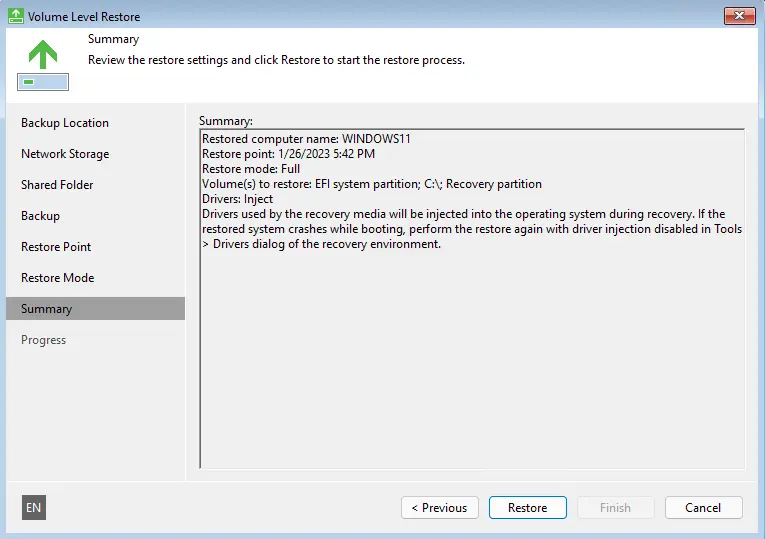
Review the restore settings, and then click Restore.
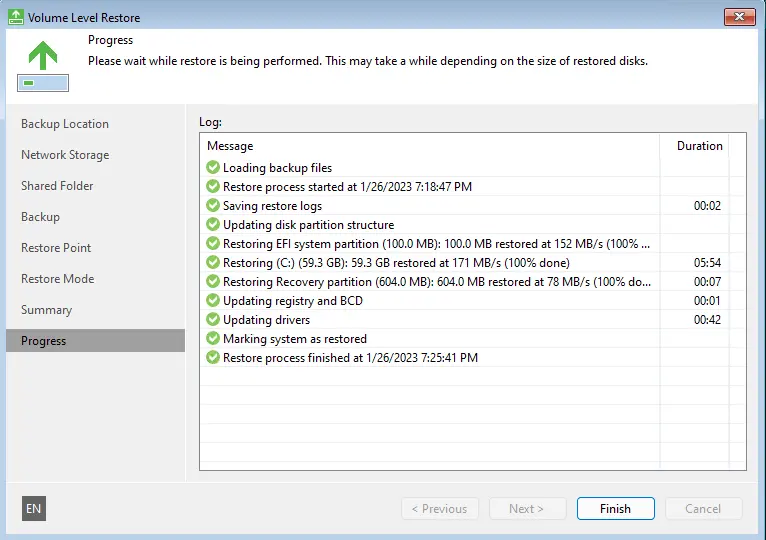
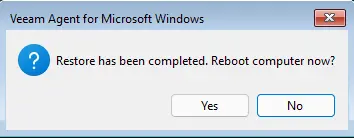
The entire computer was successfully recovered. Click on the finish button.
Click yes to restart the computer.
Successfully restored

Refer to this article to get more details about restoring from Veeam Recovery Media.

