
This article describes how to migrate Active Directory 2012 to 2022 (Windows Server 2022). The process is the same, regardless of whether you choose Server 2019 or Server 2022. But I recommend migrating straight to Windows Server 2022. I am writing this article to help the server admin migrate an existing Active Directory domain controller that is working on Windows Server 2012 R2 (Server2012) to Windows Server 2020 (Server2022). So, let’s get started.
First, we need to install Windows Server 2022 on a new physical computer or virtual machine. Join Windows Server 2022 to the domain. If you are more technically experienced with Windows Server, you could elect to install Server Core 2022 and then perform the necessary steps with PowerShell or by using remote connections to the new server using Server Manager or Windows Admin Center
Table of Contents
Migrate Active Directory 2012 to 2022
This is a very easy process, but first, you can test it in your test environment.
In the scenario in my test environment, I have two Windows servers and one local domain server (jamiltech.local).
| Virtual Machine | OS | Role | IP Address |
| Server2012 | 2012 R2 | Primary Domain Controller | 192.168.241.150 |
| Server2022 | 2022 | Secondary Domain Controller | 192.168.241.160 |
We need an account for migration procedure which is a member of administrative groups (Enterprise, domain, and schema admins).
You should configure the correct IP address on Server 2022, the same time on new server 2022 needs to be fully patched.
When all these things are completed, then join Server 2022 to the existing domain.
Install Additional Domain Controller
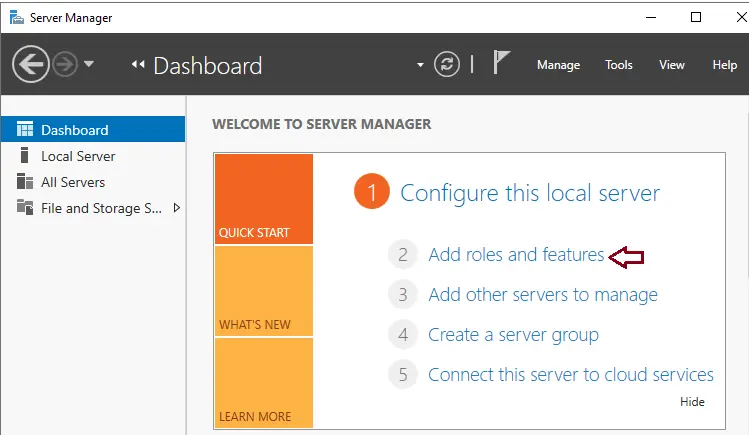
After joining to the domain controller, you can logon with the administrative account on server 2022. Then open server manager, and choose “Add Roles and Features” from Server Manager.
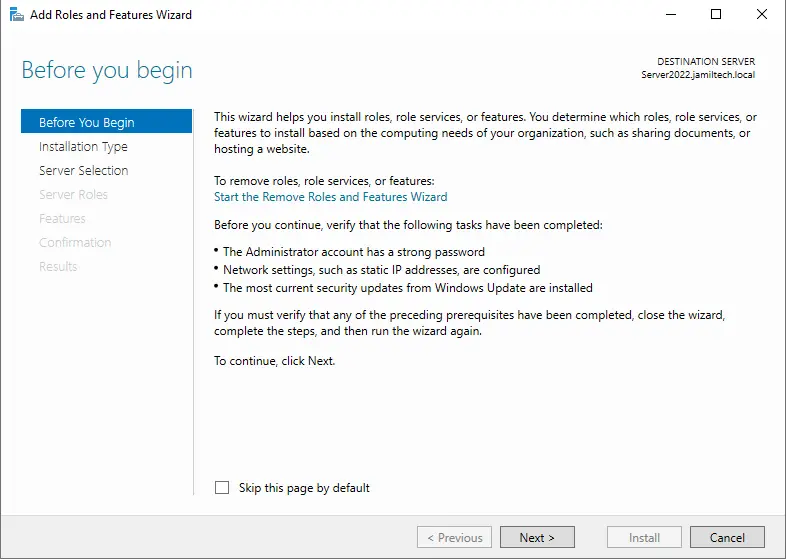
Click next
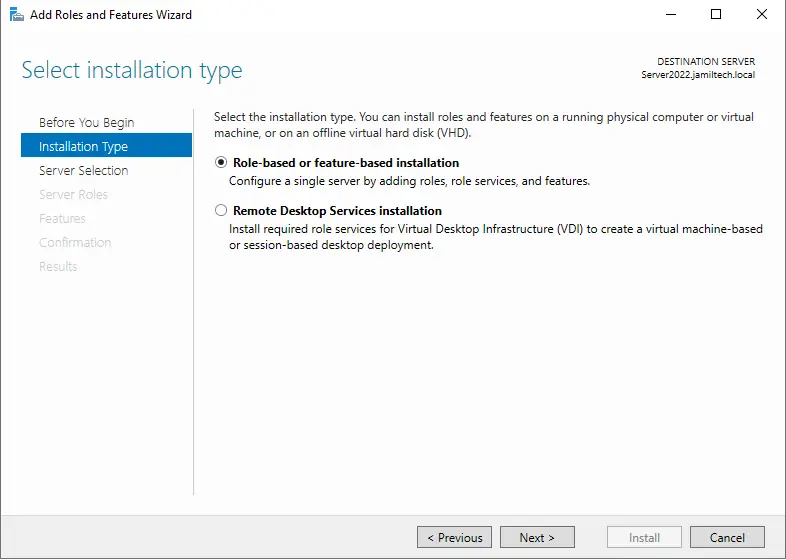
You must select Role Based installation and then click next.
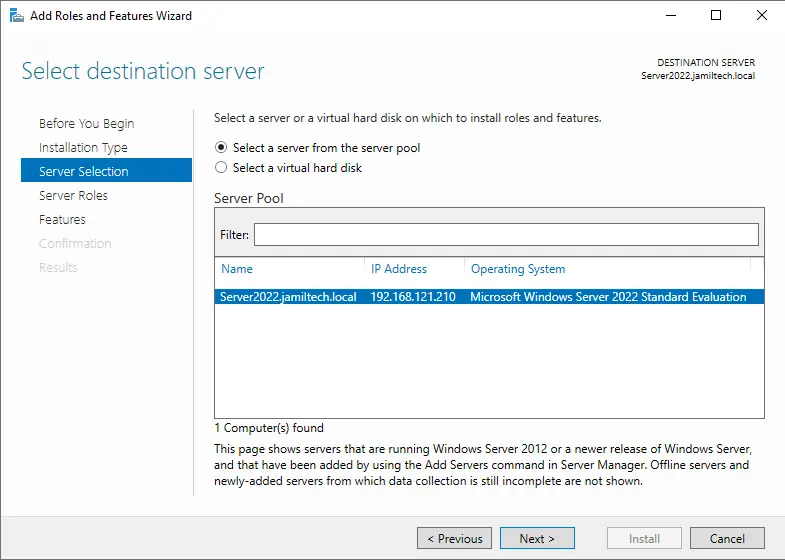
Select the destination server and then click next.
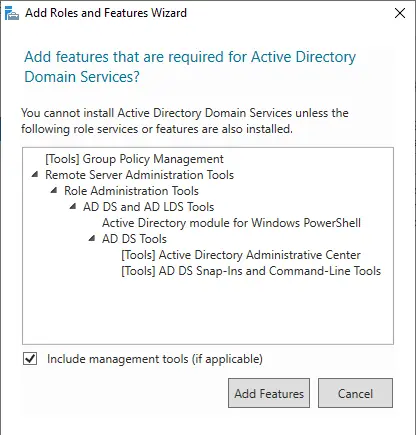
On this screen, you must choose the box “Active Directory Domain Services”.
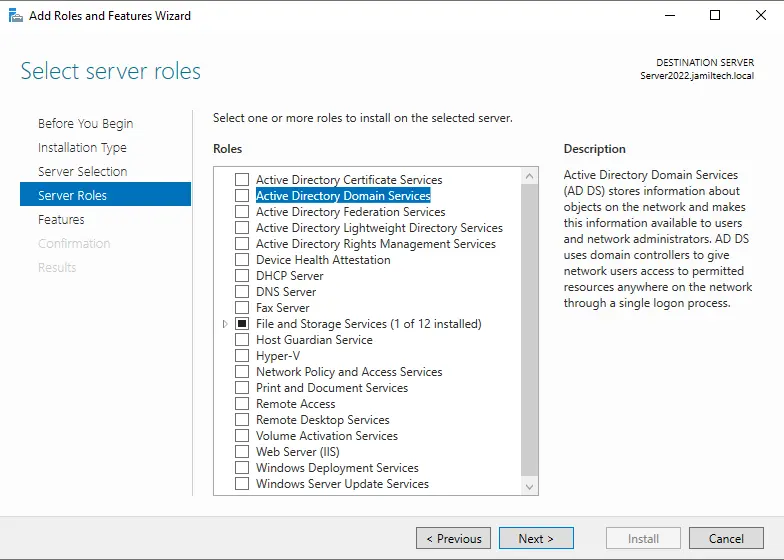
Click on add features button, and the necessary features will be adding the role.
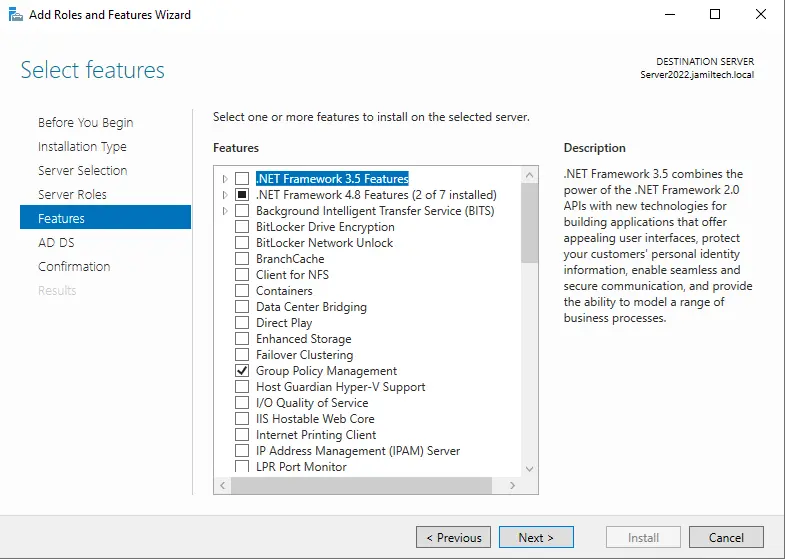
Click next

Select next
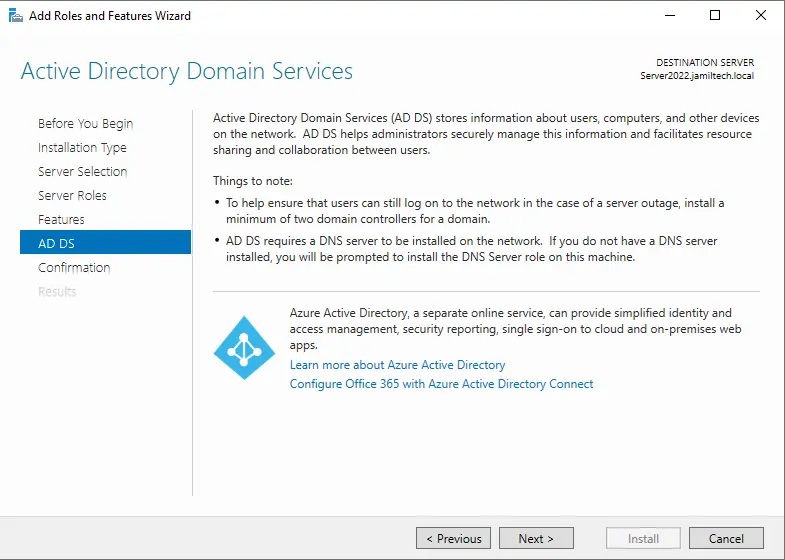
You can see information about ADDS, click next.
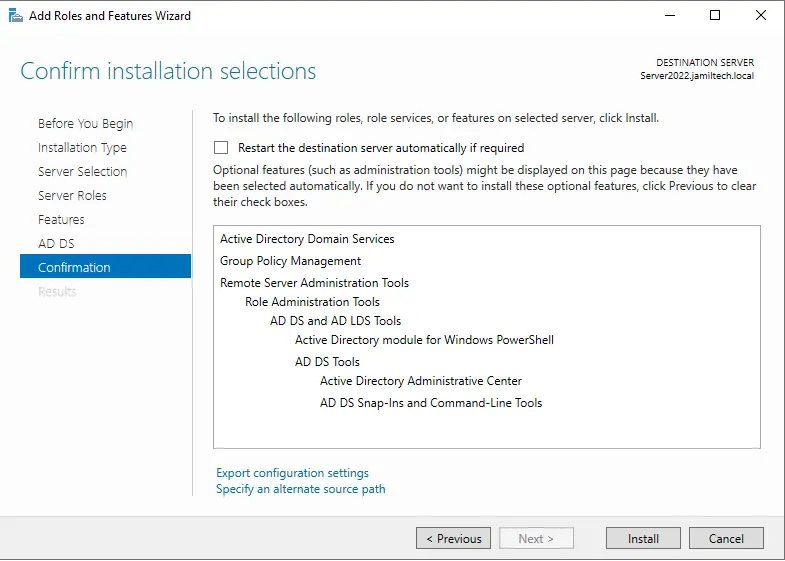
On the Confirm installation page, to start domain controller installation click the “install” button.
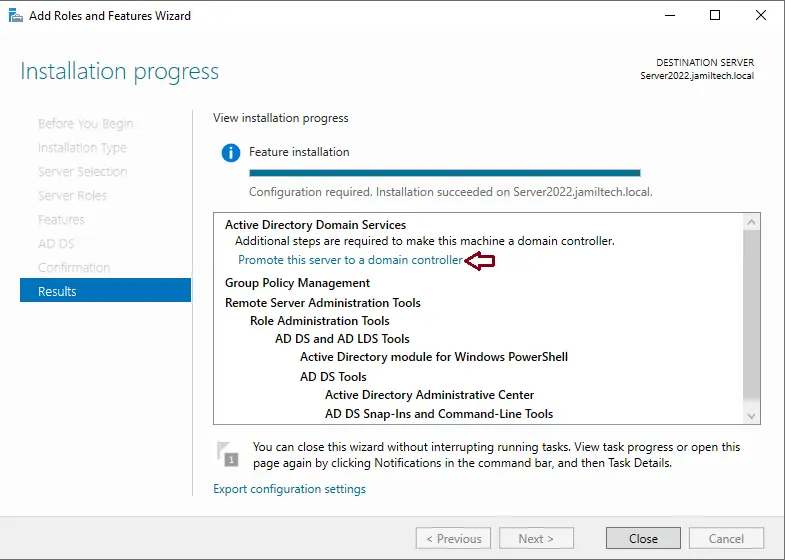
Promote this Server to a Domain Controller
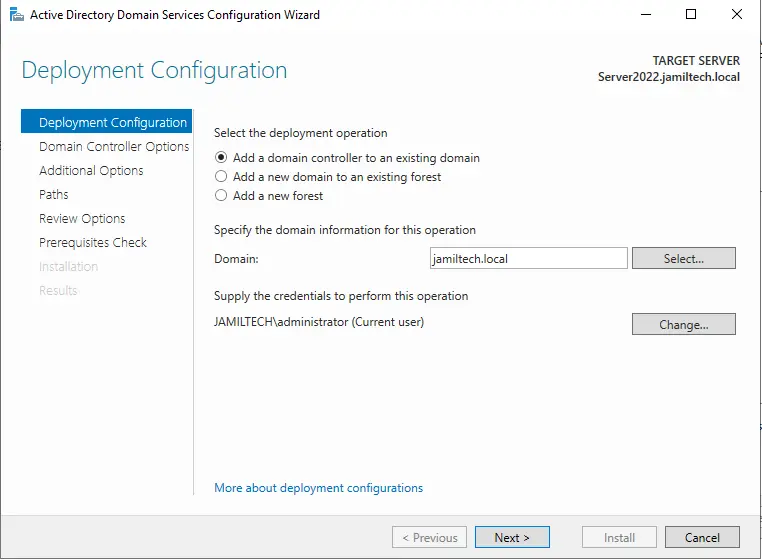
We need to add a new Server 2022 as an Additional Domain Controller to our existing domain that’s why we need to ”Add a domain controller to an existing domain”.
Deployment configuration window, select your primary domain (existing domain), and then click next.
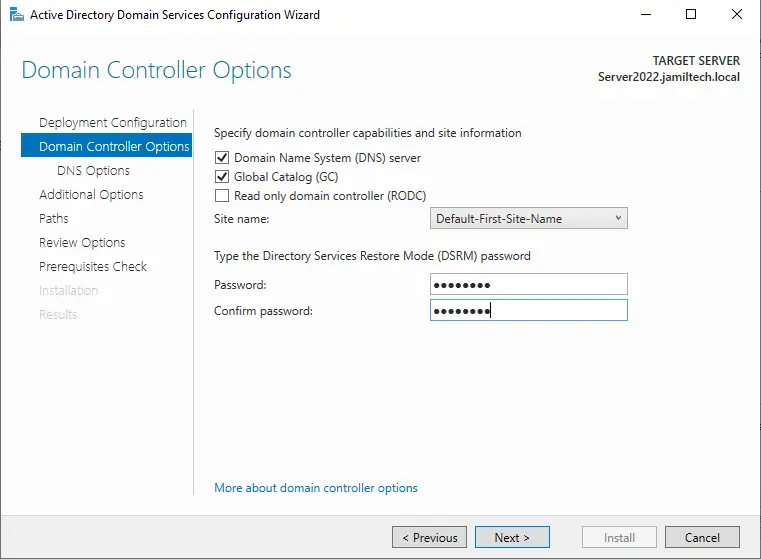
Confirm “DNS” and “GC” roles are selected.
Site name – Default first site name (default)
DSRM password – We should keep that password configure here, cause any of the domain controller (DC) restore process we need it. Click next
Click next

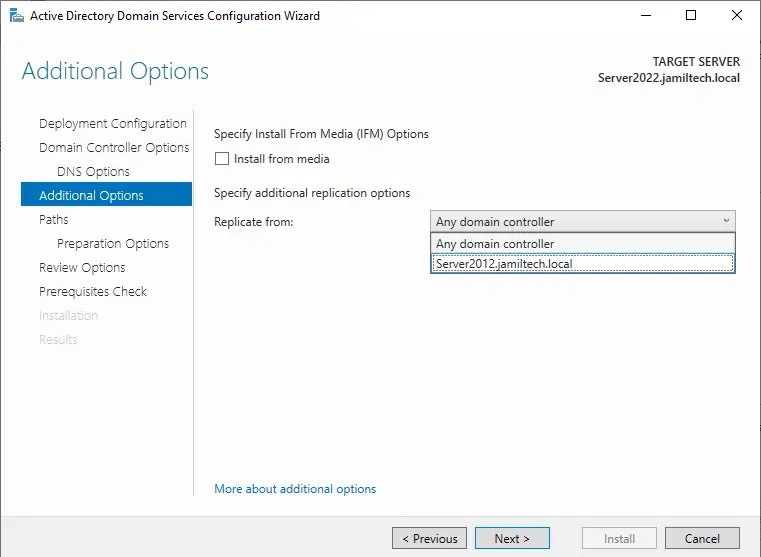
We can select the replication partner on the additional options page. If you choose the “Any domain controller” option, it will select the nearest replication partner. Click next
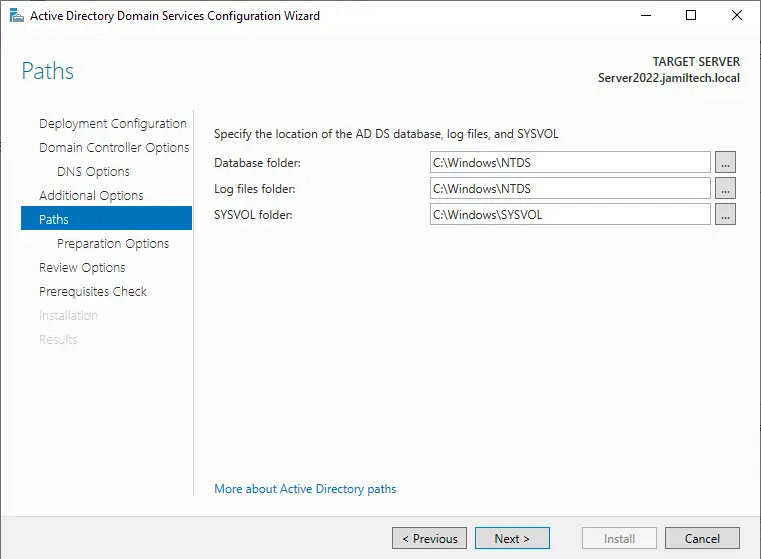
Confirm the paths and then click ok.
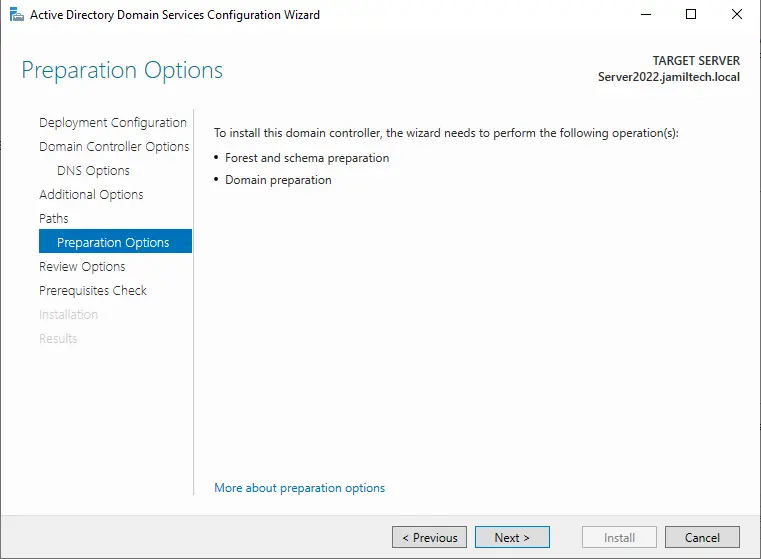
The new features become with Server 2012 R2 update forest, schema, and domain prep automatically also available with Server 2022. Click next
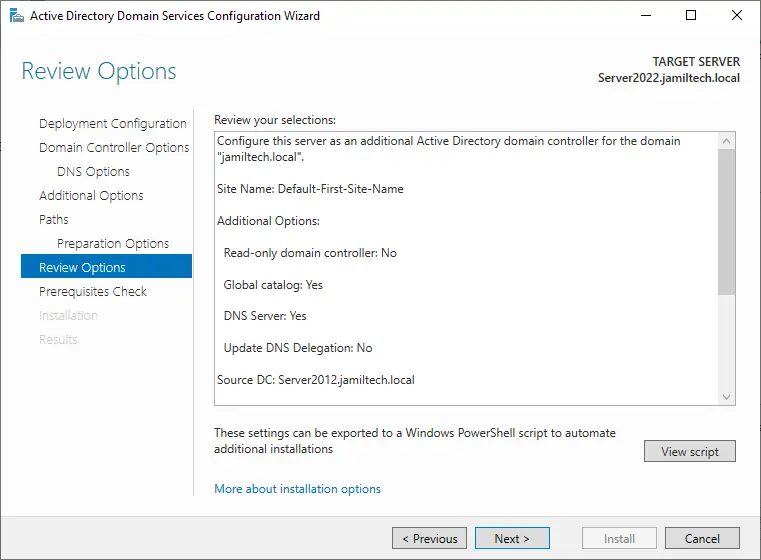
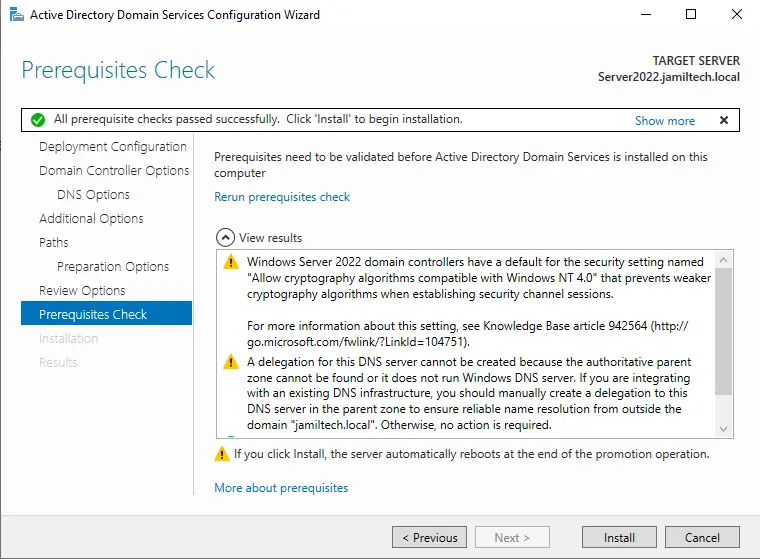
You can review options so far and then click next.
This page verifies the system prerequisite check, if it shows valid then you can click on the “install” button.
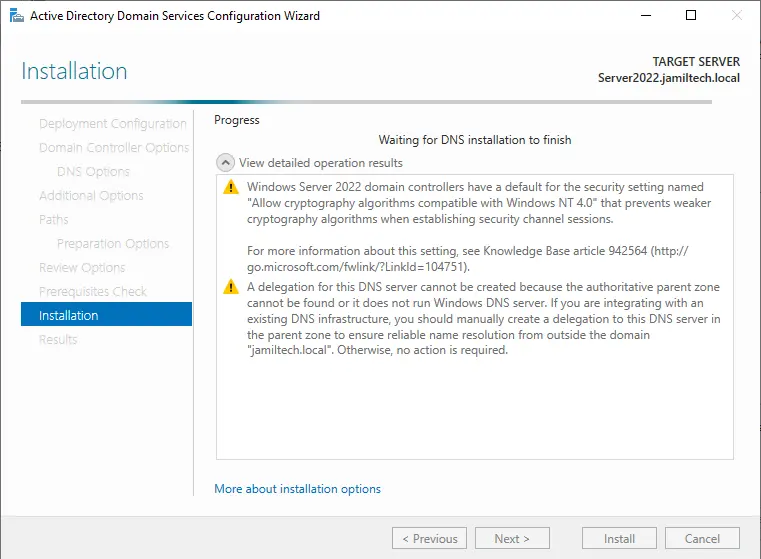
Additional domain controller configuration is in progress.
When all these processes is done, the new server 2022 adds an existing domain as an additional domain controller. Click close
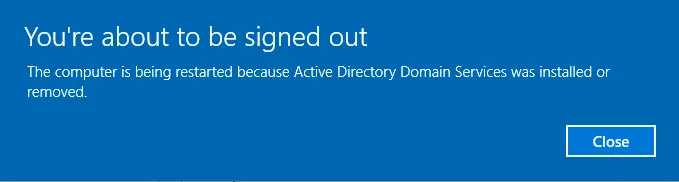
When you restart the new 2022 additional domain controller and log on you can see new roles already added on the domain controller.
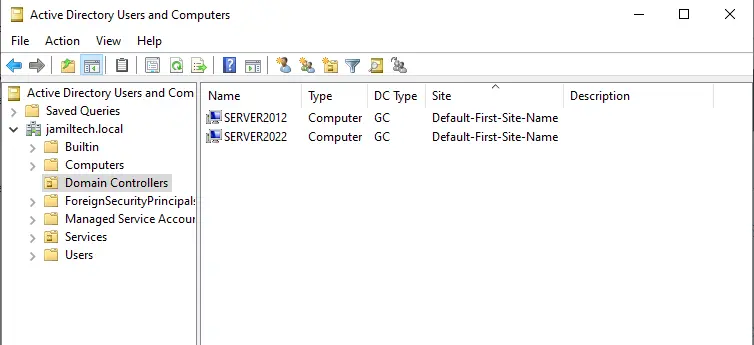
View Server 2022 Domain Controller
You should see the new domain controller listed in your Active Directory.
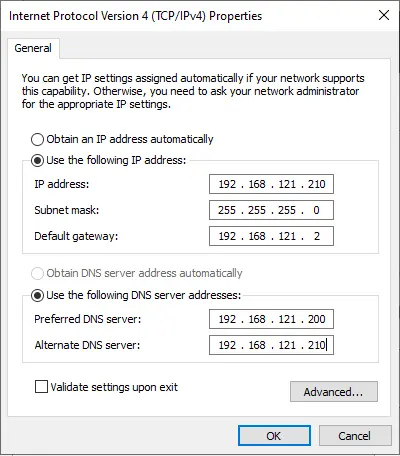
Change the Alternative DNS Server
Open network properties and then change the alternate DNS IP Address.
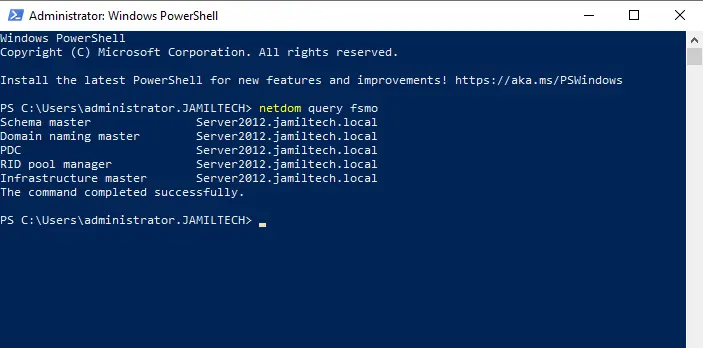
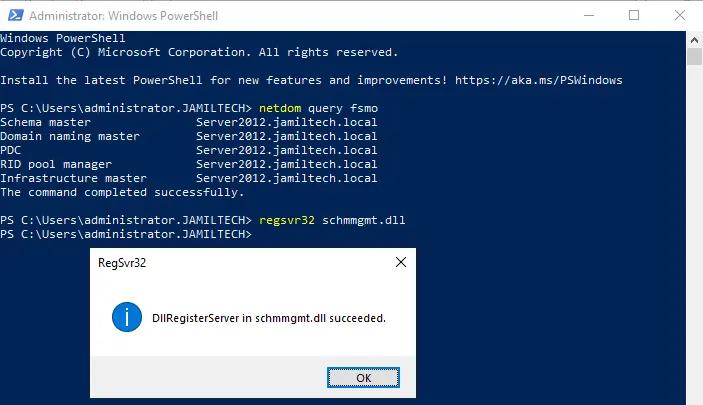
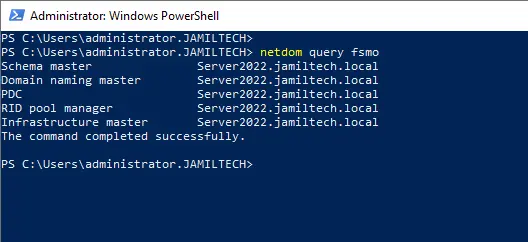
Run Windows PowerShell and then type the below command to check the Master Operation role.
netdom query fsmo
Migrating FSMO Roles to Windows Server 2022
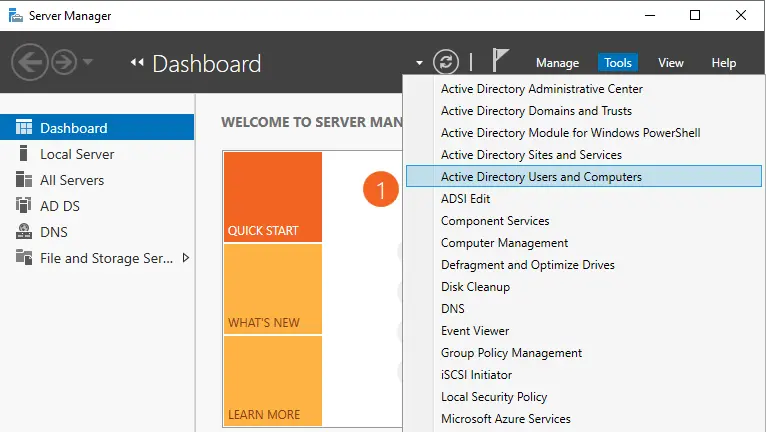
In the active directory users and computers, Right-click on your local domain (jamiltech.local) and then choose Operations Masters.

Choose the RID tab and then Change button.
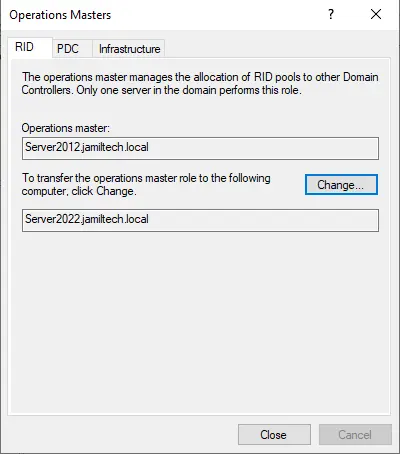
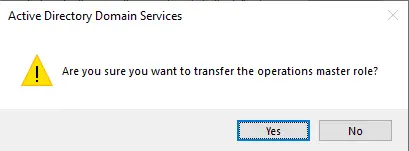
Select yes
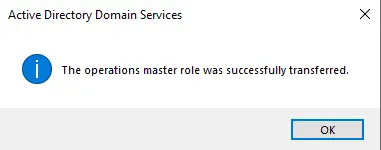
Click ok
Select the PDC tab and then choose the Change button to change the operation master role.
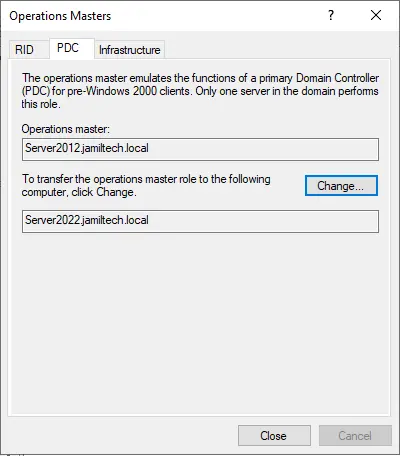
Click yes and then ok.
Now click on the Infrastructure tab and then the change button.
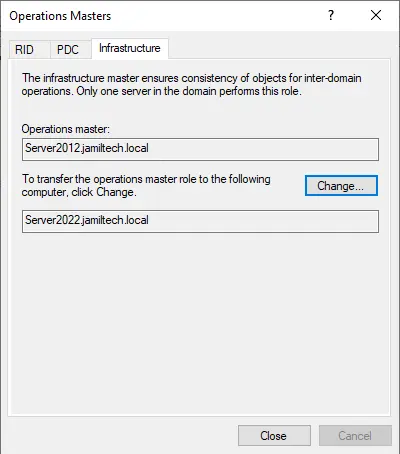
Click on yes and then ok.
Select close.
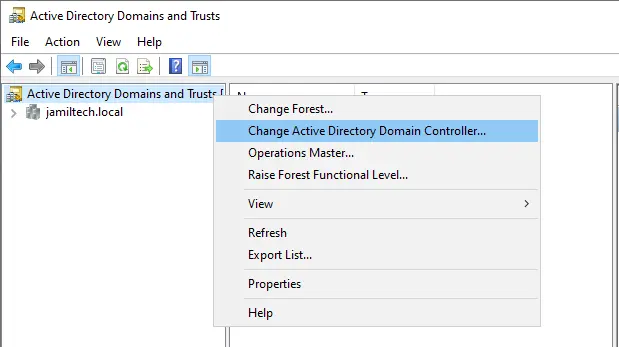
Change Active Directory Domain Controller
Run Active Directory Domain and Trusts, right-click on Active Directory Domain and Trusts, and then choose Change Active Directory Domain Controller.
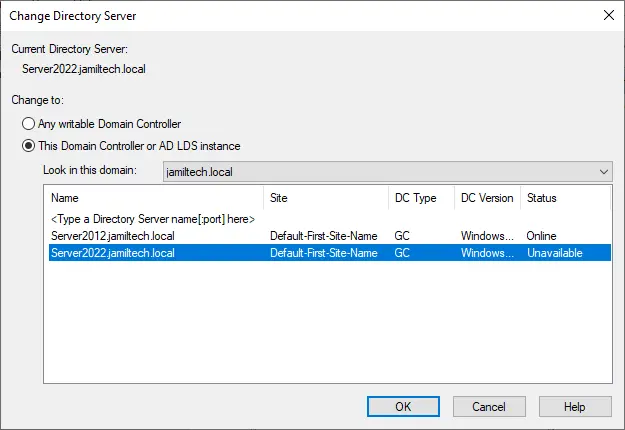
Change the Directory Server page, and select the box “this Domain Controller or AD LDS instance”. Select your new Windows Server 2022 directory server and then choose ok.
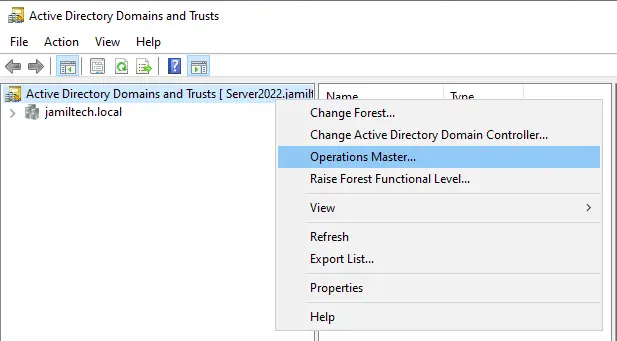
Right-click on Active Directory Domains and Trusts and then choose Operations Manager.
Choose change to transfer the domain naming master role to the Windows Server 2022.
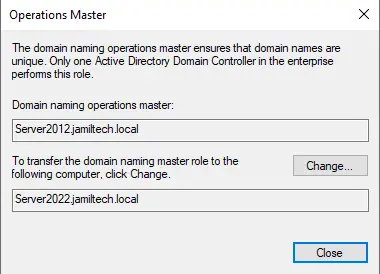
Select Yes
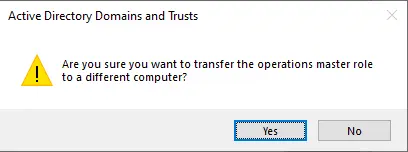
Click ok
In the Server2022.jamiltech.local server, run PowerShell and then enter the below command to change the Schema Master.
regsvr32 schmmgmt.dll
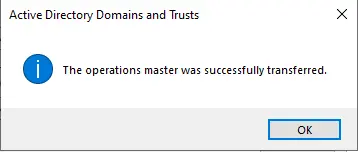
Click ok
Change Schema Master
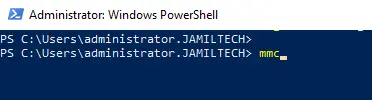
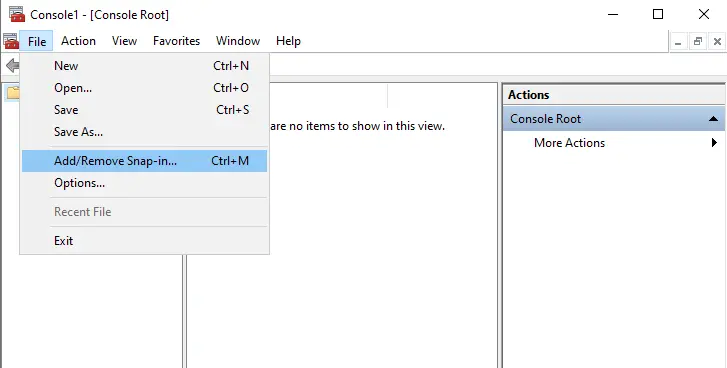
Now we will change Schema Master, enter mmc and then press enter.
Choose the File tab and then click on Add/Remove Snap-in.
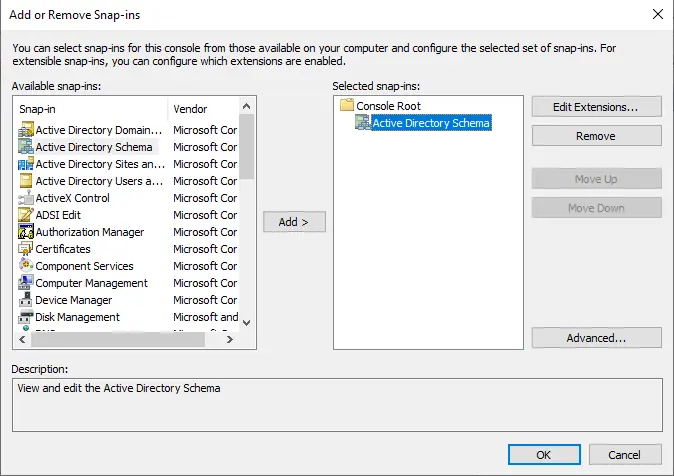
Add or Remove Snap-ins page, select Active Directory Schema, select Add button, and then ok.
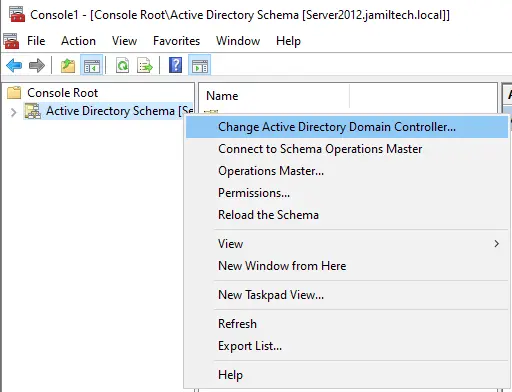
In the Console root, right-click on Active Directory Schema and choose Change Active Directory Domain Controller.
Click on Server2022.jamiltech.local server and then choose ok.
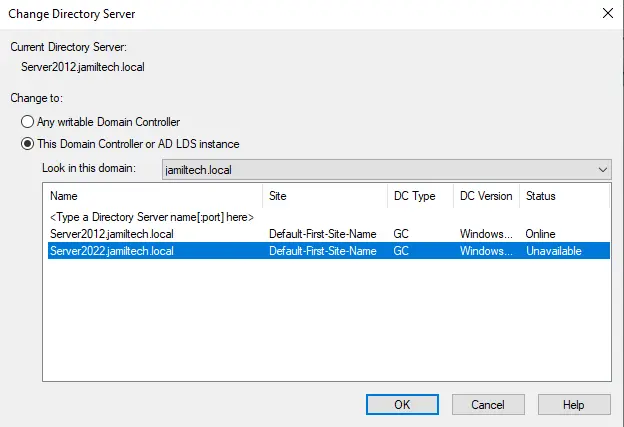
Click ok to proceed.
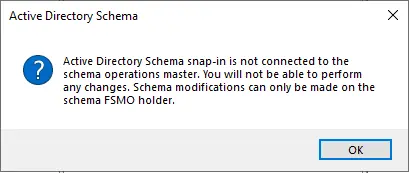
Right-click on Active Directory Schema and then choose Operations Master.
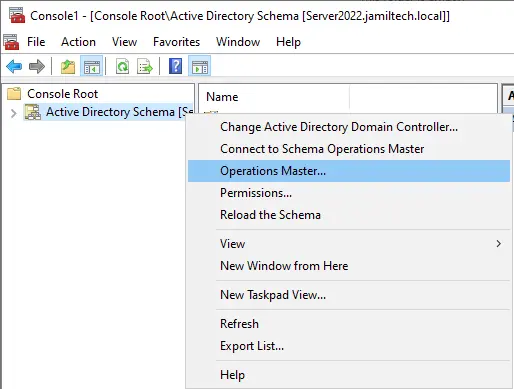
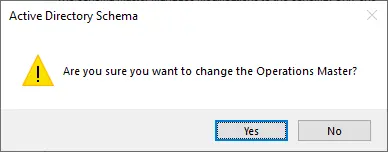
Click on Change to transfer the schema master role to Server 2022 (Server2022.jamiltech.local).

Select Yes
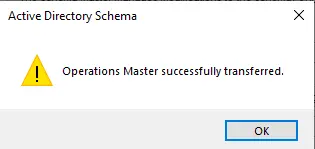
Click ok to proceed.
In PowerShell, enter the below command and then press enter.
netdom query fsmo
The FSMO roles successfully transferred to Active Directory Domain Controller Server 2022.
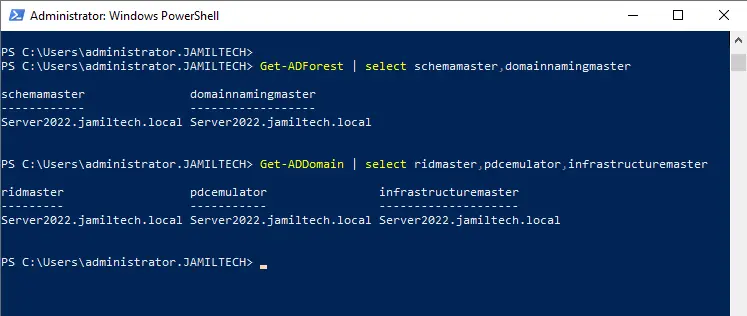
Transfer FSMO Roles with PowerShell
Transfer the FSMO role to an additional domain controller. Follow the below command
For Forest wide roles
Get-ADForest | choose schemamaster,domainnamingmaster
For Domain wide roles
Get-ADDomain | select ridmaster,pdcemulator,infrastructuremaster
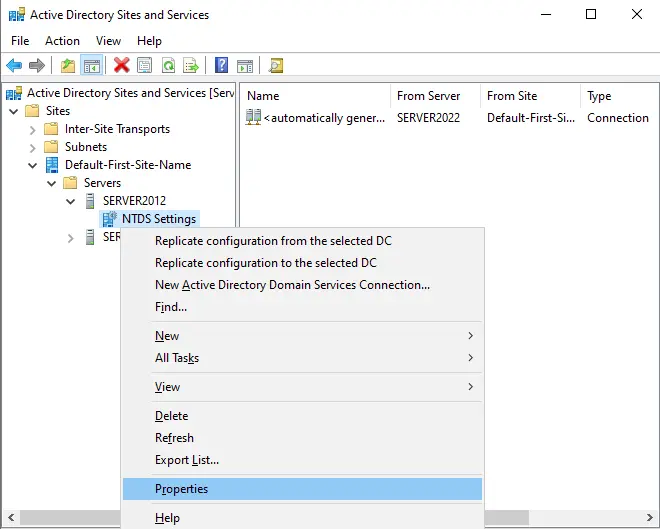
Change Global Catalog
Run Active Directory Sites and Services, expand Sites, expand Default-first-site, and then expand DC2022.
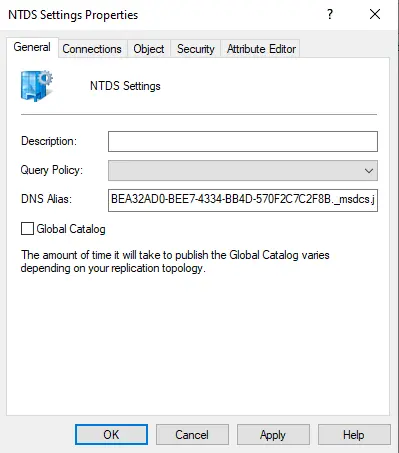
Right-click on NTDS Settings and then choose properties
Deselect the Global Catalog box and then click ok.
Now you can uninstall Active Directory from Server 2012 R2 and then join the server to the workgroup. Visit this article for more detail.
Read more: How to Active Directory Migration Server 2019 to 2022.
Refer to this article: How to Upgrade Server 2012 to Server 2022.

Thank you for the good writeup. It in fact was a amusement account it. Look advanced to more added agreeable from you! By the way, how could we communicate?