In this article, we’ll walk you through the steps to add an ESXi host to an Active Directory domain. By integrating an ESXi host with Active Directory (AD), you can leverage centralized security management within your VMware vSphere environment. Active Directory enhances authorization, authentication, and accounting, making it a crucial component for streamlined access control. Before proceeding, ensure that your environment meets the necessary prerequisites, including a properly configured ESXi server, network settings, and a Windows Active Directory server.
Benefits of Joining ESXi to Active Directory
Joining a VMware ESXi host to an Active Directory domain allows administrators to connect to the ESXi server without repeatedly entering credentials. Active Directory, which implements the Lightweight Directory Access Protocol (LDAP) in Windows, manages accounts for computers, users, and groups. It operates on a server that has been “promoted” to a domain controller with the Active Directory role installed. To complete this integration, ensure that you have at least one Active Directory Windows server available on your network alongside the ESXi host.
Table of Contents
Add ESXi Host to Active Directory
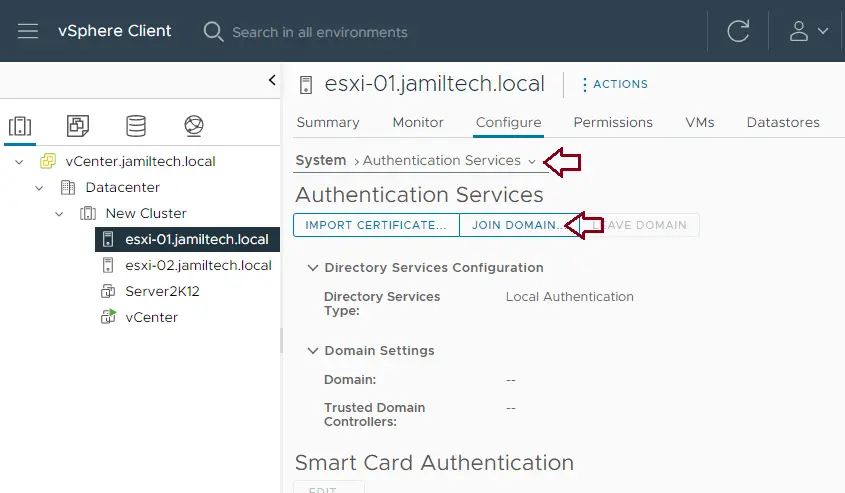
Before configuring Active Directory credentials, you’ll need to add the ESXi host to your domain controller. Here’s how:
- Open the vSphere Client and select the ESXi host.
- Navigate to the Configure tab, select Authentication Services, and click on Join Domain.
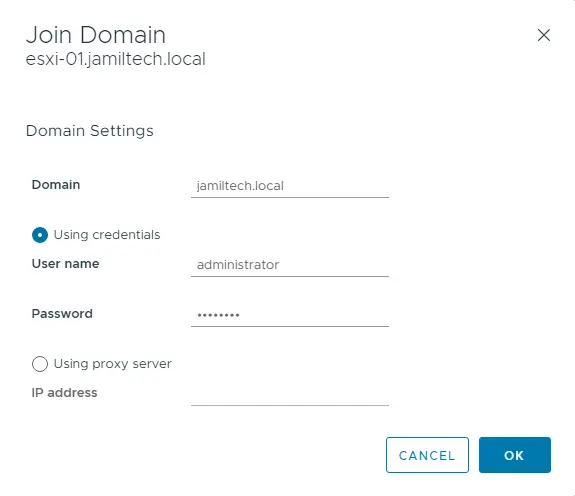
- Enter Active Directory credentials and click OK.
- Verify the Directory Services Type is listed as Active Directory.
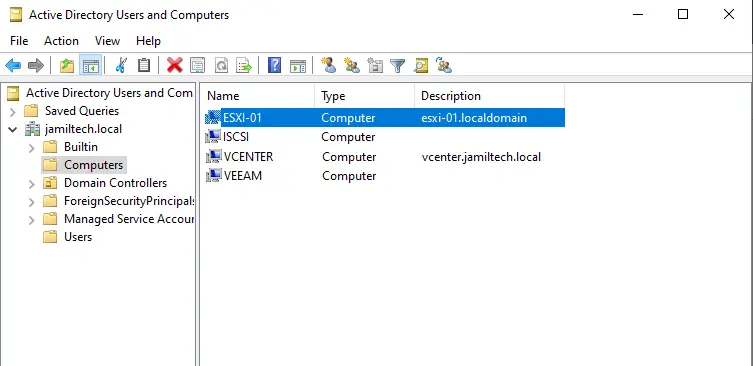
You can also confirm that the ESXi host has joined the AD domain by checking in Active Directory Users and Computers.
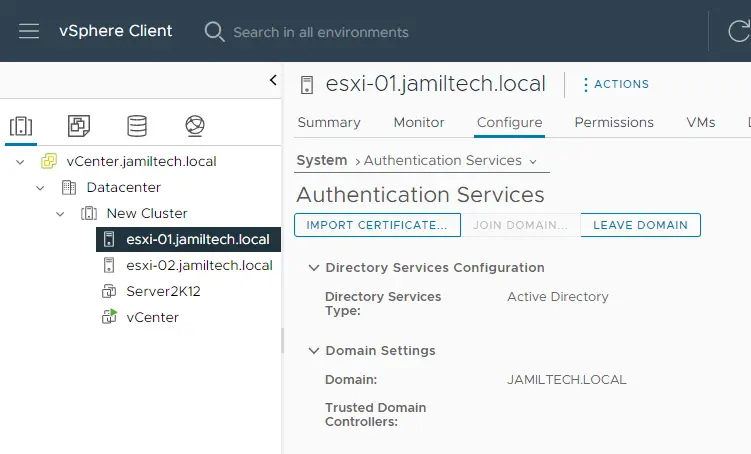
Also, you can verify if the ESXi host has joined an AD from Active Directory Users and Computers.
Assign Users and Roles for the Host
After joining the ESXi host to the Active Directory domain, the next step is to assign users and roles:
- Log in to the vSphere Client using root credentials.
- Expand the ESXi host from the left-side menu, and click on Manage.
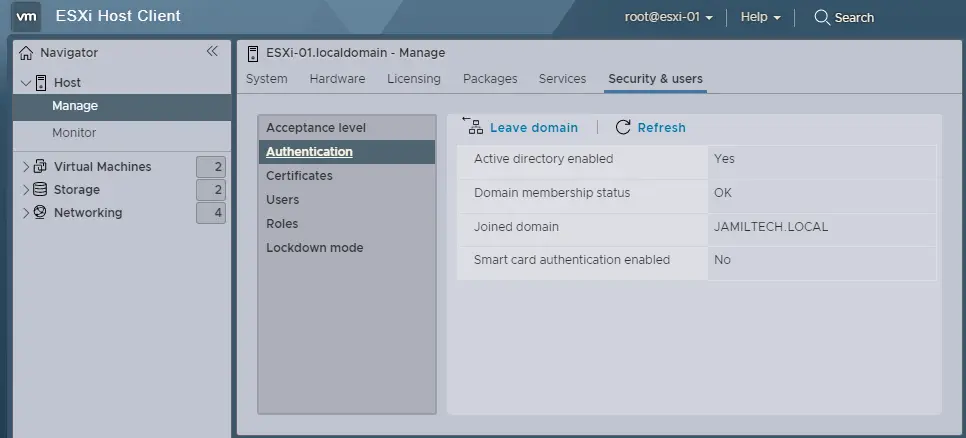
- Select the Security & Users tab and click Authentication under Acceptance Level. Ensure that the directory service is enabled and that the domain settings are correctly listed.
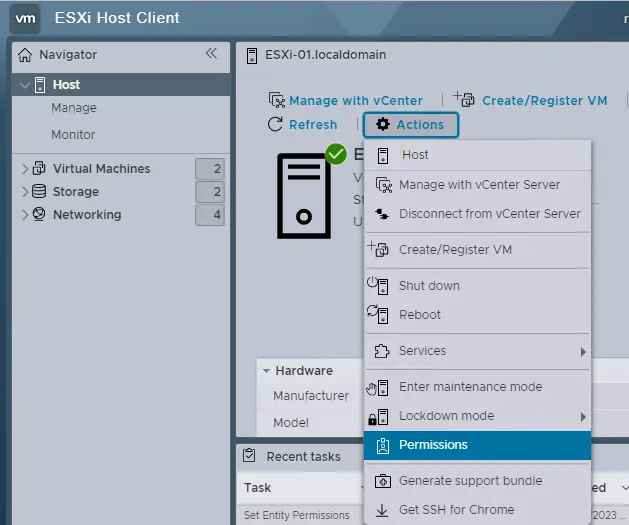
- To assign permissions, click on Host, select the Action menu, and then choose Permissions.
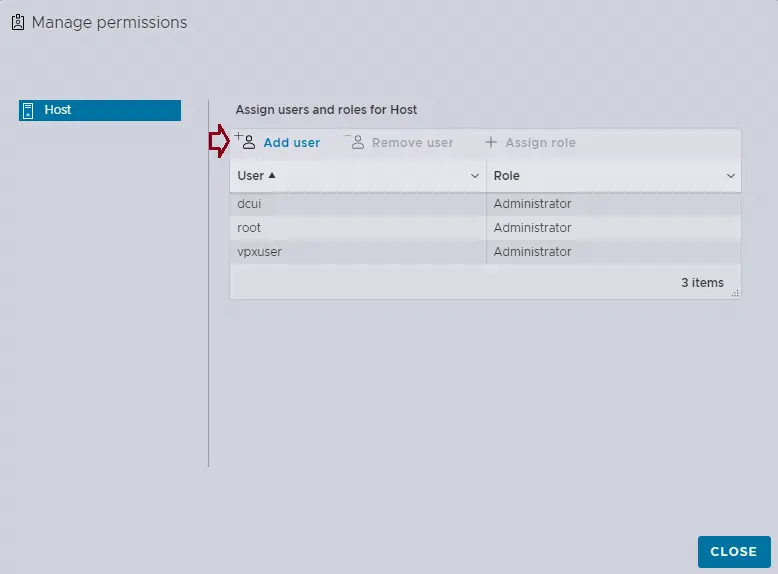
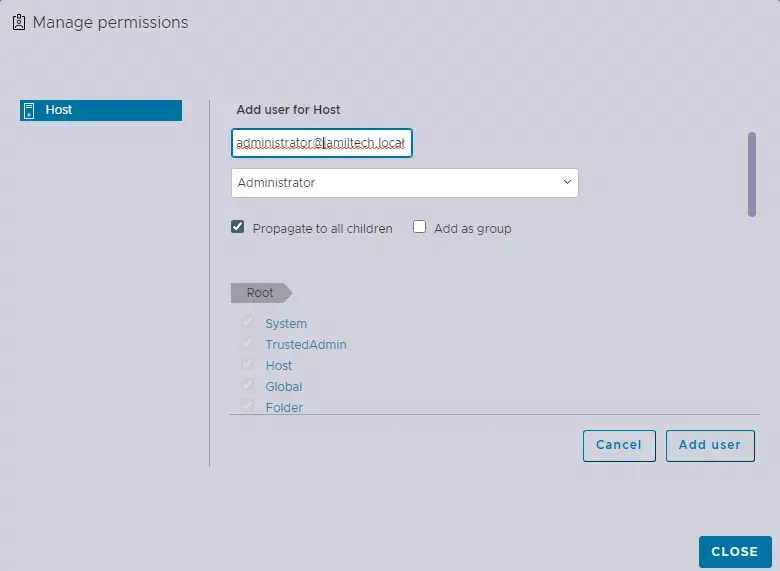
- In the Manage Permissions window, click Add User.
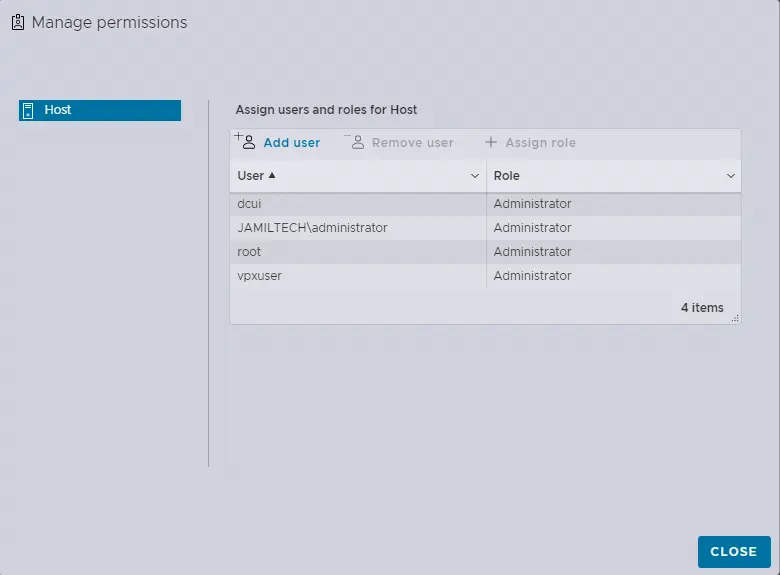
- Add a user for the host by entering your local domain user (e.g., [email protected]). Select Administrator from the list, check the box to propagate to all domains, and then add the user.
- The Active Directory user will be added; click Close.
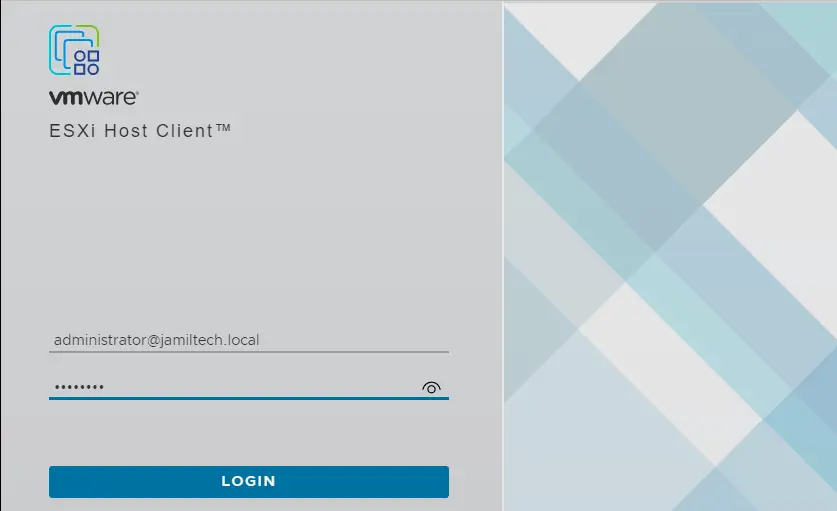
- Finally, try logging into the vSphere Client with the newly added Active Directory user to ensure everything is set up correctly.
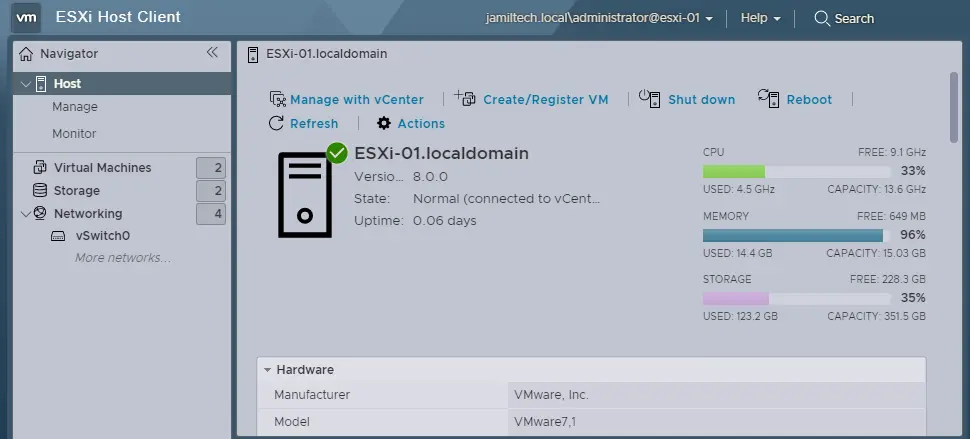
You should now be successfully logged in with an AD user.
Now, let’s add the permission. Click on Host, click on the Action menu, and then choose Permissions. A manage permission window will be open.
Click on Add User.
Add a user for the host and type your local domain user ([email protected]). Select administrator from the list, tick the box to propagate to all domains, and then add users.
You can see the Active Directory user added; click close.
Now you can try to log in to the vSphere client with an Active Directory user.
Successfully logged in with an AD user.
Conclusion
By following the steps outlined above, you can successfully add an ESXi host to an Active Directory domain, allowing for centralized security management and streamlined access control within your VMware vSphere environment. For more detailed information on this process, you can refer to additional resources on joining an ESXi host to an AD domain.Read this article to find out more about how to join an ESXi host to an AD domain.

