This article describes how to enable or disable Registry Editor in Windows 11 (regedit.exe). The Windows registry is a database that stores all of Windows’ settings in a hierarchical structure, including the majority of your system’s installed applications. Using the Registry Editor, one can perform multiple tasks in the Windows Registry, including fixing errors, feature modification, and Windows performance optimization.
For system administrators, the registry editor (regedit.exe) is pretty essential. But each person needs to have access to it. You can disable Windows‘ Registry Editor app if you don’t want users to access it. Once you disable the registry editor, users will be notified that the registry editor software has been disabled by the system administrator.
Table of Contents
Enable or Disable Registry Editor
As mentioned above, the system administrator can disable or enable the Windows Registry Editor app for specific or all Windows users.
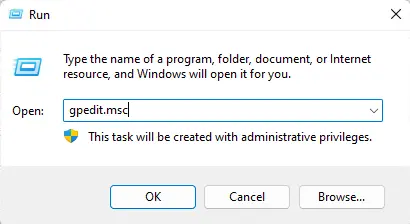
First, open the Local Group Policy Editor. Enter gpedit.msc in the run box and press open.
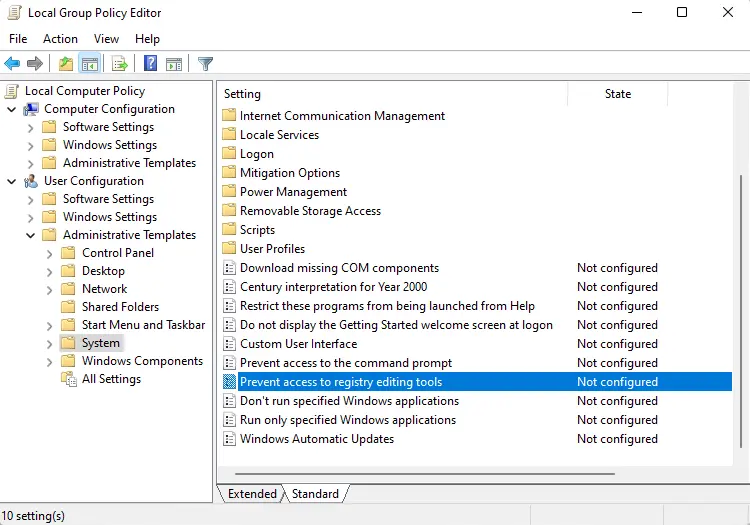
Then expand the following folders.
User Configuration / Administrative Templates / System
Click on the System folder on the left and double-click the “Prevent access to registry editing tools” setting from your right to open it.
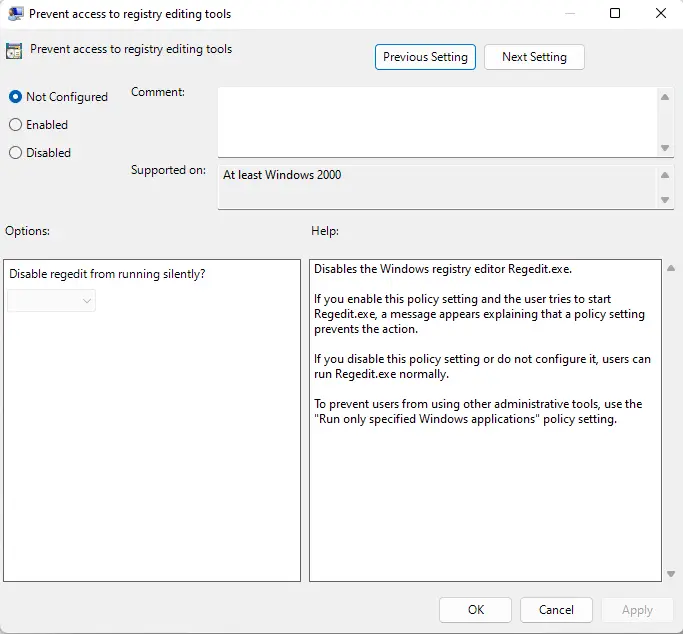
When the Prevent Access to Registry Editing Tools window opens, select one of the options:
Not Configured: Users can access the Registry Editor.
Enabled: Users can’t access the Registry Editor.
Disabled: Users can access the Registry Editor.
Save your settings and reboot your computer for the changes to apply.
Disable or Enable Registry with Windows PowerShell
Nevertheless, Windows PowerShell permits users to disable or enable the Registry Editor. The following part shows how to do so.
Open the PowerShell app as an administrator.
Run the following command to disable or enable the registry editor:
Enable the Registry Editor
PowerShell Remove-ItemProperty -Path HKCU:\Software\Microsoft\Windows\CurrentVersion\Policies\System -Name DisableRegistryTools -Force
PowerShell Remove-ItemProperty -Path HKLM:SoftwareMicrosoftWindowsCurrentVersionPolicies System -Name DisableRegistryTools -Force
Disable the Registry Editor
PowerShell Set-ItemProperty -Path HKCU:\Software\Microsoft\Windows\CurrentVersion\Policies\System -Name DisableRegistryTools -Value 2 -Force
PowerShell Set-ItemProperty -Path HKLM:\Software\Microsoft\Windows\CurrentVersion\Policies\System -Name DisableRegistryTools -Value 2 -Force
Turn On or off Registry Editor with Registry Editor
Using the Windows Registry Editor is another method to enable or disable the Registry Editor. If the Local Group Policy Editor can’t be opened, use the Windows Registry Editor instead.
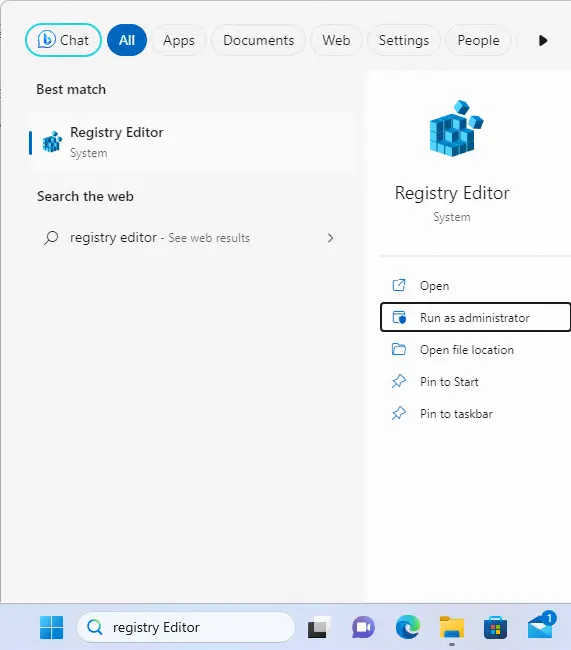
To open the Windows Registry, search for registry editor in Windows search to open it.
The USER key will turn on or off the Registry Editor for standard users. Use the machine key to disable or enable all users.
HKEY_LOCAL_MACHINE\SOFTWARE\Microsoft\Windows\CurrentVersion\Policies\System
HKEY_CURRENT_USER\SOFTWARE\Microsoft\Windows\CurrentVersion\Policies\System
If you do not see the System folder key, right-click the Policies key and then create the System folders. Right-click on the System folder in the right pane and choose New and DWORD (32-bit) Value.
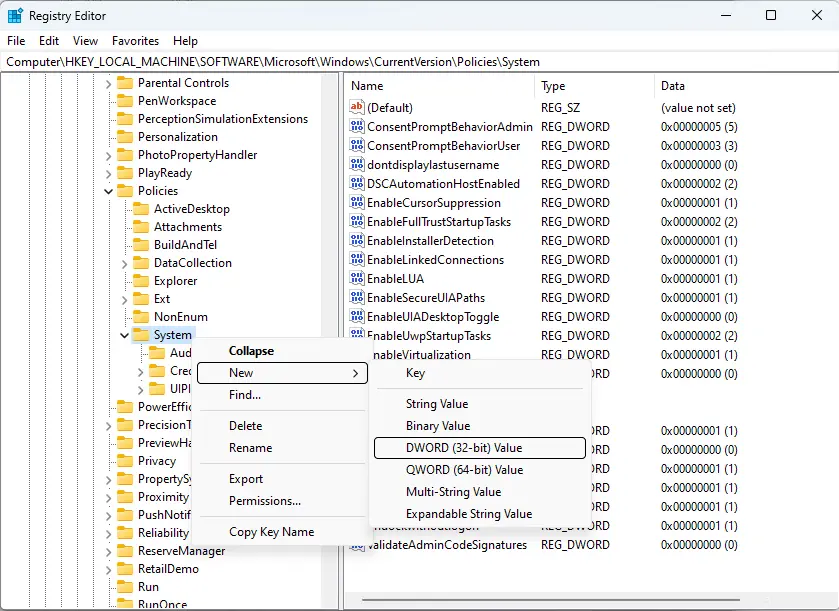
Enter a new key named “DisableRegistryTools”. Double-click on the new key “DisableRegistryTools” to open it.
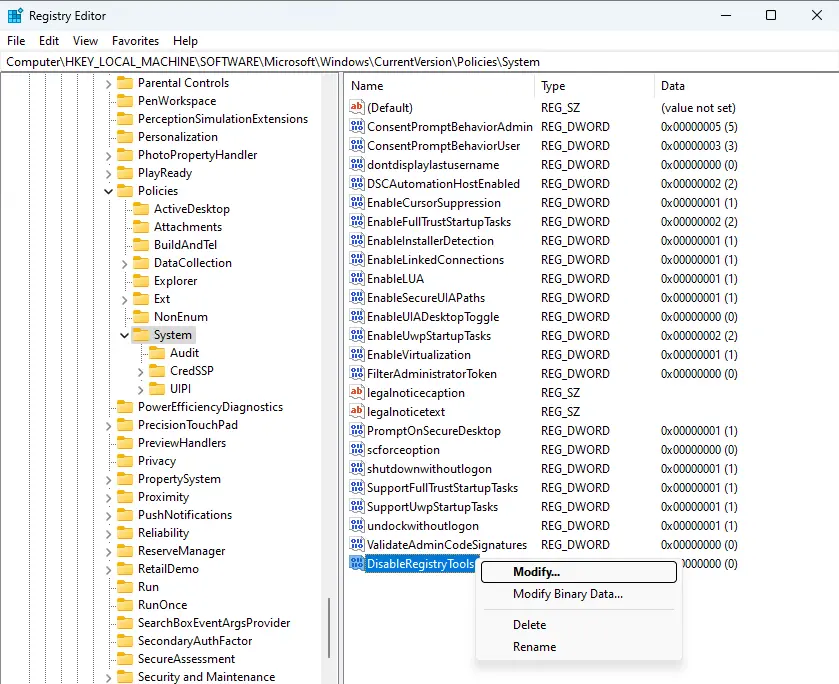
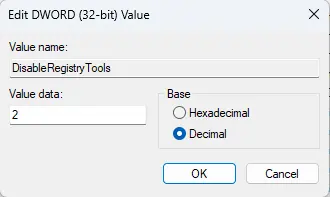
Select the base option as decimal and update the value data.
Enter 2 to disable the Registry Editor.
To turn on the Registry Editor, delete the key DisableRegistryTools created above.
Choose the OK button to save the changes and restart your computer.
Conclusion:
This article explains how to enable or suspend the Windows 11 Registry Editor. If you detect any errors or have anything to add, please use the comments section below.
Refer to this article to learn more about enabling or disabling the Windows Registry Editor.


