In this article, we will walk you through how to configure FileZilla Server. We need to set up a folder on your Windows system as an FTP repository via a free program called FileZilla. We can use FileZilla FTP to simply transfer files between computers. You can map the FTP repository to multiple computers across the Internet so that other users can access the directory right from Windows Explorer.
Table of Contents
Configure FileZilla Server
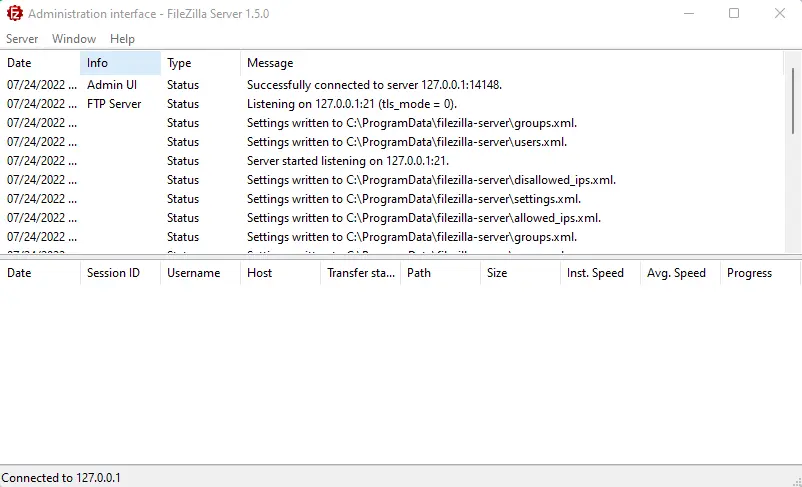
FileZilla Server Administration interface
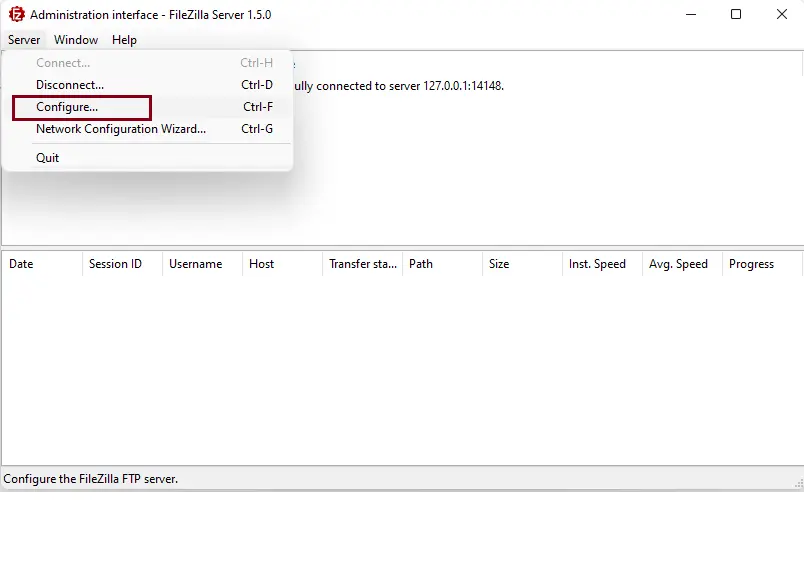
Now we are going to configure the connection through the local network. Click on the Server tab, and then click on Configure.
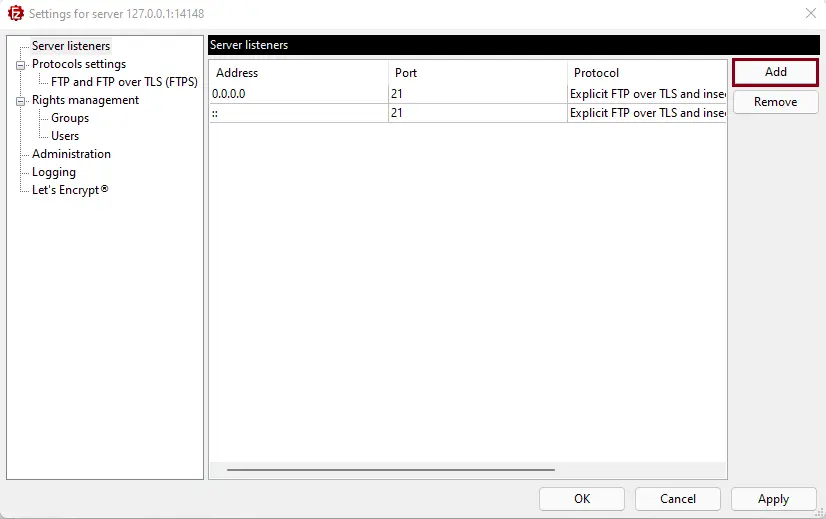
The FileZilla server configuration page will be displayed immediately. It is familiar that, by default, an insecure FileZilla FTP connection is offered. Hence, we will configure a new FTP-secure server. Accordingly, click on the Server Listener’s option, and then click on Add.
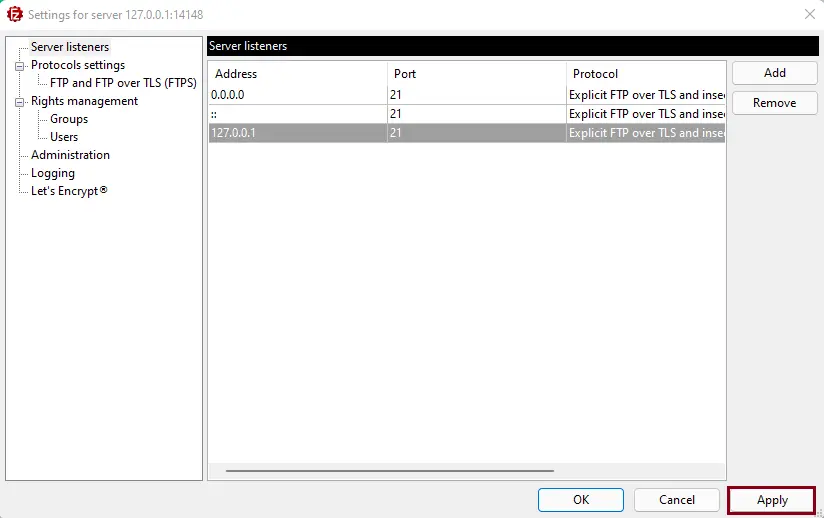
Now, you need to specify the new values. Under the IP address, please enter 127.0.0.1, select port 21, and then use the protocol that requires explicit FTP over TLS.
How to Add FileZilla User
Now, you have to add a new user to the FTP server. To do this, click on Users. Click on the Add button under available users, and then enter a user’s name.
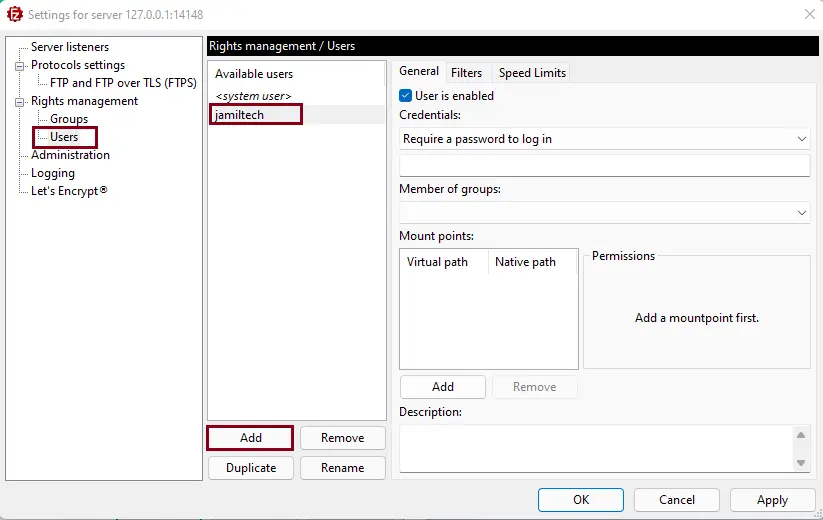
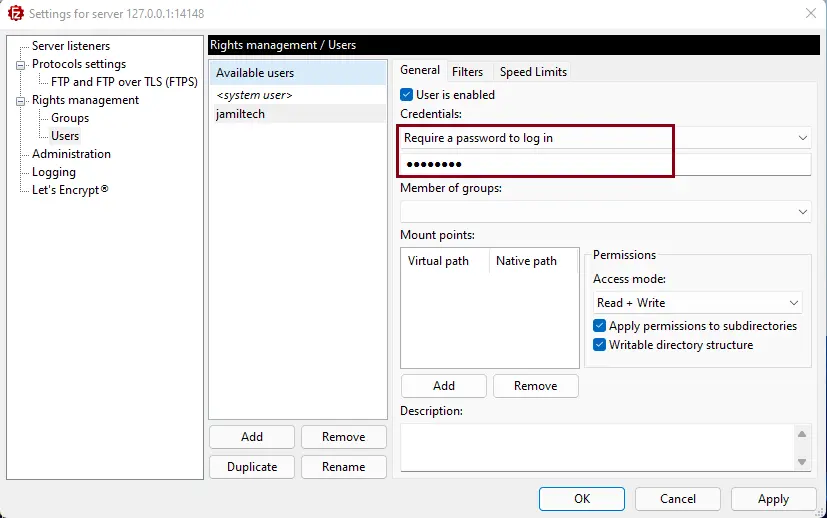
Next, select the checkbox User is enabled. It also requires a password for the user.
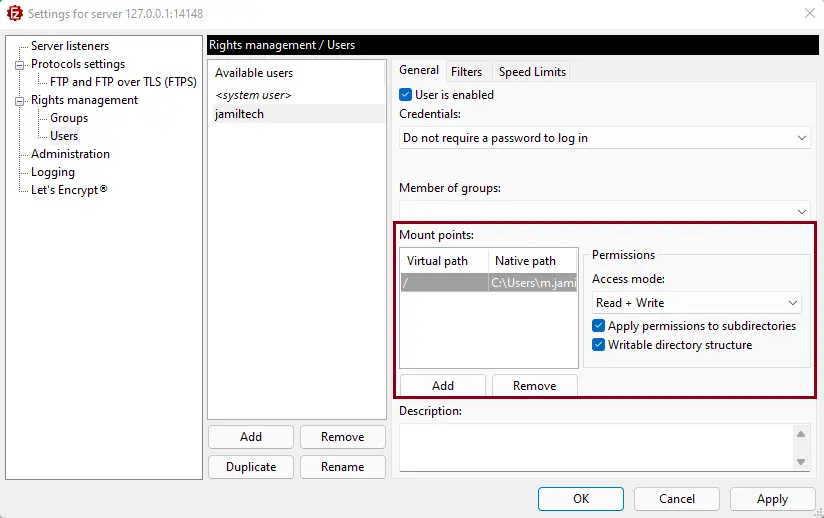
It is time to confine which folders the user will have access to on the FileZilla Server. Keep in mind, under Mount Point. In the Virtual Path field, just type a /. The next field matches the Native Path. There, you just need to go to Windows Explorer and copy the path of the folder you need to share. Then paste it into the native path field. Finally, allow the permissions, and then click OK.
Administration interface – FileZilla as Server
That’s all! We have learned how to configure FileZilla FTP Server on Windows. Now you can use your favorite FileZilla FTP client to connect to the FileZilla server.
This article describes how to configure the FileZilla FTP server.

