In this article, we will teach you how to enable or disable built-in administrator account in Windows 11. Windows 11 has a hidden built-in administrator account that serves as the local system administrator with elevated rights without needing to operate as administrator or user account control (UAC) for elevation approval.
The Administrator account permits you to make more broad changes to the computer, for example, adding and removing user accounts or making modifications to install software settings. For those changes, an administrator account is typically necessary.
The built-in administrator account can’t be deleted or locked out, however, it can be enabled, disabled, or renamed.
If you sign in to this built-in administrator account, you are required to have the same full access rights as the administrator. This can be a security issue if you have malware or a virus while signing in to the built-in administrator.
Table of Contents
Enable or Disable Built-in Administrator Account
It is not recommended to use the built-in administrator account as a daily account. It is recommended to only enable the built-in administrator account to be used as necessary and disable it when finished.
Enable or Disable Built-in Administrator in Local Users and Groups
You must sign in as an administrator to use this option.
Local users and groups are only available in the Windows 11 Pro, Enterprise, and Education versions.
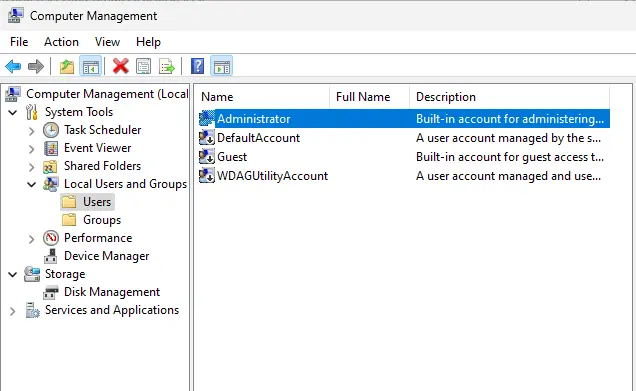
Open computer management by right-clicking on the Windows button, or you can directly access local Users and Groups by typing “lusrmgr.msc” in the run box.
Expand local users and groups and click on the user folder. Double click on Administrator in the middle window.
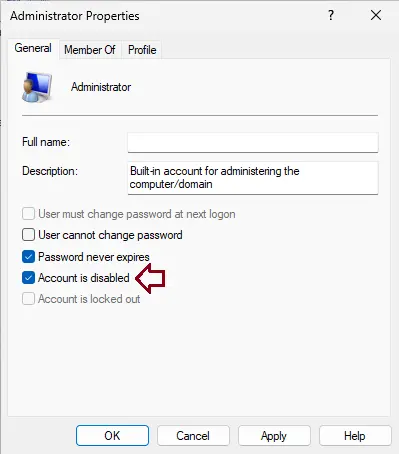
In the General tab, check (disable) or uncheck (enable) the account that is disabled for what you want, and click OK.
You can now close computer management if you want.
Enable or Disable Built-in Administrator using PowerShell
You must sign in as an administrator to use this option.
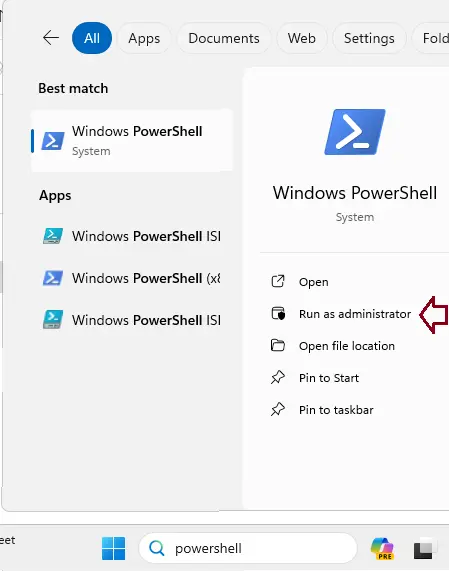
Search PowerShell and open it as an administrator.
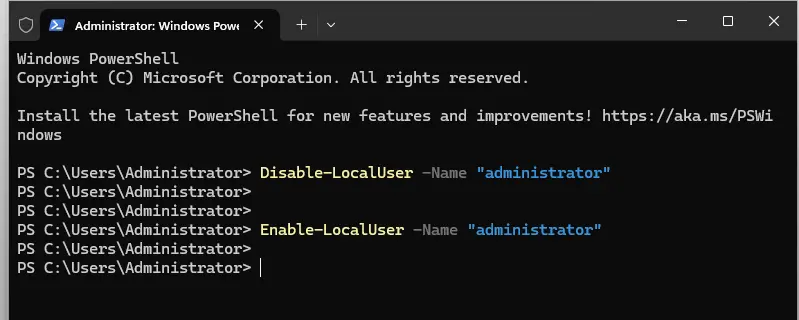
Copy and paste the command below you want to use in the elevated PowerShell, and press enter.
To enable a built-in administrator account, type the below PowerShell command.
Enable-LocalUser -Name "Administrator"
To disable the built-in administrator account, type the below PowerShell command.
Disable-LocalUser -Name "Administrator"
If you have previously renamed the “Administrator” account’s name, then you will have to replace Administrator in the command above with the new name instead.
If your Windows uses a different language than English, then you should substitute Administrator in the command above with the translation for your language instead.
When finished, you can close the powershell if you like.
Enable or Disable Built-in Administrator via the Command Prompt
You must sign in as an administrator to use this option.
Search command prompt and open it as an administrator.
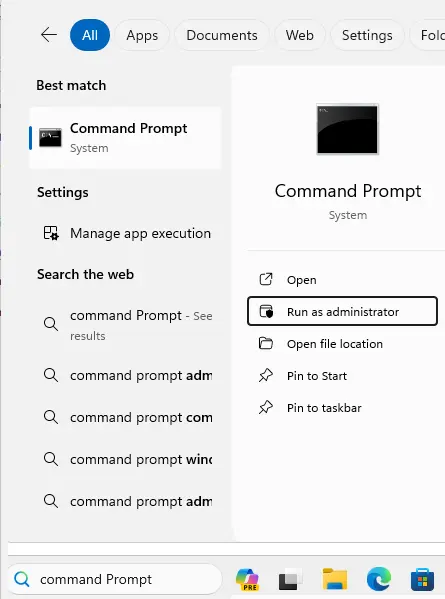
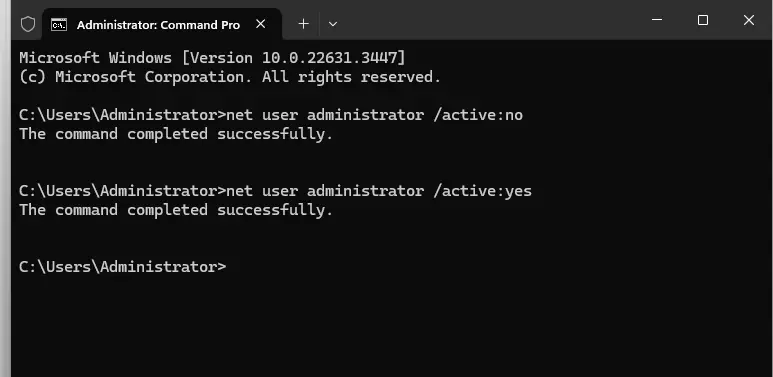
Copy and paste the command below you want to enable or disable built-in administrator account into the command prompt, and hit enter.
To enable, type the below command.
net user Administrator /active:yes
To disable it, type the below command:
net user Administrator /active:no
Once finished, you can close the command prompt if you like.
Enable or Disable Built-in Administrator using the Local Security Policy
You must sign in as an administrator to use this option.
Local Security Policy is only available in Windows 11 (Pro, Enterprise, and Education versions).
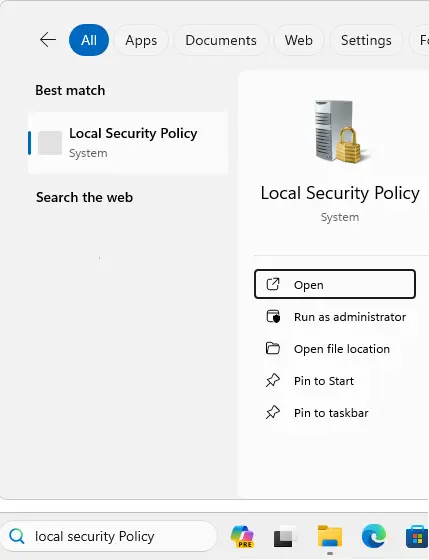
Search for the local security policy and open it.
Expand the Local Policies folder in the left pane, click on the Security Options subfolder in the left pane, and double click on Accounts: Administrator account status in the right pane.
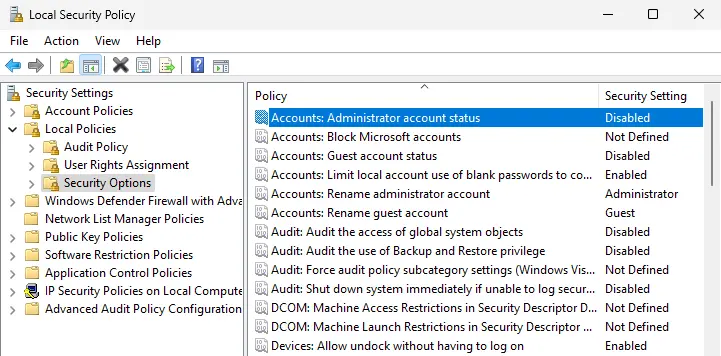
In the administrator account status properties, select Enabled or Disabled for what you wish, and click OK.
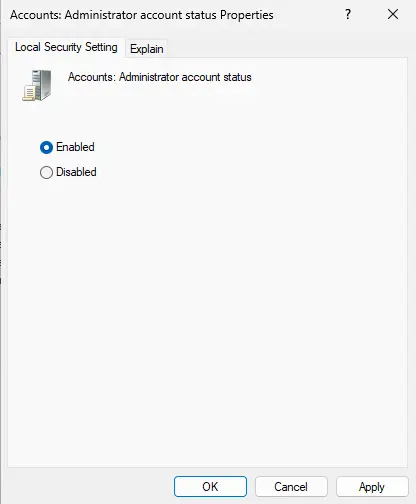
You can now close the Local Security Policy if you desire.
If you don’t have another administrator account to sign in, or are unable to sign in to Windows 11, this option is ideal.
Boot your system with Windows 11 bootable disk. When the Windows setup screen appears, just press the +FF10 key to open command prompt.
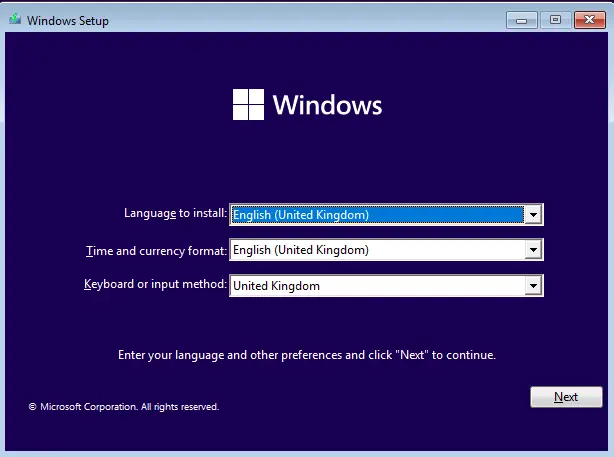
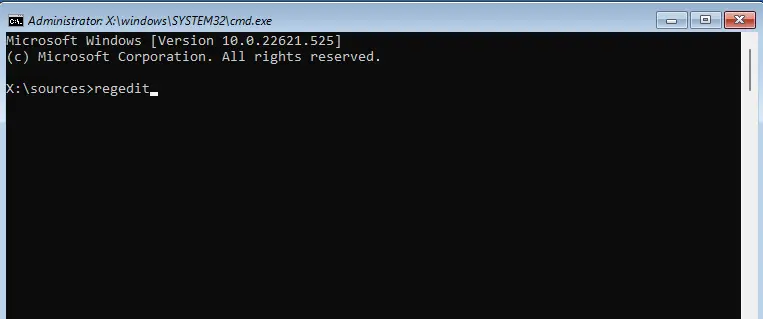
Type regedit into the command prompt at boot, and then hit enter.
Click the HKEY_LOCAL_MACHINE key in the left pane of Registry Editor.
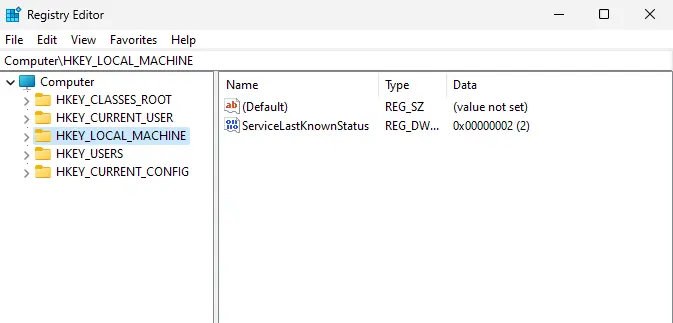
Click on the File tab and click on Load Hive.
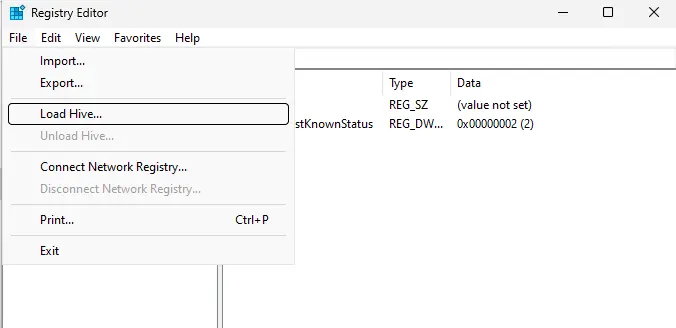
In the Load Hive dialogue, open the drive (:C or :D) that Windows 11 is installed on, and navigate to the location below.
The drive letter (:C) will not always be the same at boot as it is in Windows 11.
It will not be the boot (:X).
C:\Windows\System32\config
Select the SAM file inside the config folder, and click on Open.
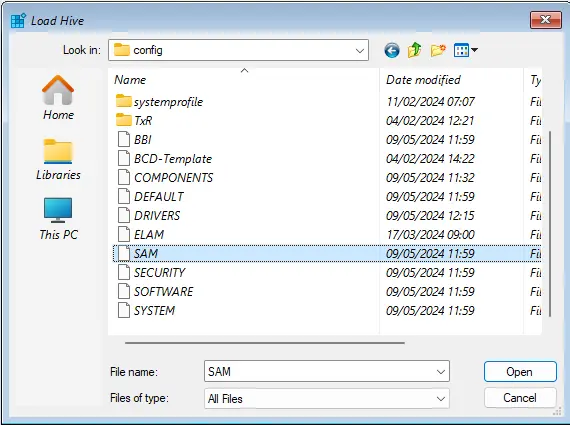
In the Load Hive dialog, enter REM_SAM as a key name and click OK.

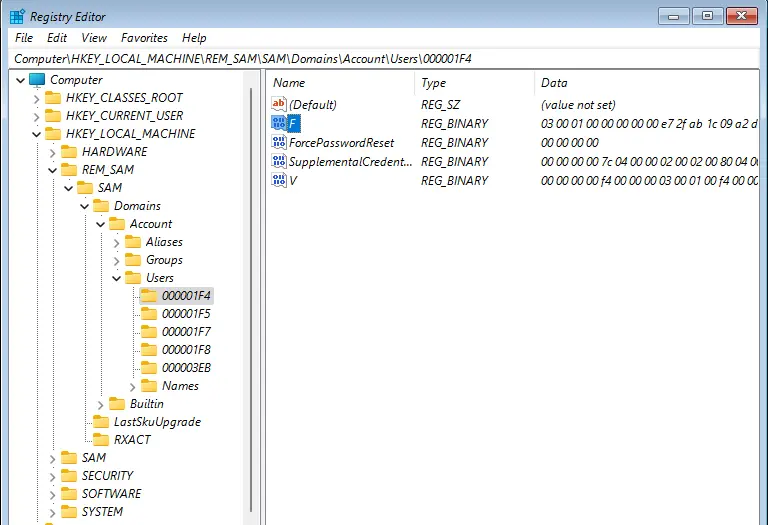
Navigate to and enter the key below the left pane of Registry Editor.
HKEY_LOCAL_MACHINE\REM_SAM\SAM\Domains\Account\Users\000001F4
In the right pane of the “000001F4” key, double click on the F binary value to modify it.
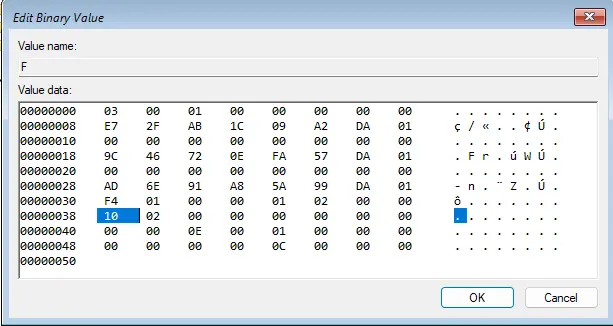
In the first column of row line 00000038, change 11 to 10, and click OK.
In the first column of row line 00000038, change 10 to 11, and click OK.
You could do this by clicking to the left of 11 to locate the cursor, pressing the Delete button, then typing 10.
Please visit Microsoft to learn more about the built-in administrator account.


