Let’s have a look at how to install Second Exchange Server 2019 in the domain. We have an existing Exchange association with only one Exchange server installed. For high High Availability configuration, we would like to install a second Exchange Server 2019 in our domain. The below steps will work for all on-premises Exchange Server versions. In this guide, you will learn how to add a second Exchange server to the domain.
Table of Contents
Exchange Server Prerequisites
Before installing the Exchange server, you must have a Windows server available. It is because you need to install Exchange Server on a Windows server.
Read more about Exchange Server 2019 Prerequisites.
Find Exchange Server Version
We recommend installing the latest version of the Exchange Server that is running in your organization. Run the Exchange Management Shell with administrator rights. Run the “Get-ExchangeServer” command to check which version of Exchange Server is running in the domain.
Get-ExchangeServer | Format-Table Name, Edition, AdminDisplayVersion

Exchange Server 2019 CU12 is running in the organization. So, we will use the same version for our second Exchange server.
Download Exchange Server
Download the latest Exchange Server 2019 CU12 ISO image. Mount the ISO image and check to see to which drive letter it’s mapped. In our scenario, it’s the D: drive.
Prepare Active Directory and Domains for Exchange Server
Prepare active directories and domains for the Exchange server
Install Second Exchange Server
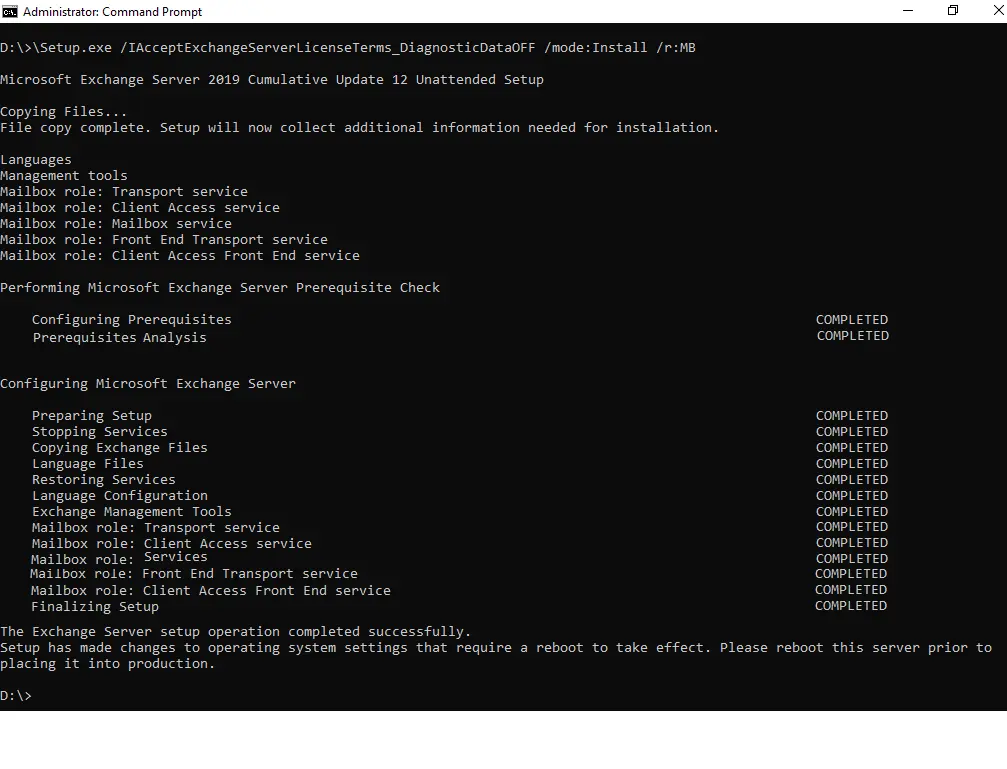
Open the Command Prompt with admin rights. Run the below command to install the Exchange Mailbox server role.
\Setup.exe /IAcceptExchangeServerLicenseTerms_DiagnosticDataOff /mode:Install /r:MB

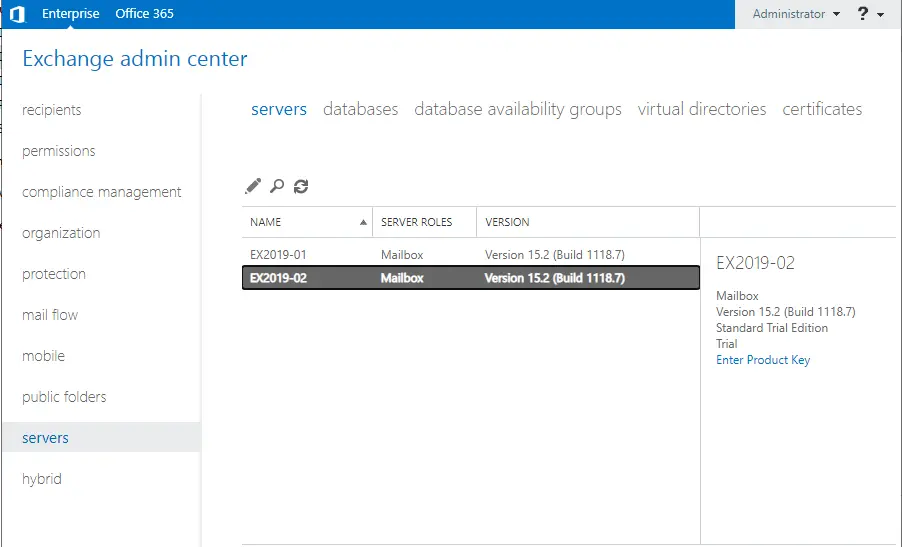
Once the exchange server setup is complete, restart the exchange server.

Read more about how to Install Exchange Server 2019.
Set Exchange Autodiscover URL
After successfully installing the Exchange Server, we will set the Exchange virtual directories URLs and the Exchange autodiscover URL.
After you configure the autodiscover URL, you won’t bother anyone in the associations with a certificate warning.
Get Exchange AutoDiscover URL
Get-ClientAccessService | fl

Related: Configure Outlook Anywhere
Conclusion:
In this article, we learned how to install a second Exchange Server 2019 in the domain. It’s the same steps as installing the first Exchange Server.


