In this article, we will guide you through the process of adding a database copy in Exchange Server 2019. After configuring the Database Availability Group (DAG), it’s essential to add a database copy to your mailbox databases. This ensures that the mailbox databases remain active even during updates or in the event of a server failure. For more detailed instructions, you can refer to the official Microsoft documentation on adding a database copy in Exchange Server 2019.
Table of Contents
Add Mailbox Database Copy Using Exchange Admin Center
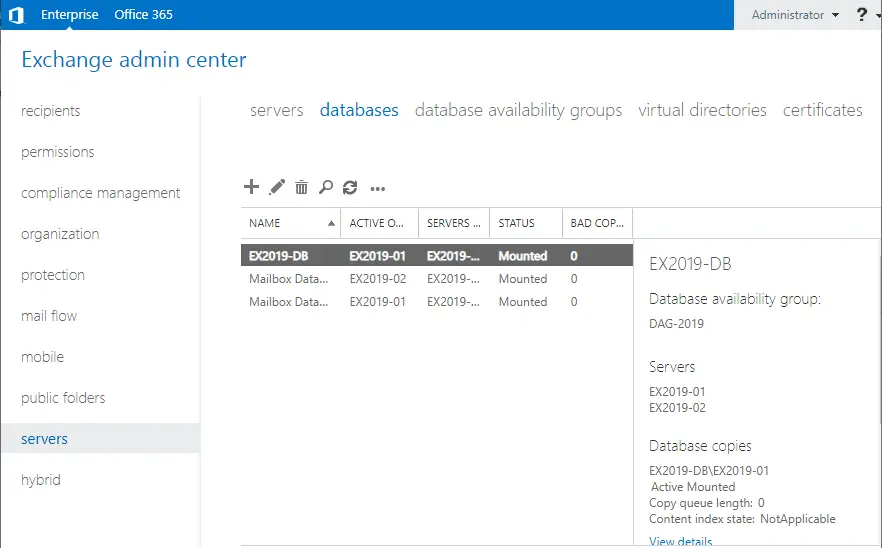
To begin, sign in to your Exchange Admin Center (EAC). Navigate to the Servers option and click on the Databases tab. In this example, you will see three mailbox databases mounted on your Exchange servers. If the Exchange servers show the same hostname as the active server, it indicates that the database copy is not configured on all of them.
Add Database Copy in Exchange Server
- Log in to the Exchange Admin Center.
- Select the Servers option.
- Click on the Databases tab.
- Click on the “…” (ellipsis) icon, then select Add database copy.
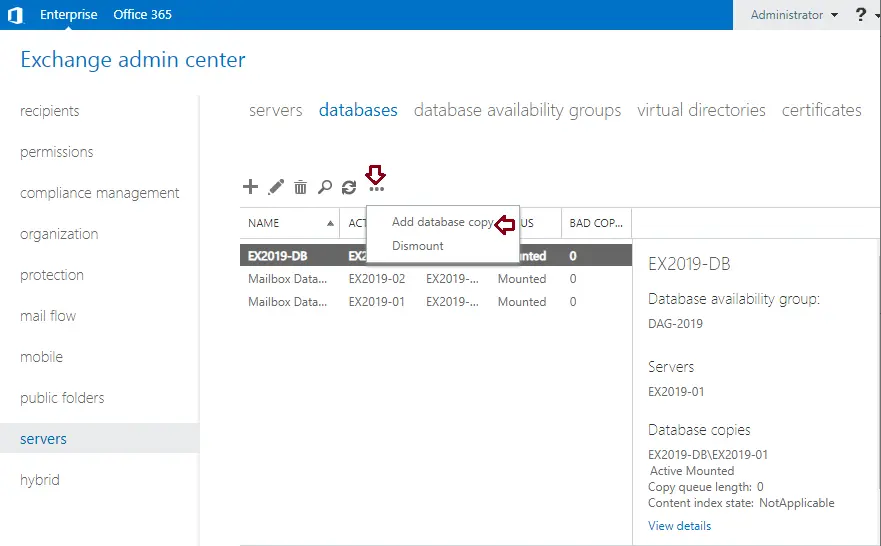
Add Mailbox Database Copy in Exchange
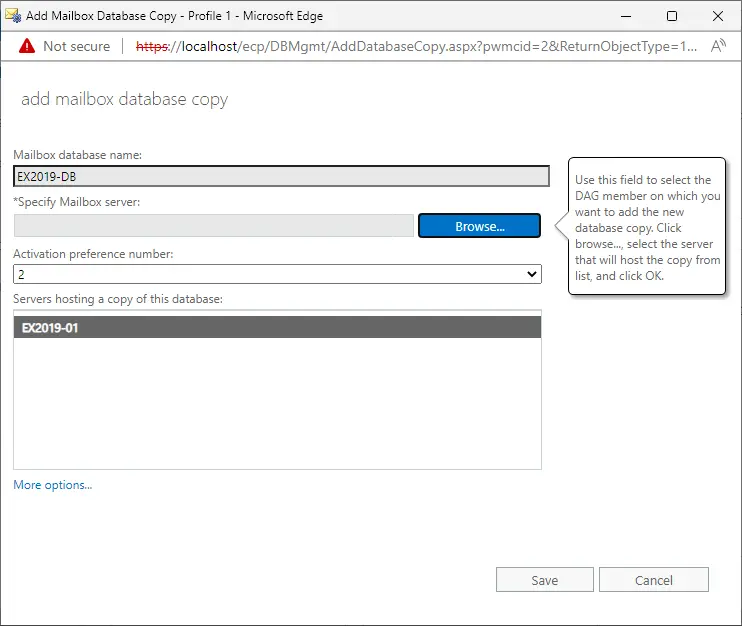
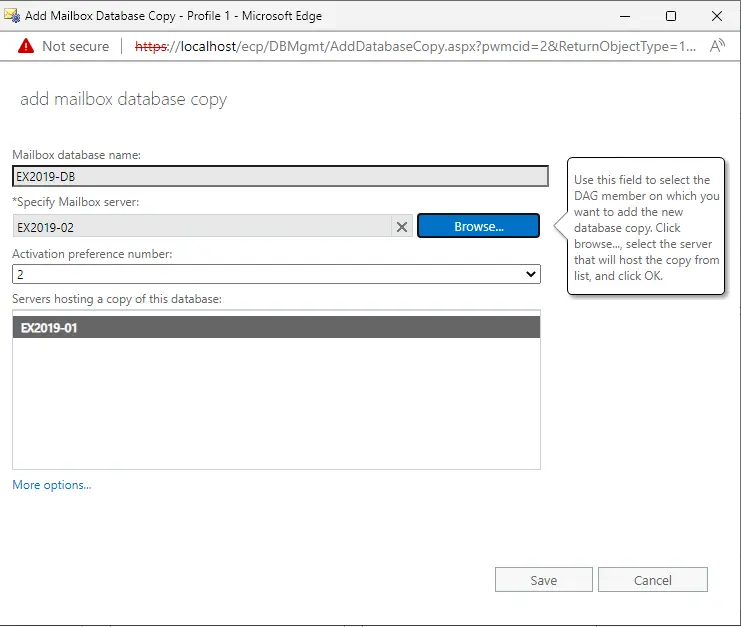
- In the Add Mailbox Database Copy window, click the Browse button to select the mailbox server where the database copy will be hosted.
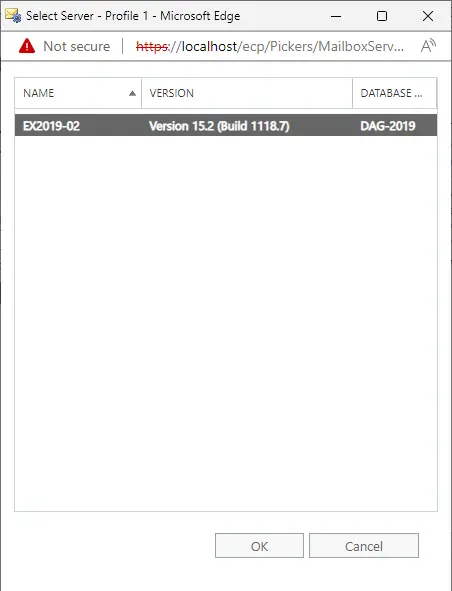
- Choose the mailbox server and click OK.
- Set the Action preference number to 2, then click the Save button to add the database copy.
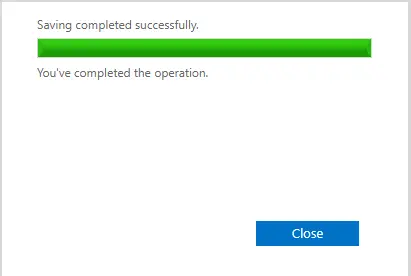
- The process will start, creating the mailbox database and database log files on the specified Exchange Server. Once completed, click Close.
Choose the mailbox server to which you need to add a database copy, and then click OK.
Action preference number: choose 2, and then click the save button to add the database copy.
Verifying the Database Copy
- Click the Refresh button in the toolbar or refresh the page. The Exchange Servers with Copies column should now show that the mailbox database copy is on Exchange Servers EX2019-01 and EX2019-02, with the mailbox database active on EX2019-01.
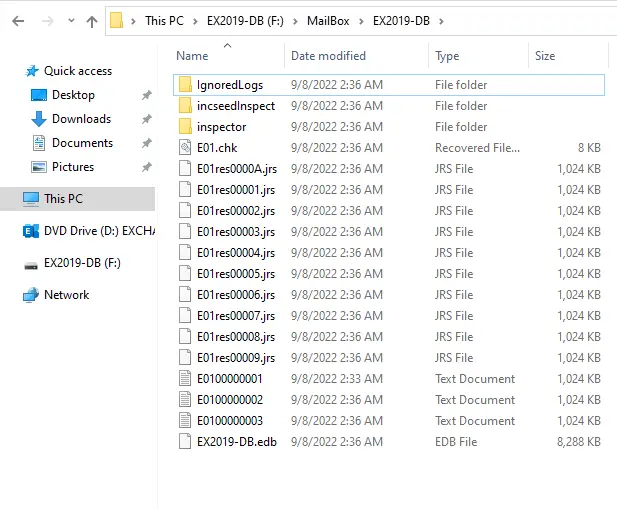
- You can also view the file paths on the Exchange Server where the database copy was added, and confirm that transaction log files are being copied across.
You can now see the file paths on the exchange server to which you are adding the database copy, and you will also see that transaction log files are copied across.
Checking Database Copy Health
To check the health of the database copy, you can use the following command in the Exchange Management Shell:
This command will display the status of the mailbox database copy.
Get-MailboxDatabaseCopyStatus

Get-MailboxDatabaseCopyStatus "EXCHDB" | ft -auto

Conclusion
In this guide, we have covered how to add a database copy to Exchange Server 2019. You can follow similar steps to add mailbox database copies for each mailbox database on your other Exchange Servers.For further reading, you might also be interested in: How to Move Database Path Log Folder Path in Exchange Server 2019.

