
In this article, I am going to configure DNS settings in exchange server 2019. The internal DNS servers will hold a false copy of our external namespace. Briefly, with the exception of a few minor tweaks to the Exchange records, we are cloning everything in our external DNS to an internal DNS server. Internal users will only use this.
Table of Contents
Configure DNS Settings
How to set up a forward lookup zone in DNS Manager
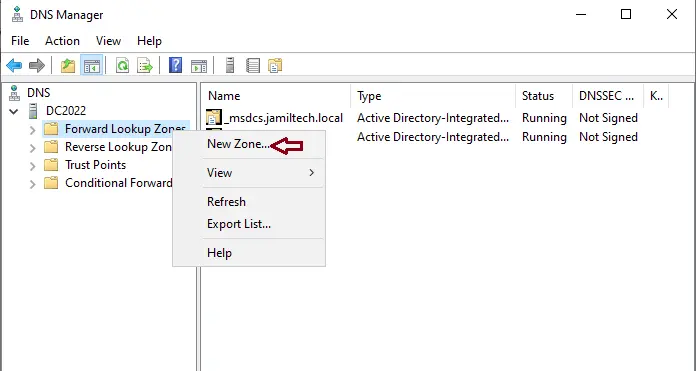
On your Active Directory DNS server, open DNS Manager, right-click on Forwarding Lookup Zone, and then select New Zone.
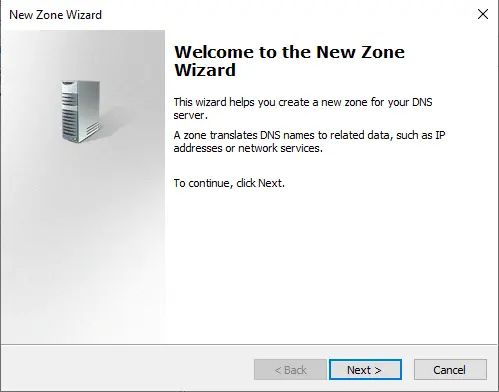
Click next
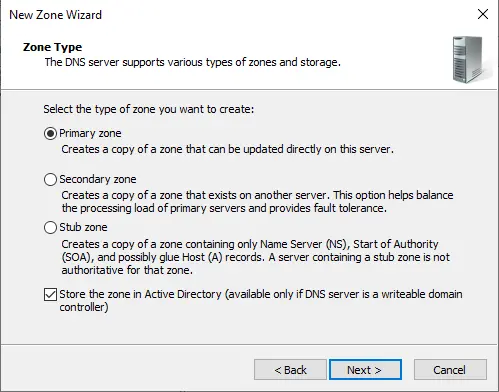
For default settings, click next.
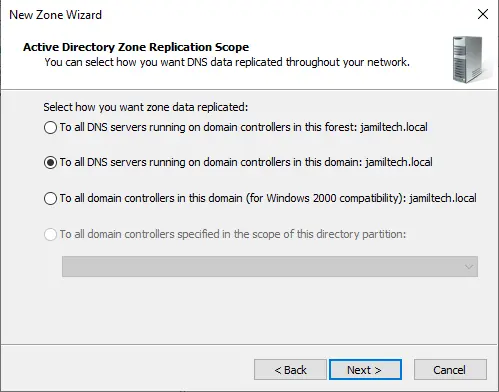
Choose Next
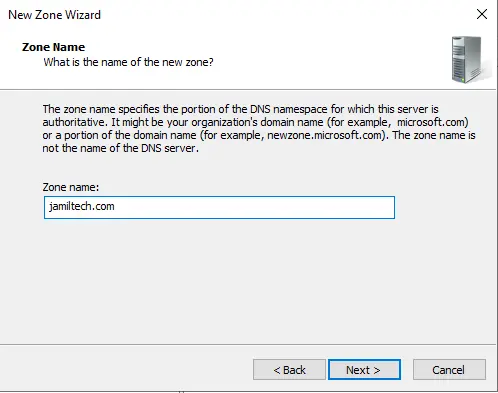
In the zone name field, enter the external domain name (my external domain is jamiltech.com)
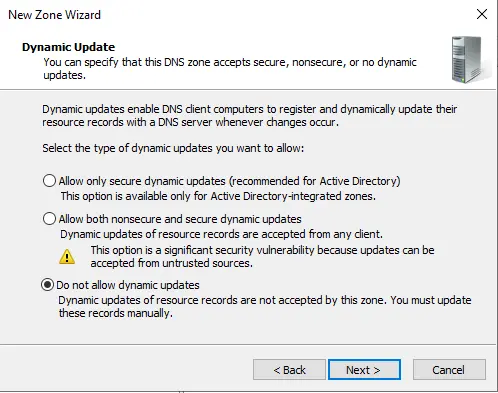
Select Don’t allow dynamic updates. We will manually create all the records in this zone, so click next.
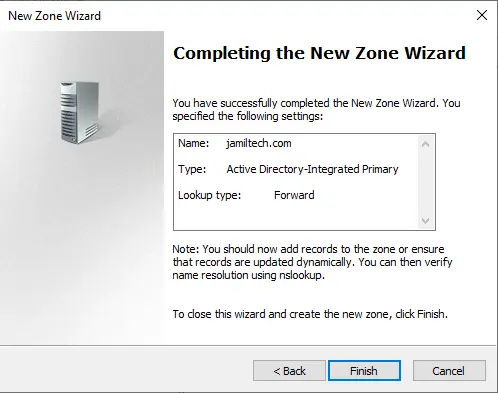
Select finish
How to Add Host A Record in DNS Manager
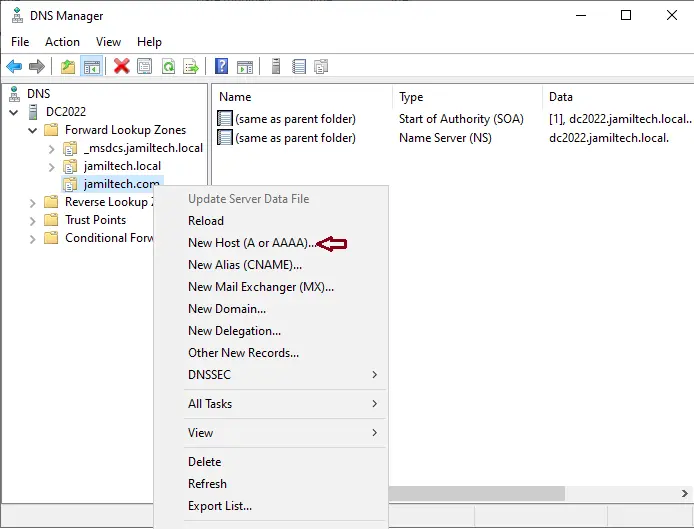
Expand Forward Lookup Zones
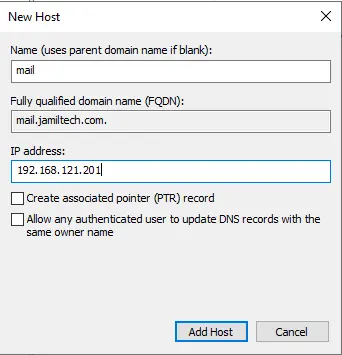
Right-click on your external domain (jamiltech.com) and then choose New Host (A or AAAA).
In the name field, enter the name on your certificate.
Under the IP address field, enter the internal IP of your Exchange server.
For example, it is 192.168.121.201
Click Add Host.
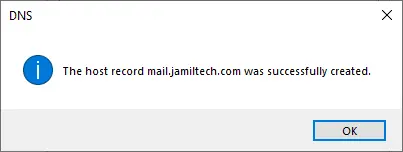
“The host record was created successfully.”
Click ok.
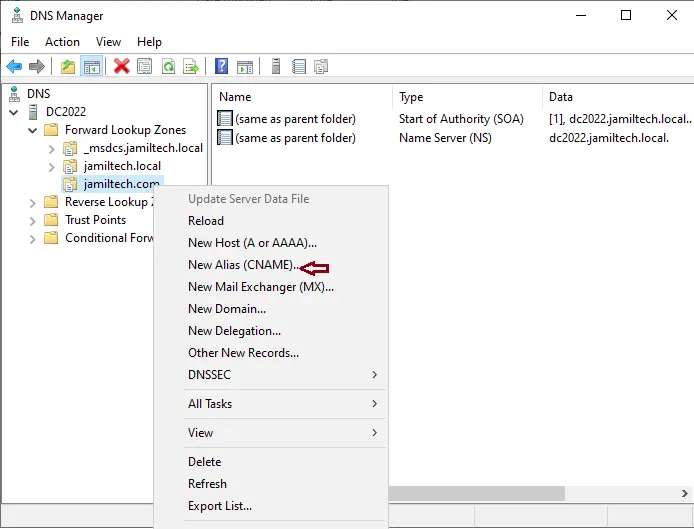
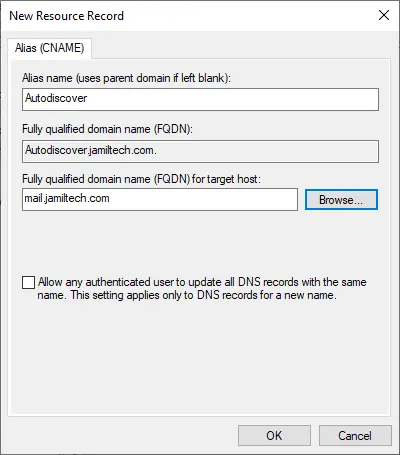
Create Alias CNAME Record
Right-click on the external domain (jamiltech.com) and then click on New Alias (CNAME).
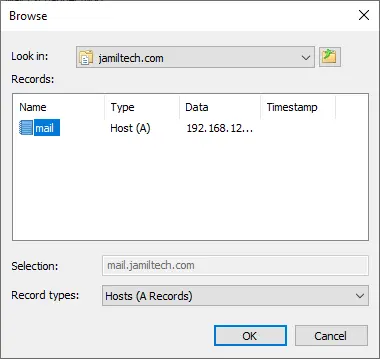
In the alias, the name field enters a name (autodiscover) for the certificate and then clicks browse.
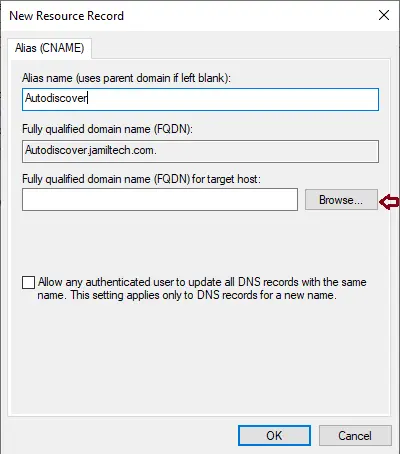
Choose your DNS server.
Forward lookup zones
Your external domain (jamiltech.com)
Select Mail, and then click OK.
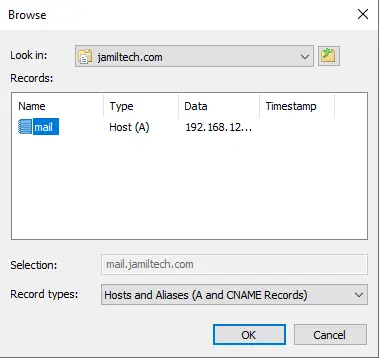
Click ok
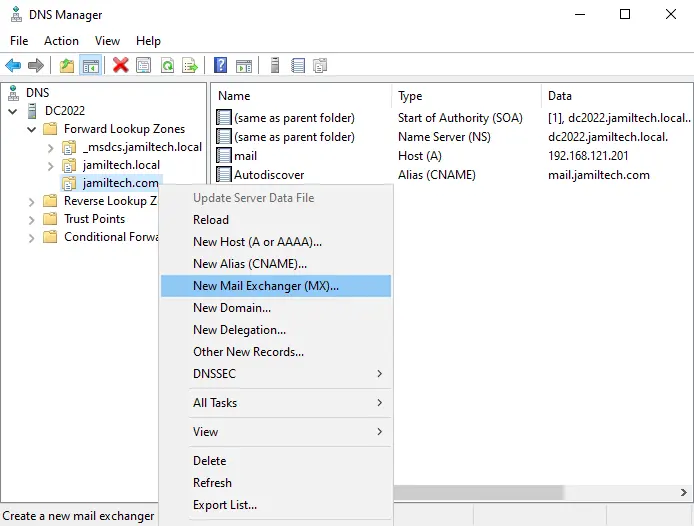
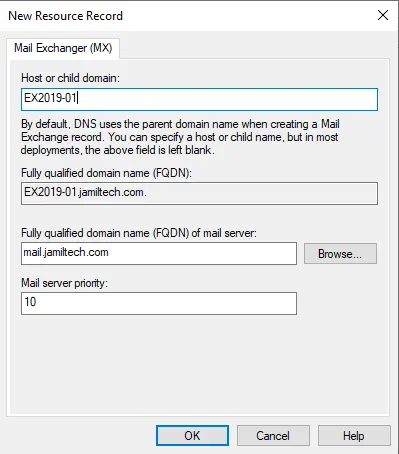
How to Create New Mail Exchange (MX) Record
Right-click on your external domain name (jamiltech.com) and then click on New Mail Exchange (MX).
Click browse
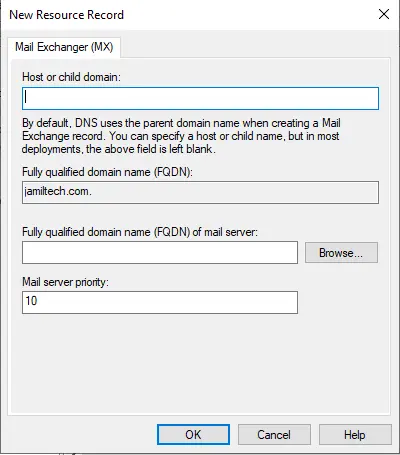
Select your DNS server.
Forward lookup zones
External domain (jamiltech.com)
Select Mail, and then click OK.
Enter the exchange server name, and then click OK.
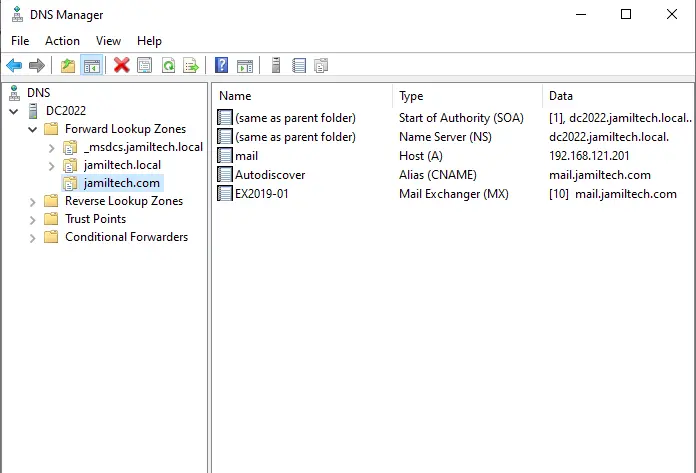
After creating records,.
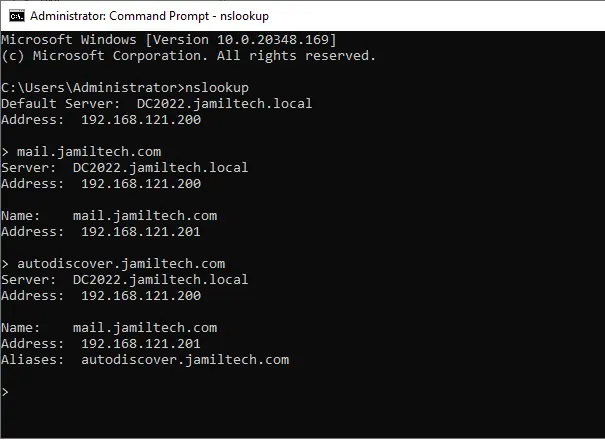
All set. At this point, use the command prompt to verify responses from all the host records we have just created. Also, ensure you can get Autodiscover and the Outlook Web App internally with a web browser. For instance, point a web browser to https://mail.jamiltech.com/owa. You will see a certificate error, but you will reach the login page and be able to log in.
Related: How to Backup and Restore Exchange Database
Refer to this article for more detail about DNS settings in Exchange Server.

