In this article, you will learn how to create business card in Outlook 365. Before determining how to create a business card, a user should know about the use of business cards and their benefits. With Business Cards in Outlook 365, users can share, view, and create contact information with a professional look similar to a paper business card.
This business card can be created using existing information from contacts or a new information entry. It can also be created using the Windows environment only.
Some advantages of a Business Card in Microsoft Outlook are given below.
Can be accessed via email in Outlook
It is possible to forward multiple times
Use the email address to send the business card
Modification is quite straightforward
I can include hyperlinks within it
No additional charges and application is required
We have pondered the role of business cards in the Outlook app until now. In this article, we examine how to create electronic business cards using MS Outlook.
Table of Contents
Create Business Card in Outlook 365
Perform the following steps one after another to create the business card.
The first step is to open the Outlook app version on your computer.
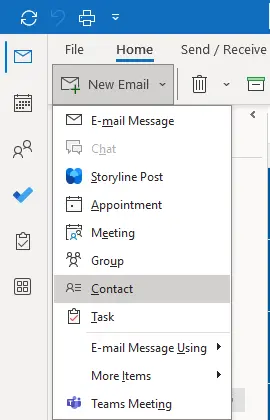
From the toolbar, go to Home and click the New Items available.
Select Contact from the drop-down menu to create a new contact entry.
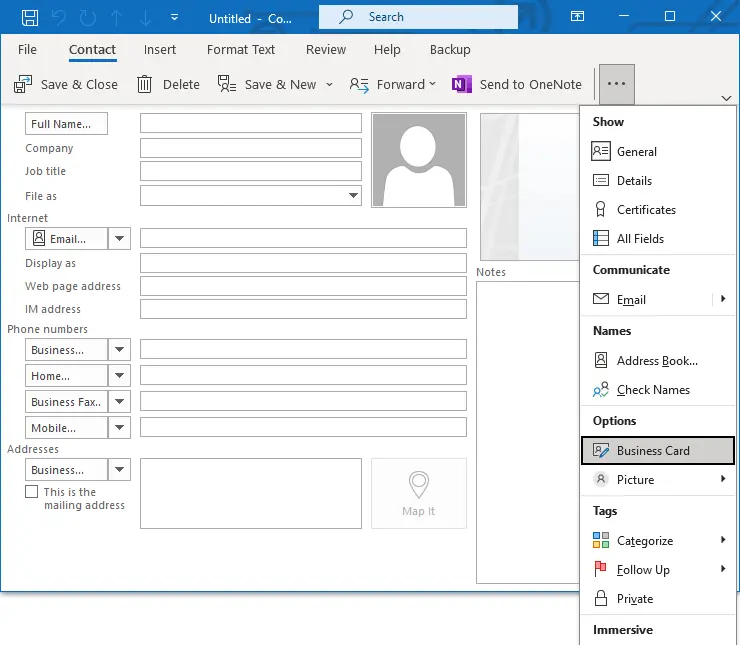
Business Card is available in the Options section of the toolbar.
Click on the three dots and select Business Card.
A new pop-up window will open the Edit Business card.
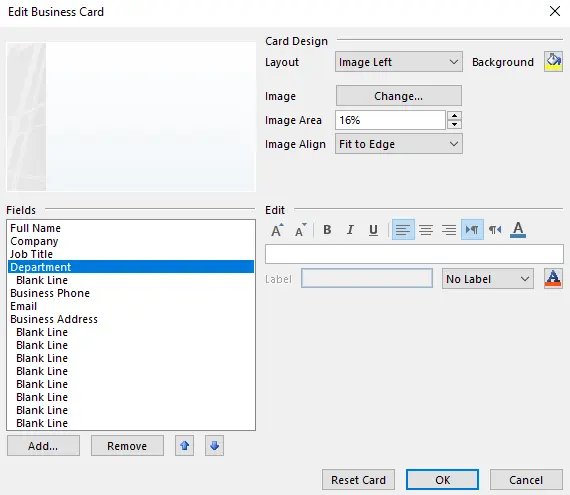
Under the Card Design section, you can customize the card and provide the details. Select the layout of your choice from the options such as Image Left, Image Right, Image Top, Image Bottom, Text Only, Background Image, etc.
Image: To add an image browsing system to a business card.
Image Area: To set the area details percent for the added image.
Image Align: To create the alignment details for the added image.
Background: To select the background color of your business card.
Under the Fields section, the user can fill in and add the desired fields from the given options to add information to his business cards. The fields filled and added are Full Name, Company, Job Title, Department, Business Phone, Email, Business Address, etc. Users can always remove the field using the Remove option from the section. The user can position the text on the business cards using the Up and Down arrows. Edit the text (formatting and styling) with Bold and italics, Align the text with the left, right, and center alignments, increase or decrease the text size, alter the text color, etc.
Now, after the Business Card has been formatted, it’s finally ready to click on save and close.
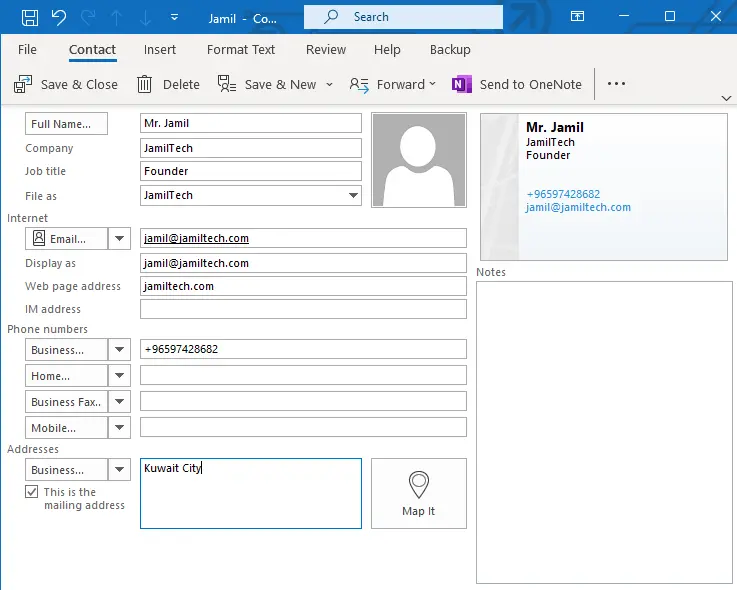
Your new Business Card has been created and is ready to share with other users.
How to Share Business Card
More recent versions of Outlook show the shared business card exactly as you created it. On the other hand, older versions share the business card as an image along with a .VCF file containing all the user’s contact information.
To share the Business Card with other users, follow the steps below:
Open a New Mail in Outlook.
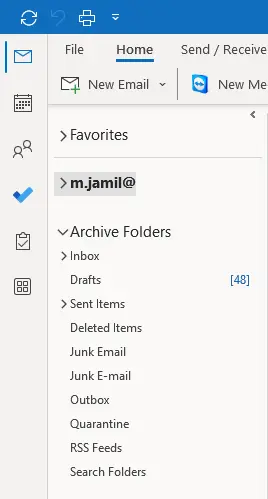
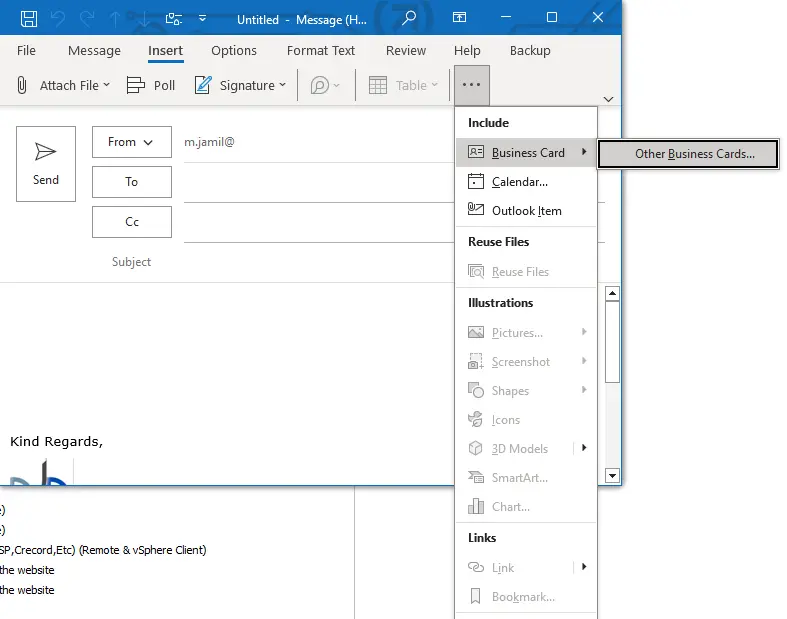
Go to the Insert tab and click on the three-dot icon.
Click on Business card and then other business cards.
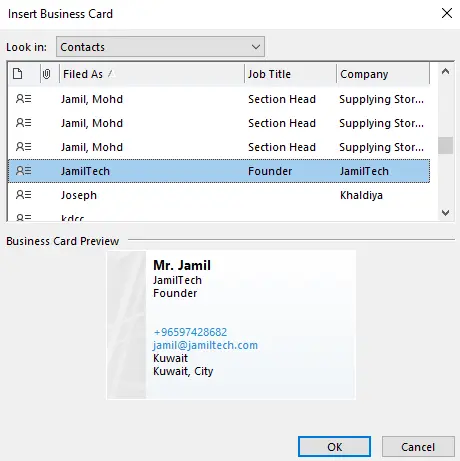
Click the name provided on the Filed As page and click ok.
Enter the sender’s name and click Send.
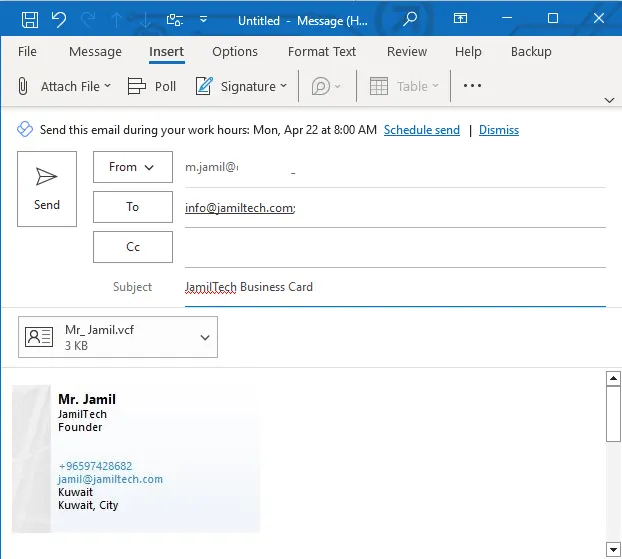
Note: To save the received Business Card in .vcf file format attached to an email, users must double-click on this file and save it to Outlook contacts. The application allows updating the existing contact or creating a new one if the received one matches the one in the Contacts list.
Here, the process for creating a business card and customizing or modifying Outlook is discussed. The procedure is straightforward and easy to execute for all kinds of users. Business cards are essential in small businesses and large enterprises to share contact details of the various delegates and users. Sharing business cards, such as attachments, is again an easy way. I hope users have gained some information through this blog.
Visit Microsoft to learn more about creating a business card in Outlook.

