Creating a Linux bootable USB drive is a crucial step for anyone looking to try or install a Linux distribution on their system. This guide will walk you through the process of turning a Linux ISO image into a bootable USB drive on both Windows and Linux systems.
Table of Contents
Step 1: Download the Linux ISO Image
- Visit the Ubuntu Website:
- Open a web browser, such as Chrome, and navigate to the official Ubuntu website.
- Choose the Ubuntu version you wish to install. For this example, we’ll use Ubuntu 20.04 LTS.
- Click the download link, select the Save File option, and then click OK to save the ISO file to your computer.
Step 2: Create a Linux Bootable USB Drive on Windows
Using Rufus
- Download Rufus:
- Go to the Rufus website and download the latest version of the Rufus tool.
- Prepare Your USB Drive:
- Insert a USB pen drive into your Windows computer. Ensure that this drive has no important data, as it will be erased during the process.
- Launch Rufus:
- Navigate to your Downloads folder, double-click on the Rufus.exe file to launch it.
- Rufus will automatically detect your USB drive. If not, select it from the dropdown menu.
- Select the Ubuntu ISO:
- If Rufus does not automatically detect the Ubuntu ISO, click the SELECT button, browse to the location of the Ubuntu ISO file, and click Open.
- Configure Rufus Settings:
- Ensure that the File System is set to FAT32.
- Tick the Create a bootable disk using box, and choose ISO Image from the dropdown menu.
- Start the Bootable USB Creation:
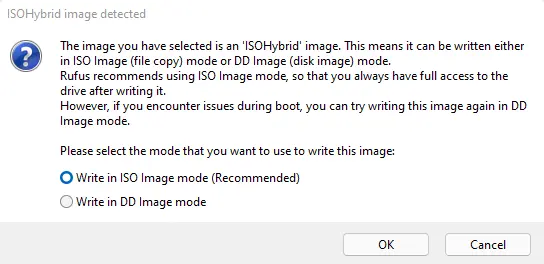
- Click Start to begin the process. If Rufus detects an ISOhybrid image, click Yes to allow Rufus to handle it.
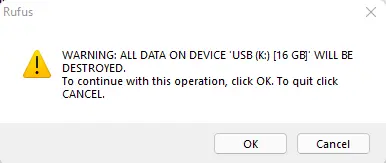
- A warning will appear stating that all data on the USB drive will be destroyed. Click OK to proceed.
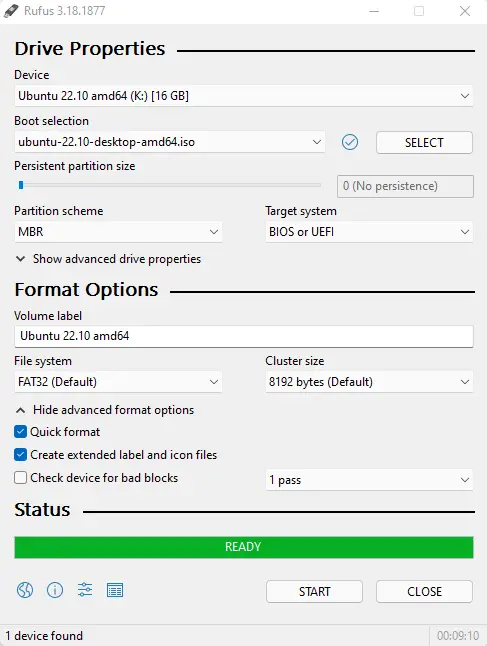
- Completion: Once Rufus completes the process, you will see a message indicating the USB drive is ready. Click Close to exit Rufus.

Insert your USB pen drive into the computer. Now double-click on the downloaded Rufus.exe file, which would be in the Downloads folder.
Once we run the Rufus installer with the USB plugged in, it will automatically recognize it.
It might also automatically find the Ubuntu ISO. If not, then click on the SELECT button.
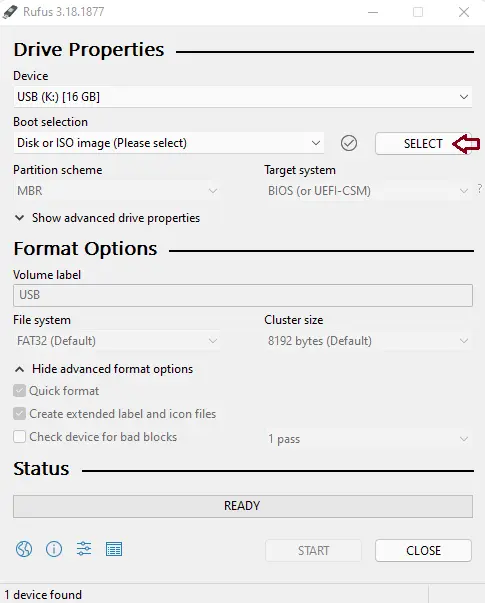
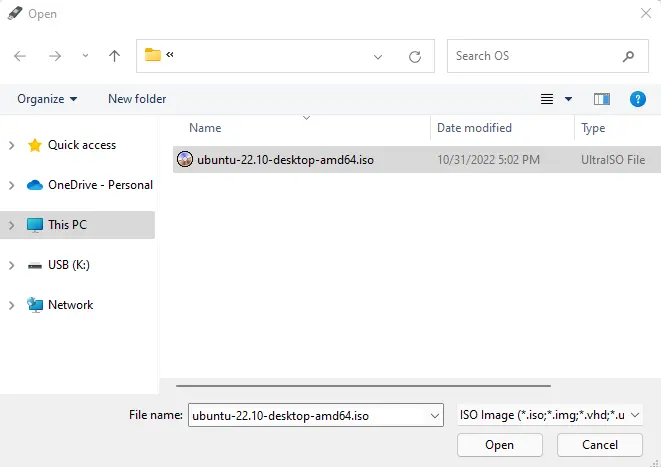
Select the Ubuntu ISO, and then click Open.
Select the File System box, and then select FAT32.
Tick Create a bootable disk using the box.
Once you have selected the correct options, select the Start button to create a bootable USB.
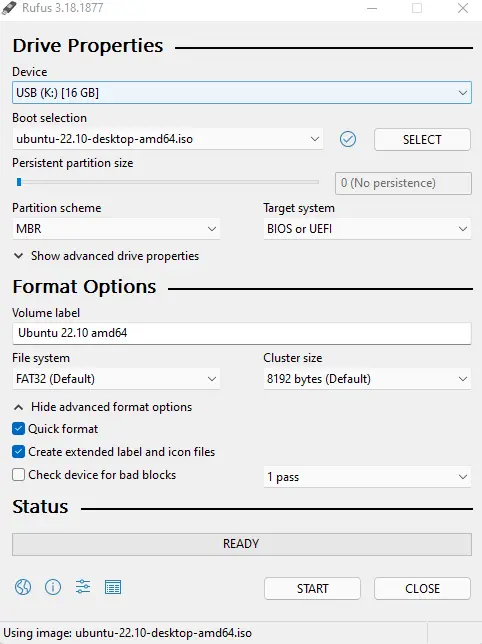
If an ISOhybrid image is detected, just select the Yes button, and the Rufus tool will automatically download it for you.
Rufus will be warned that all data on the device will be erased. Choose OK to continue if the USB drive has no necessary data on it.
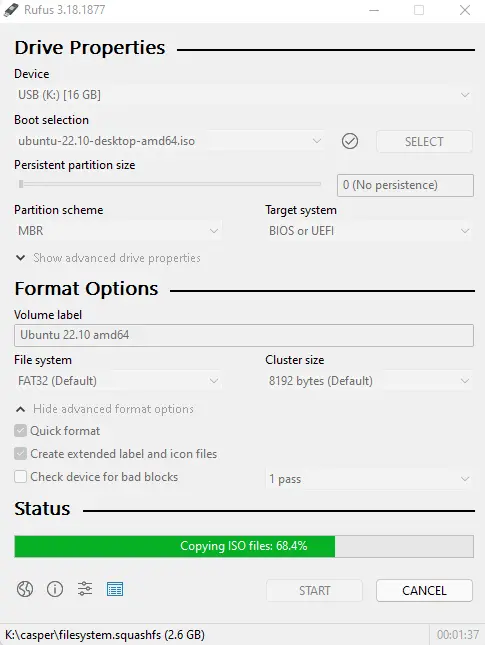
Linux USB burning process.
Rufus successfully created a bootable USB drive. You can choose Close to Close Rufus when it’s done.
Step 3: Create a Linux Bootable USB Drive on Linux or Mac
Using Balena Etcher
- Download Balena Etcher:
- Visit the Balena Etcher website and download the software for your operating system (Windows, Linux, or Mac).
- Prepare Your USB Drive:
- Insert a USB drive with at least 32 GB of storage into your computer’s USB port. Remember that all data on the USB drive will be erased, so back up any important data beforehand.
- Launch Balena Etcher:
- After installation, open Balena Etcher.
- Select the Linux ISO File:
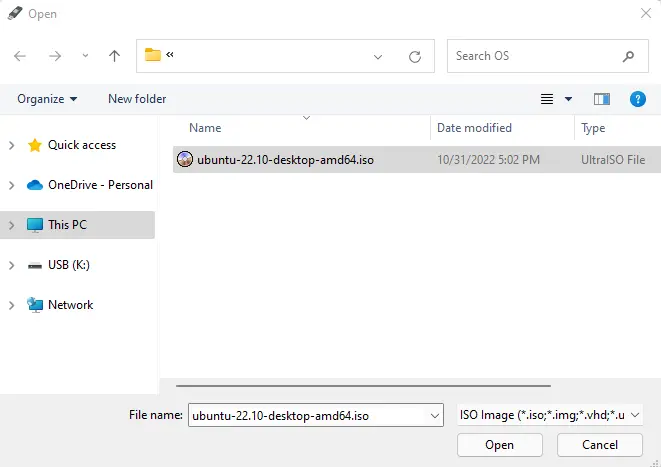
- Click Flash from file and browse to the location of your Linux ISO image file. Select it, and click Open.
- Select Your USB Drive:
- Ensure that your USB drive is correctly selected as the target device. Balena Etcher usually auto-selects the connected USB drive.
- Start the Bootable USB Creation:
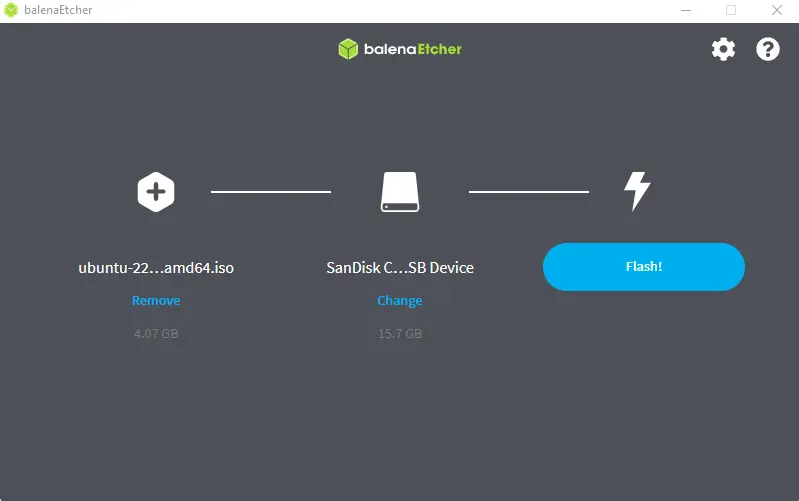
- Click Flash! to begin the process. Balena Etcher will now create the bootable USB drive.
- Completion:
- Once the process is complete, you will see a success message. Your Linux bootable USB drive is now ready to use.
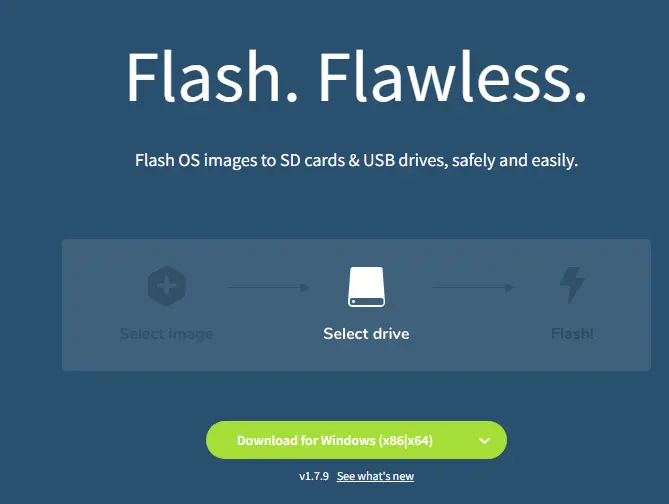
Click on the Flash form file.
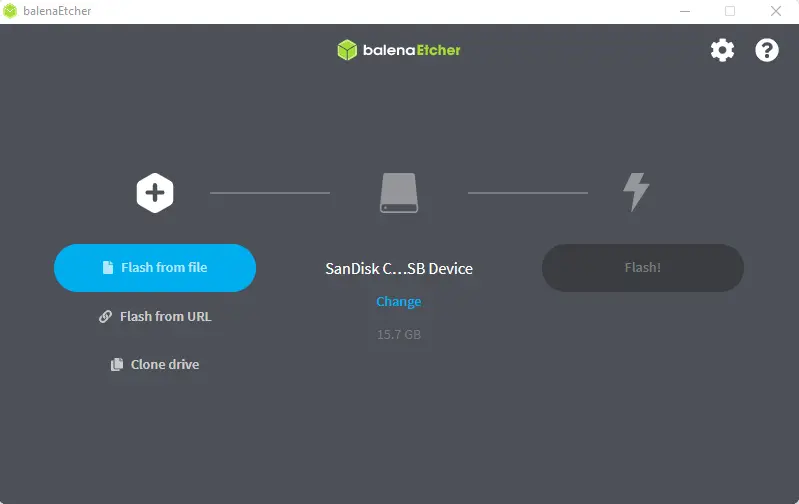
Browse your Linux ISO image file, and then choose open.
Click on the flash button to start the Linux bootable USB creation process.
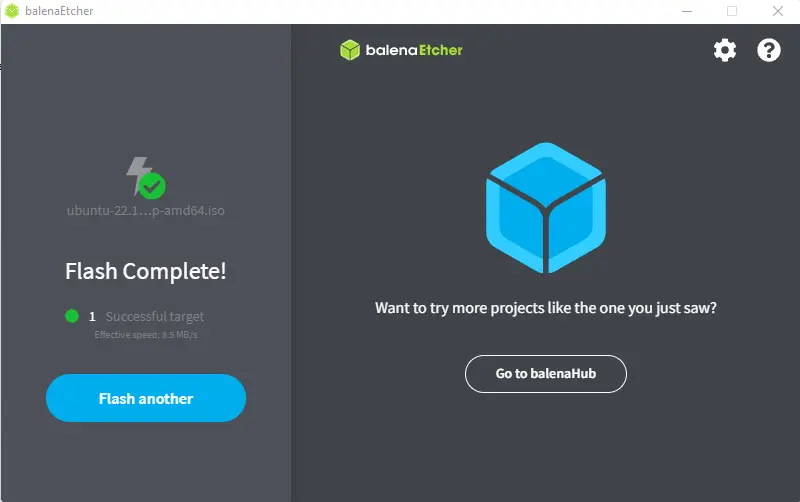
Successfully created a Linux bootable USB drive.
Conclusion
You have successfully created a Linux bootable USB drive using either Rufus on Windows or Balena Etcher on Linux or Mac. This USB drive can now be used to install or try Linux on any compatible computer. For more detailed instructions and troubleshooting tips, refer to related articles on creating bootable USB drives for various Linux distributions.
Refer to this article to learn more about creating a bootable Linux USB drive.

