
In this article, we will learn how to create SMB shared Windows Server 2022 to allow multiple users to access this share. Learn how to create a secure and efficient SMB shared Windows Server 2022 environment with our comprehensive step-by-step guide. Simplify file sharing and collaboration within your small to medium-sized business. Start maximizing productivity today. Visit Microsoft to learn in detail how to set up SMB sharing on Server 2022.
Table of Contents
Understanding SMB Shared Windows Server
Define SMB shared Windows Server 2022 and its role in facilitating file sharing, resource sharing, and collaboration within an organization. Discuss the key features and capabilities of Windows Server 2022 for SMBs. Highlight the advantages of using Windows Server 2022 over previous versions.
Create SMB Shared
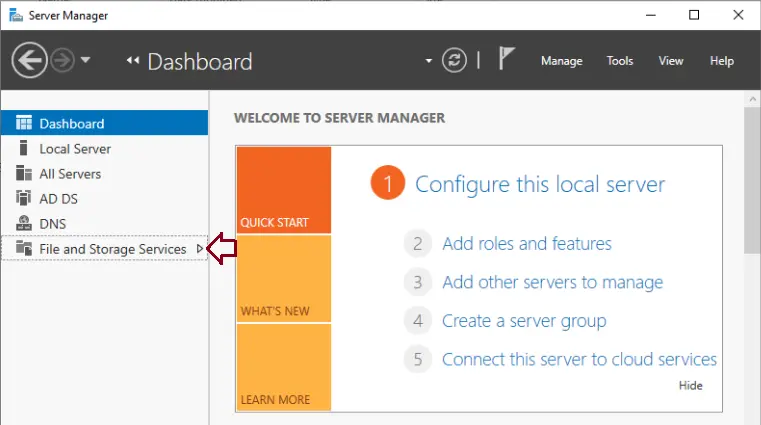
We open the Server Manager and click on “File and Storage Services”.
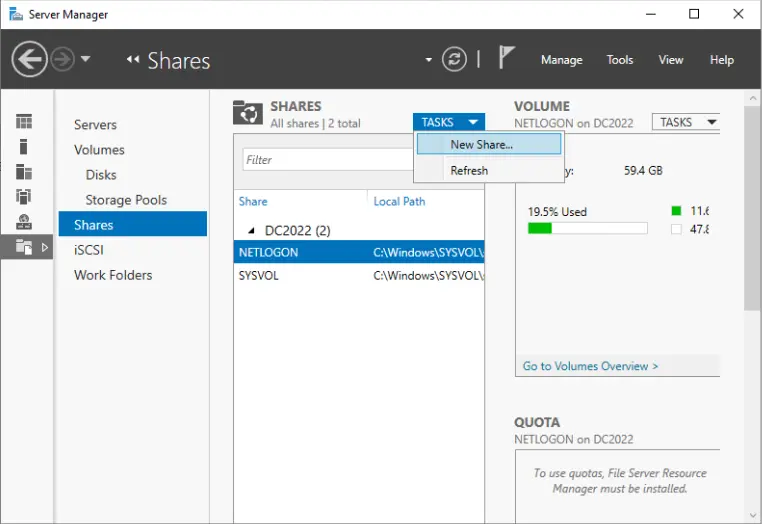
Click on Shared and click on Tasks and New Shared.
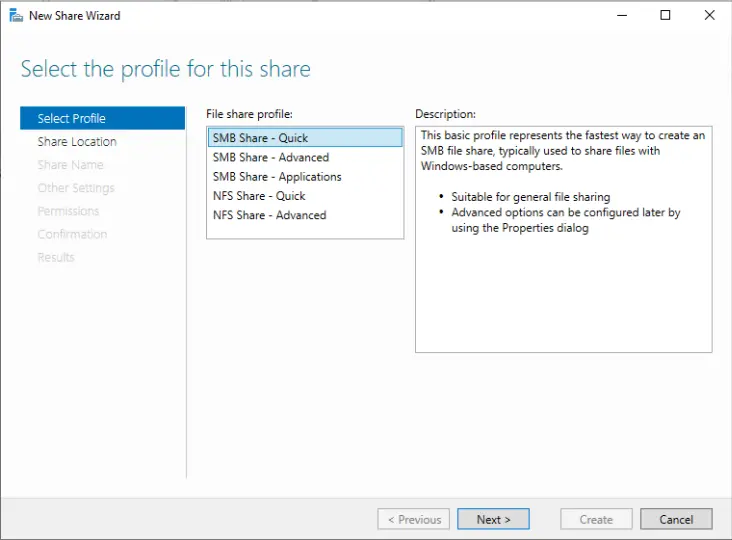
The new share wizard will be displayed; select SMB Shared – quick and click next.
In the share location window, tick the box “Type a custom path” to select the folder to share.
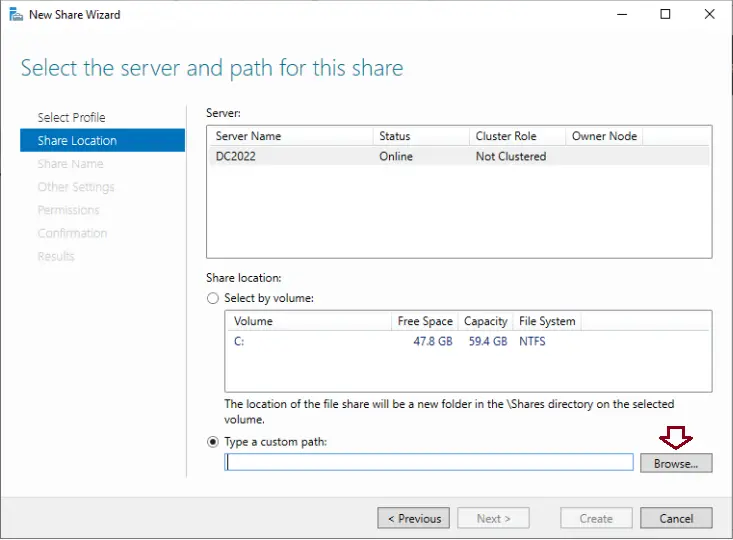
Find your shared folder and choose select folder.
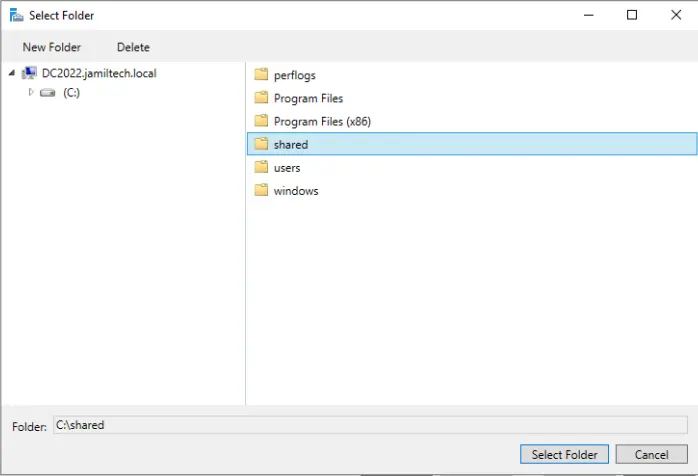
Click next.

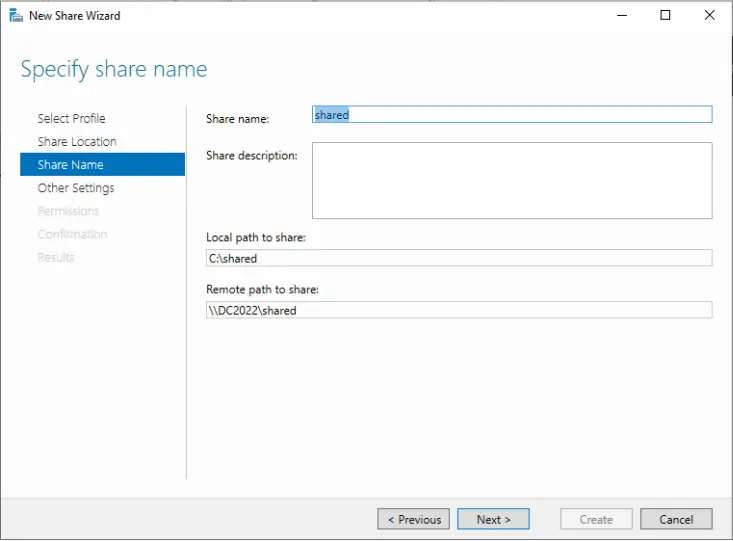
Specify a share name and click next.
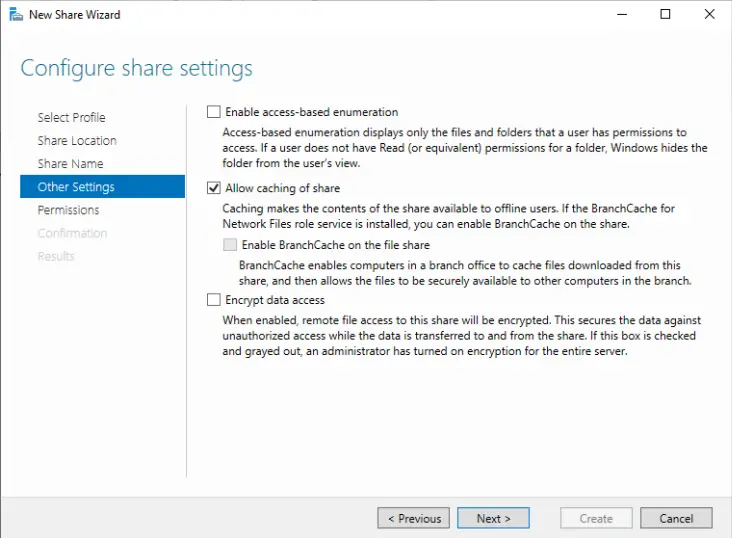
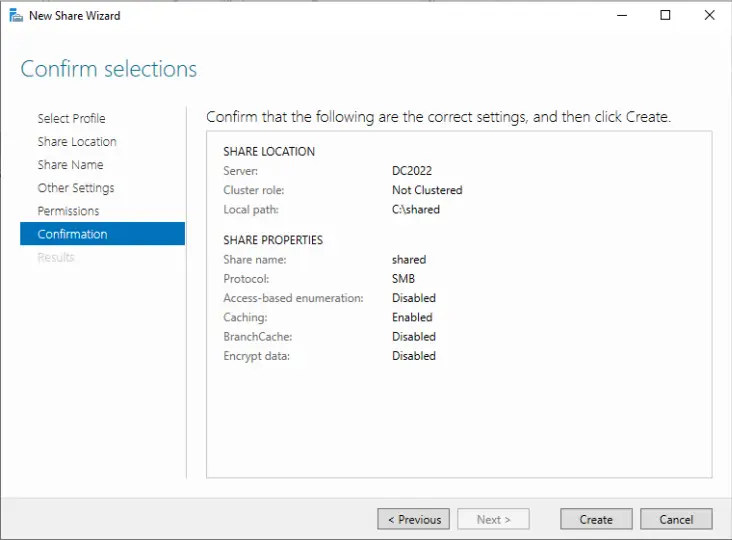
Verify the configured share settings and click next.
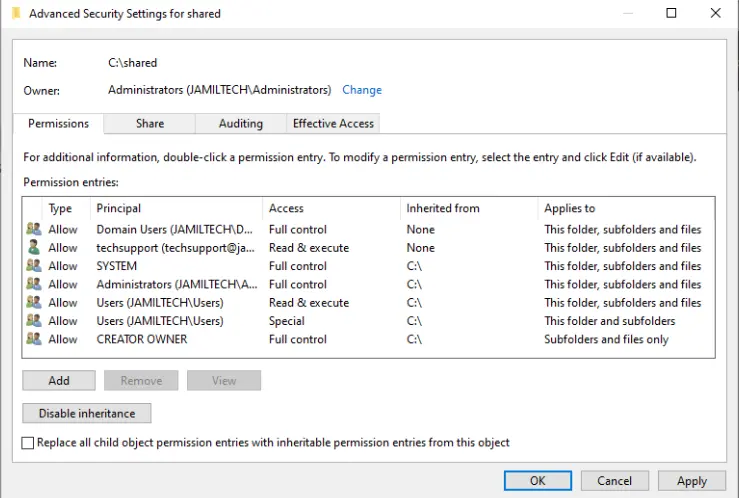
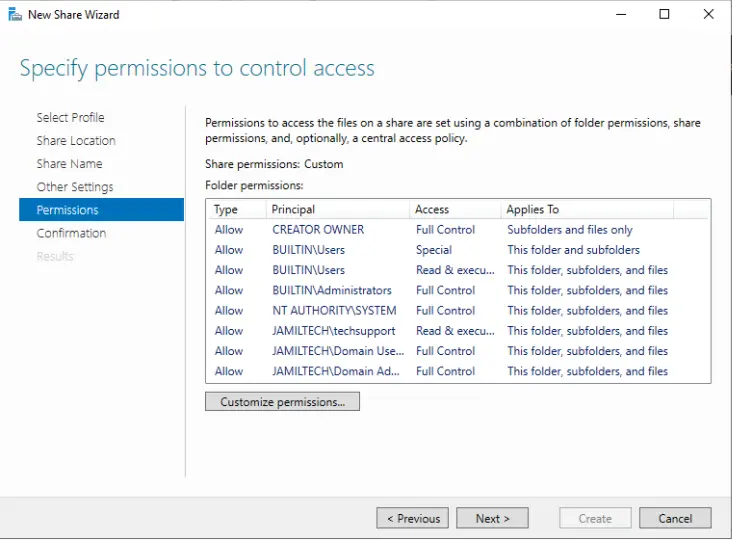
Specify Permissions to Control Access
Specify permissions to control access, and click on customize permissions.

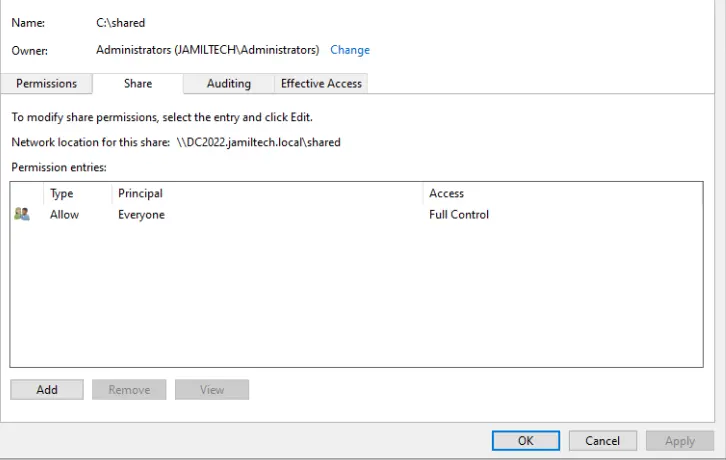
Click on the share tab.
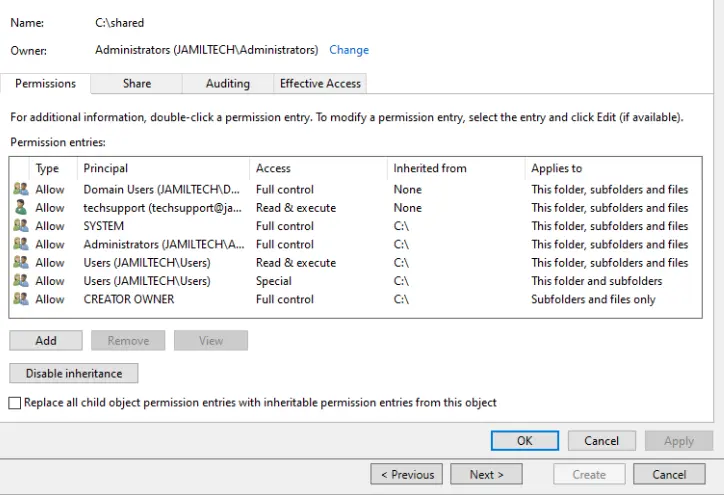
In the Share tab, click on Add.
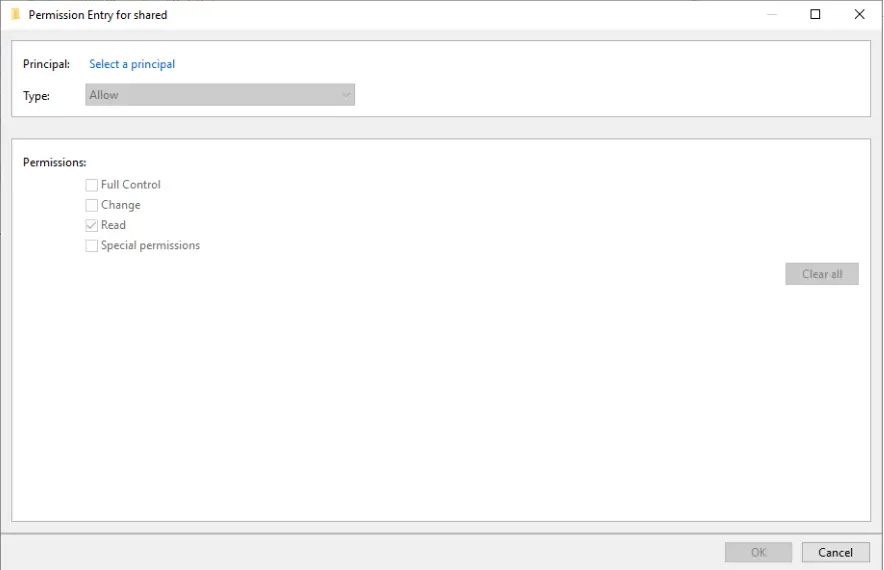
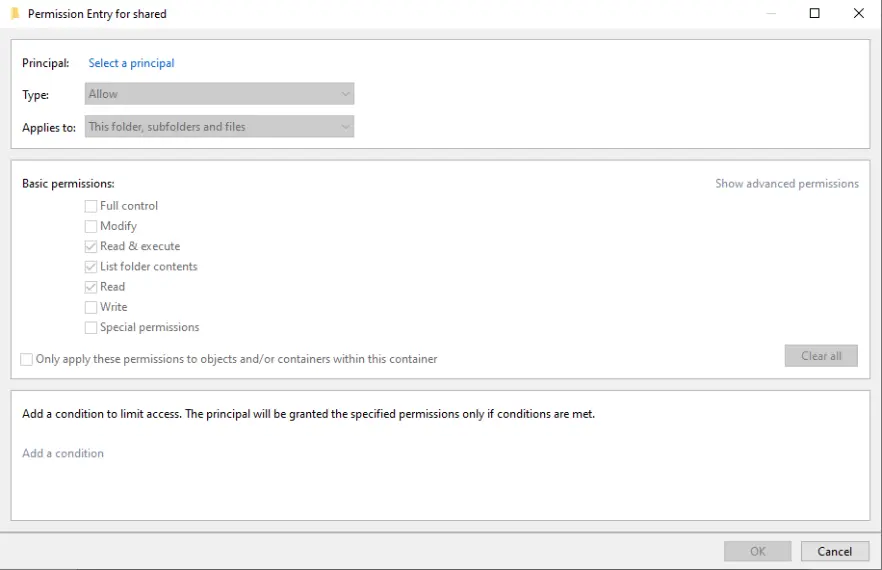
Click on Select a principal link.
Type domain users and click OK.
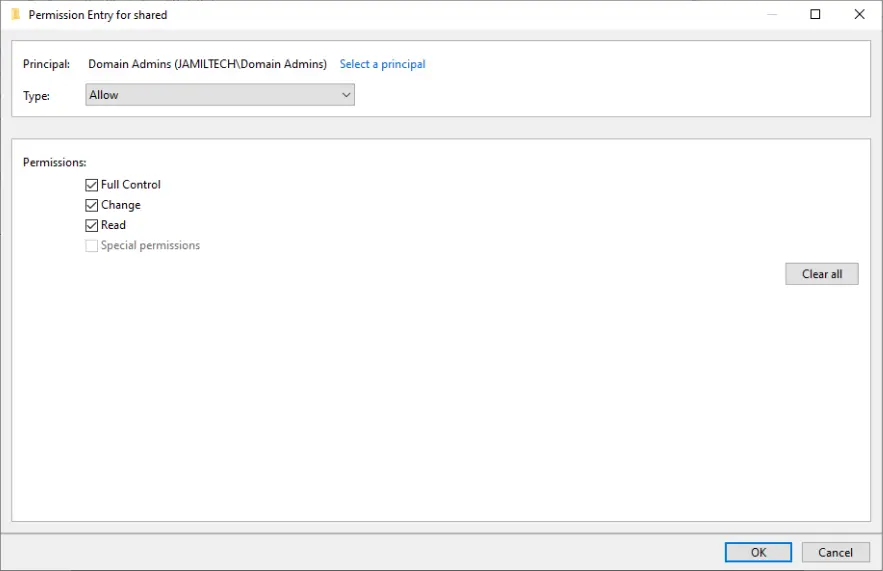
Grant the permissions and click OK to apply the changes.
Click on the change link.
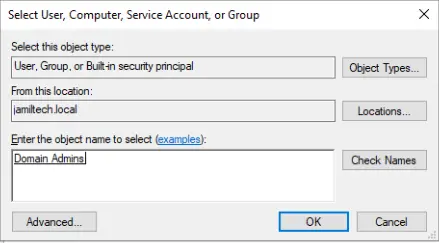
Choose to select a principal.
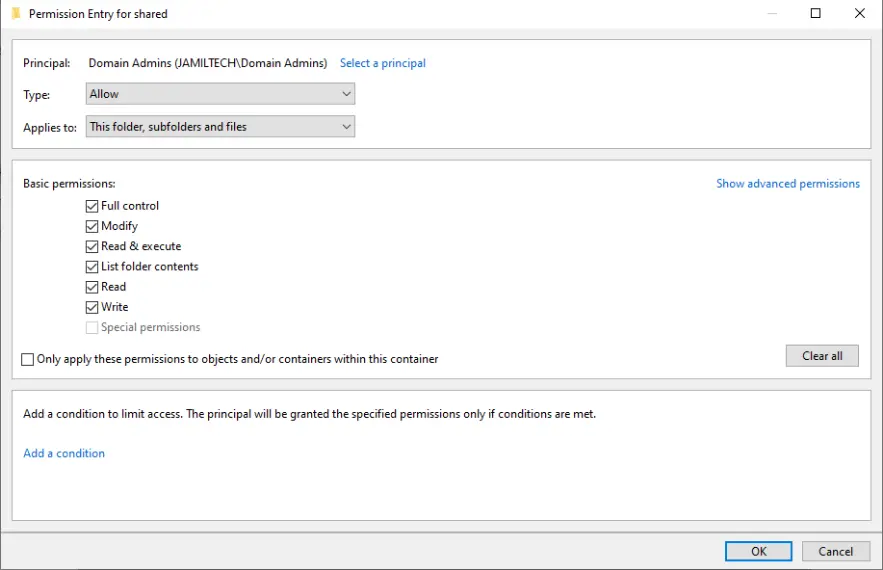
Type domain admins and click OK.
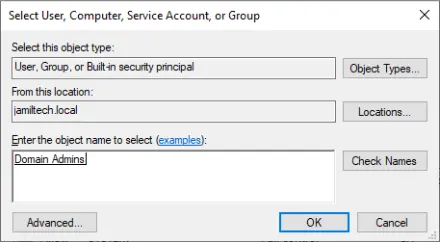
Click ok
Choose next.
Click Create to complete the process.
Choose Close.

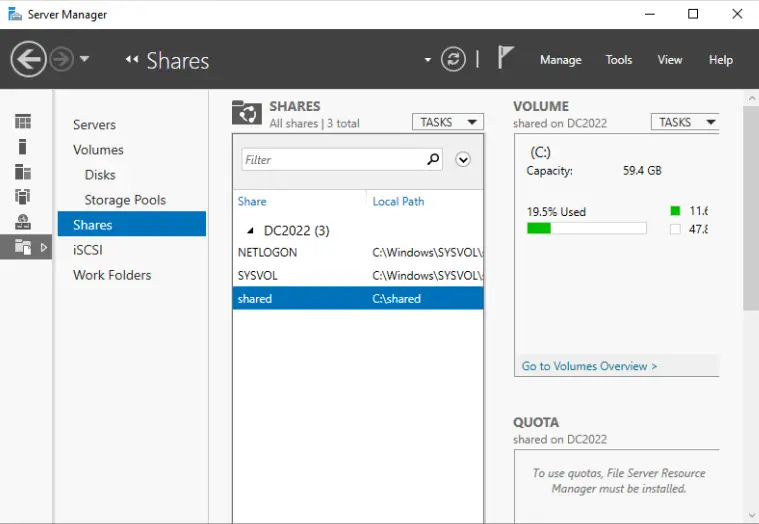
We see the shared folder.
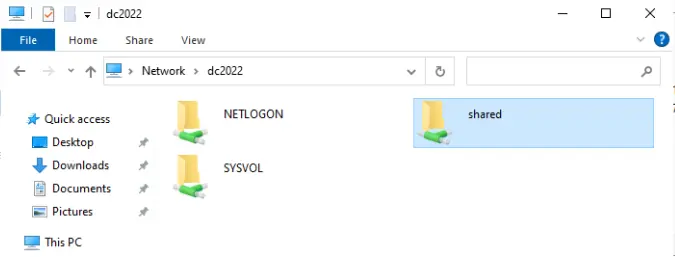
In File Explorer, go to Network Options, and there you will see the shared folder.
With any of the above methods, we are able to create shared folders on Windows Server 2022.

