
Let’s look at this article on how to run CHKDSK to repair and fix hard disk errors. A computer could destroy your entire week. Windows’ built-in CHKDSK (check disk) utility helps to find and fix errors. Keep reading to learn how to improve your computer’s performance with CHKDSK. Then, use a powerful system optimization tool to keep your computer running well.
Table of Contents
What is CHKDSK?
CHKDSK is a Windows tool or program that scans your hard drive for file system errors. Running CHKDSK checks for errors on your system’s hard drive and fixes them. It also keeps your system files in order. It’s good practice to maintain the computer running well.
Most of the time, CHKDSK is run in Windows 10 (and Windows 8 and 7) using the Command Prompt. Using tools like chkdsk /f or chkdsk /r, you can check your Windows file system NTFS (New Technology File System) on Windows XP or later to find data errors on your drive and fix them.
Although running CHKDSK may not speed up your computer directly, it can free up space, which often has the same effect. Even if you’ve already replaced your PC’s storage system with a faster SSD (solid-state drive), checking it with CHKDSK can keep it clean and running fast.
How Do I Know When to Use CHKDSK?
Use CHKDSK frequently to check for damaged files on the hard drive, fix and clean up your PC, and keep it in good health. Even if your PC won’t turn on, CHKDSK can check for bad sectors, which are damaged parts of your hard drive. This helps you find and fix mistakes on your hard drive, and it also frees up disk space.
If your computer seems slow or glitchy, it could be because your hard drive is full or failing. Before you run CHKDSK to repair and fix, test your hard drive to make sure it isn’t broken. You might also want to clean up your PC to get closer to the ideal amount of free hard drive room, which is 15-20%.
Because a CHKDSK scan can take time and be hard to do by hand, it may be better to run a PC optimizer tool. Avast Cleanup gets rid of useless files on your PC, speeds up its startup time, and makes sure there is enough room on your hard drive so that your computer works well all the time.
How to Use CHKDSK
CHKDSK (check disk) can be performed in three ways, each of which is suited to checking both fixed and removable storage devices, including solid-state drives.
Run CHKDSK to Repair and Fix from File Explorer
The best way to find errors on your hard drive is to use the Error Checking tool in File Explorer.
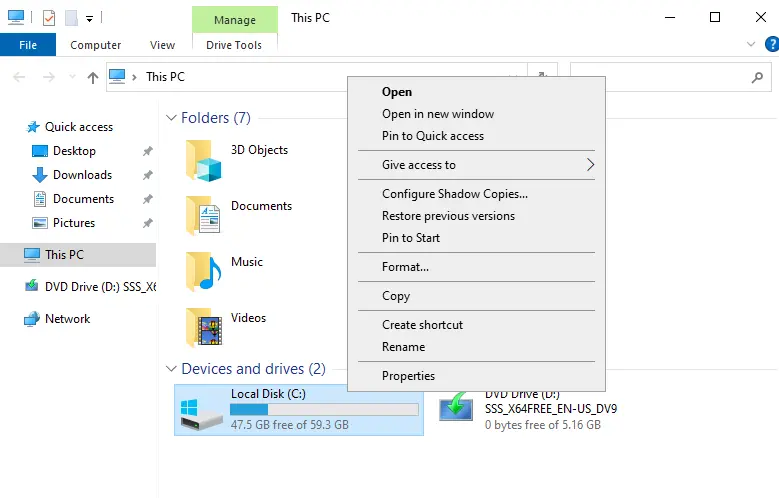
Open File Explorer and click on This PC. Right-click on the C: drive and choose Properties.
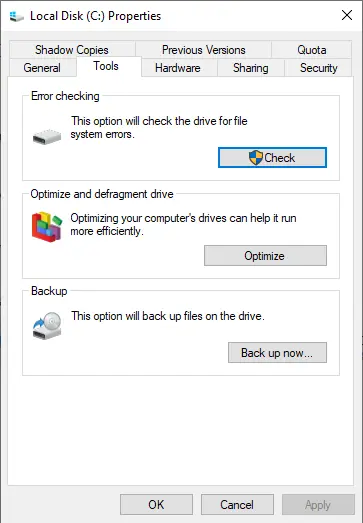
Select the Tools tab and click the Check button.
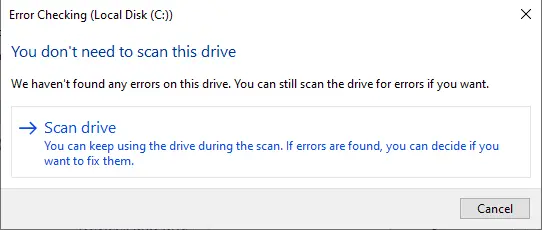
If the test finds no issues, a message will inform you that the drive does not require scanning. Select Scan Drive if you want to scan the drive.
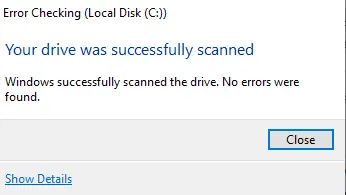
Once the CHKDSK is successfully scanned, click on the Show Details link to view any errors that were repaired, or click Close.
Run CHKDSK from Command Prompt
From the Command Prompt, you can run CHKDSK to repair and fix the hard disk. Follow the steps to run the CHKDSK command.
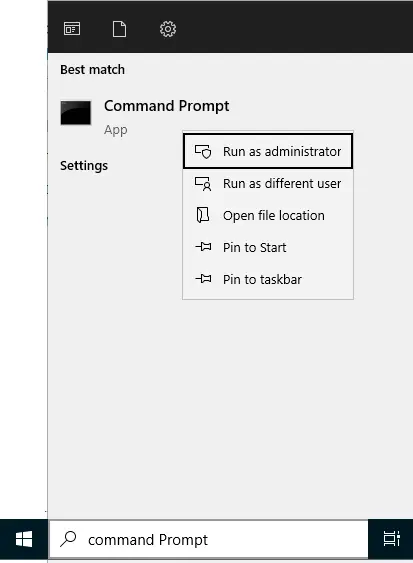
Enter Command Prompt in the Windows search bar, and select Run as administrator.
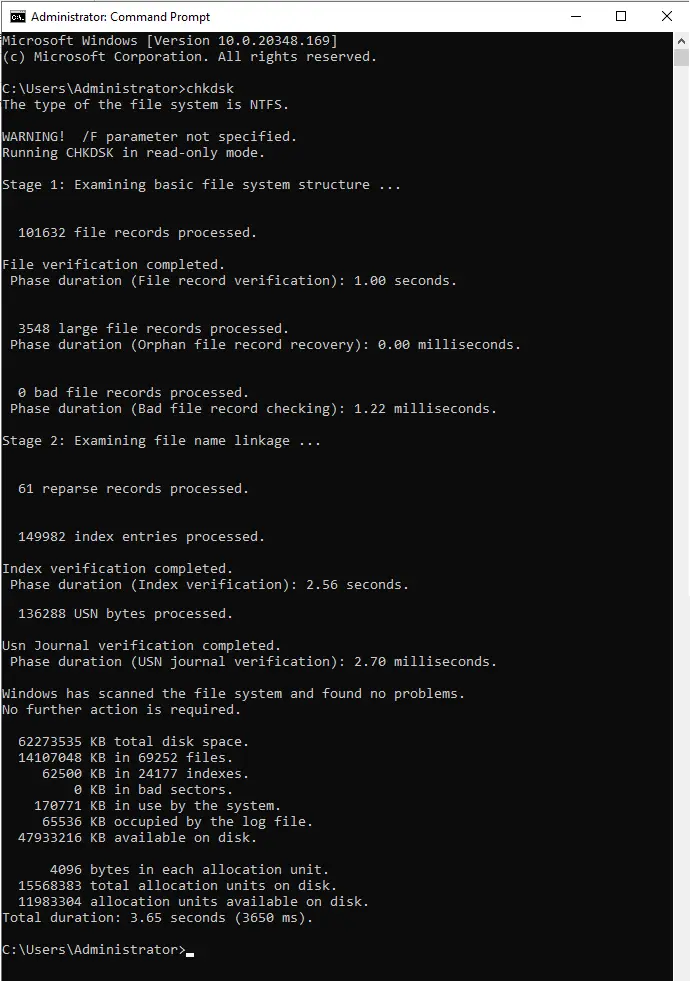
Type chkdsk and hit Enter. CHKDSK will scan for drive errors and notify you if it finds any errors that need to be fixed, but it will not attempt to fix them until given specific instructions.
Keep reading to learn about specific CHKDSK methods and how to use them to fix errors found during a CHKDSK scan.
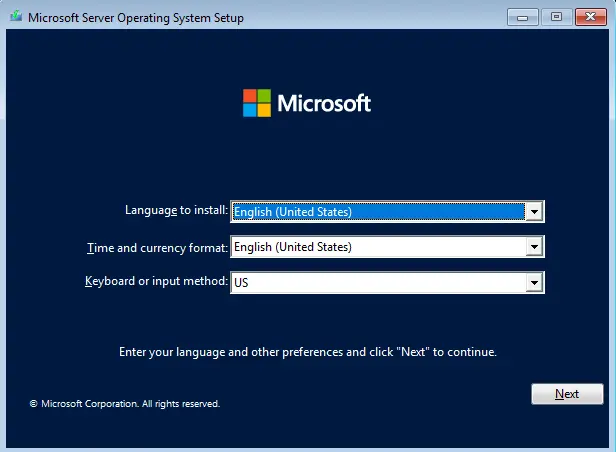
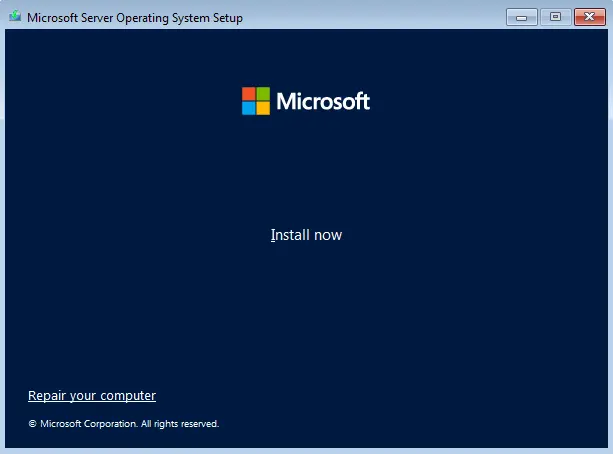
Run CHKDSK from Installation Media
If your computer fails to boot up or you see the Blue Screen of Death when it does, you can run CHKDSK from an external drive or other installation media with your version of Windows on it. This will check your operating system version for issues and try to fix them before it starts up.
Boot your system with bootable Windows installation media and keep pressing the F8 key before the Windows logo appears.
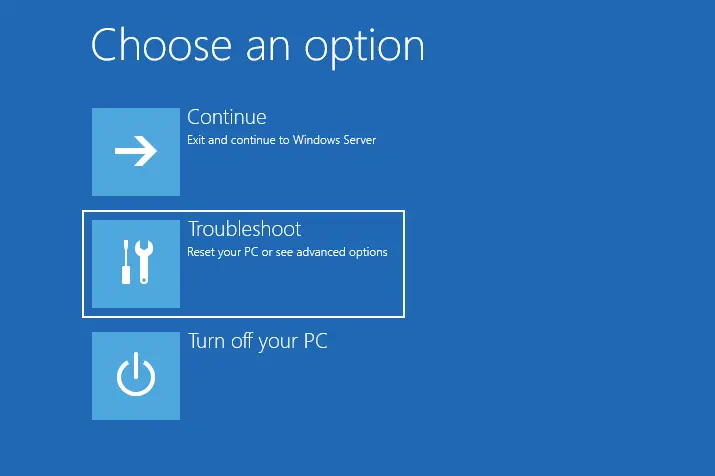
Select Repair your computer.
Click Troubleshoot.
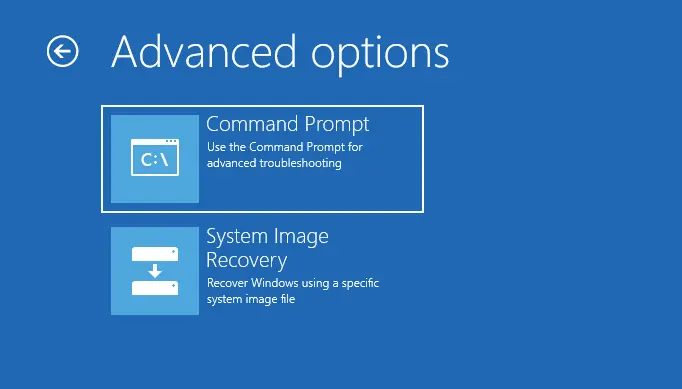
Select Command Prompt.
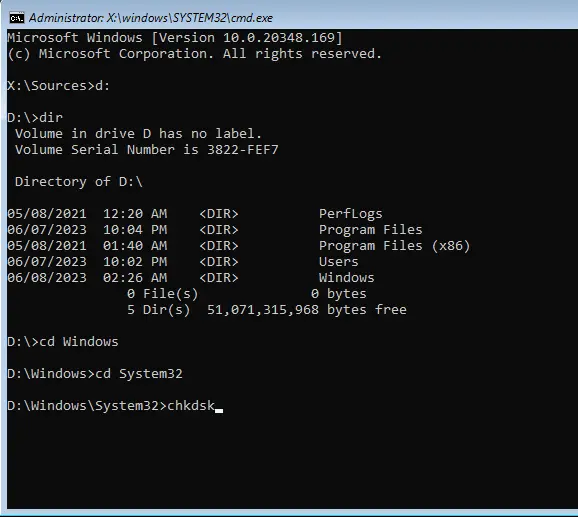
Make sure you know which drive or portion of your PC holds Windows. Type c: or d: and hit Enter to try this. Then type “dir” and press Enter. If the directory has Windows, this is your home drive.
Next time your computer restarts and you are prompted to run CHKDSK, type Y and then Enter. When you restart your computer, CHKDSK will scan your Windows drive for problems and try to fix them if it finds any.

