
In this article, we will discuss how to create user mailbox in Exchange Server 2019. But there are a few points that you have to know before creating a user mailbox in Exchange Server 2019.
Create a user mailbox in Exchange Server for existing Active Directory users or new users to send and receive email. In the below steps, you will learn how to create a new user mailbox in Exchange Server. Refer to this article to get more information about creating new user mailboxes in Exchange.
What is a User Mailbox?
The user mailbox is the most common kind of recipient in Exchange Server that we allocate to an individual user in our Exchange association. Every user mailbox has a related Active Directory user account that provides the user access to the mailbox to send and receive e-mail messages. We will create a new user account in the Mailbox Database in Exchange Server 2019 by using the Exchange Admin Center (EAC) and Exchange Management Shell (EMS).
Create User Mailbox in Exchange Server
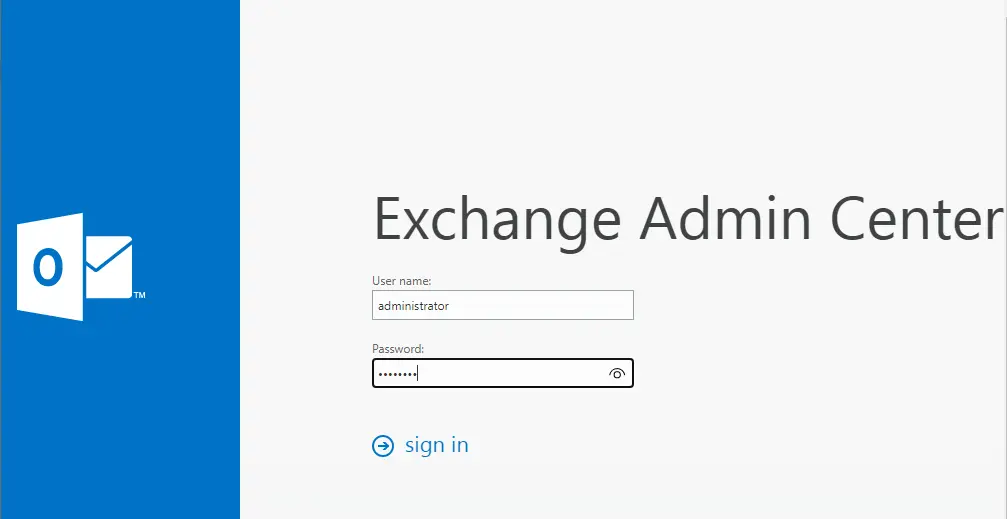
Sign into the Exchange Admin Center.
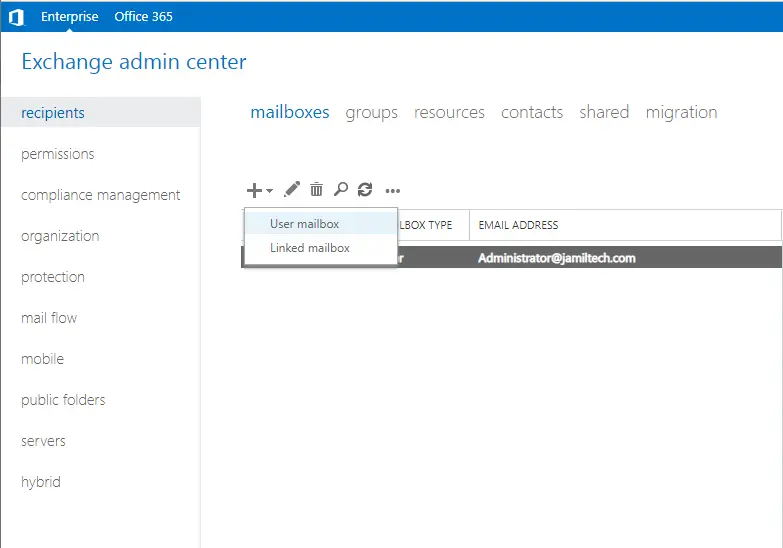
Select recipients in the feature pane, and then select the mailboxes tab.
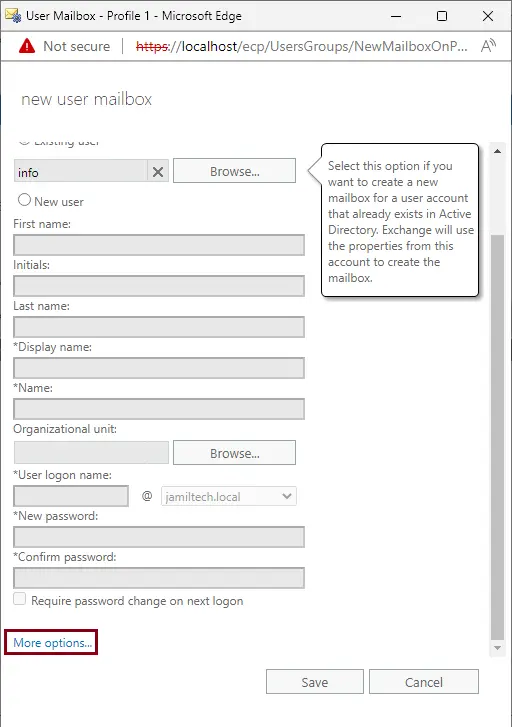
Click the + icon and click on the user mailbox.
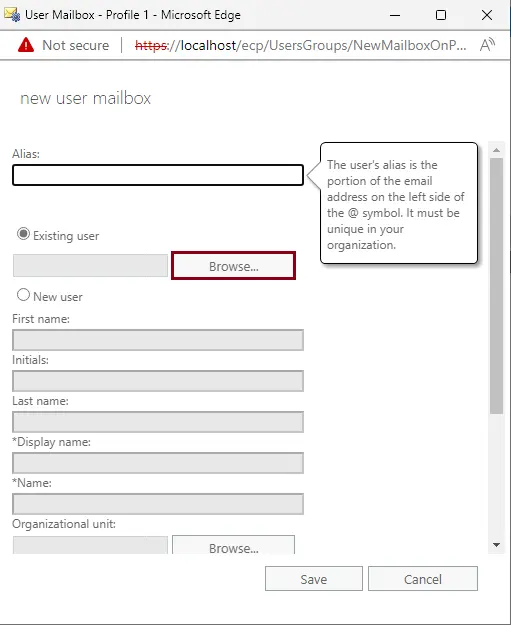
Select the Existing user option, and then click Browse to find the user that has already been created in Active Directory. If you do not have the user created in the server’s active directory, choose New User and fill in the fields. That will create a new user in an active directory, including a mailbox.
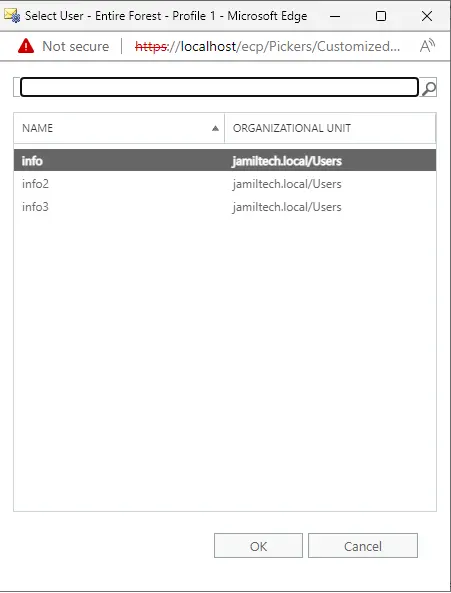
Select a user, and then click OK.
Choose more options.
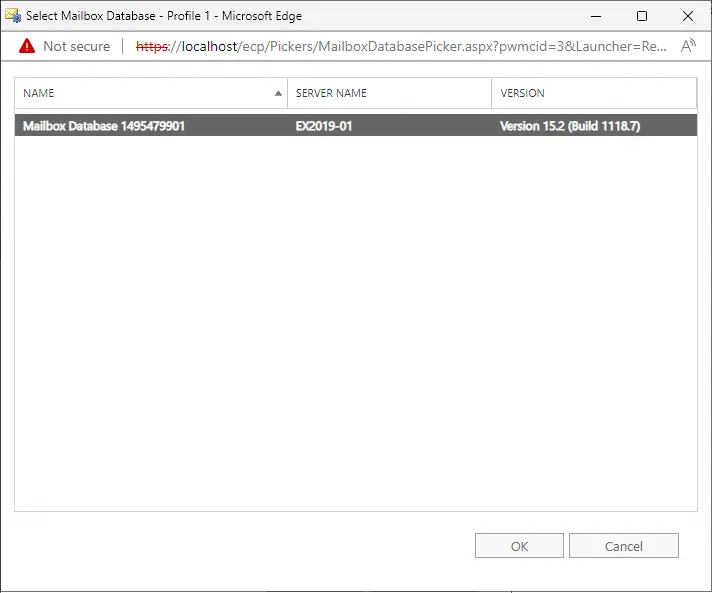
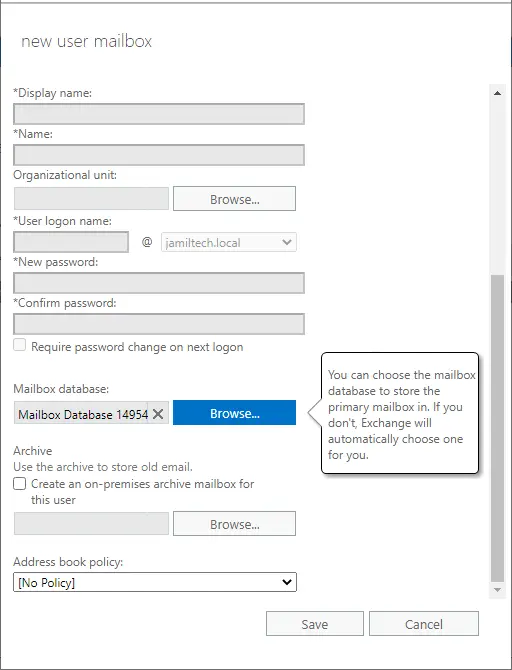
If you have more than one database to choose from, then click the Browse button.
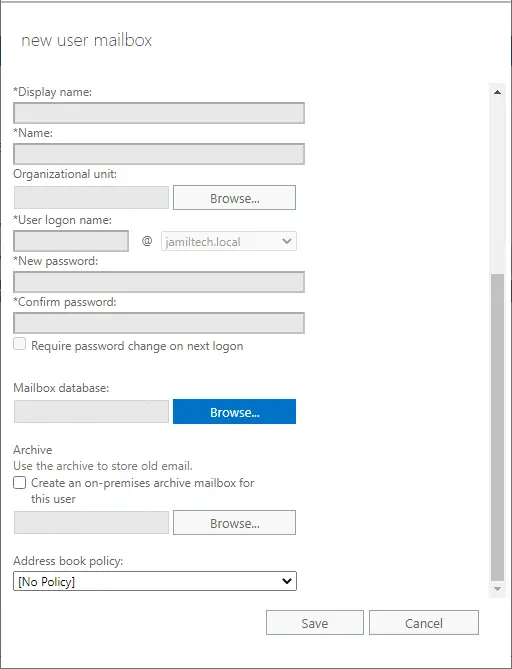
In our example, we have only one mailbox database.
Select the database, and then click OK.
Would you like to create a mailbox database? Then read the article and create a mailbox database in Exchange.
Select Save to create the mailbox.
Have you seen the mailbox list? The user’s mailbox is created.
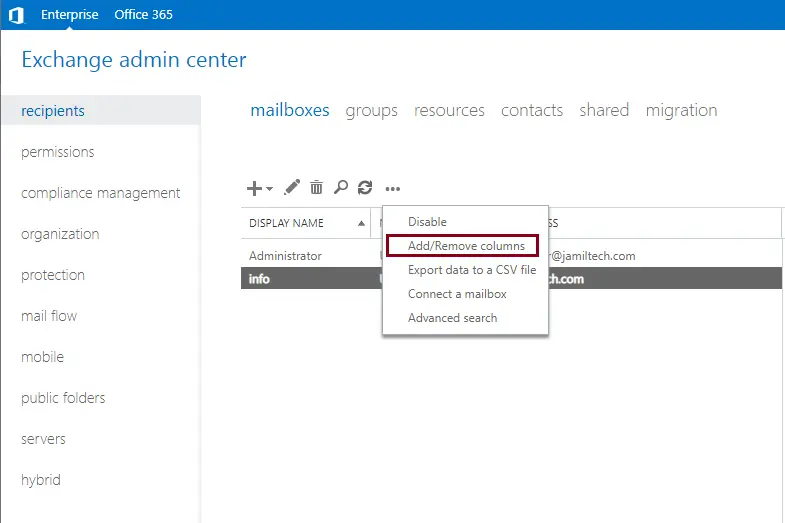
Add Database Column
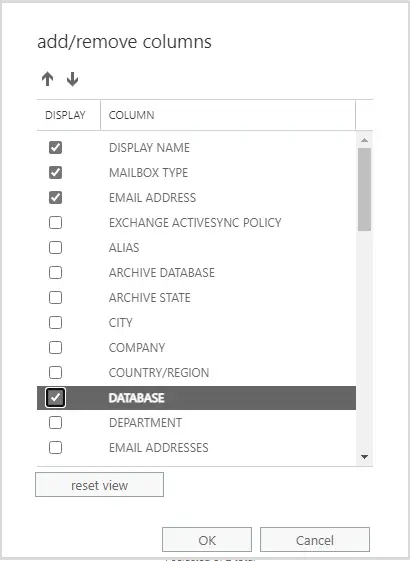
Add the database column if you would like to know which database is configured for every mailbox. Select the More… icon. And then select Add/Remove columns.
Choose the checkbox Database, and then click OK.
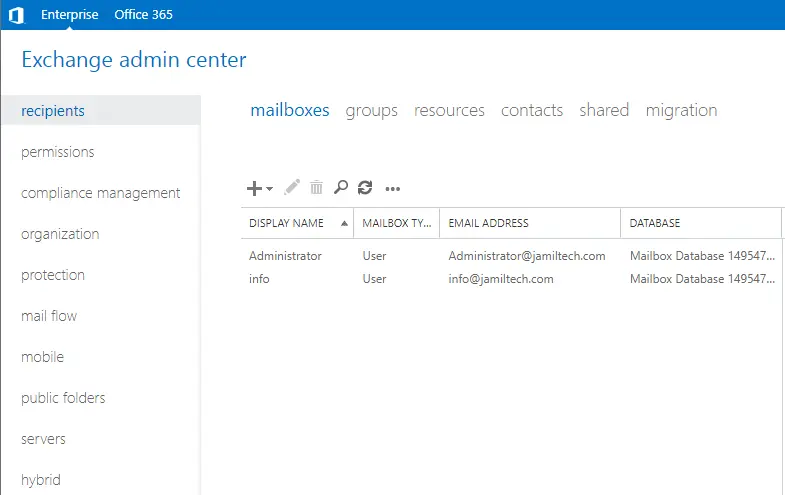
Here, you can have a look again at the mailbox list. This time, you will find each mailbox configured in which mailbox database.
I hope that the article helped you create a user mailbox on Exchange Server.
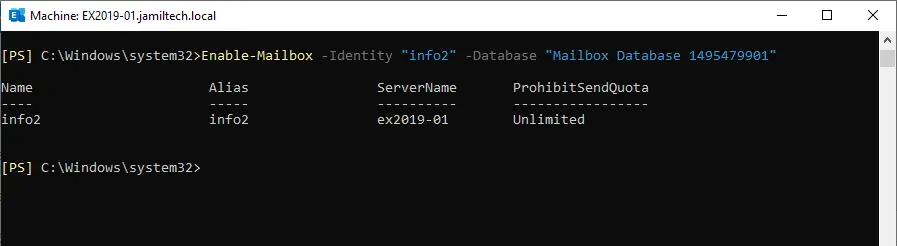
Enable Mailbox for Existing Active Directory User PowerShell
Type the below command:
Enable-Mailbox -Identity "info2" -Database "Mailbox Database 1495479901"
Here to Create User Mailbox in Exchange PowerShell
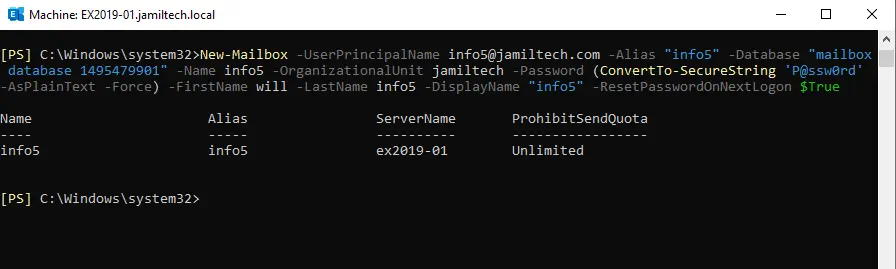
I am creating a new user (info5). Enter the following command:.
New-Mailbox -UserPrincipalName [email protected] -Alias "info5" -Database "mailbox database 1495479901" -Name info5 -OrganizationalUnit jamiltech -Password (ConvertTo-SecureString 'P@ssw0rd' -AsPlainText -Force) -FirstName will -LastName info5 -DisplayName "info5" -ResetPasswordOnNextLogon $True
Conclusion:
In this article, you learned how to create a user mailbox on an Exchange Server. Open a web browser and go to the Exchange Admin Center (EAC). Create a mailbox for an existing user in AD, or create a new user with a mailbox directly from EAC.

