In this article, I will go through the different ways to enable SSH on ESXi 8.0 host. In some cases, you might want to enable SSH on ESXi. Some of the normal cases are to use performance tools like esxtop or edit host configuration. There are a few simple ways to do this, it depends on how you are managing ESXi hosts. You can enable SSH via vCenter using the vSphere Client or VMware ESXi server for standalone hosts not using vCenter.
Enable SSH on ESXi using vSphere Client
Log in with vCenter Server 8.0 via the vSphere client, type your vCenter credentials, and then click on login.
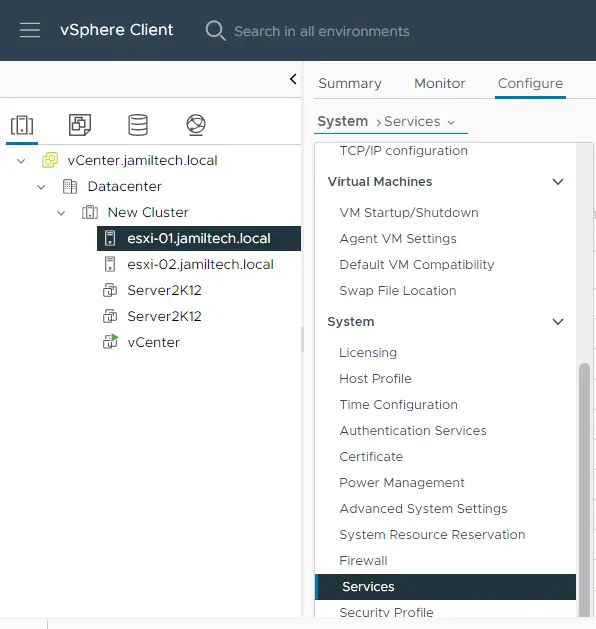
Choose a host where you want to enable the SSH ESXi service. Click on the configure tab, and under system options, select services.
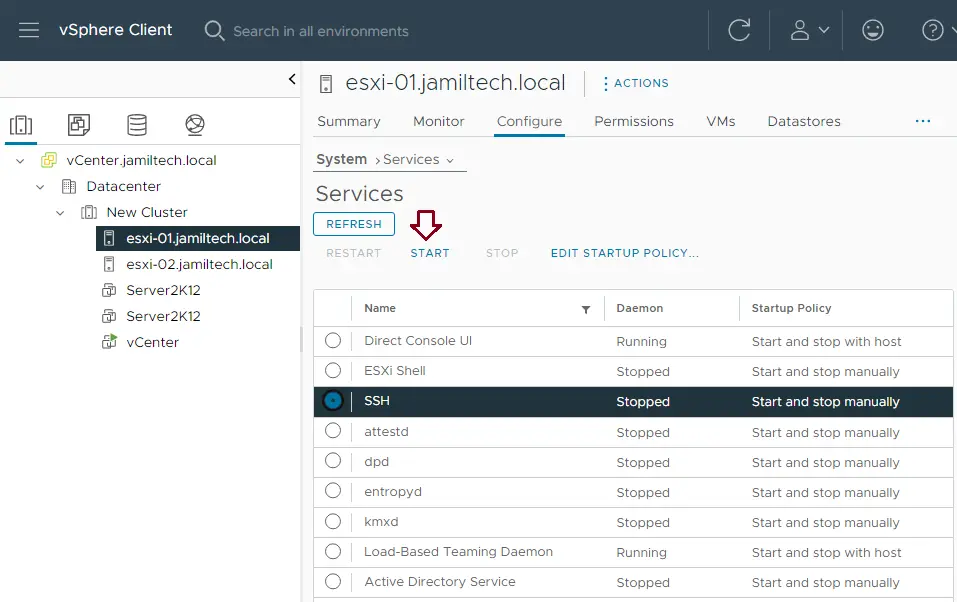
In the services option, choose the SSH service, and then click on the start button to start the SSH service.
Enable SSH on ESXi Host Client
On ESXi hosts that the vCenter does not manage (and ESX hosts that the vCenter does manage), you can enable SSH using the ESXi client. Following the below method, you connect directly to the host instead of through vCenter.
Verify your FQDN of the ESXi host, login, and then follow the steps below.
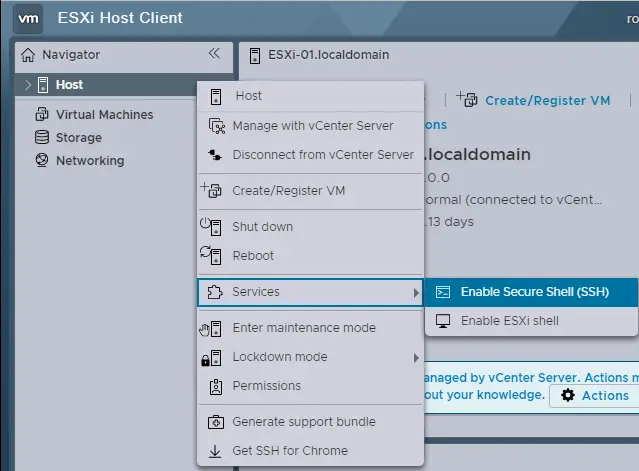
Right-click on Host, choose Services, and then enable Secure Shell (SSH). Or click on the Action menu, select Services, and then click on Enable Secure Shell (SSH).
In the services tab, click on TSM-SSH from the services list, and then choose the Start button to enable SSH.
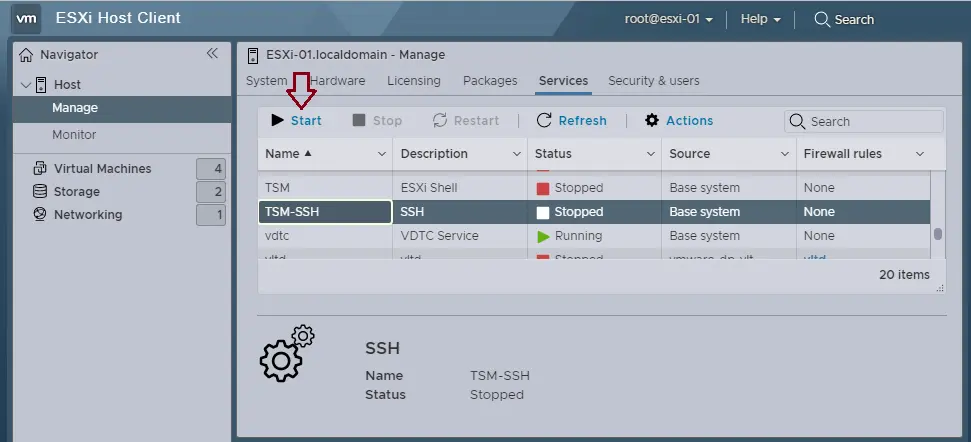
Now you are able to access the ESXi host remotely using a Secure Shell client.
On the VMware ESXi 8.0 DCUI screen, hit the F2 key for login.
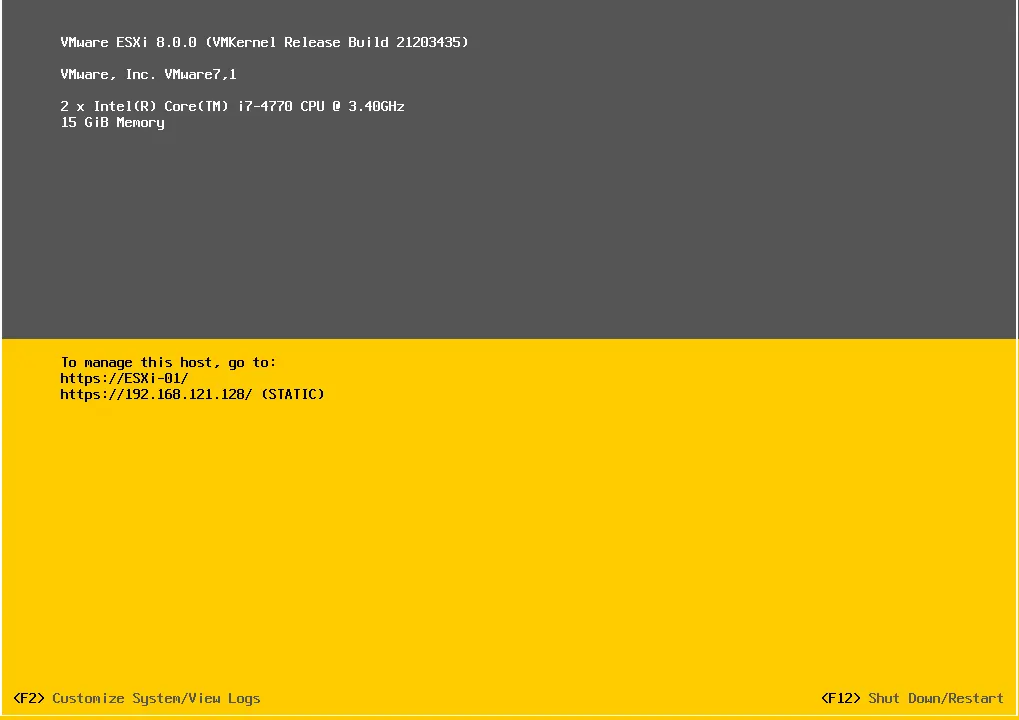
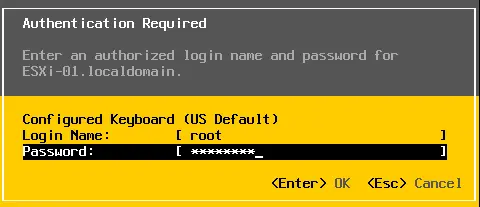
Enter the login name, root, and credentials, and then hit enter.
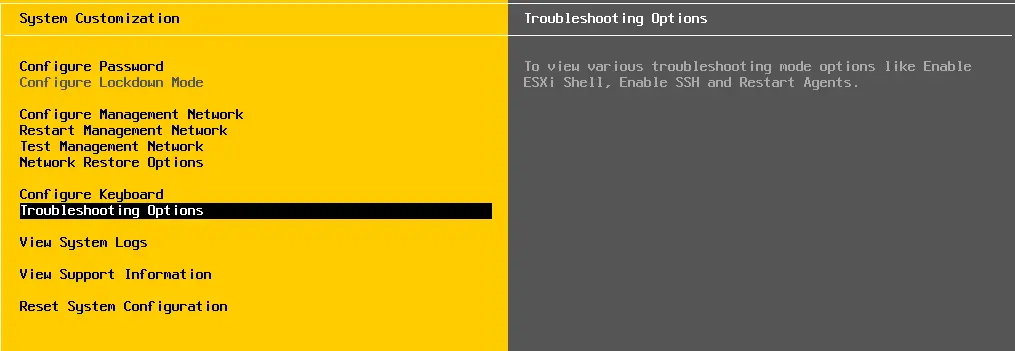
In the system customization, click on the troubleshooting options and then hit enter.
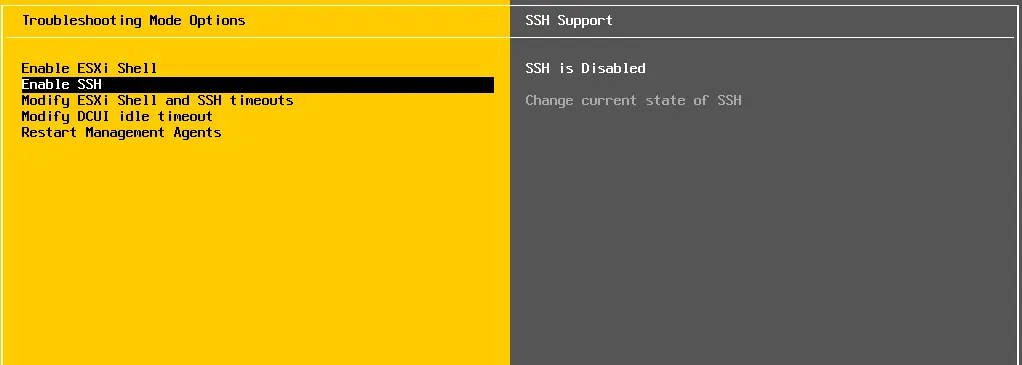
In the troubleshooting mode options, under the SSH support section, SSH service is disabled. Click on Enable SSH and then hit enter.
Visit VMware to learn more about enabling SSH on an ESXI host.

