
In this article, we will discuss how to enable Hyper-V role in Windows Server 2022 and how it can improve the Hyper-V management process. The Hyper-V roles are not enabled by default in Windows operating systems, perhaps because not all environments will be able to apply virtualization. It depends on their specific CPU. You can download Windows Server 2022.
Table of Contents
Install Hyper-V PowerShell Command
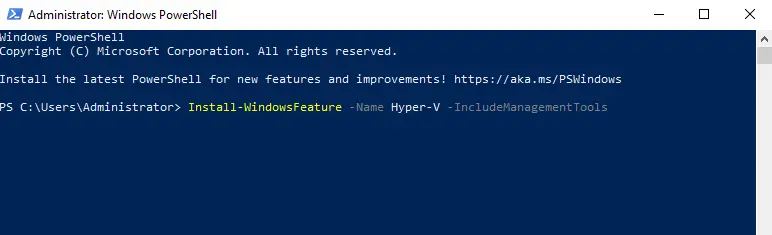
You can use the PowerShell command to make the process of Hyper-V installation even easier. To install Hyper-V Management Tools on Windows Server, launch the PowerShell cmdlet as an administrator and then run the below command.
Install-WindowsFeature -Name Hyper-V -IncludeManagementTools
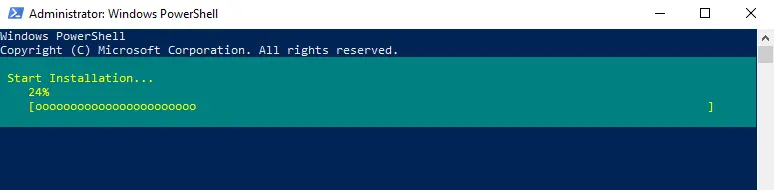
Hyper-V roles installation is in progress
We can enable the Hyper-V role with an automatic system restart using the following command:.
Install-WindowsFeature -Name Hyper-V -IncludeManagementTools -Restart
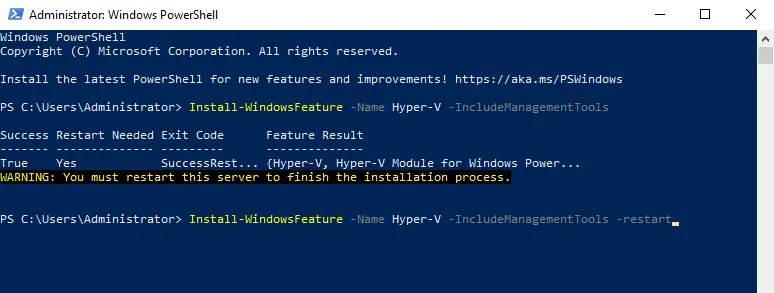
The Hyper-V process will start automatically. Please don’t forget to restart the system after the operation is done.
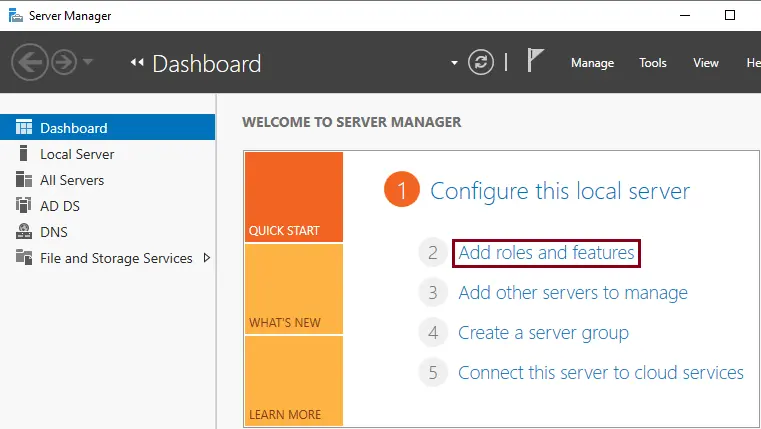
Enable Hyper-V Role Manager on Windows Server
In the Server Manager, click on the dashboard, and then click Add Roles and Features.
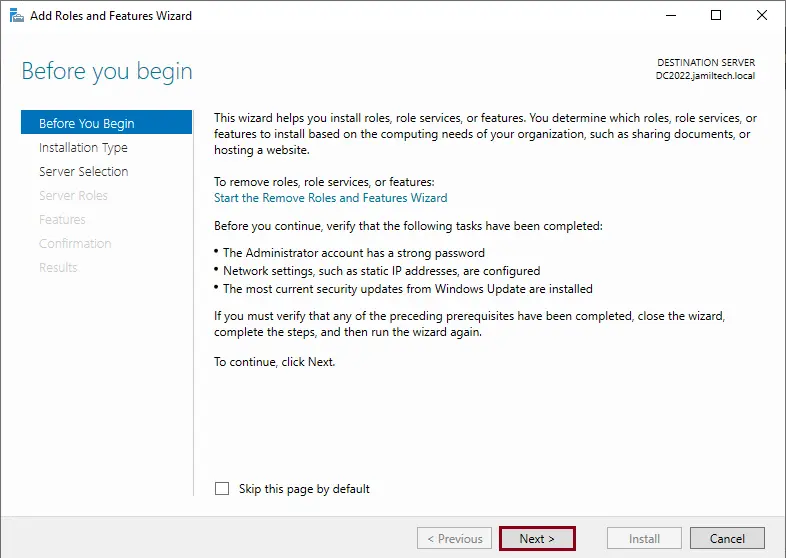
Before you begin the window, verify that your destination system and network environment are ready for the role and feature you wish to install. Click Next.
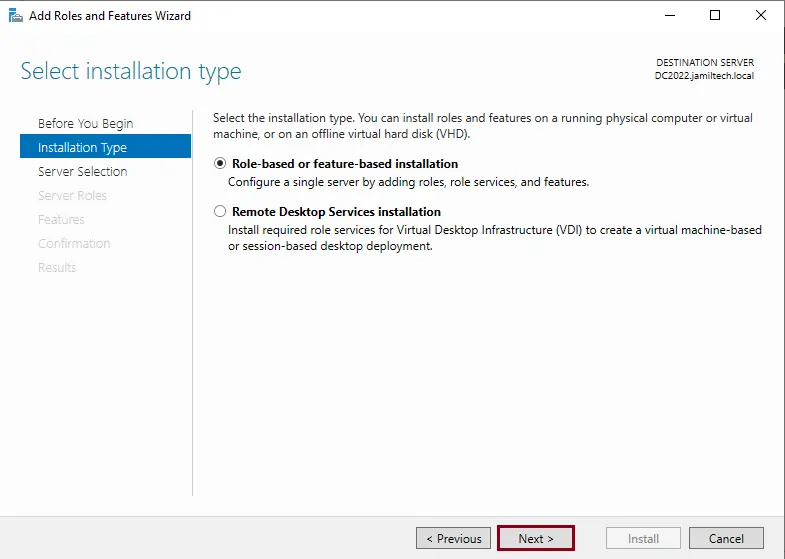
In the select installation type window, choose Role-based or feature-based installation, and then select Next.
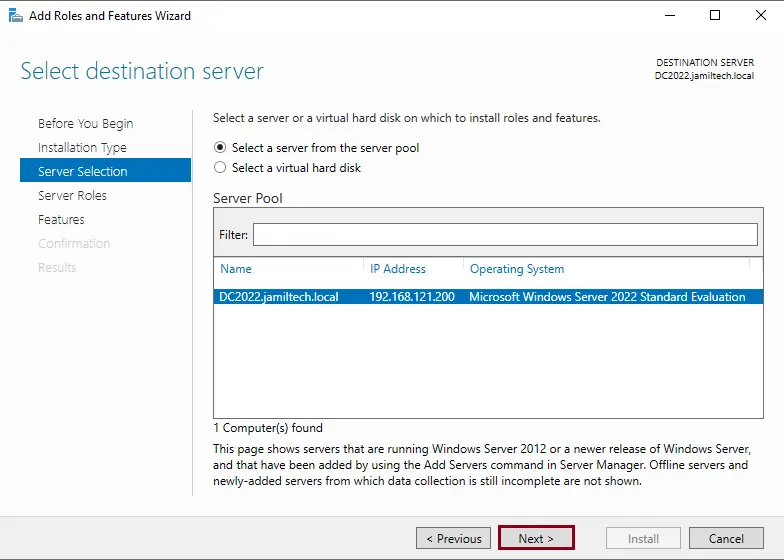
In the Select destination server window, select a server from the server pool and then select Next.
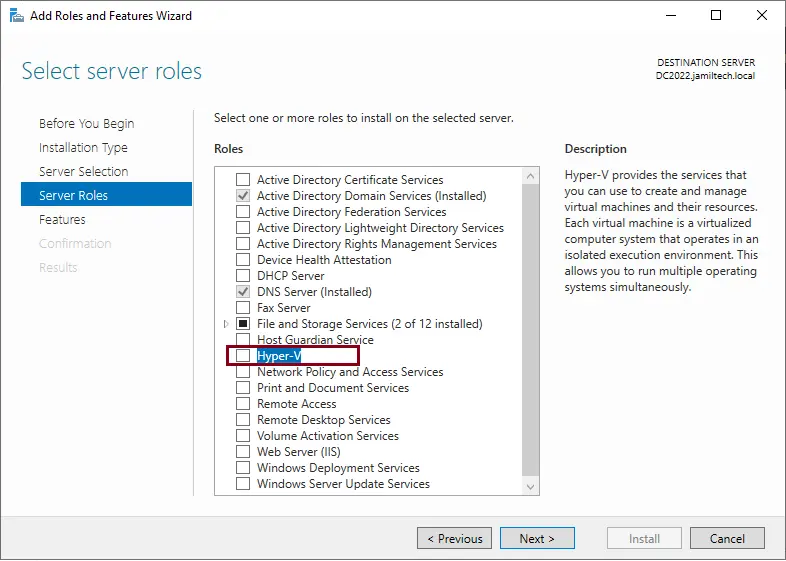
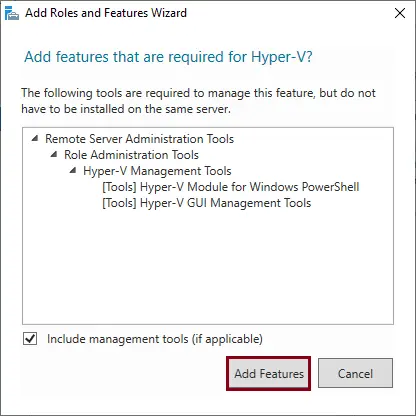
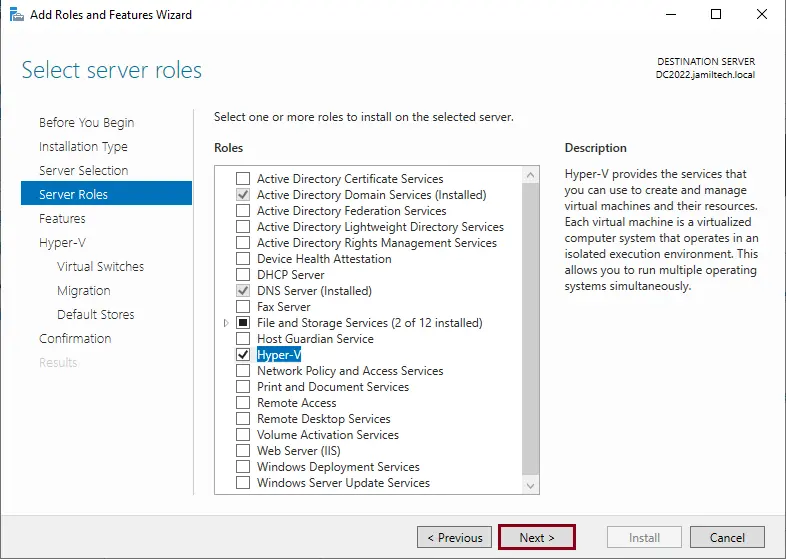
Select the Hyper-V role on the Select Server Roles window.
Click on Add Features.
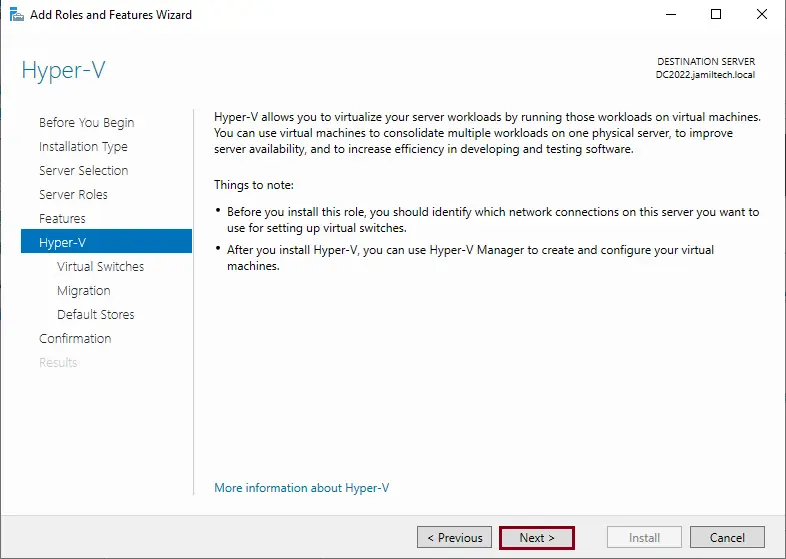
After enabling the Hyper-V role, click next.
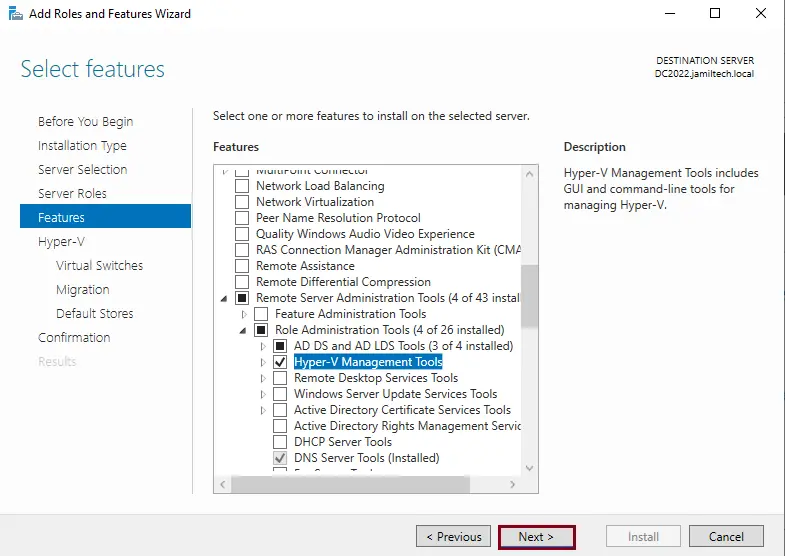
Enable the Hyper-V role, enable Hyper-V management tools, and then click Next.
Click Next
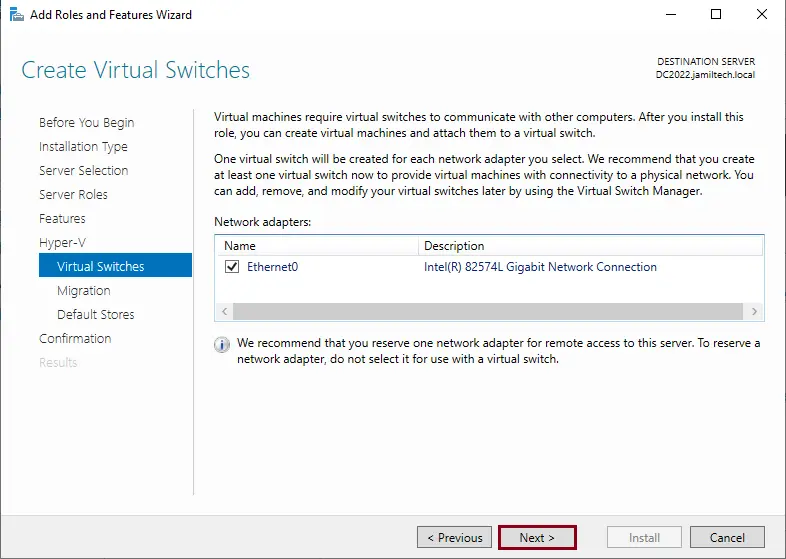
To host a Hyper-V virtual switch, choose a physical Ethernet adapter and then select Next.
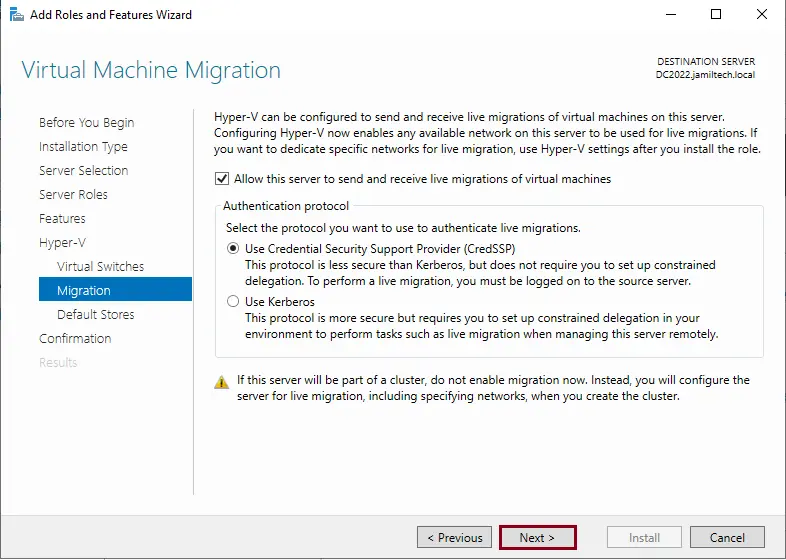
Install Hyper V on Windows. For the Live Migration security control, these options are shown only for shared-nothing live migrations and not clustered live migrations. Choose the required settings, and then choose Next. If required, we can change this option later.
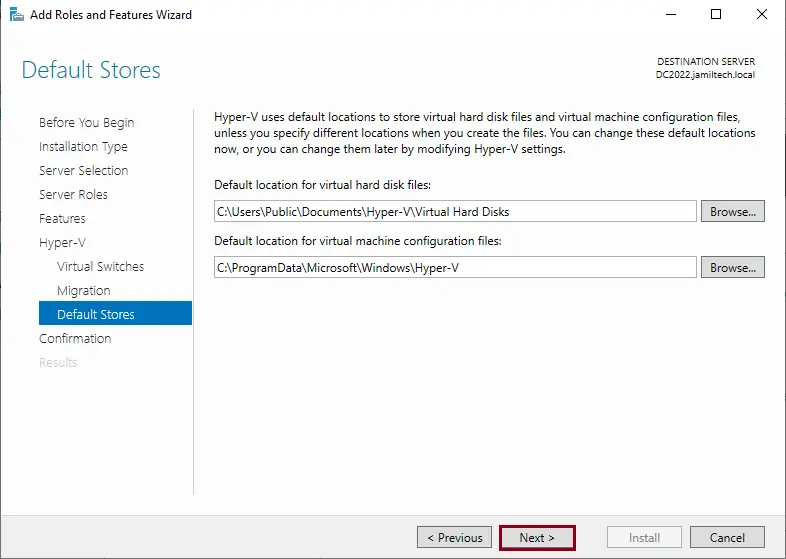
Select the storage directory for virtual machines and virtual hard drives, or leave it as the default path, and we can change it later. Choose Next
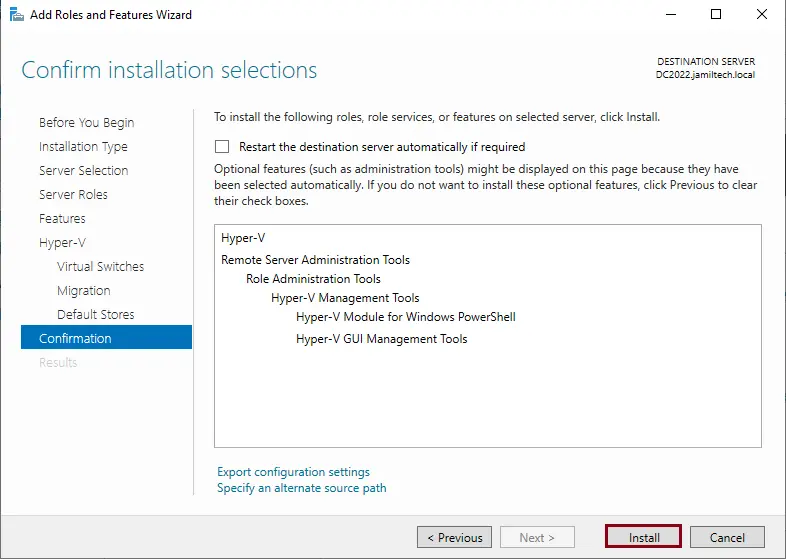
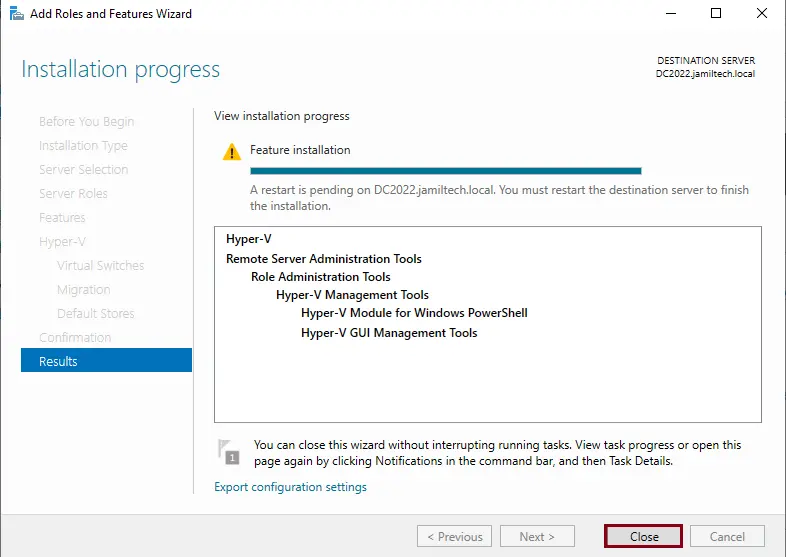
Enable the Hyper-V role, confirm the installation selection, and then click on Install.
Hyper-V roles are successfully done; click on the close button.
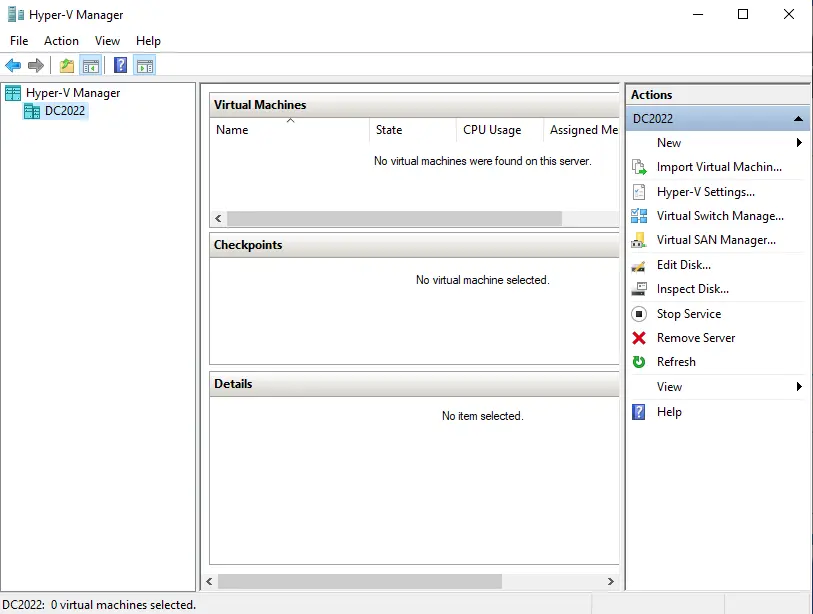
To manage hyper v, click on the Tools tab and then select the Hyper-V manager.

Hyper-V Manager
Visti Microsoft to learn about what is Hyper V

