In this article, we will teach you how to start or stop automatic maintenance in Windows 11. Windows Automatic Maintenance is a feature that combines different background tasks and runs them all at once at a particular time, usually 2 AM by default. Some of the WAM tasks are keeping the Windows operating system and applications up-to-date, checking security, and running scans for malware.
If the default time of 2 AM doesn’t work for you, Windows lets you change WAM schedules and shows you a list of all device tasks. You can also start and stop Windows Automatic Maintenance on your own at any time.
Table of Contents
Manually Start or Stop Automatic Maintenance via Command Prompt
To start or stop Windows Automatic Maintenance, use the command prompt or PowerShell.
To do that, first, open the command prompt or PowerShell.
When the CMD app opens, run the following command to start or stop WAM.
Start Windows Automatic Maintenance
MSchedExe.exe Start
Stop Windows Automatic Maintenance
MSchedExe.exe Stop
Start or Stop Windows Automatic Maintenance
As mentioned above, users can manually start or stop Windows automatic maintenance (WAM) anytime without waiting for its default scheduled time.
Open the control panel, go to Control Panel, System and Security, Security and Maintenance, and Automatic Maintenance.
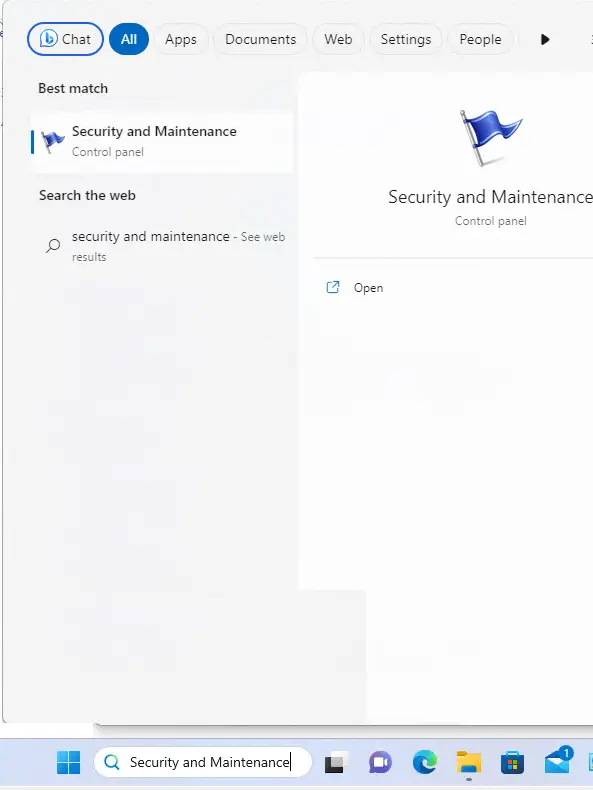
Or search for security and maintenance and open it.

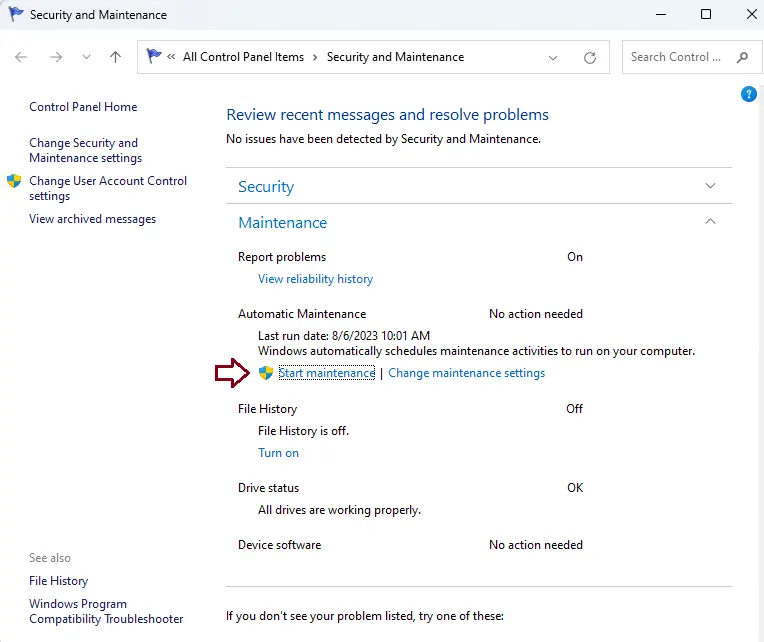
On the security and maintenance settings window, under automatic maintenance, click the Start maintenance link to start WAM manually. You will see the Start Maintenance Link if Windows Automatic Maintenance isn’t running.

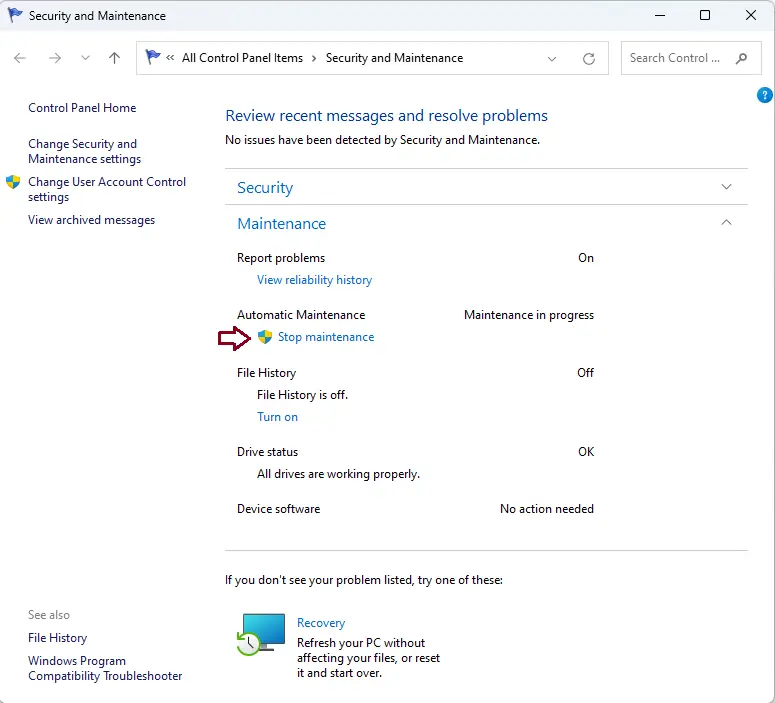
If the automatic maintenance is running, you will see the Stop maintenance link. To disable Windows Automatic Maintenance, choose the Stop Maintenance link highlighted below.

Once you are done, close the control panel.
Conclusion
This article shows you how to start or stop Windows Automatic Maintenance in Windows 11.
Refer to this article for more information about enabling and disabling automatic maintenance in Windows 11.


