
In this article, we will teach you how to use iCloud on Windows 11. With the release of its apps and services, Apple has begun to take the Windows ecosystem seriously. Apple’s media apps, including Apple Music and Apple TV, are downloadable from the Microsoft Store. Additionally, you can access your iCloud account directly from the File Explorer app. Here is how to setup and use iCloud on Windows 11.
On Windows 11, accessing your iCloud folders and data is no longer burdensome. Apple now offers a native iCloud app for Windows that integrates securely with the File Explorer app. Additionally, you may use the newly redesigned iCloud web interface, which combines emails, notes, reminders, photos, and all folders.
If you have an iPhone or iPad but a Windows PC instead of a Mac, synchronizing your data across devices can appear daunting. In terms of compatibility, the two platforms are not exactly chummy with one another. In fact, Apple is renowned for maintaining exclusivity.
However, some of these are misconceptions. On a Windows PC, it is simple to manage your iCloud account and all its data. Although you can view your iCloud data on your PC by visiting icloud.com, Apple and Microsoft have created the iCloud Windows app for the optimal iCloud experience.
Table of Contents
Use iCloud on Windows
Download iCloud on Windows 11
Ensure that iCloud is configured on your iPhone or iPad and that you are signed in with your Apple ID before you download the app. The iCloud app for Windows 11 is available for installation from the Microsoft Store.
Open the Microsoft Store and search for iCloud. Then, click the Get button to download and install iCloud.

Run the app after it installs. It may take a few seconds to set up the first time.

Sign into iCloud with your Apple ID. If you enabled two-factor authentication, you would need to enter the code to complete the sign-in.

Enter the verification code.

Select the iCloud features you wish to use on Windows and choose Apply.

Downloading items for iCloud

Outlook has been set up for iCloud.

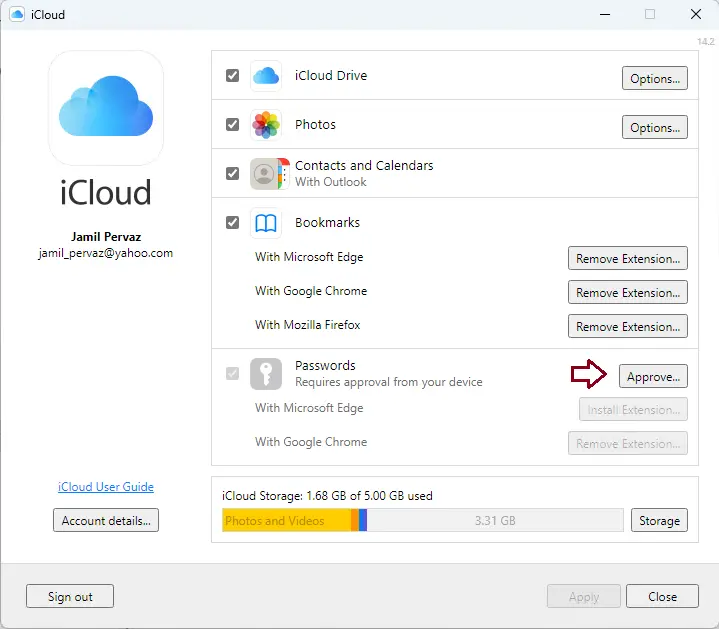
After logging in, a prompt will appear asking if you want to submit Apple diagnostic and usage data. Choose between automatically send and don’t send. And whatever you select can be modified later via the settings.

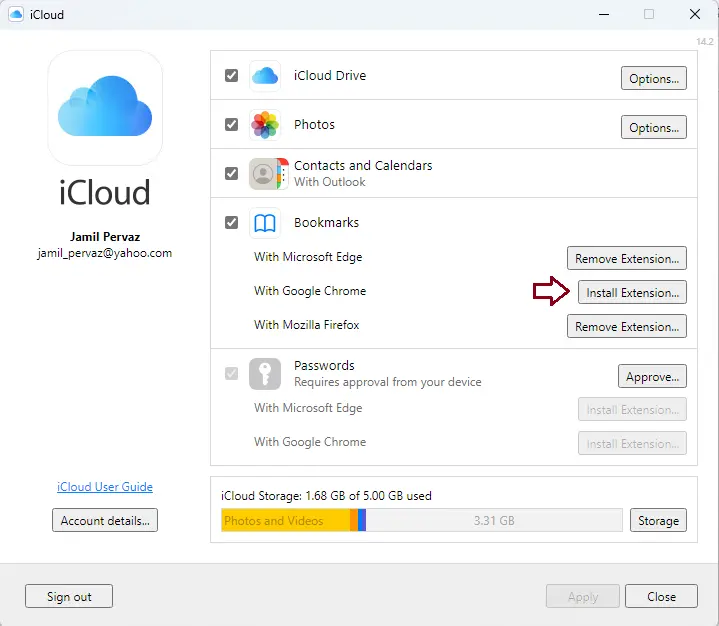
For photos and bookmarks, you can also configure further options. Choose the Options button next to each.

Additional options for photos include whether to use iCloud Photos and Shared Albums on your PC. You can also modify the folder location for shared albums.

You have the option to choose which browser to use for bookmarks. The bookmarks from your selected browser will appear on your iOS device, and the bookmarks from your iOS device will be synchronized with your PC browser. It displays your default browser by default. You may also select an alternative browser. Install extensions if not installed.
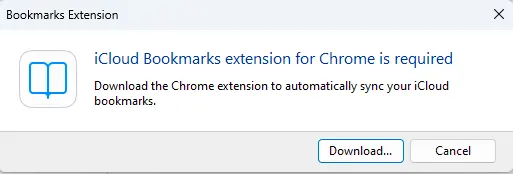
Click the Download button to download it. If you already have the extension installed on your browser, you won’t get this message.
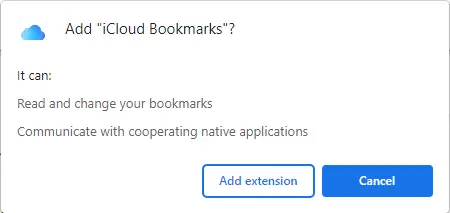
Click on Add to Chrome.

Click Add Extension.
Using iCloud Photos
If you select the Photos option during the iCloud setup process, iCloud will create a ‘iCloud Photos’ folder in the File Explorer. Using iCloud Photos, you can upload photos and videos from your PC to iCloud and view them on your Apple devices.
To upload photos from your PC, launch File Explorer and navigate to the iCloud Photos folder. Then, drag and drop the desired images into the folder. You must have iCloud Photos on your Apple device in order to view them there. Otherwise, your uploaded photos will be accessible on iCloud.com.
Similarly, if iCloud Photos is enabled on your Apple device, all new photos and videos you capture on your device will be accessible on your PC. You can either store them locally on the device or in the cloud to conserve storage space. The cloud-based photos will have a ‘cloud’ icon next to their names.
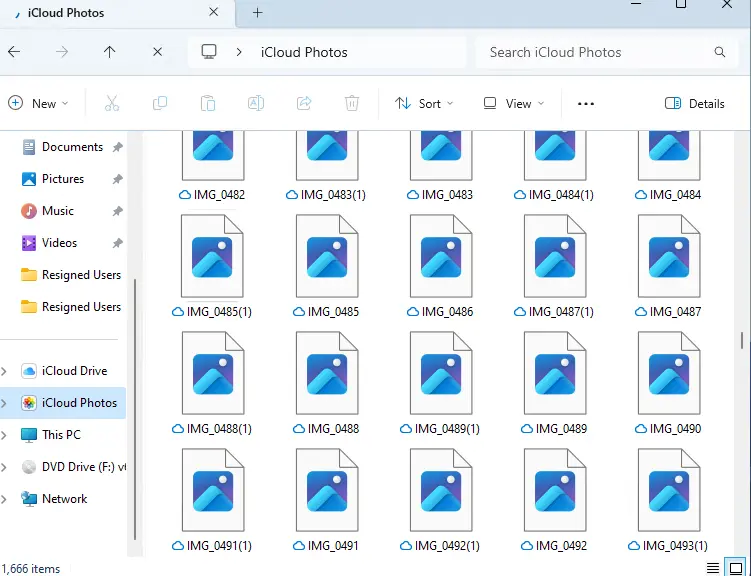
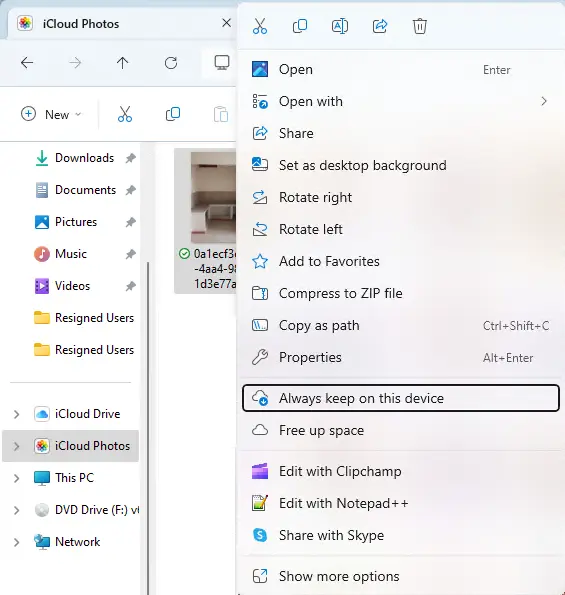
Double-click the thumbnail to download a photo. The status of downloaded images will be indicated by a white ‘tick’ icon on a white background.

You can also permanently save downloaded images on your computer. Select your preferred image(s) and right-click it. Choose ‘Always keep on this device’ from the context menu.
Using Shared Albums
Using iCloud for Windows 11, you can also share photos. The default location for the shared album folder is C:\Users\username\Pictures\iCloud Photos\Shared. If you do not alter its location during setup, it will be shared.
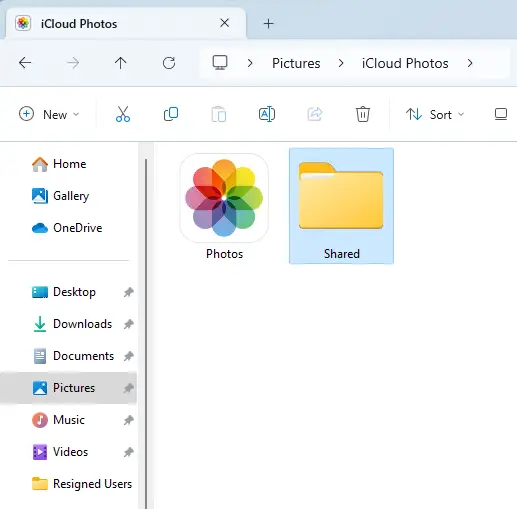
Shared Photos must be enabled on your Apple device for photos to appear on your computer. You can examine and share your photos and videos with others using shared albums. You can also like and comment on the photos and videos you share and receive.
How to Use iCloud Drive
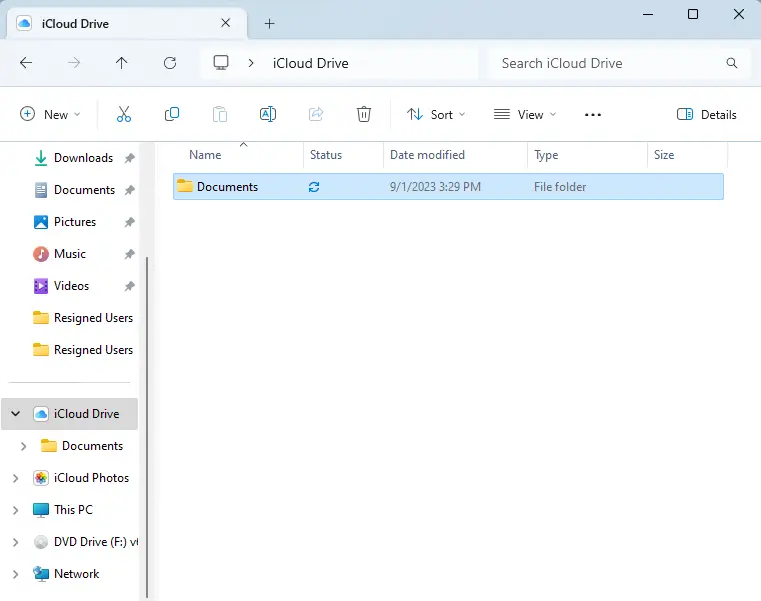
If iCloud Drive is enabled, a folder for it will be created in File Explorer. The iCloud Drive folder contains all the documents you’ve stored on your Apple device, organized in their respective folders.
On your computer, you can view and download these documents. There will be a ‘Cloud’ icon next to cloud-stored documents.
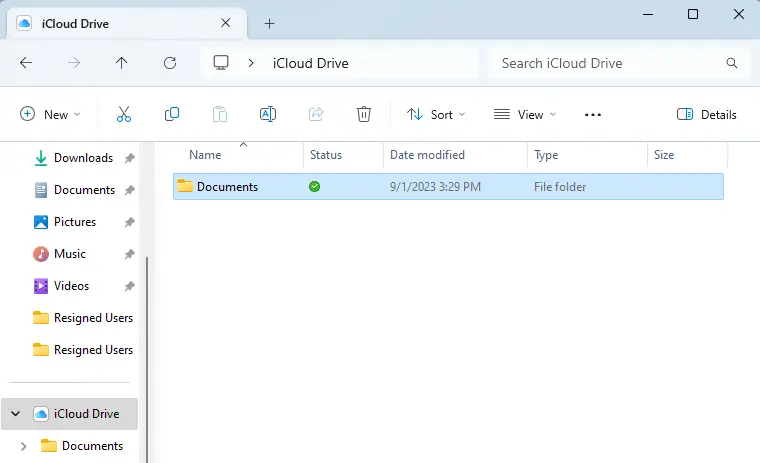
To download documents that are stored in the cloud, double-click the document. A white checkmark will appear next to downloaded documents to signify their status. You can retain them temporarily or permanently on your device, or you can send them back to the cloud.
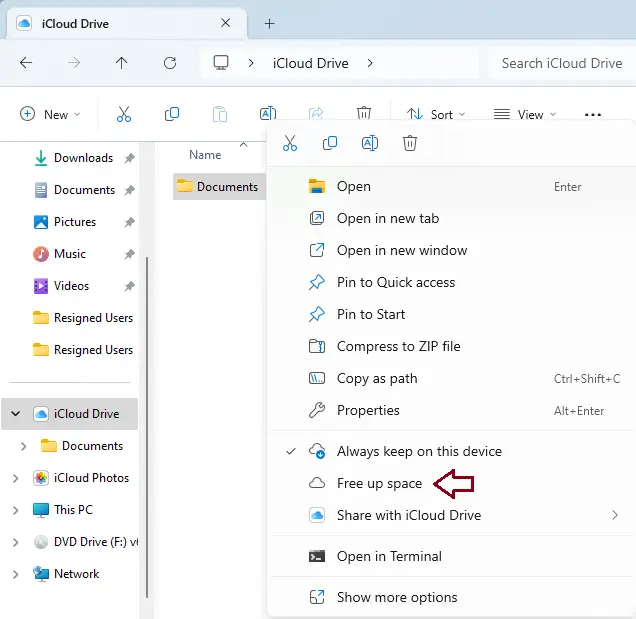
To permanently save a document, right-click it and select “Always keep on this device.”

Permanent files will be marked with a green checkmark. Uncheck the option ‘Always keep on this device’ from the right-click menu to store them on the device indefinitely but not permanently.
To delete the documents from the computer and keep them only in the cloud, right-click and choose Free Up Space.
Using iCloud for Windows, you can also upload documents. Any folders or files you create on the PC will appear on your other Apple devices automatically.
Share Folders with iCloud Drive
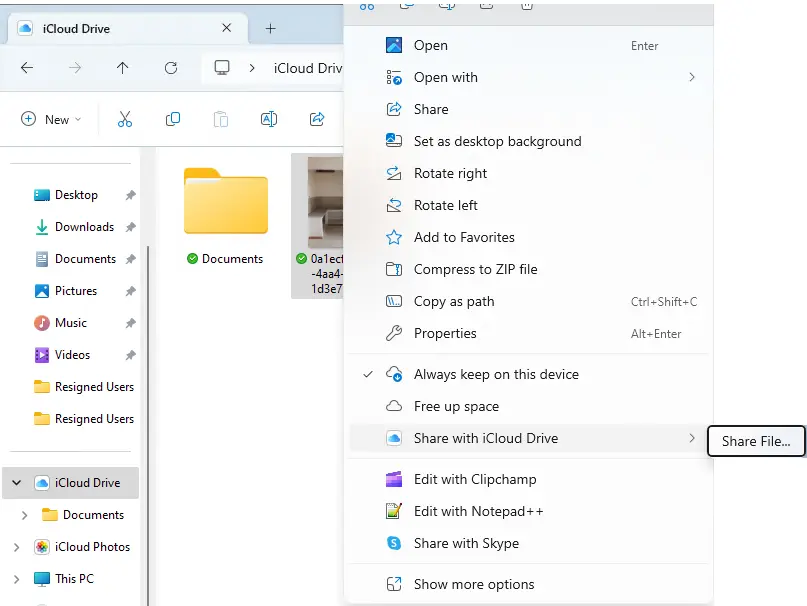
Using iCloud for Windows 11, it is possible to share files and folders with other users. Using iCloud Drive to share files and folders enables collaboration with other users.
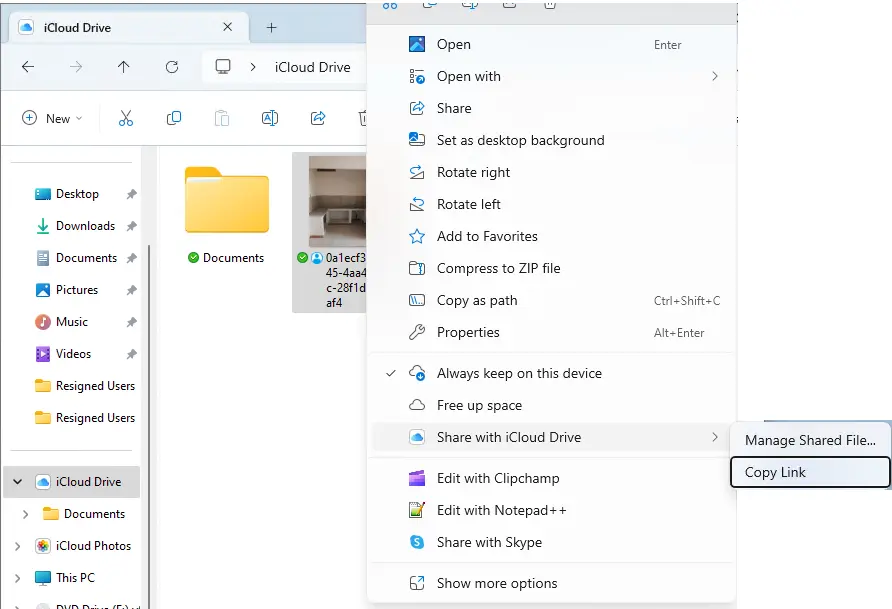
To share a file or a folder containing a group of files, right-click on it. Choose “Share with iCloud” and click the Share File.
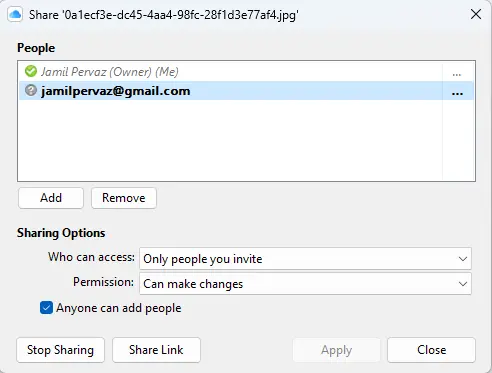
The iCloud Sharing window will appear.
Under ‘Sharing Options,’ you can determine who has access to your documents (people you invite or anyone with a link) and the extent of access they have (whether they can only view or edit).
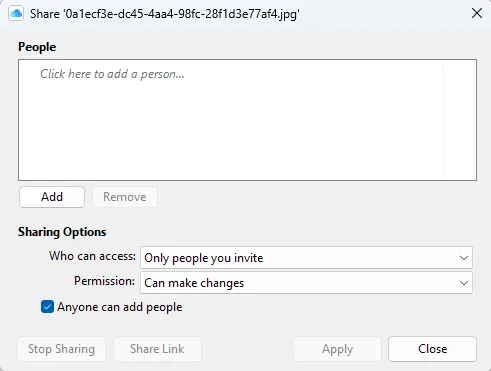
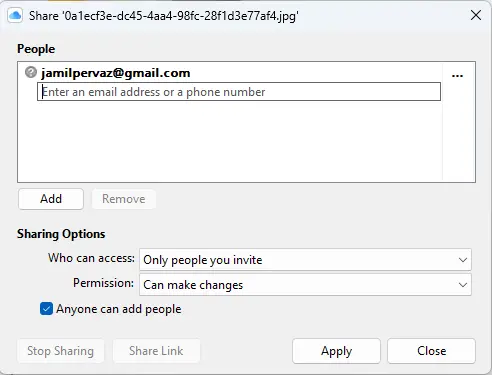
If you have selected “Only people you invite”, then you need to invite people. Add the email address of the users with whom you need to share the documents under People.
Just right-click on the file, choose Share with iCloud Drive, and select Copy Link.
Additionally, the permission level can be specified differently for each participant. Click the permission button next to each participant’s name on the participants’ list. Then, you can select permissions that differ from those applied to the entire document.
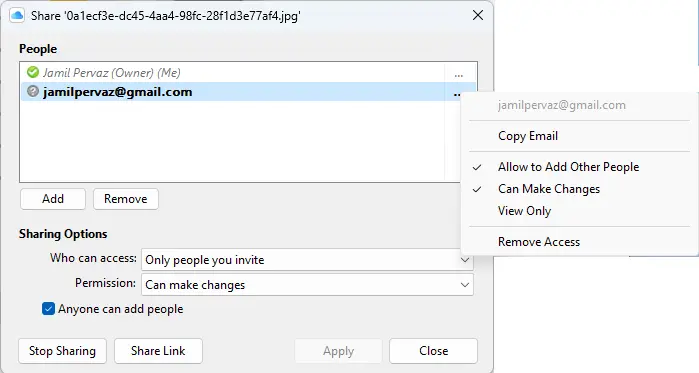
To remove someone’s access, select the people you wish to remove and click Remove.
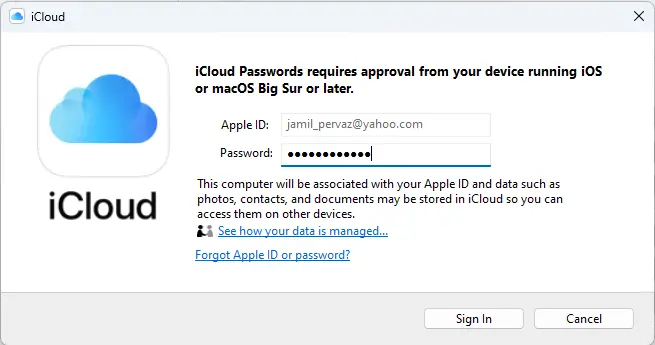
Using Passwords with iCloud
Even if you enabled passwords during setup and downloaded the iCloud Passwords browser extension, you must still approve iCloud Passwords on an Apple device before using it on a Windows computer.

To enable iCloud passwords for your Windows PC, you need an iPhone or iPad, or a Mac running macOS BigSur or later.
Open iCloud on your Windows 11 and select the Approve button next to Passwords.
Sign in using your Apple ID.
To authorize the sign-in, you must input the code sent to your Apple device. After entering the code, iCloud passwords will be validated.

When you need to autofill a password, choose the extension icon.

