In this guide, we’ll walk through the process of converting a physical machine into a virtual machine (VM) using VMware vCenter Converter Standalone. This tool is particularly useful for IT professionals looking to manage and migrate physical systems into virtual environments.
Table of Contents
VMware, a leader in software development for creating and managing virtual machines, provides free applications that are very useful to help IT professionals manage virtual machines in their work environments. One of these is a VMware vCenter Converter, a free tool mainly useful for converting physical computers into virtual machines, but this converter can also be used to reconfigure existing virtual machines.
Step 1: Install VMware vCenter Converter
- Download and Install:
- Download VMware vCenter Converter Standalone from VMware’s official website.
- Follow the installation wizard to complete the setup.
- Launch VMware Converter:
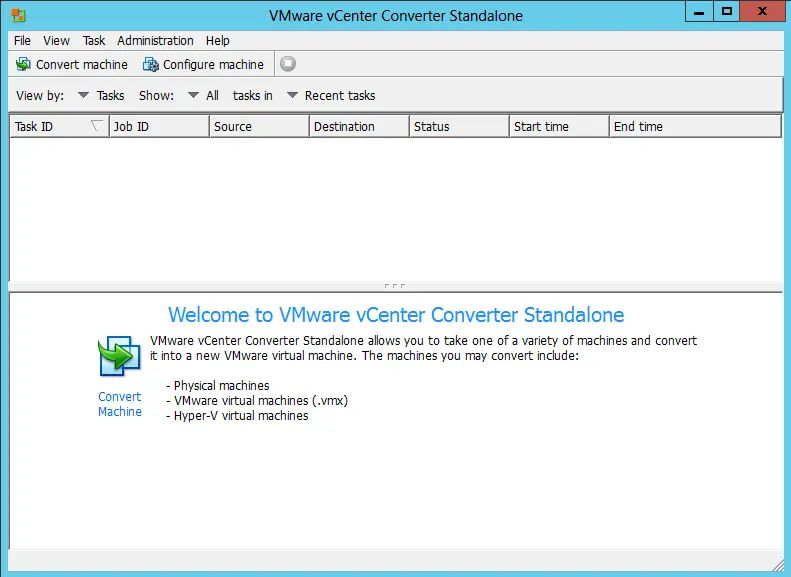
After installation, double-click the VMware vCenter Converter Standalone shortcut on your desktop to launch the application.
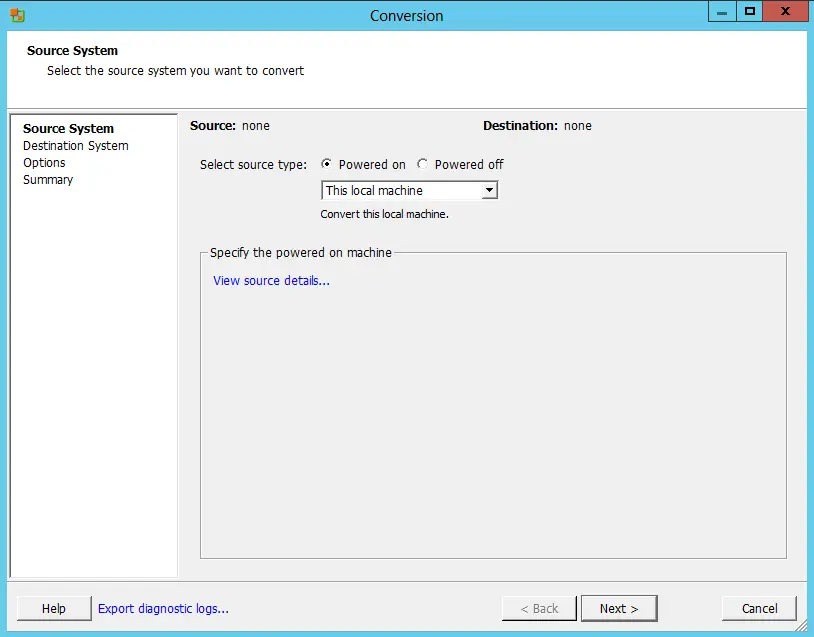
Tick source type Powered on, and then choose this local machine.
Click Next.
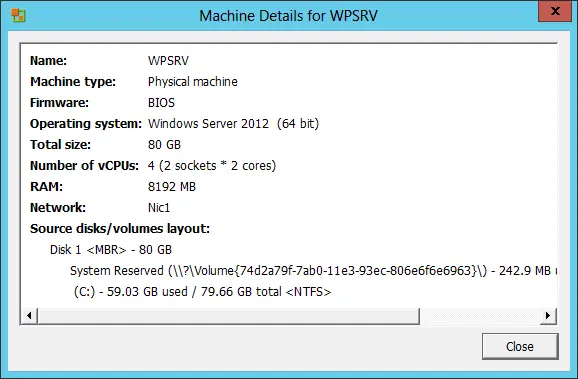
For machine details, click close.
Step 2: Start the Conversion Process
- Click “Convert Machine”:
- On the main interface of the VMware Converter, click Convert Machine to begin the conversion process.
- Choose Source Type:
- Select Powered on as the source type (since the physical computer is running), and choose This local machine to indicate you are converting the machine you are currently using.
- Click Next.
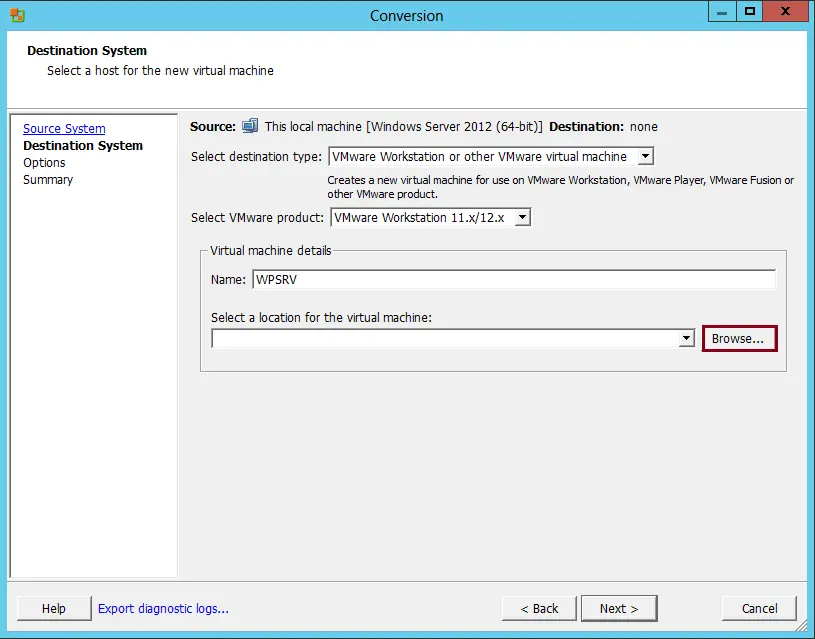
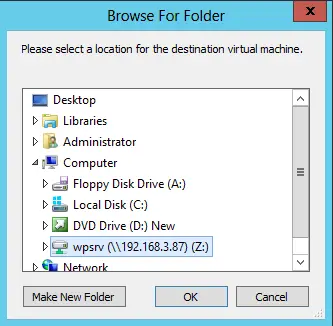
Select a folder where you want to save the virtual machine, and then click save.
Click next.
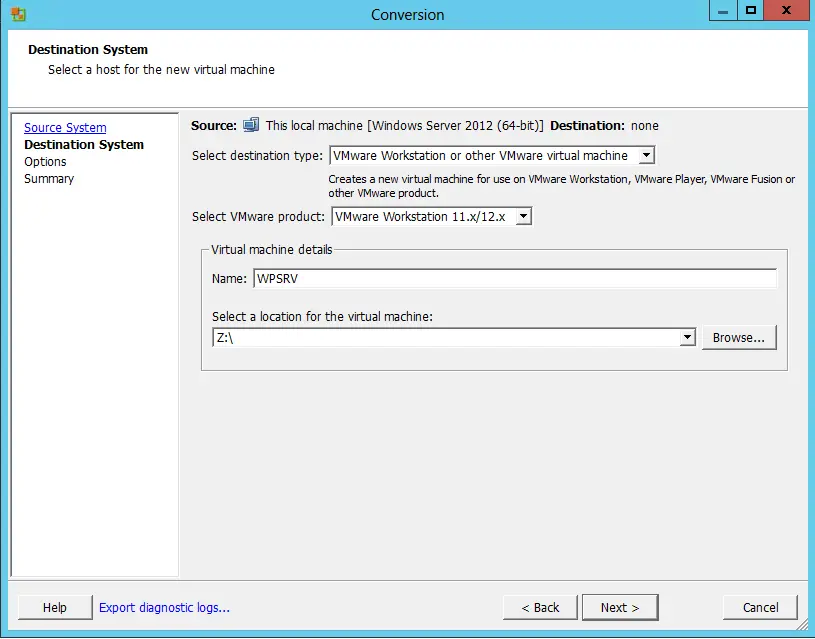
Step 3: Specify Destination for the Virtual Machine
- Select Destination Type:
- Choose VMware Workstation as the destination type. This indicates that the virtual machine will be created to run in VMware Workstation, VMware Fusion, or VMware Player.
- Provide Virtual Machine Details:
- Enter a name for the virtual machine (e.g., “MyVM”).
- Choose the location where the virtual machine files will be stored by clicking Browse and selecting the appropriate folder.
- Click Next.
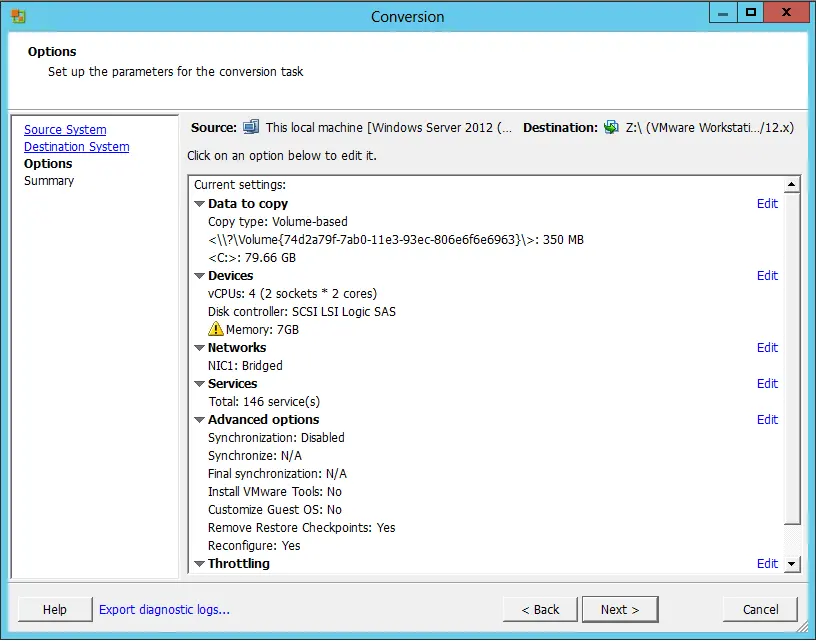
Step 4: Configure Virtual Machine Settings
- Edit Virtual Machine Parameters:
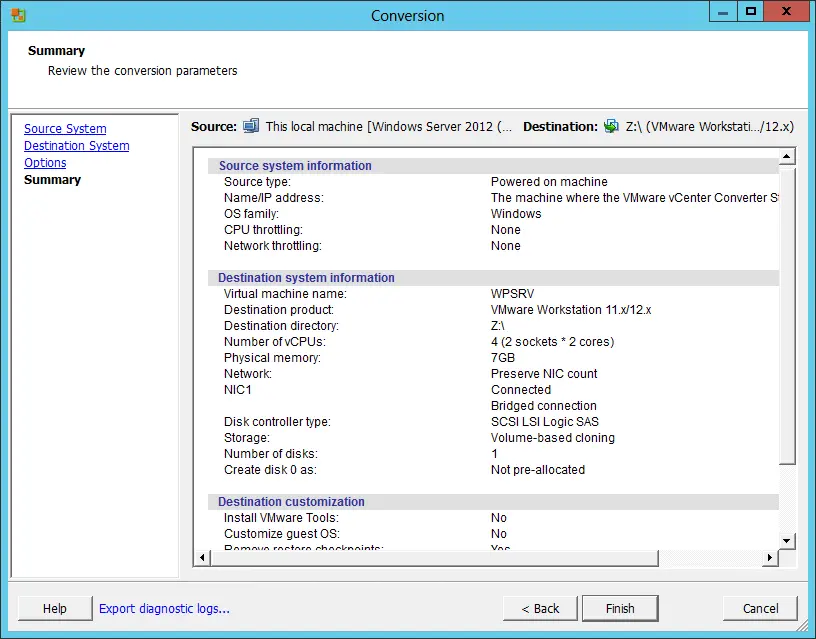
- Adjust the virtual machine settings such as CPU, memory, and disk allocation. You can tailor these settings based on the resources available on the target machine where the VM will run.
- Review Settings:
- Once all parameters are set, review the conversion summary to ensure all settings are correct.
- Start Conversion:
Click Finish to begin the conversion process. The conversion may take some time depending on the size of the physical computer’s data.
Step 5: Verify Conversion and Transfer Virtual Machine
- Check Conversion Output:
- After the conversion process is complete, navigate to the folder where the virtual machine files were saved.
- You should see two key files: the .vmx file (which contains the configuration of the virtual machine) and the .vmdk file (which contains the virtual disk).
- Transfer the Virtual Machine:
- If needed, disconnect your external hard drive (where the converted virtual machine is stored) and connect it to the system where your VMware product (Workstation, Fusion, or Player) is installed.
- Open the Virtual Machine:
Launch your VMware product and open the newly created virtual machine by navigating to the .vmx file.

Conclusion
By following these steps, you have successfully converted a physical computer into a virtual machine using VMware vCenter Converter. This virtual machine can now be used in VMware Workstation, Fusion, or Player for testing, backup, or migration purposes.

