
This article will detail all the steps required to upgrade vCenter Server Appliance 8.0 from VCSA 7.0 without any issues. Let’s have a look at the method to upgrade an existing vCenter Server (7.0 in my home lab) up to vCenter Server Appliance 8.0 If you are running vCenter Server Appliance (VCSA) 7 to 8. You must know that the upgrade isn’t an in-place upgrade. Rather, it is a new deployment of VCSA 7.0 with some copying of the old data to the new vCenter Server 8.0.
You aren’t obliged to upgrade if your hardware is not certified compatible with VMware vSphere 8.0 or if your software vendor has not released an upgrade for the software.
Table of Contents
VMware Compatibility Guide
The VMware Compatibility Guide is used when we wish to check which versions of VMware vSphere products are compatible with each other.
VMware vSphere 8.0 Release Notes
Click on the Release Notes to read about the new and enhanced features in VMware vSphere 8.0.
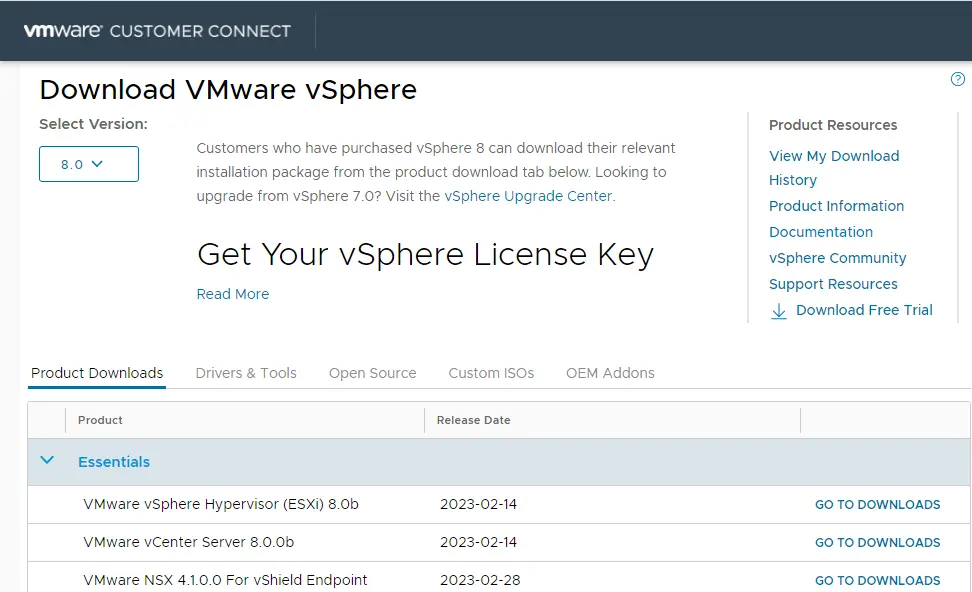
Download VMware vSphere 8.0
Download the VMware vSphere 8.0 ISO image from VMware if you have not downloaded the ISO image yet.
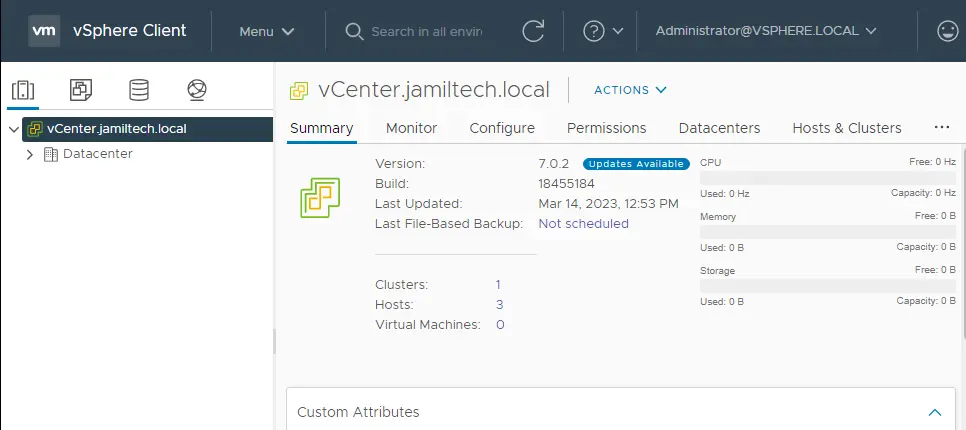
First, you need to check the current version of vCenter Server 7.
Upgrade VMware vCenter Server Appliance 7 to 8.0
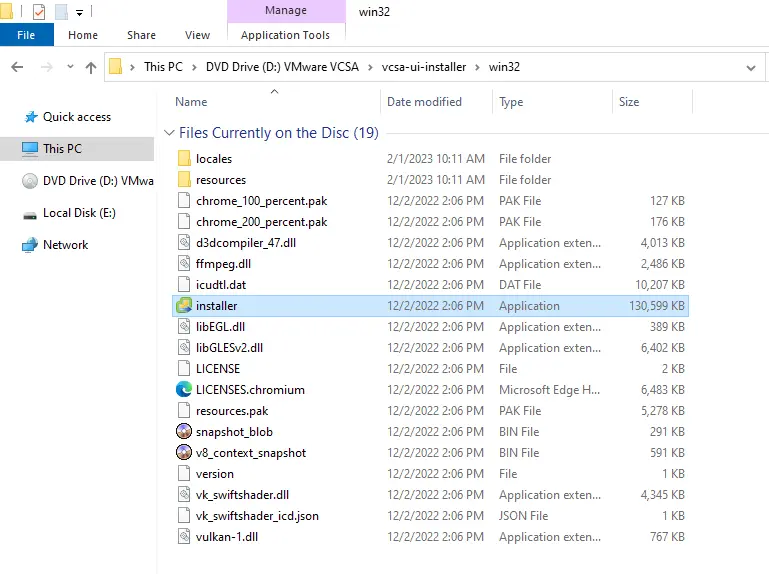
The name of the installation image is VMware-VCSA-all-8.0.0-21216066.iso. Mount the VCSA ISO to a virtual CD/DVD drive. Go to the D:\VMware VCSA\vcsa-ui-installer\win32\ directory and double-click on the installer.exe file.
vCenter Server 8.0 Installer, click on Upgrade.
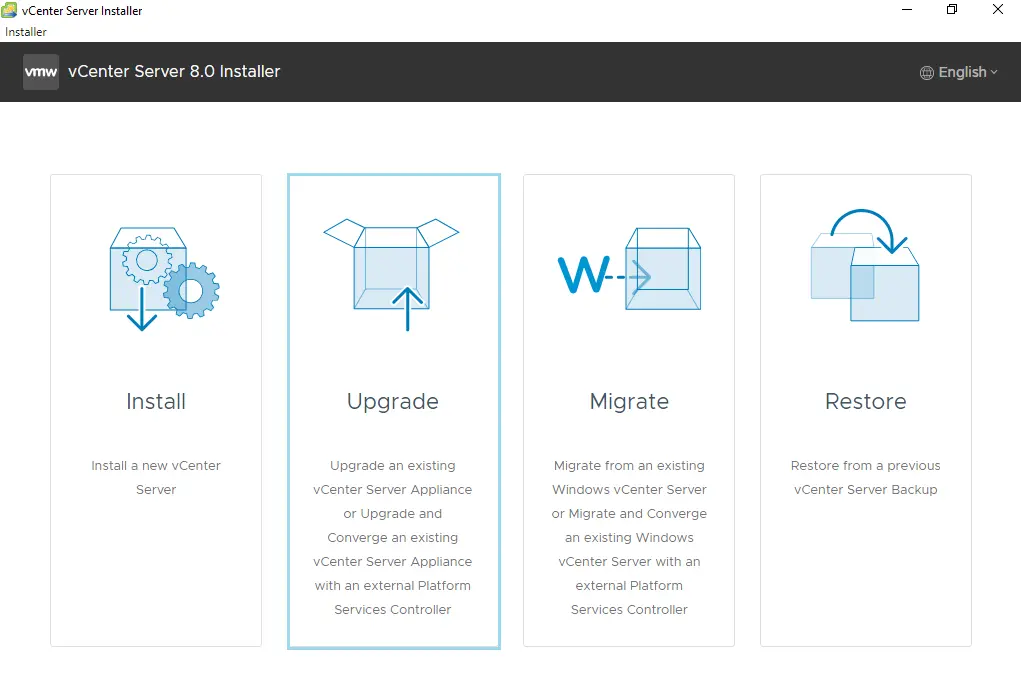
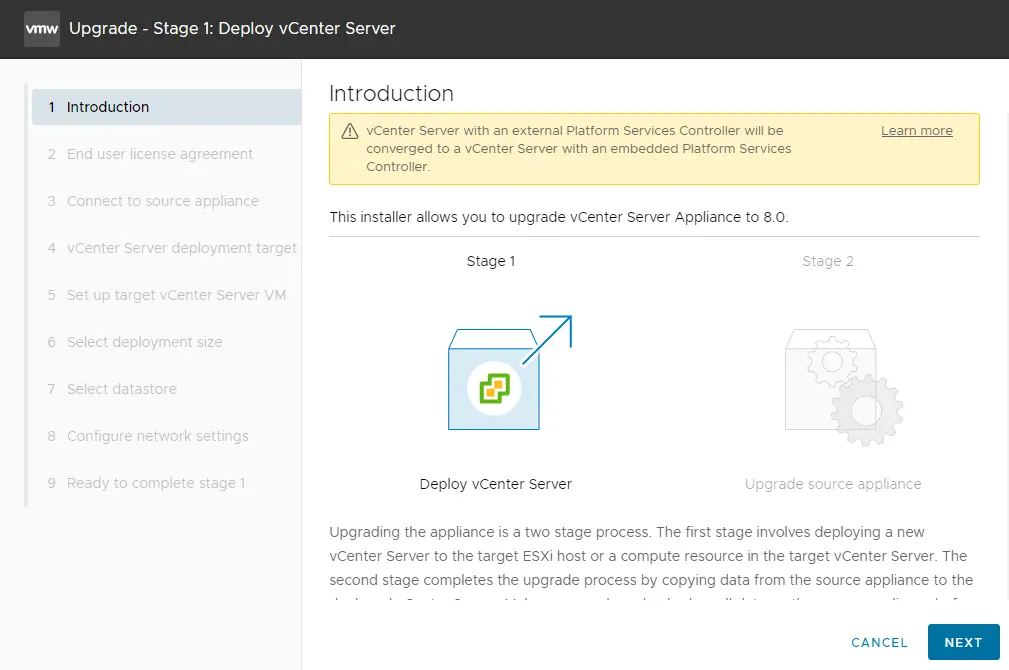
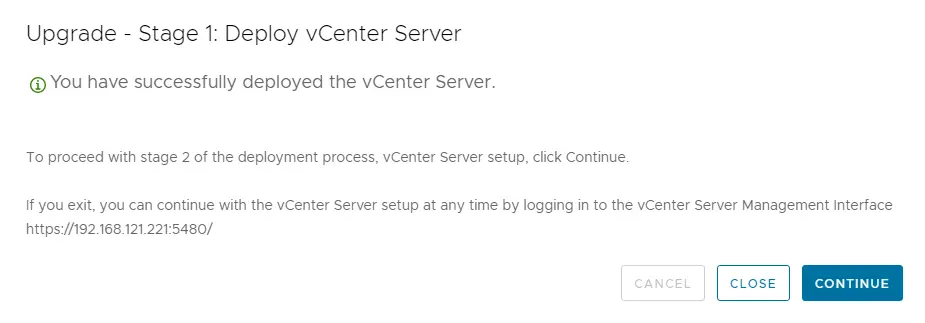
Upgrade – Stage 1: Deploy vCenter Server
In the Deploy vCenter Server process, the vCenter upgrade process consists of two stages, just like the installation process for a new vCenter instance.
Introduction settings, and click on Next.
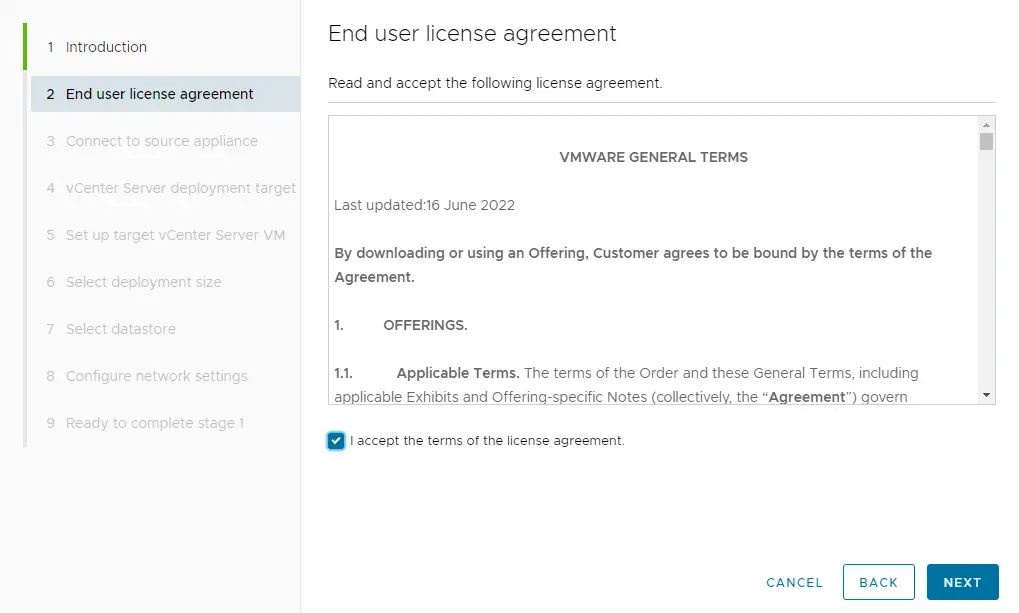
Accept the VMware license agreement, and then click Next.
Upgrade VMware vCenter Server to 8.0
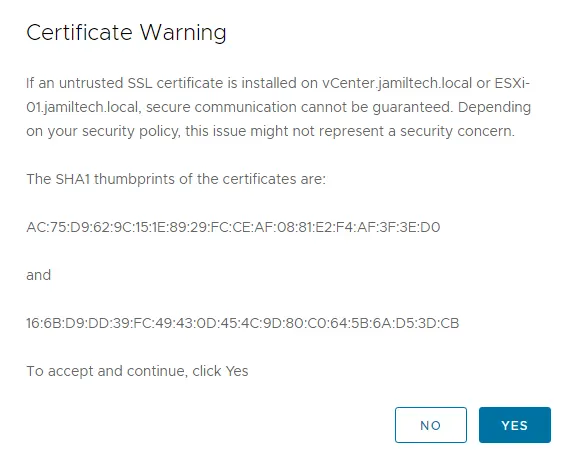
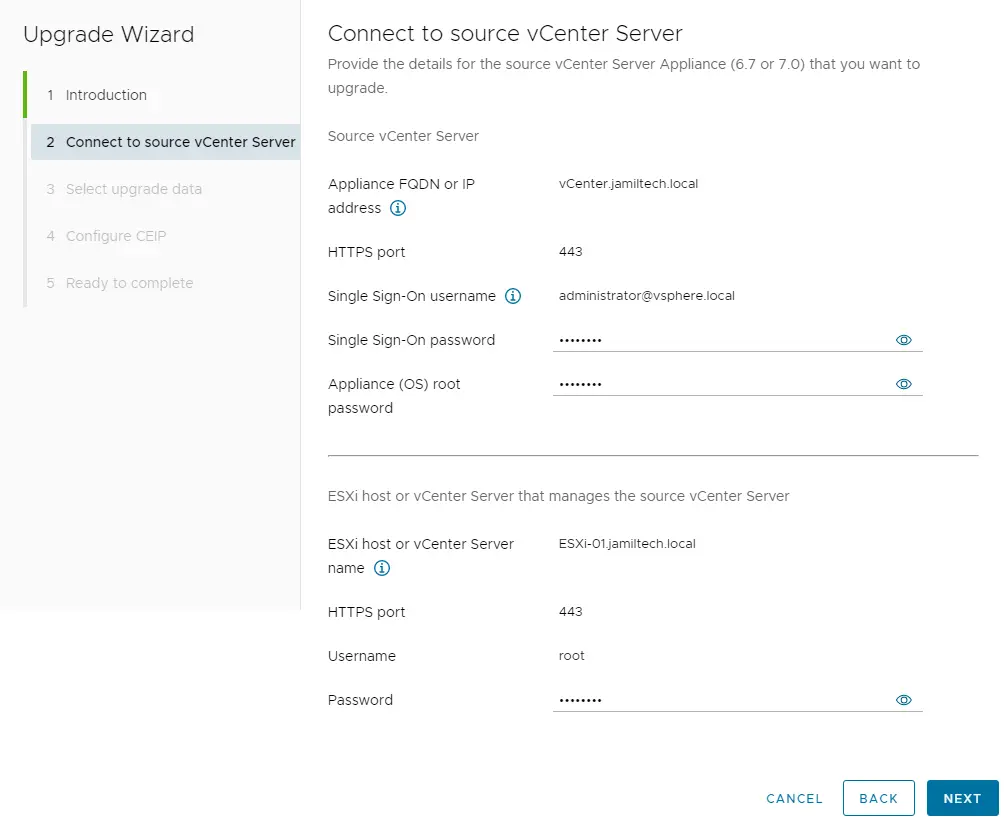
Connect to the source appliance and provide the IP address of the source vCenter Server Appliance (192.168.121.210 in this case) and the appliance’s HTTPS port (443 by default). Click on Connect to the source.
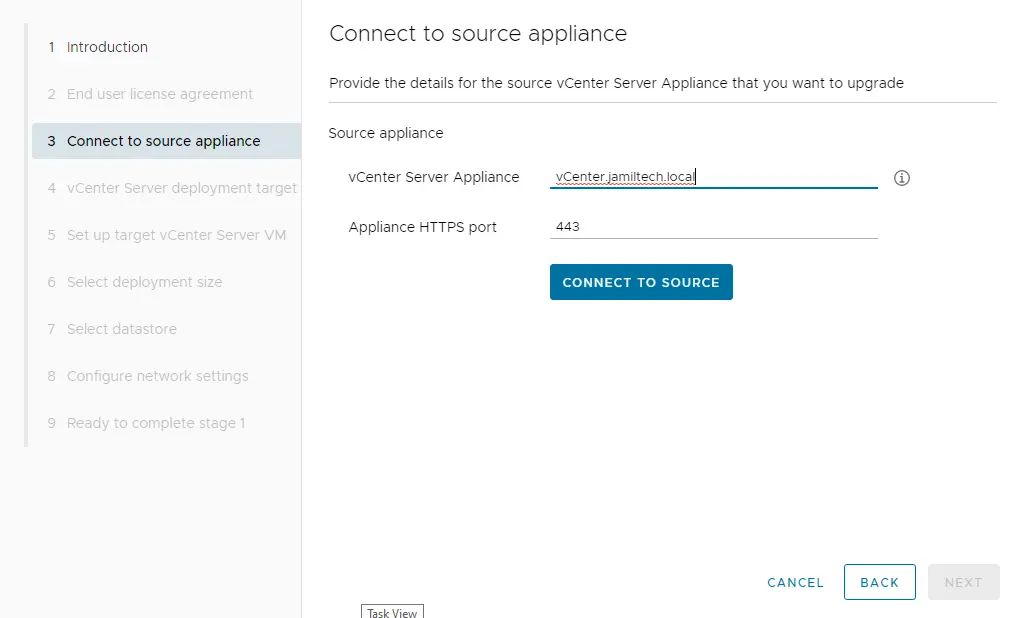
We are successfully connected to the source vCenter Server Appliance. Now provide the details for the vCenter server that you wish to upgrade. Click next.
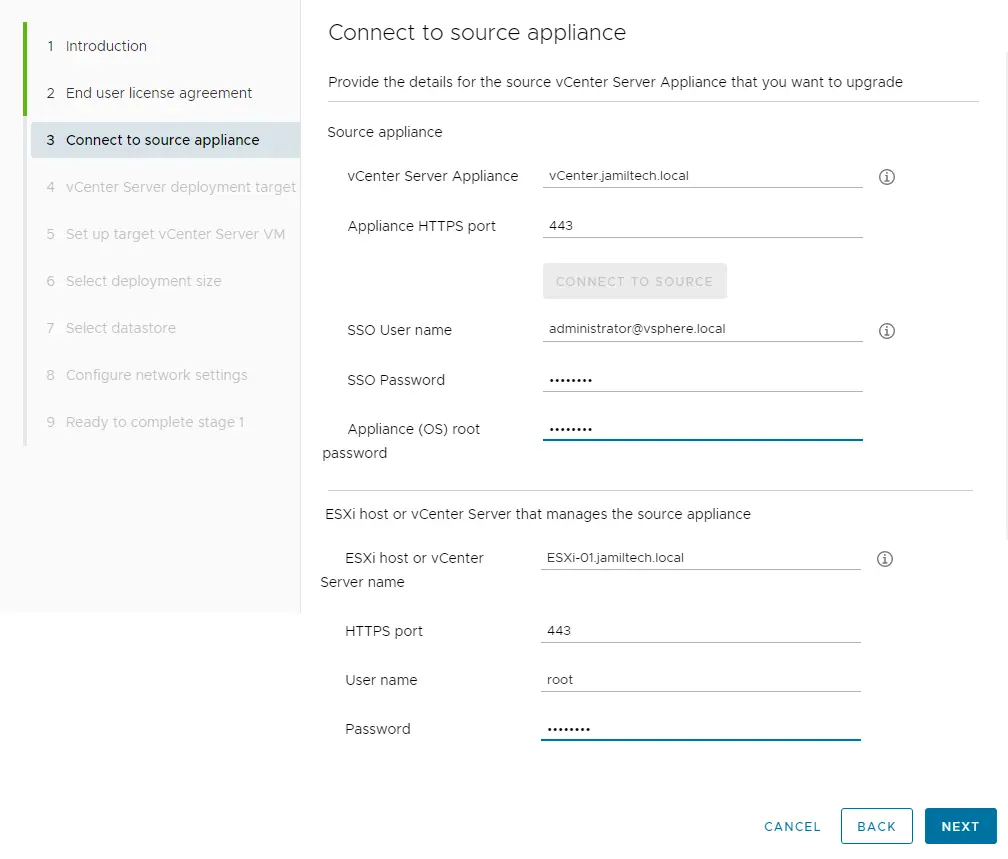
Choose yes to accept the SSL certificate warning.
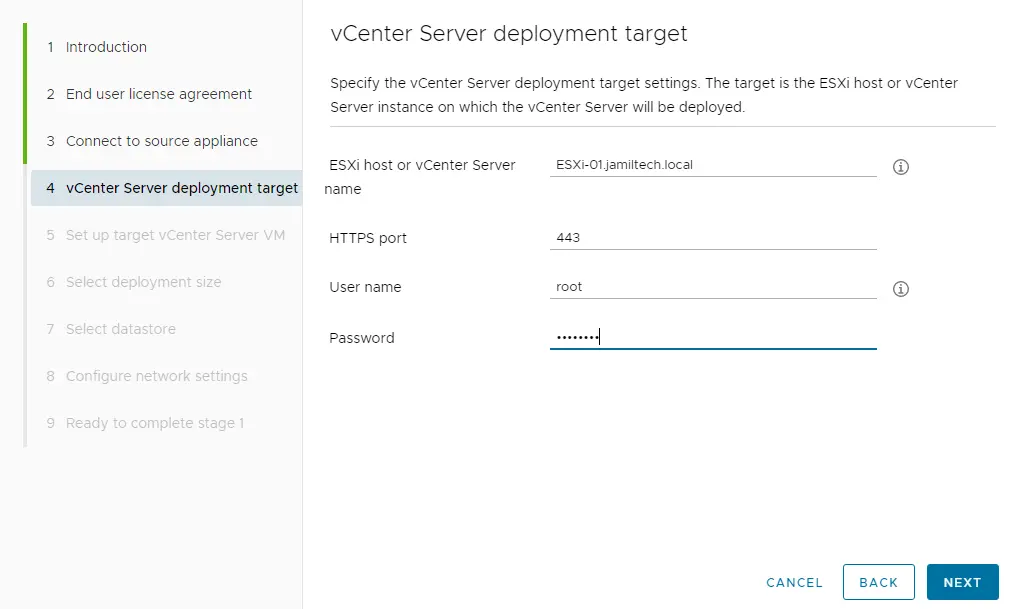
vCenter Server Deployment Target
Enter the IP address of the ESXi on which you want to run vCenter 8 after the upgrade, the port number, and the root password for this ESXi host.
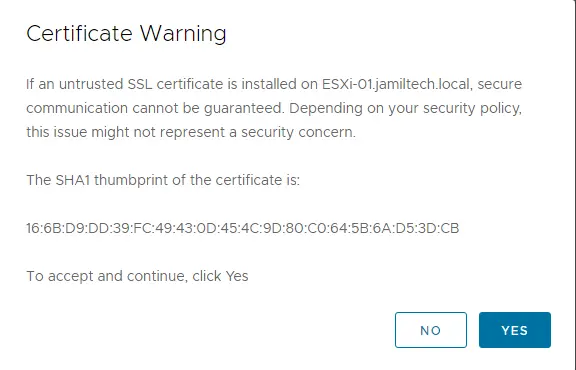
Click yes to accept the SSL certificate warning.
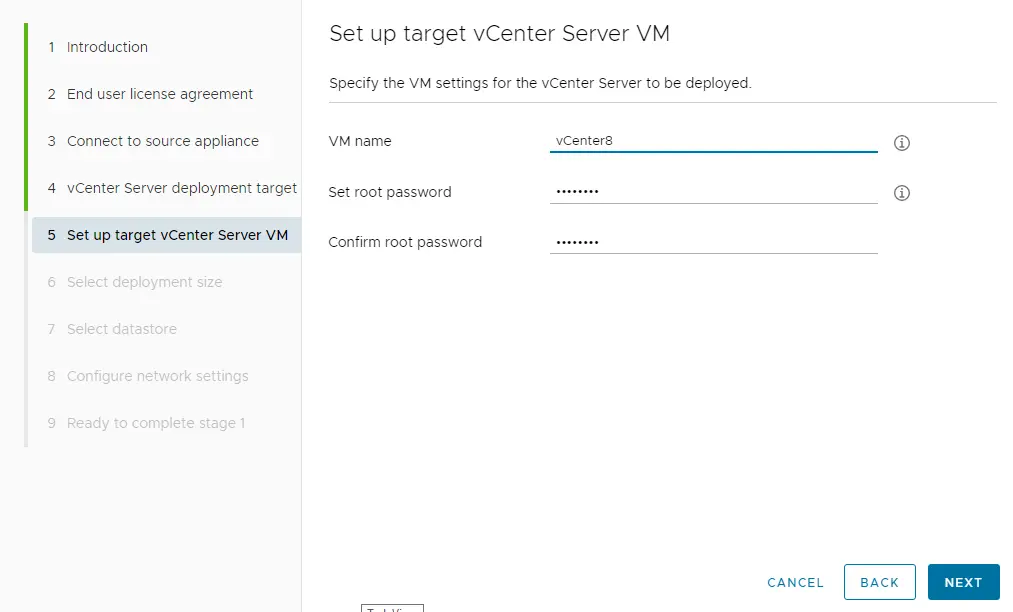
Set up the target vCenter appliance VM, enter the VM name and root password, and then choose next.
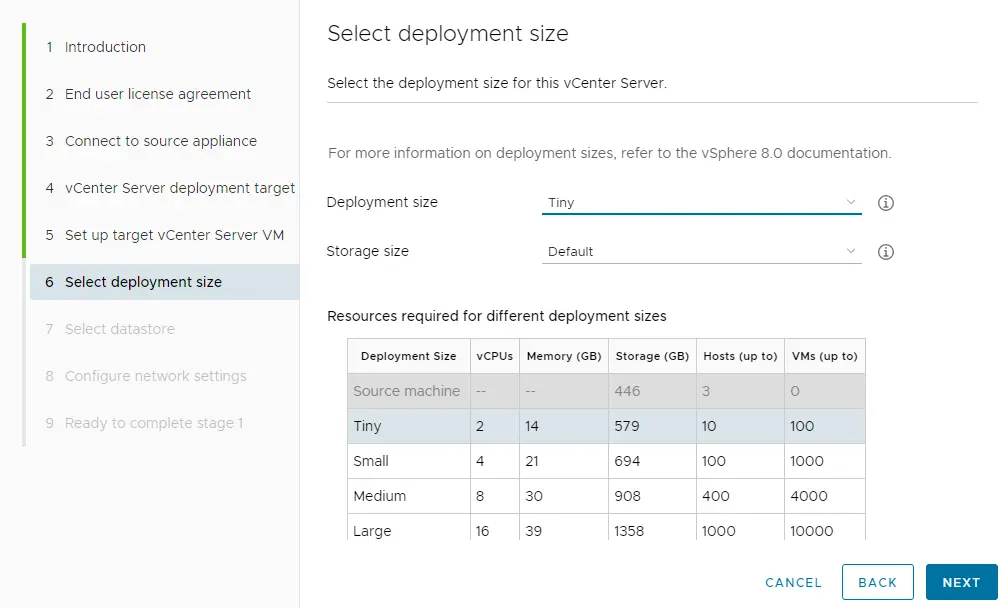
Specify the deployment size, and then choose next.
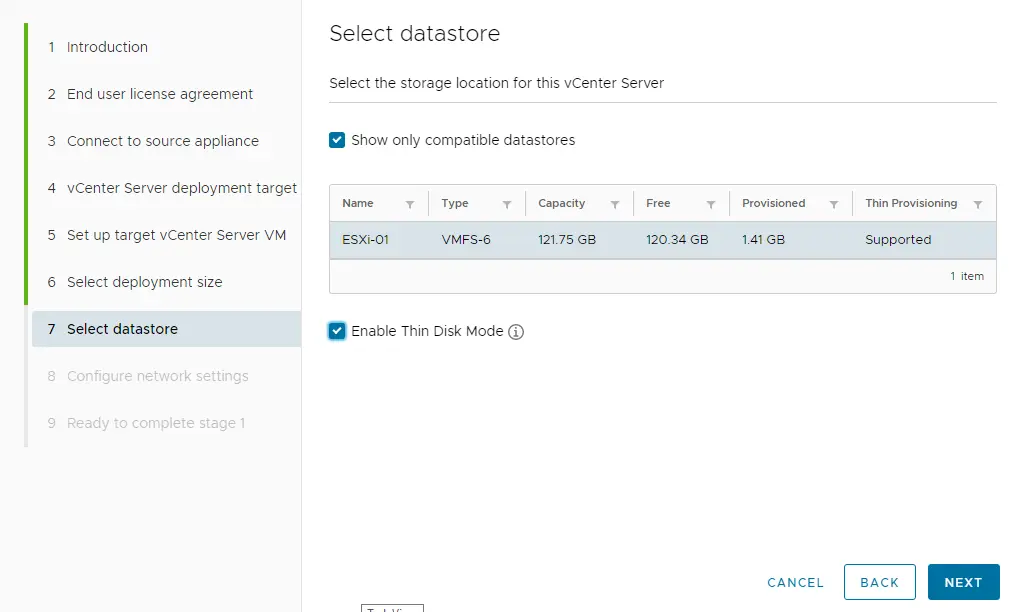
Select the datastore where you would like to store the VM, and then choose Next.
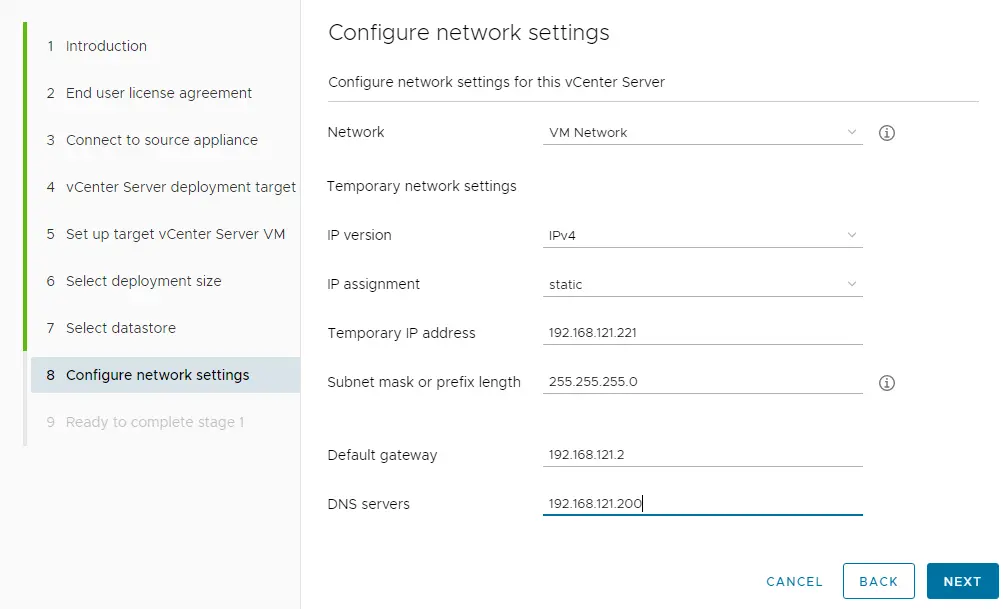
Configure network settings, provide the necessary information, and then choose next.
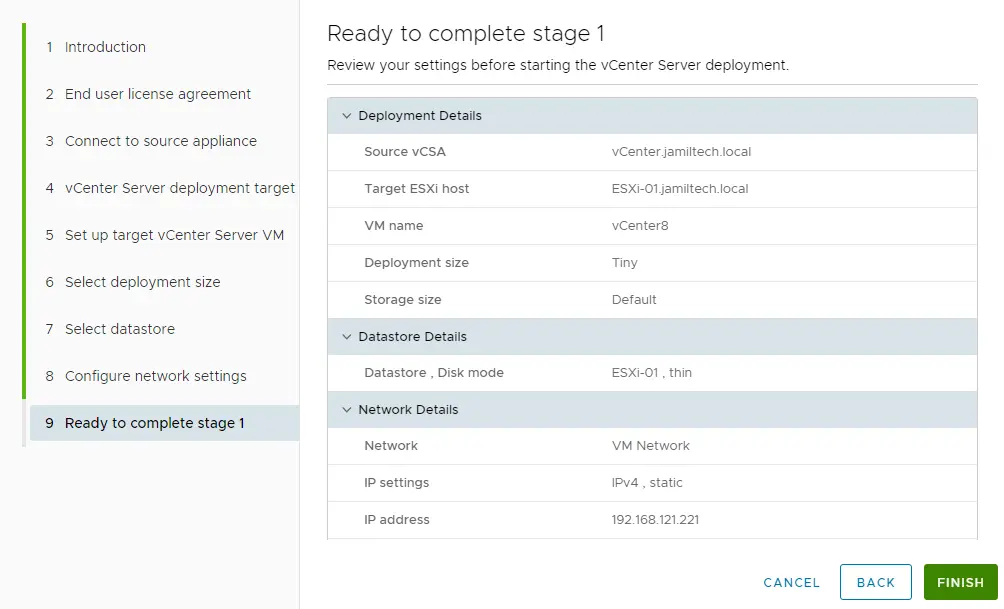
Ready to complete stage 1 Review the settings before starting the deployment process, and then click on Finish.
Upgrade vCenter Server appliance stage 1 successfully completed.
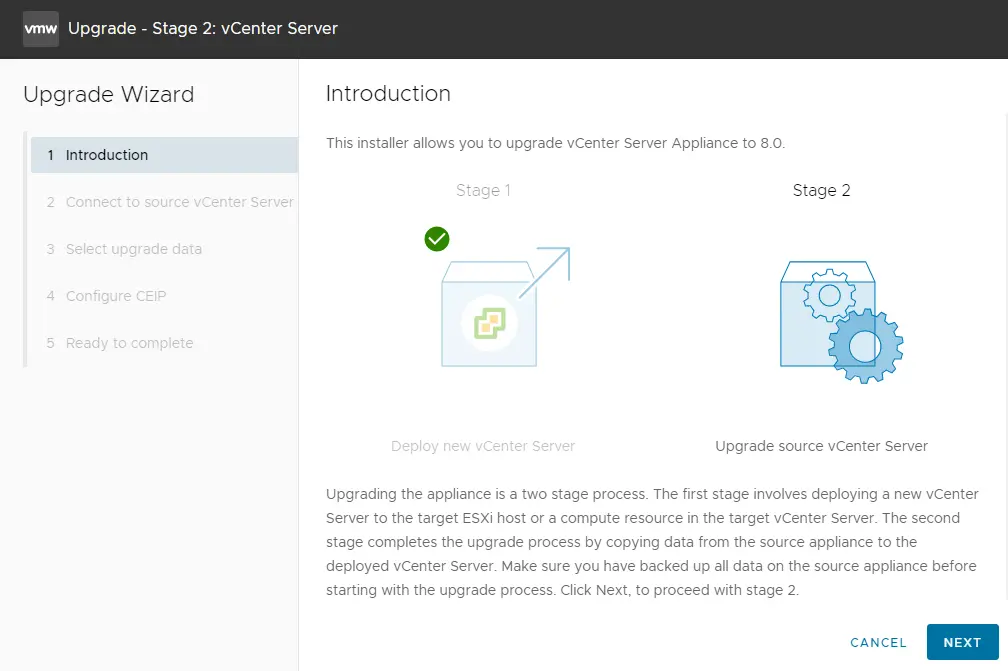
Stage 2 – Upgrade vCenter Server Appliance 7.0 to 8.0
The next step is to migrate data to the new vCenter server appliance. Click Continue.
Upgrade – Stage 2: vCenter Server
Upgrade VMware vCenter Server Appliance, Introduction page, click next.
Now the VMware vCenter Server Installer will connect to the source vCenter and then do some checking before the upgrade.
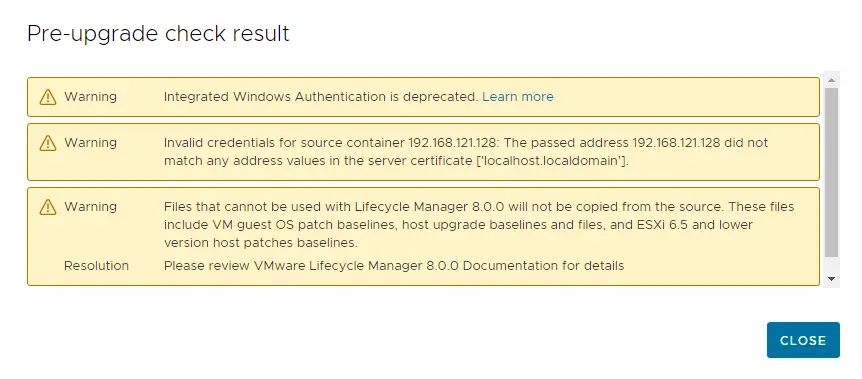
The vCenter installer will automatically run a pre-upgrade check on the existing VMware vCenter Server Appliance. Click close
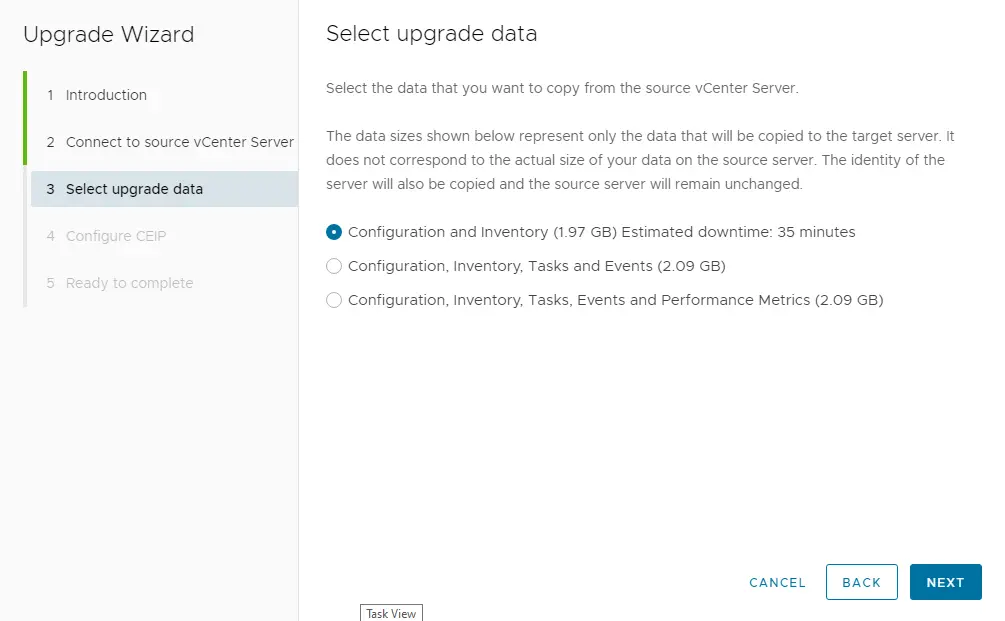
Next, choose which data you wish to copy from the source vCenter Server 7 to the new VCSA 8.0 appliance.
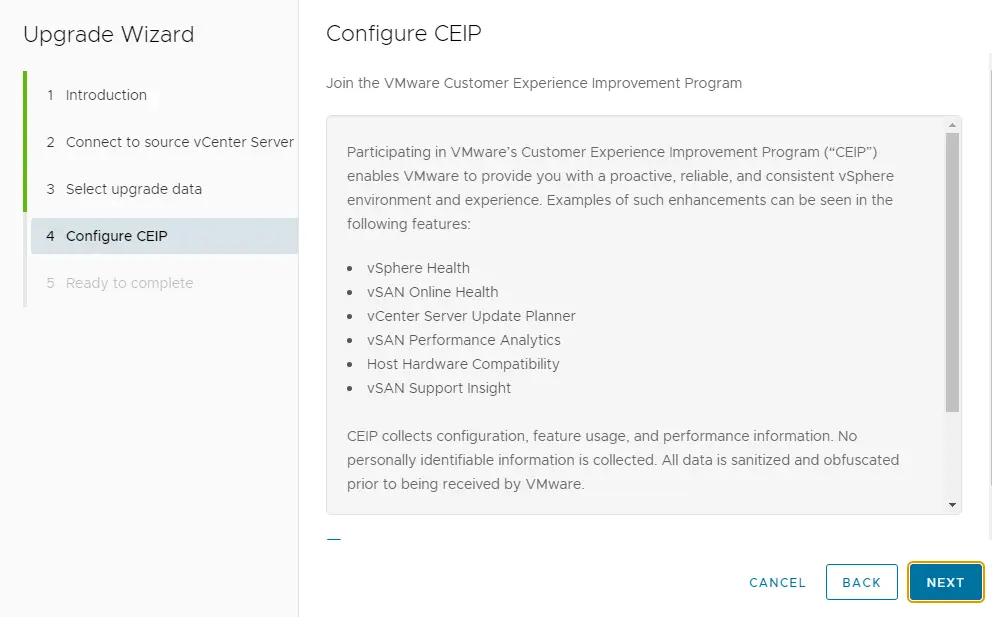
Upgrade VCSA, configure CEIP, and then click on Next.
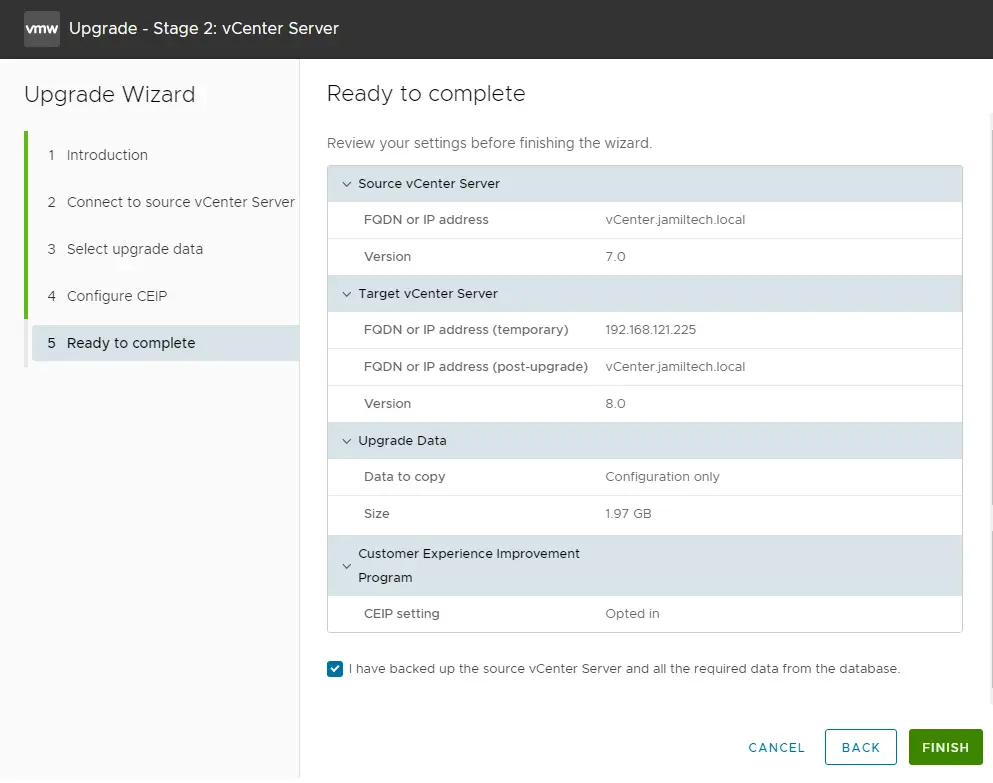
Ready to complete the upgrade process, Review the source and target vCenter settings. Please ensure you have a backup copy of your source vCenter, and then click on Finish.
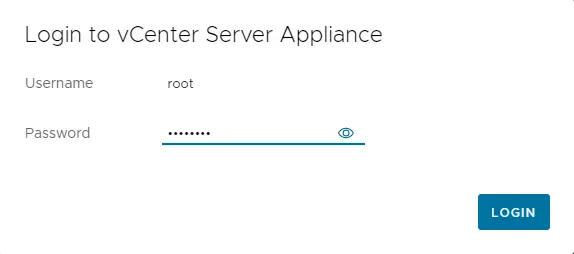
Log in to the vCenter server appliance.
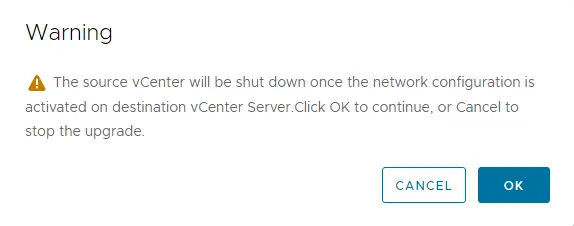
For the source, the VCSA 7.0 shutdown warning, choose OK.
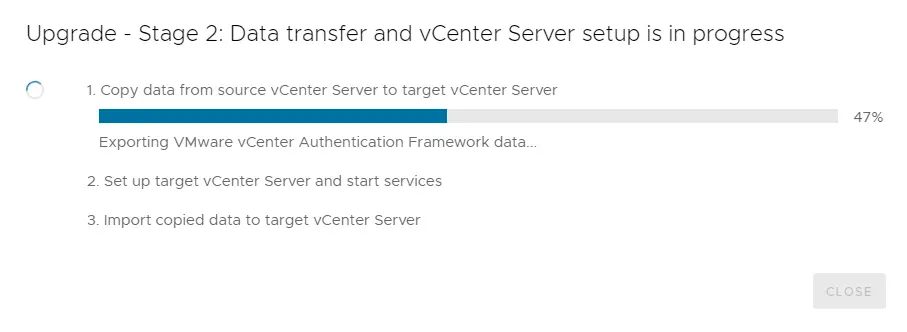
Upgrade the VMware vCenter Server appliance to version 8.0, copying data from the source to the target vCenter server.
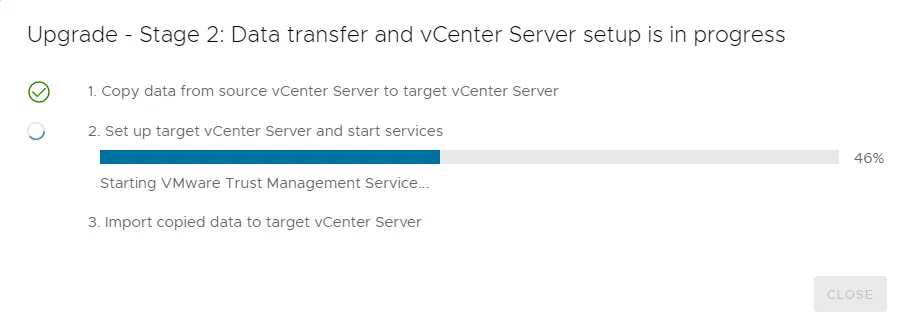
Set up target vCenter Server
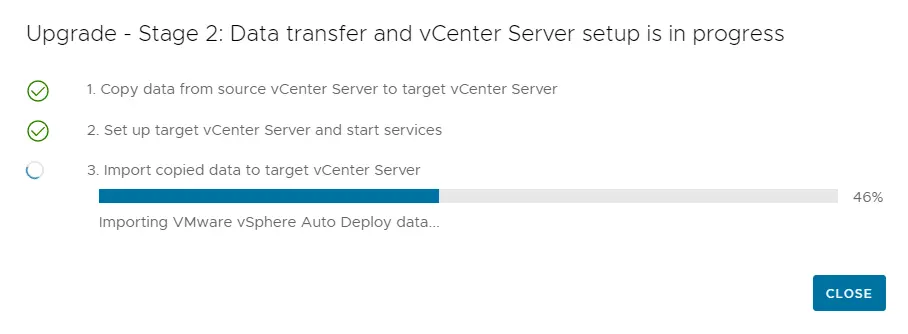
Import copied data to target VCSA
Maybe you will get a message that you have to update the DHCP to disable “TLS 1.0 and TLS 1.1” and then choose Close.
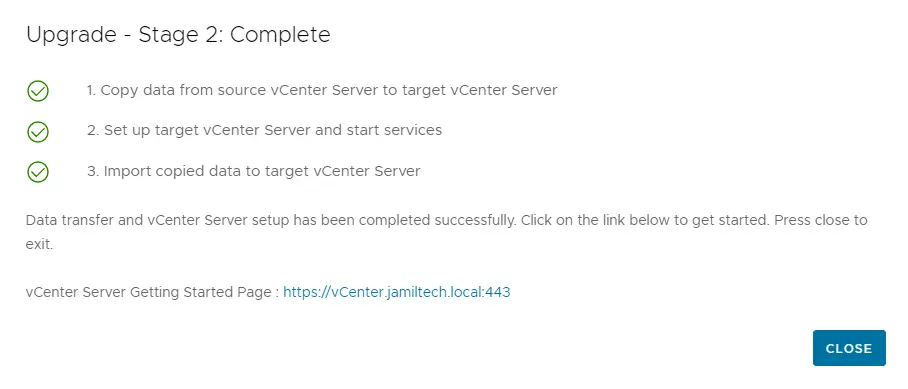
Upgrade – Stage 2: Complete; click Close.
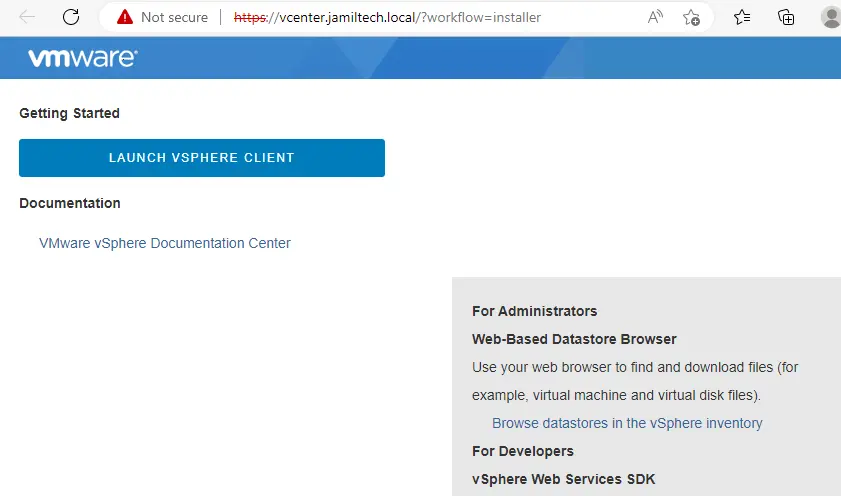
Inter vCenter Server URL in the browser, and then click on Launch vSphere Client.
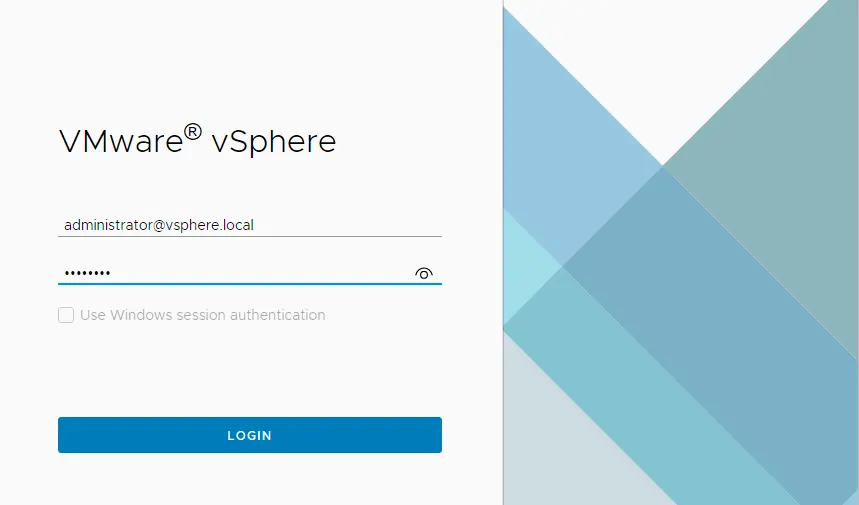
Log in to the new vCenter Server 8.0.
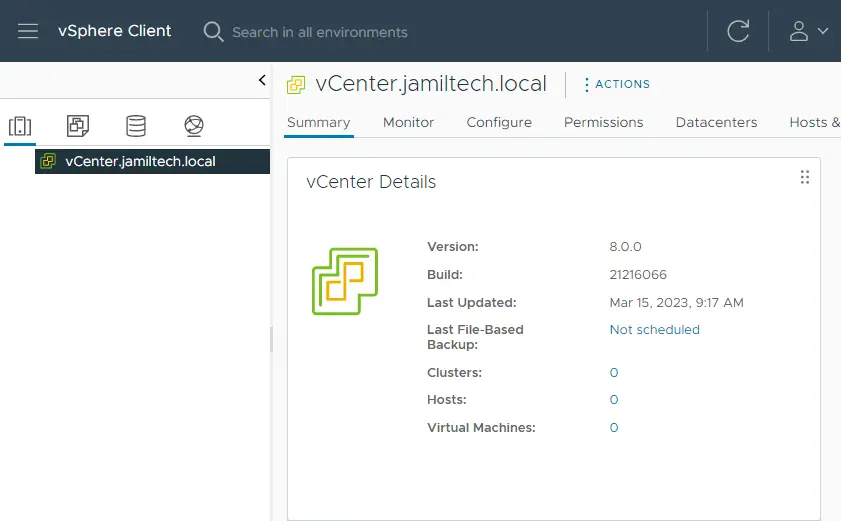
vCenter Server 8.0 Summary: check your VCSA version, which is now 8.0
Find out more about upgrading the vCenter Server Appliance by visiting VMware.
