In this article, we will learn how to backup Hyper-V virtual machines and simple ways to get the virtual machine’s backup done. If you are running virtual machines in your company, you are more likely to be using VMware or Hyper-V. With the number of Microsoft Hyper-V users increasing quickly, here are a few points for you to get started in data protection.
Backing up your Hyper-V virtual machines is the best precaution you can take against data threats. It gives you the scope to roll back in time to recover your system to a particular point before the threat wiped out data. Visit Microsoft to get more information.
Table of Contents
Export the Virtual Machine
Exporting a VM involves creating a copy of virtual machine configuration files and snapshots in another location. To export a virtual machine can be done either when the virtual machine is in a running state or a stopped state.
The exported Hyper-V virtual machine (VM) files can be imported into the same Hyper-V server or a new server, and the virtual machine can be created.
Backup Hyper-V Virtual Machines with Windows Server Backup
This is the built-in feature of Microsoft Windows that helps you backup Hyper-V virtual machines, along with other features such as backup and restore choices for the server environment. This will permit the user to configure multiple automatic backups in a sequence. First, you need to enable the Windows Server Backup feature in Windows Server.
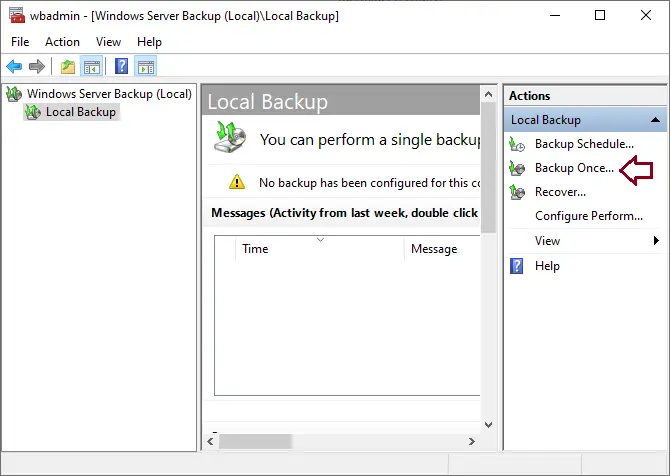
Open Windows server backup; under the action menu, click on backup once.
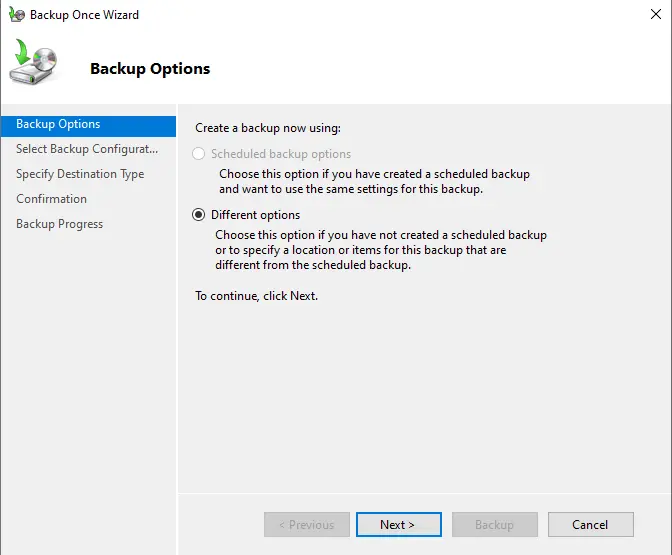
Select different options on the packup option page before clicking next.
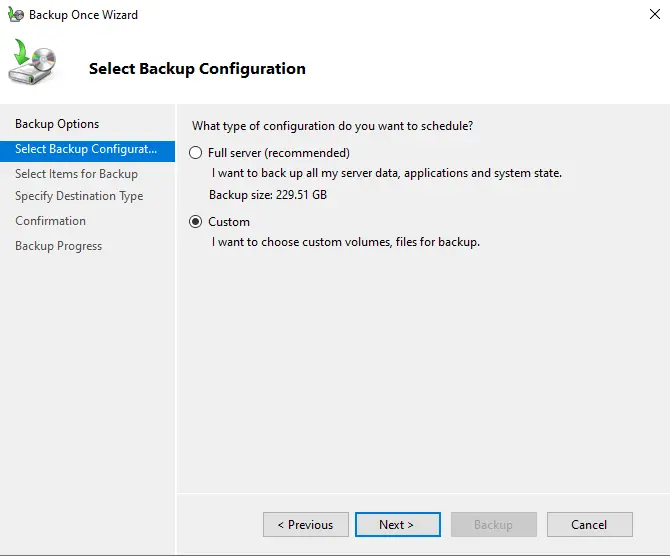
In the Select Backup Configuration window, you can choose Custom and then click Next.
In the Select Items for Backup page, click on Add items to add a Hyper-V virtual machine.
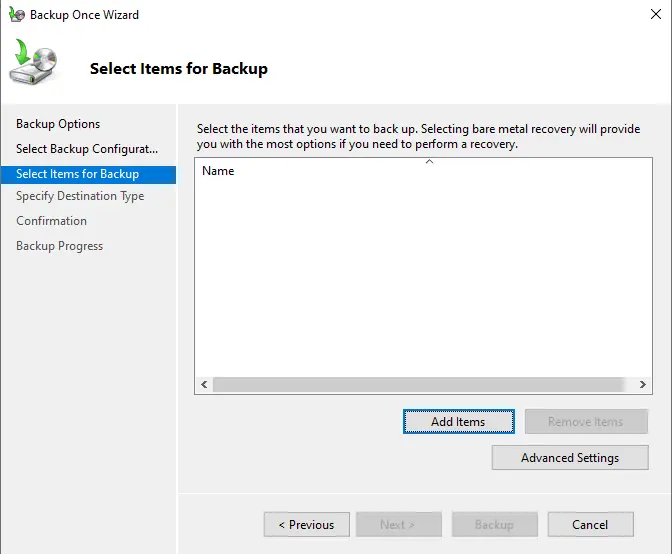
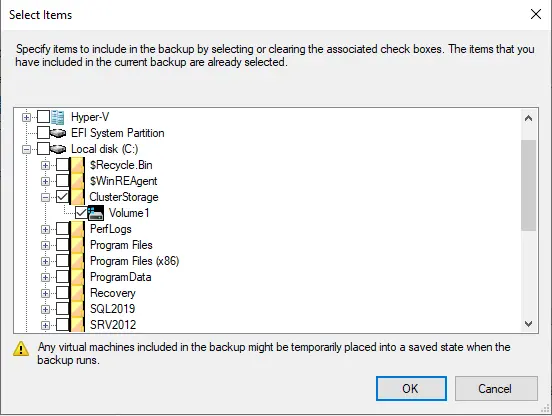
Select storage, and then click OK.
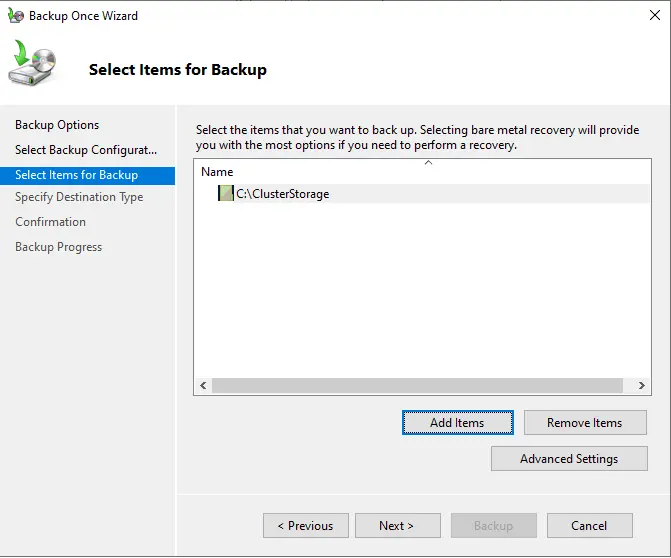
Choose next.
Specify a destination type before clicking next.
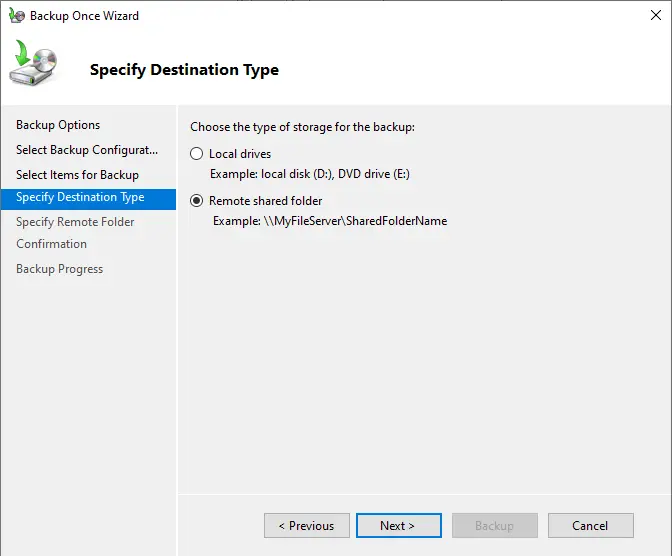
Specify the remote folder for the backup, and then click next.
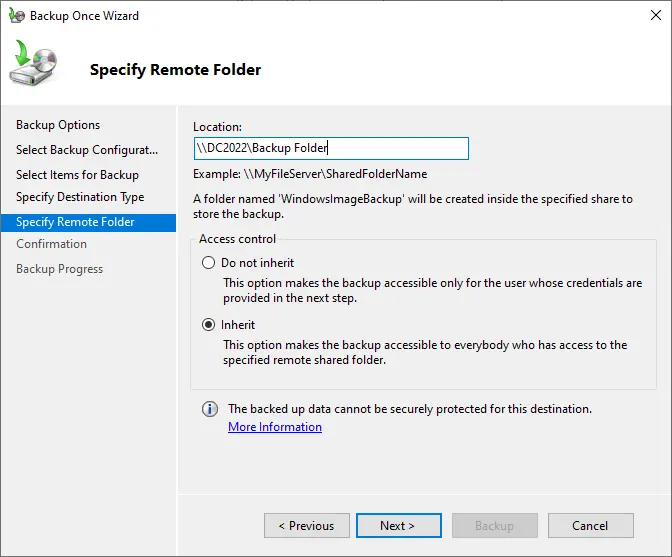
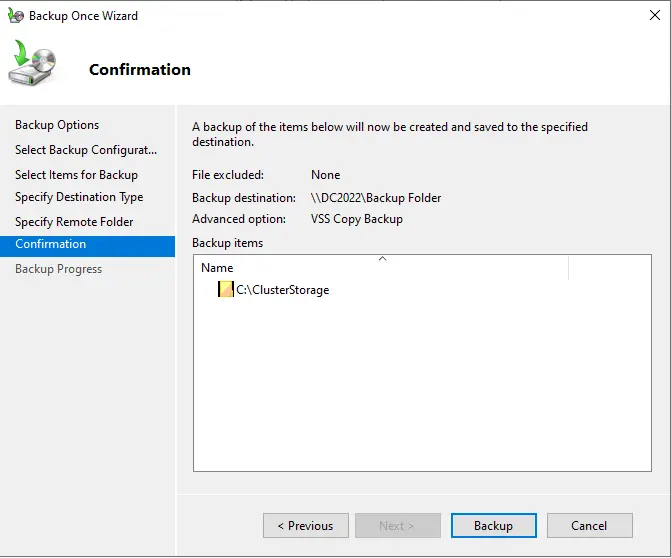
Click on the backup button to start the process.
