Creating a shared mailbox in Microsoft 365 via the Exchange Admin Center is a useful way to allow multiple users to read and send emails from a common address. This can be especially helpful for teams, such as customer support or sales, where several people need to manage communications from the same email address. In this article, we’ll guide you through the process of setting up a shared mailbox.
Table of Contents
Step 1: Sign in to the Exchange Admin Center
Before you begin, ensure you have the necessary admin privileges to create a shared mailbox. If you need more information on admin roles, you can refer to Microsoft’s documentation.
- Log in to the Exchange Admin Center:
- Use your Microsoft 365 credentials to sign in.
Navigate to the Exchange Admin Center.
Step 2: Access the Mailboxes Section
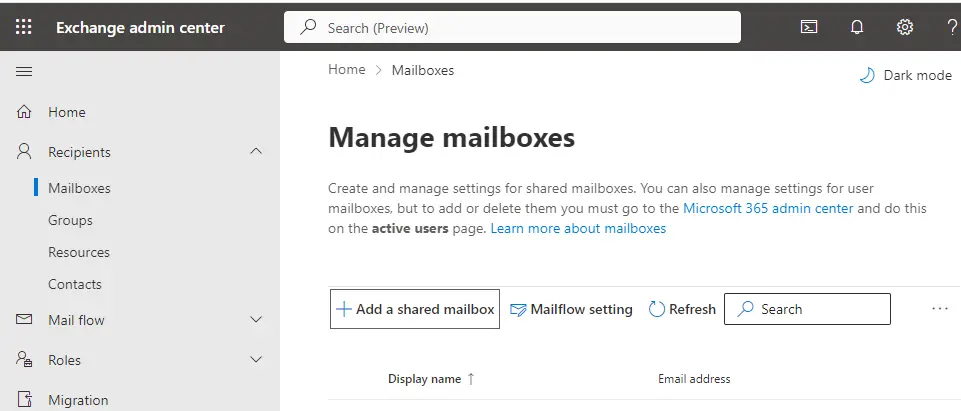
- Expand the Recipients Pane:
- On the left-hand side, find and expand the Recipients section.
- Select Mailboxes:
Click on Mailboxes to view the list of mailboxes.
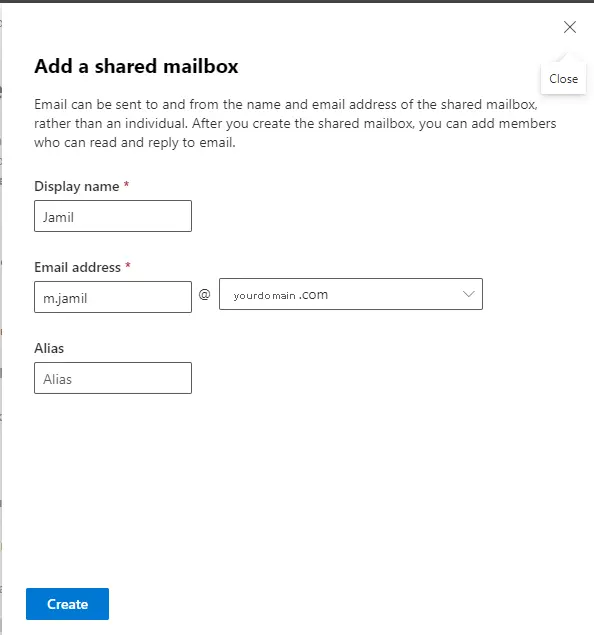
Under Next steps, click on “Add users to this mailbox” link.
Step 3: Add a New Shared Mailbox
- Create the Shared Mailbox:
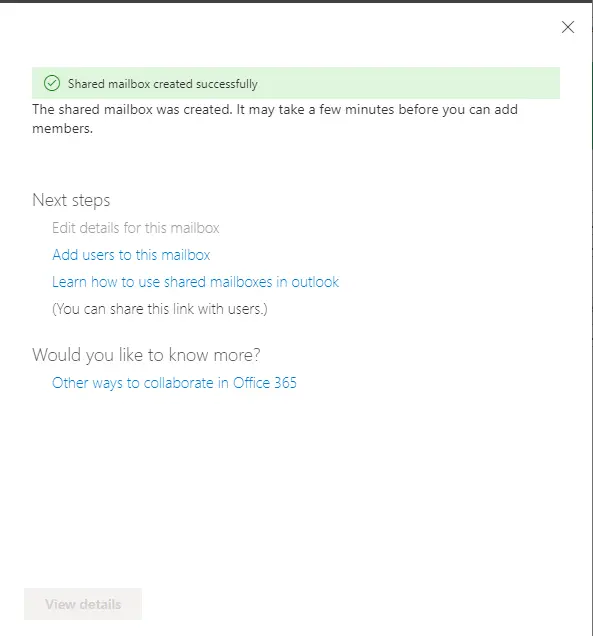
- Click on the + Add a shared mailbox link. This will open the creation window on the right side of your screen.
- Enter Display Name:
- In the Add a shared mailbox page, enter a Display Name for the mailbox. This is the name that will appear when recipients receive emails from this address.
- Specify the Email Address:
- Enter the desired Email Address for the shared mailbox. For example, you could use [email protected] for a sales team or [email protected] for general inquiries.
- Select the Domain:
- Choose your domain name from the dropdown list.
- Add an Alias (Optional):
- If needed, you can add an alias for the shared mailbox. This alias can be used as an alternative address.
- Create the Shared Mailbox:
Click on the Create button to finalize the setup. The shared mailbox will be created, and you will receive a confirmation message once it’s done.
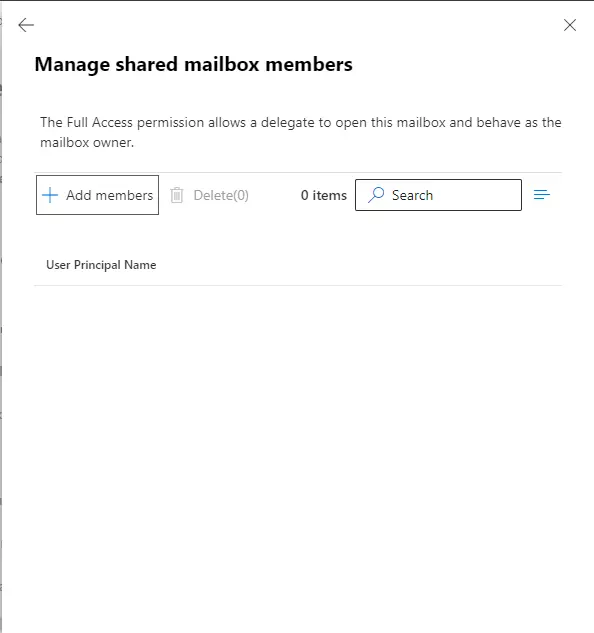
Select the users that you would like to have access to the shared mailbox, and choose Save.
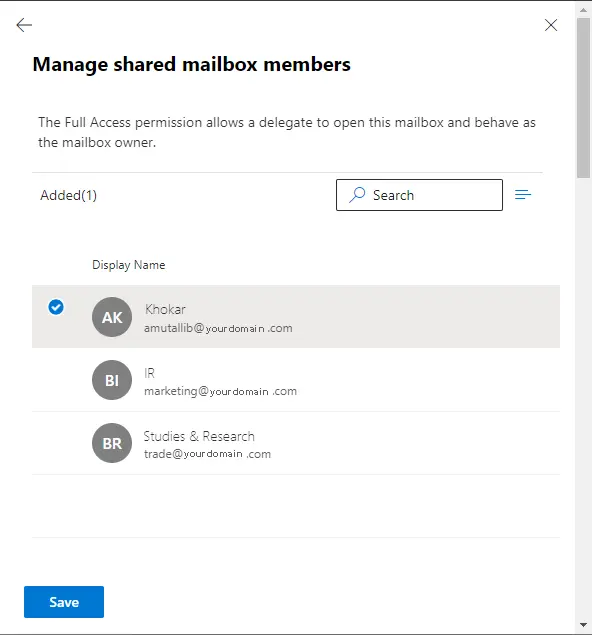
Select confirm to confirm that you wish to add delegate permissions for these mailboxes.
Step 4: Add Members to the Shared Mailbox
- Access Next Steps:
- After creating the mailbox, under the Next Steps section, click on Add users to this mailbox.
- Add Members:
- In the Manage shared mailbox members page, click on + Add members.
- Select the users who need access to this shared mailbox and click Save.
- Confirm Permissions:
- Confirm that you want to grant delegate permissions to these users. They will be able to send and receive emails from this shared mailbox.
- Success Notification:
- You will see a success message indicating that the selected users have been added. It may take up to an hour for the changes to reflect in Outlook and Outlook on the web.
Important Notes
- Storage Limit: A shared mailbox can store up to 50GB of data. If the mailbox exceeds this limit, a license will be required to continue storing more data.
- Sending Limit: If the shared mailbox reaches its storage capacity, users will be unable to send new emails, and eventually, the mailbox will stop receiving emails. A “non-delivery” notification will be sent to the senders if this occurs.
Conclusion
By following these steps, you can easily create a shared mailbox in the Exchange Admin Center. This feature is an excellent way to streamline communication for teams that require access to the same email address. Remember to monitor the storage usage to ensure continuous service.


