Let’s have a look at this article on how to add ESXi host to vCenter Server 8.0. In my last article, we finished our VMware vCenter Server 8.0 installation. Before I show you how to add an ESXi host to VMware vCenter Server, I will clarify the difference between adding an ESXi host to a datacenter object and to a cluster object.
VMware ESXi hosts need the vCenter Server inventory in order to create a vSphere environment and use VMware vSphere features such as Fault Tolerance or high availability. First, you should create at least one datacenter object before adding an ESXi host to the vCenter Server inventory. Below are the steps to create a datacenter object via the vSphere Client to add standalone ESXi hosts and VMware vCenter servers to the product. Follow the steps below.
Table of Contents
Add ESXi Host to vCenter Server
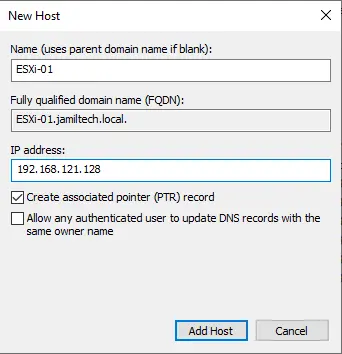
First, we need to add an ESXi host in the DNS Manager. Open DNS manager, right-click on your local domain, and then select New Host (A or AAAA).

Type your hostname and IP address, select the box “Create associated pointer (PTR) record” and then click the Add Host button.
Adding the ESXi/ESX host to the vCenter Server
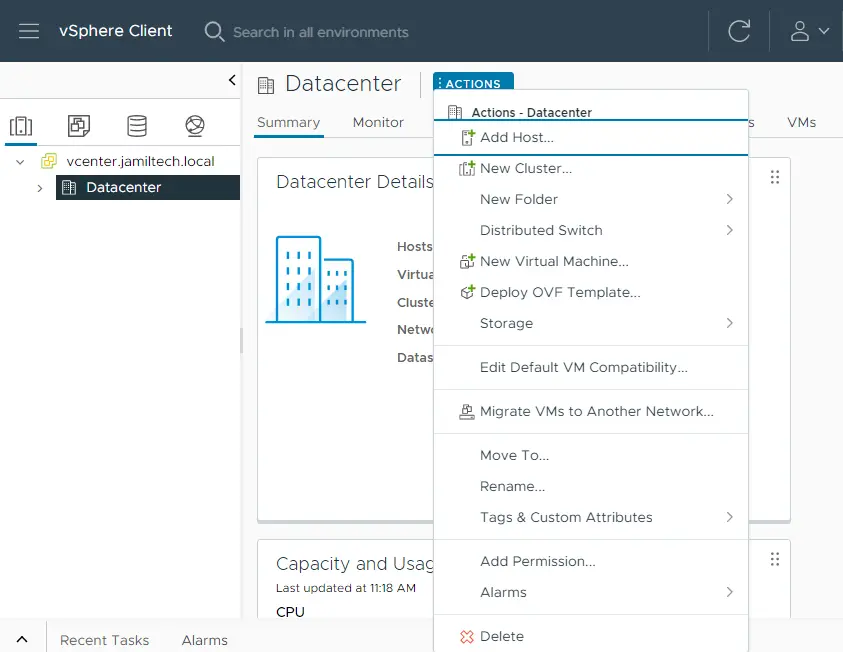
Now we can add an ESXi host to the VMware vCenter Server inventory. Below are the steps:
Right-click on the datacenter you have created in the previous step, and then select Add Host.
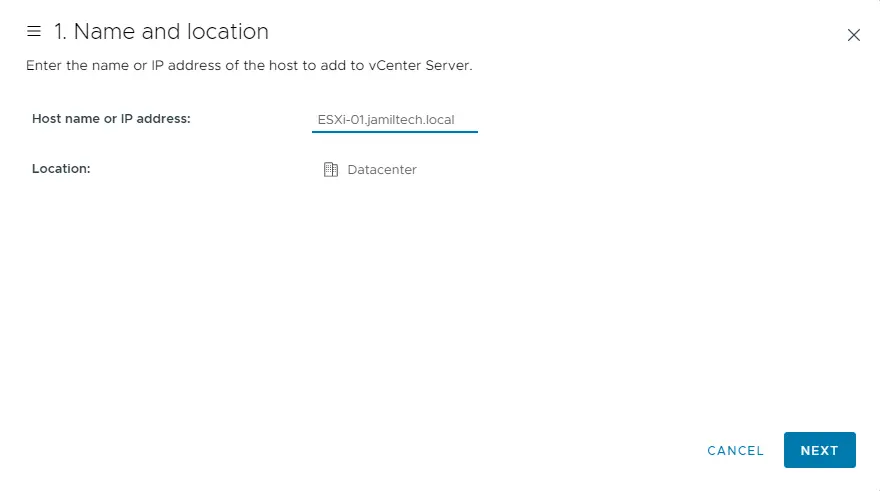
Name and location, enter the fully qualified domain name or IP address of your ESXi host, and then click next.
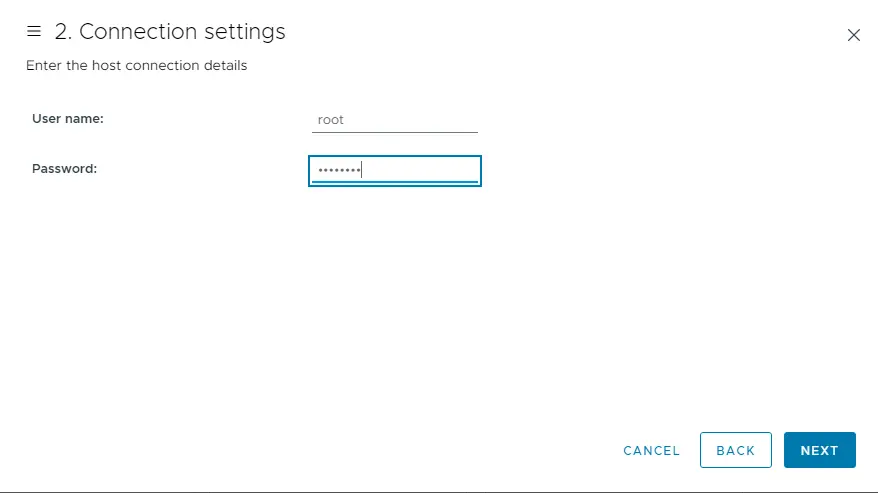
ESXi Host connection settings, enter the username and password of the root account on the ESXi host.
Note that this isn’t the password of the vCenter Server administrator.
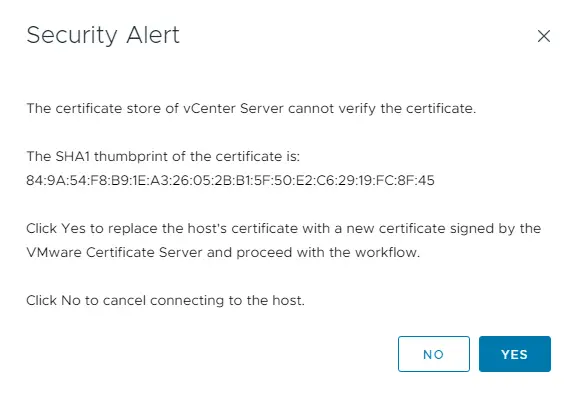
If you receive a security alert about the authenticity of the host, choose Yes to trust the host.
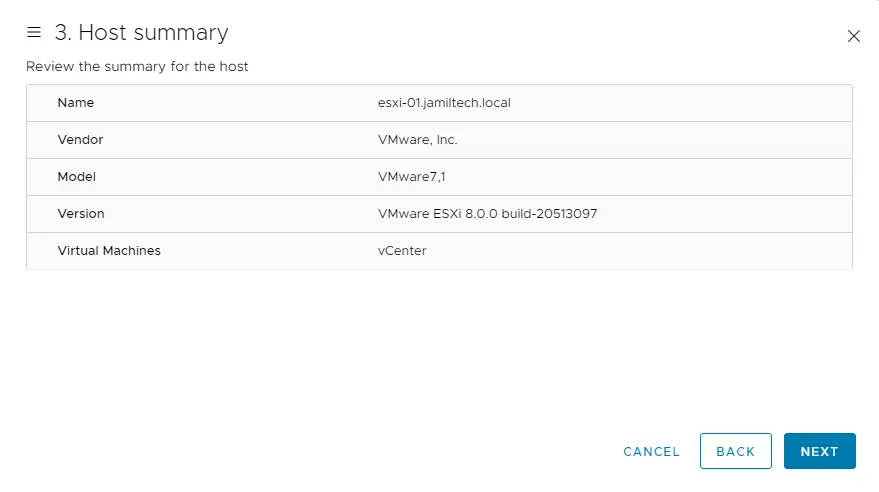
Review the ESXi host summary and then click next.
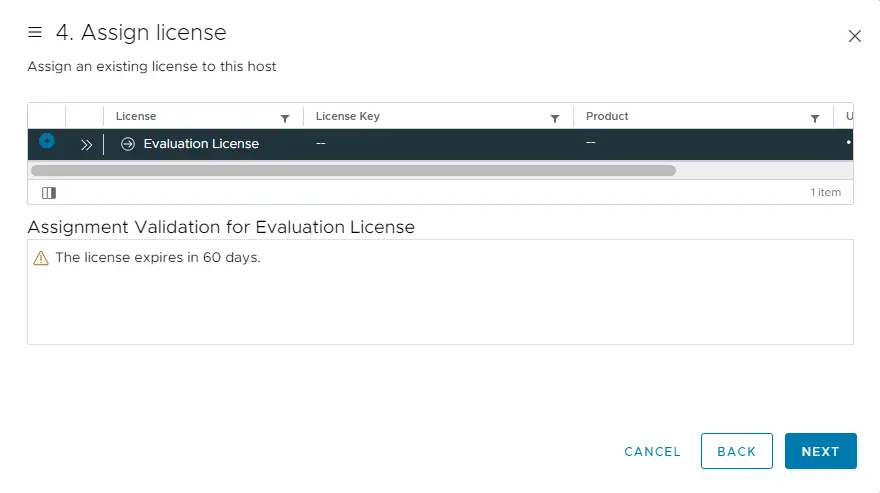
In the default assign license option, click next.
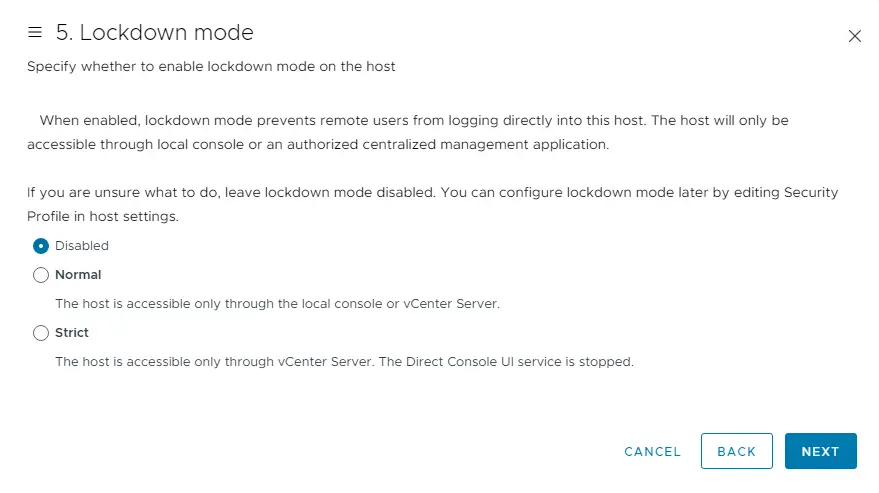
Add Host to vCenter Lockdown mode, you can disable access to the host for the root account after VMware vCenter Server takes control of the host. This way, the VMware ESXi host can be managed only via the vCenter Server or the local console.
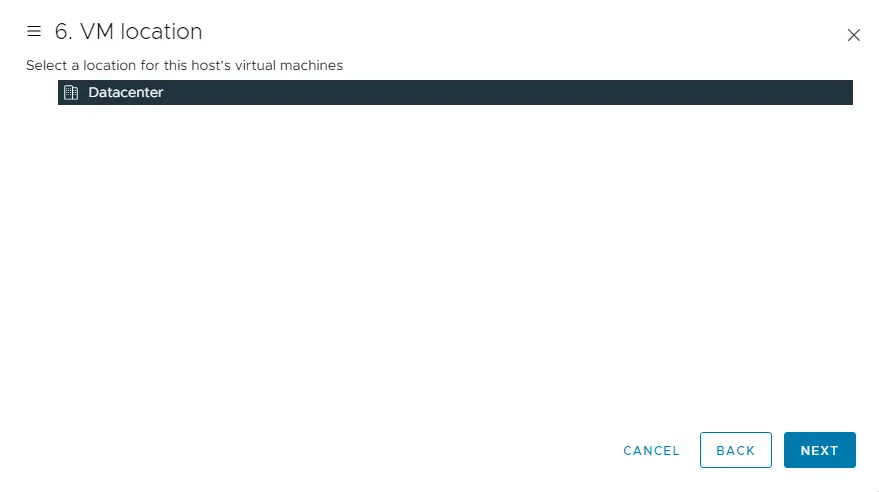
VM location, select a datacenter, and then click next.
Review the summary and then click on the finish button to complete the process.
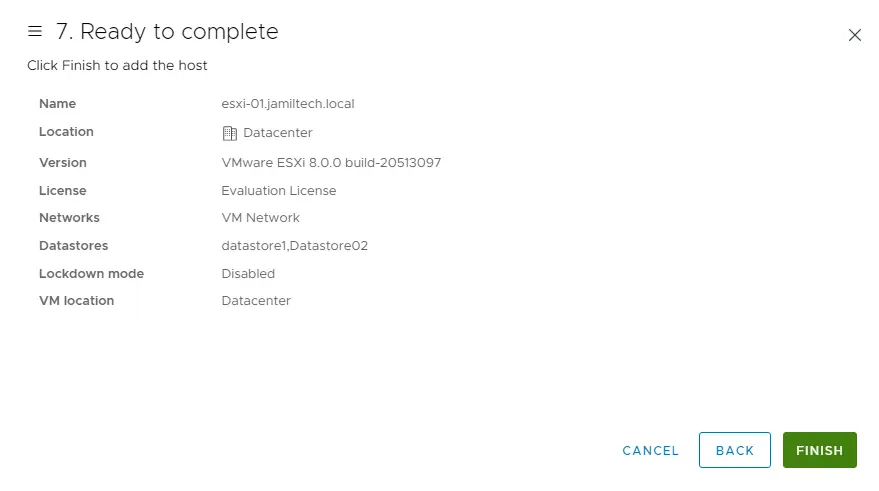
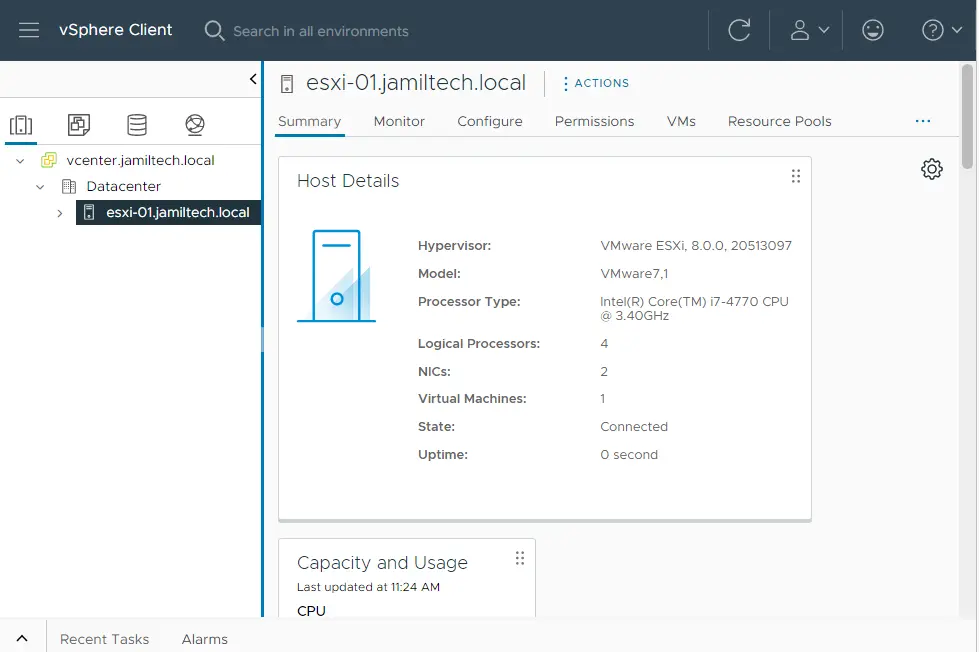
We have successfully added our ESXi host.