
In this article, we will teach you how to change video frame rate and quality with gameplay captures in Windows 11. You can record and save videos of significant and enjoyable moments while playing your preferred games on Windows. To capture the moment, select the Windows logo key in conjunction with ALT + G.
Automatically, the captured gameplay moments are appended to the video folder within the personal directory. However, Windows allows you to define the maximum recording duration for video clips and change the default location for that location to a different drive or folder with more free space.
When capturing instances of gameplay, the video frame rate and quality may also be crucial. Because they impact the video’s overall appearance and fluidity, adjusting the video frame rate and quality can be crucial when capturing gameplay moments.
A higher frame rate can make the video look more flowing and smoother, while a lower frame rate can make the video look choppy and miss some frames. In the same way, better video quality can make a video clearer and more detailed, while lower quality can make the video pixelated and blurry.
Table of Contents
Change Video Frame Rate and Quality with Gameplay Capture
As was already said, picking the best frame rate and quality can make the video playback better when you record your gaming. Here’s how to change the quality and frame rate of the movie when you record gameplay.
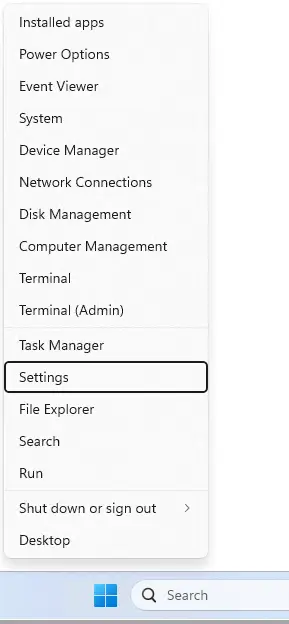
Open the Windows settings.
You can do that by right-clicking on the Windows start menu and clicking on Settings. Or hold the keyboard shortcut key (Windows key + I) to open the settings app.
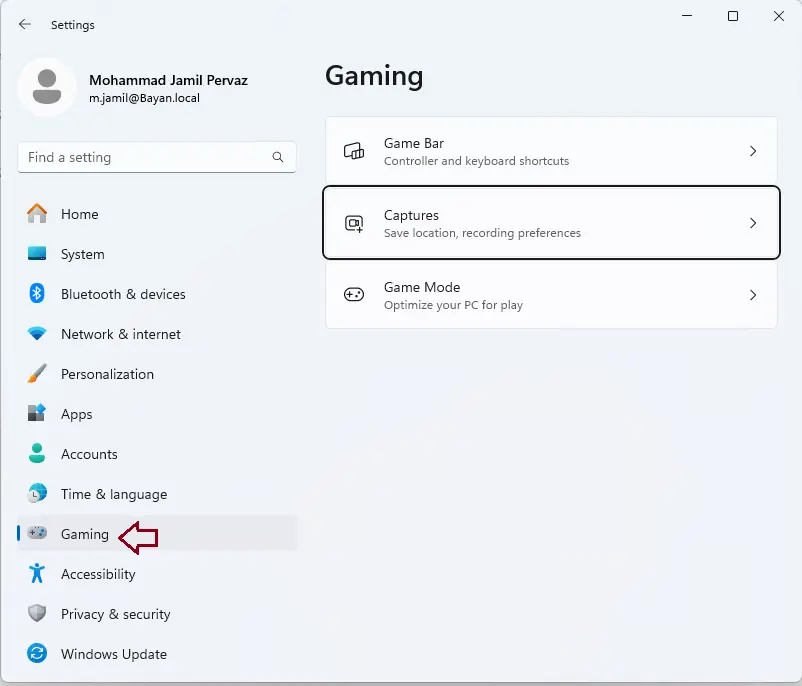
When the Setting app appears, click the Gaming button on the left.
Click on the Captures tile from your right to expand it.
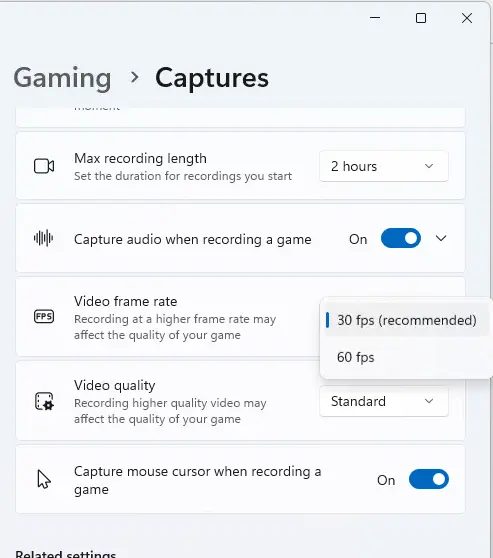
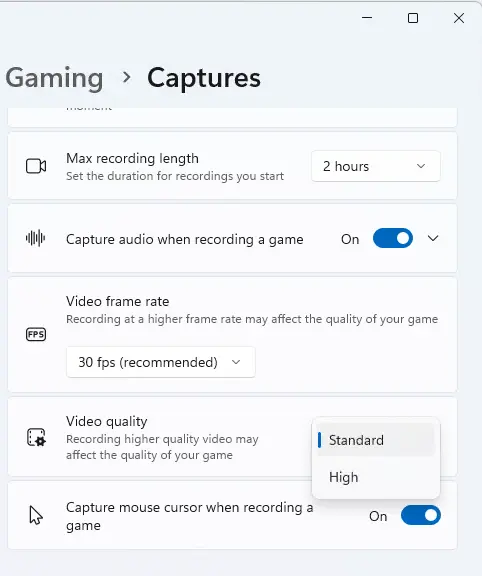
Choose the “Video frame rate” and “Video quality” tiles in the Gaming -> Captures settings pane.
To change each setting, click on the down arrow to the right of the tile to reveal more secret settings.
By default, Windows will select the standard video quality and recommended frame rate for your device.
You will be able to choose from these frame rates based on your device’s hardware:
30 fps (recommended)
60 fps
Video quality options are:
Standard
High
Close the settings when you are done.
This article showed you how to change the video frame rate and video quality when recording gameplay moments in Windows 11.
Visit Microsoft to learn more about video frame rate and quality.

