
Let’s have a look at how to configure automatic forwarding email in Exchange Server 2019. Some companies may require that they automatically forward emails or send a copy of a message to another mailbox on the Exchange server in 2019. The reasons may be different, ranging from auditing purposes to data leak protection, availability, etc. In another way, there are cases when emails from certain users must automatically reach other recipients too.
Fortunately, Exchange Server offers transport rules, which we can use to process messages according to our needs. These include the possibility to forward, bcc, or cc messages to different recipients automatically. For more details on what auto-forwarding is and how to configure email forwarding, please visit Microsoft.
Table of Contents
Configure Automatic Forwarding Email
Let’s say the manager needs to know about all emails sent outside of the organization by a certain user. Follow the steps below to set up the rule.
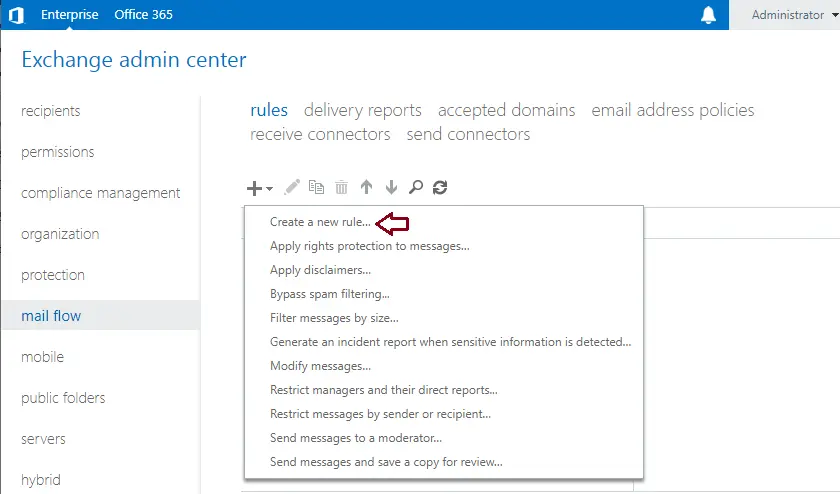
Open the Exchange admin center and go to the mail flow section from the left pane.
Click on the rules tab and click on the + icon. This opens a list of rules and then selects Create a new rule.
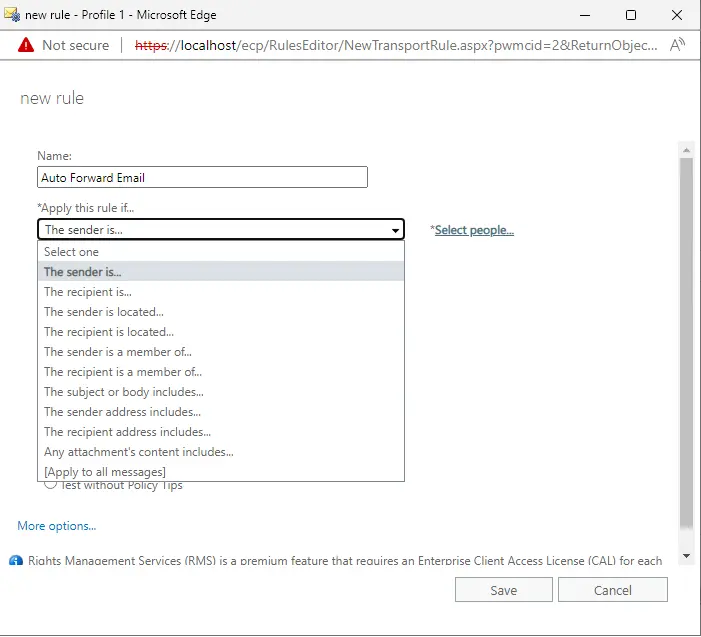
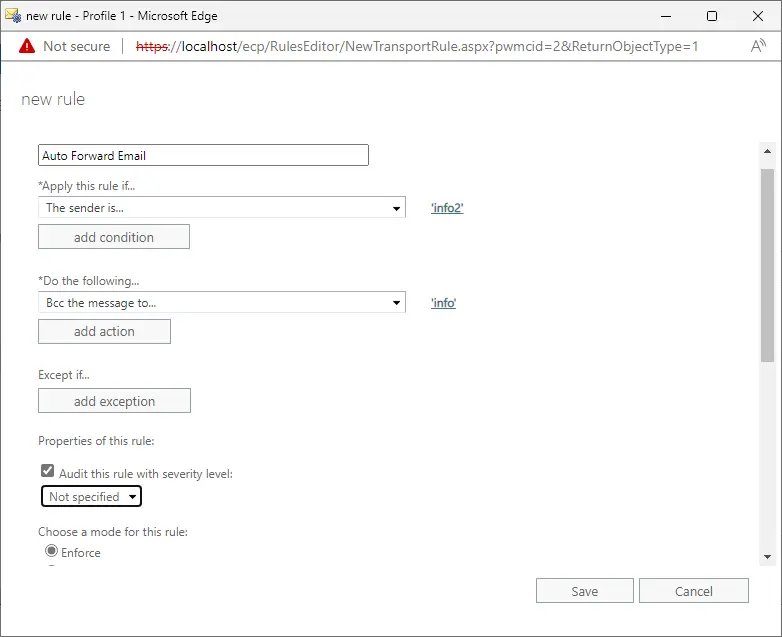
On the new rule page, configure the auto-forward email rule settings. Enter a name, then go to the Apply this rule if… section, and then select the sender is…
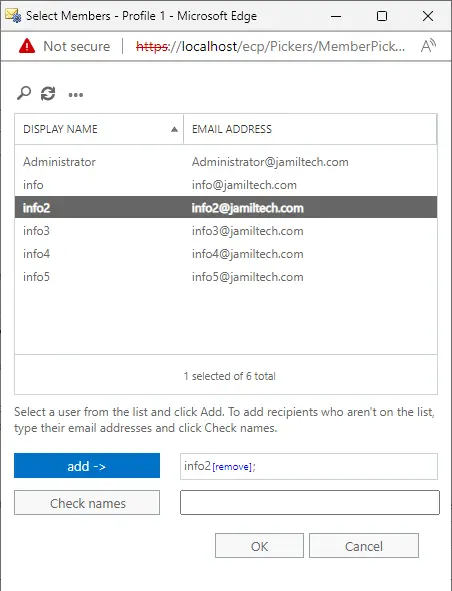
Click on the sender that you wish to set up the rule for, and then select the add button. Then click OK.
Create a Role for Auto Forwarding
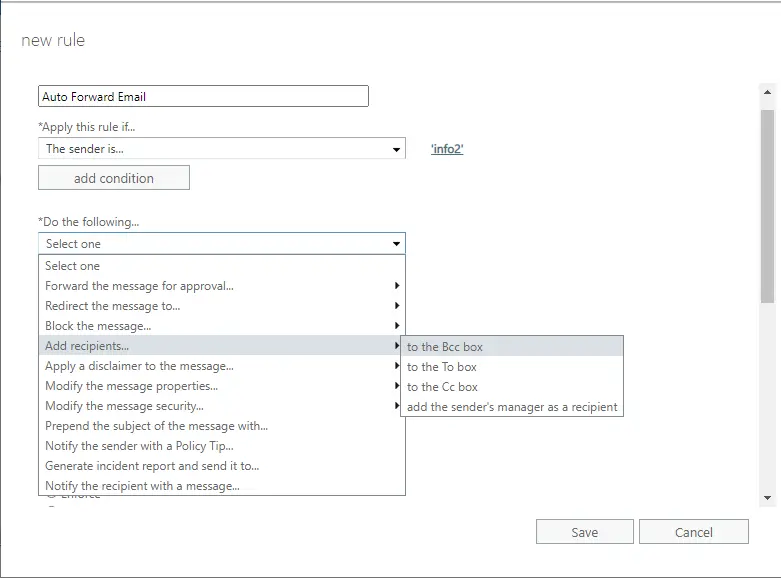
Next, go back to the new rule page and click More Options… at the bottom. This will unlock more actions in the Do the following… menu.
In the Do the Following section, there are different actions available in terms of email forwarding:
Forward message for approval... With this option, you can prevent the message from leaving your company until an authorized person accepts it.
Redirect the message to... The option isn’t delivered to the original recipient and is redirected to the one defined in the rule.
Add recipients… This section permits you to add more recipients to the message in the To, Cc, and Bcc fields.
Let’s select the Add recipients… action, and then click on the “to the BCC box.”. This email will automatically BCC emailed to a different mailbox.
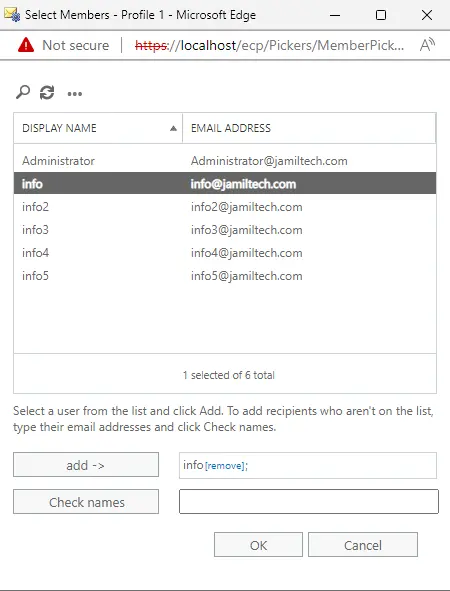
In the Select Member window, choose recipients who should receive a copy of the message. Click on the add button, and then click OK.
Select Save to finish the rule configuration.
The rule is now ready to add other recipients in the Bcc field to every message the user sends.
Visit this article on how to create offline address book in exchange for

