This article provides information on how to configure Multiple NIC vMotion VMware vSphere 8.0. VMware vMotion has been very prosperous technologically when you think about the initiative because it has been reliable and user-friendly to configure. It is very easy to configure multi-NIC VMware vMotion. Whether it is vMotion with shared storage or nothing shared vMotion, the setup is the same. The Multi-NIC vMotion configuration consists of four steps.
This configuration assumes you have at least two physical networks on each ESXi host. We are using a vSphere standard switch. Read this article to find out more about how to configure multiple-NIC vMotion in vSphere.
We need to create two VMkernel adapters, each with a different network name but within a similar IP subnet/vLAN. Then it will apply a “cross configuration” of active/standby assignments of physical networks to both VMkernel adapters.
Create a new VMkernel adapter
Activating the vSphere vMotion checkbox
Assign an IP address
Assign a physical NIC
Table of Contents
Multi-NIC vMotion Requirements
Two dedicated networks (NICs) per ESXi host for multi-NIC vMotion operations.
Prepare a network for the multiple NIC vMotion. For every VMkernel adapter, please ensure that all VMkernel ports are on the same IP subnet and VLAN on all ESXi hosts.
Configure Multiple NIC vMotion
Log in with your VMware vCenter server.
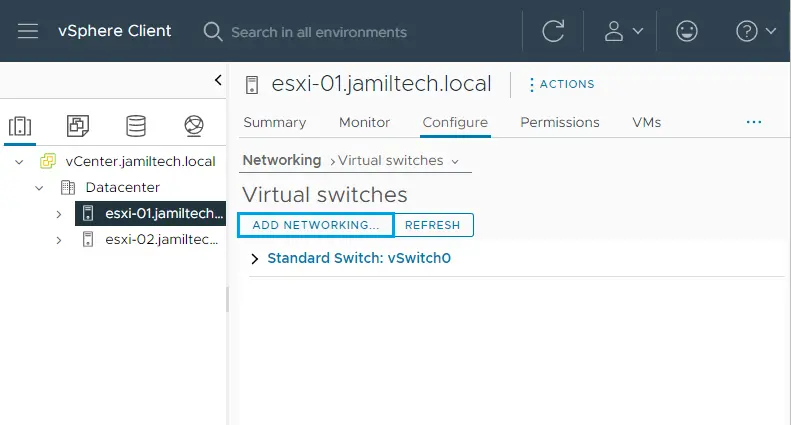
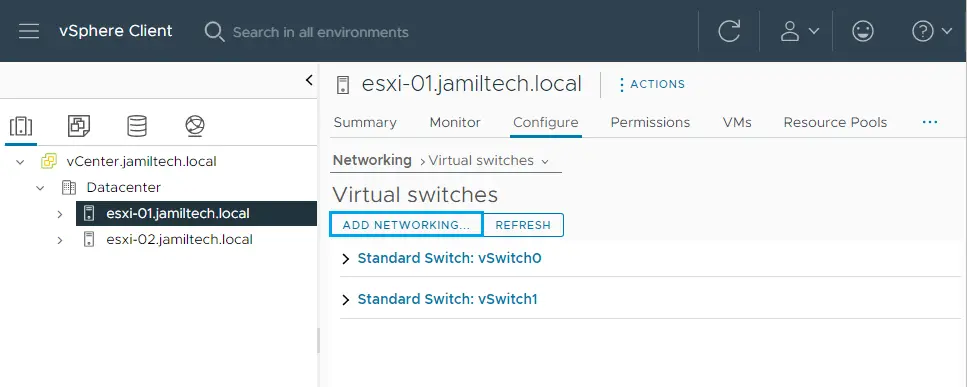
Select one ESXi host, click on the configure tab, under networking, choose virtual switches, and then click on Add Networking.
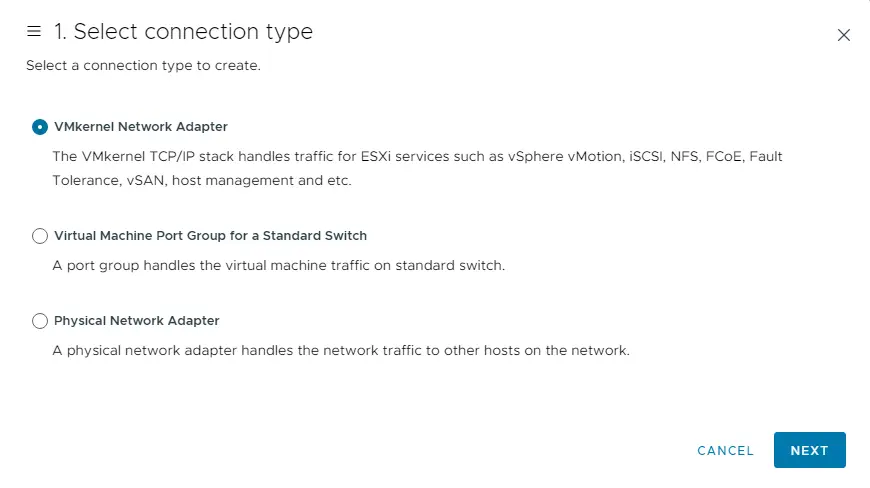
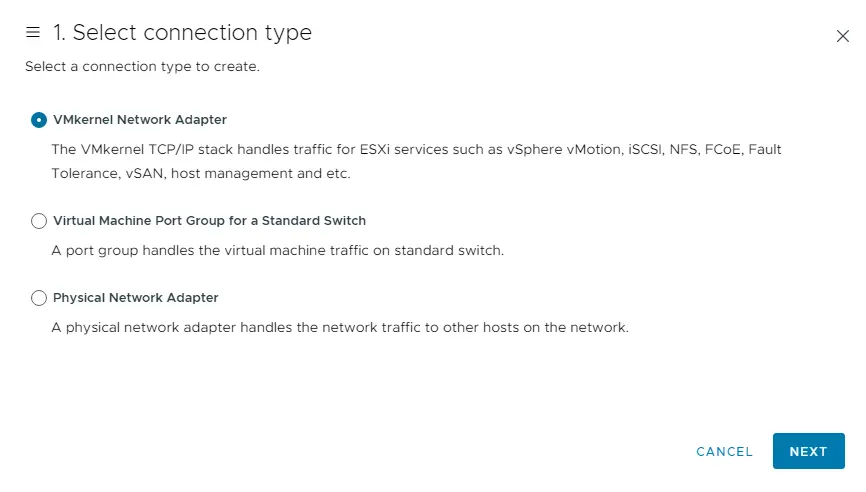
In this scenario, we will create a new virtual switch (vSwitch), which by default will be named vSwitch1. Choose the VMkernel Network Adapter type, and then click next.
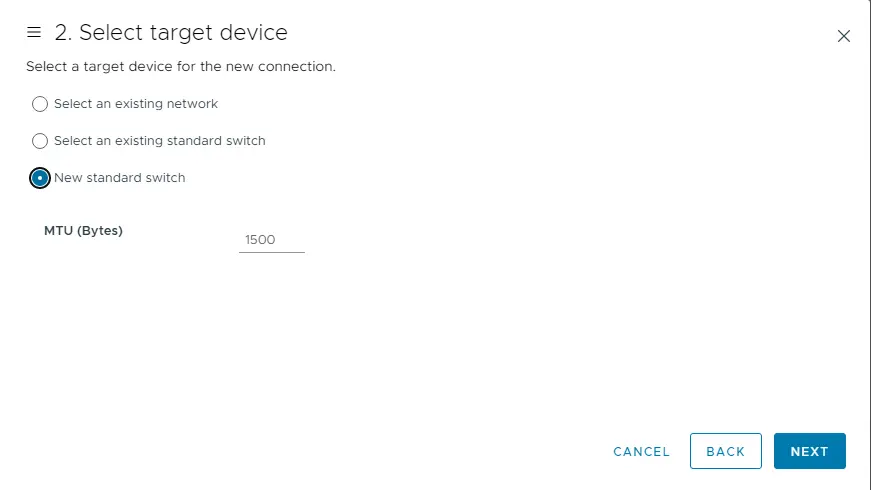
Select the New Standard switch, and then choose Next.
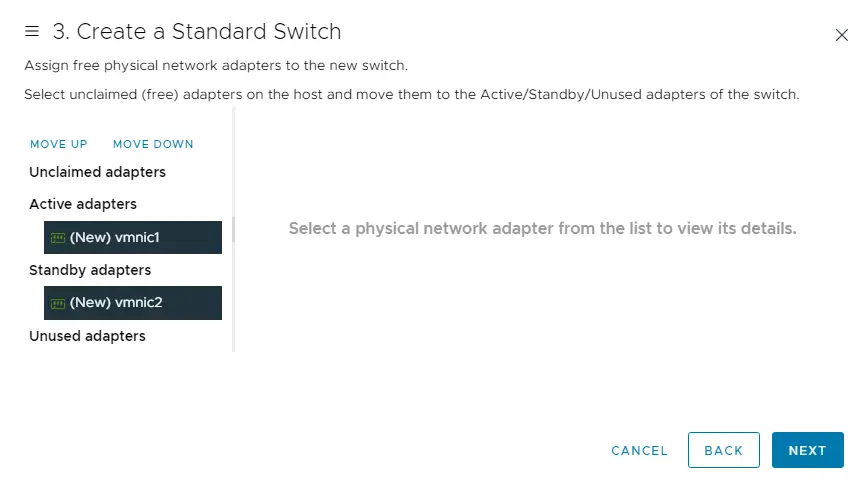
Add two NICs to vSwitch1, setting one as active and the other as standby.
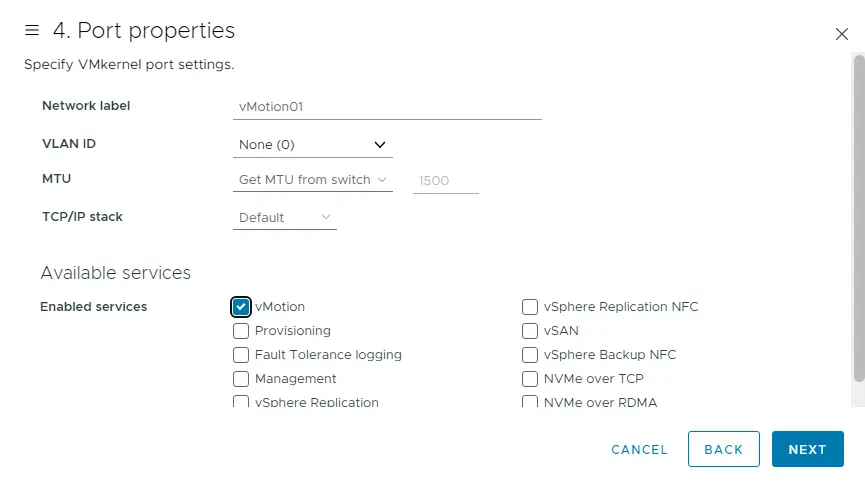
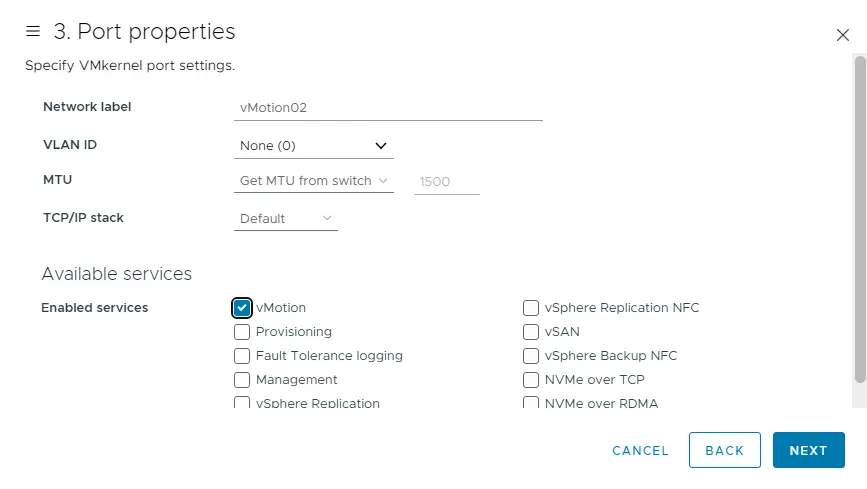
Specify VMkernel port settings, type a network label, choose the vMotion service box, and then click next.
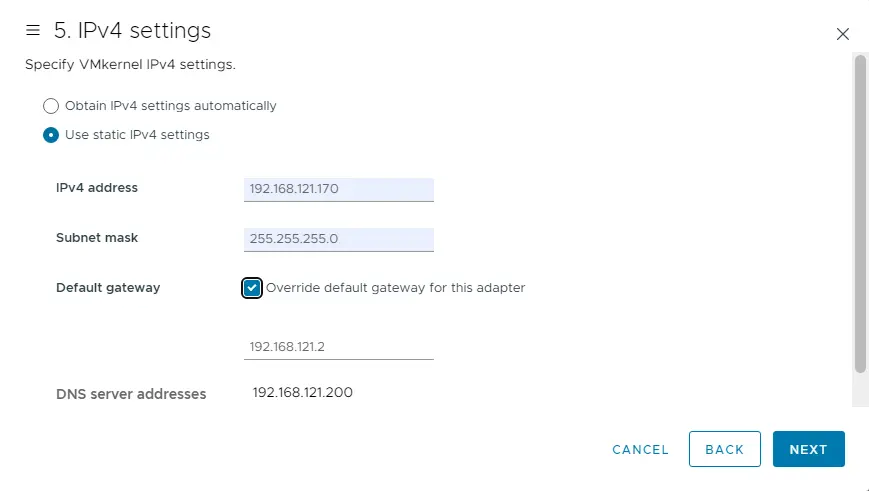
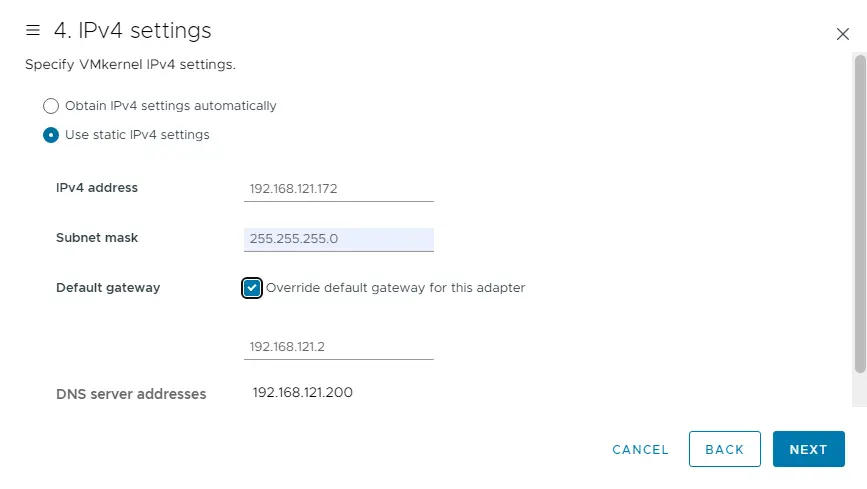
Specify VMkernel IP4 settings, and then click next.
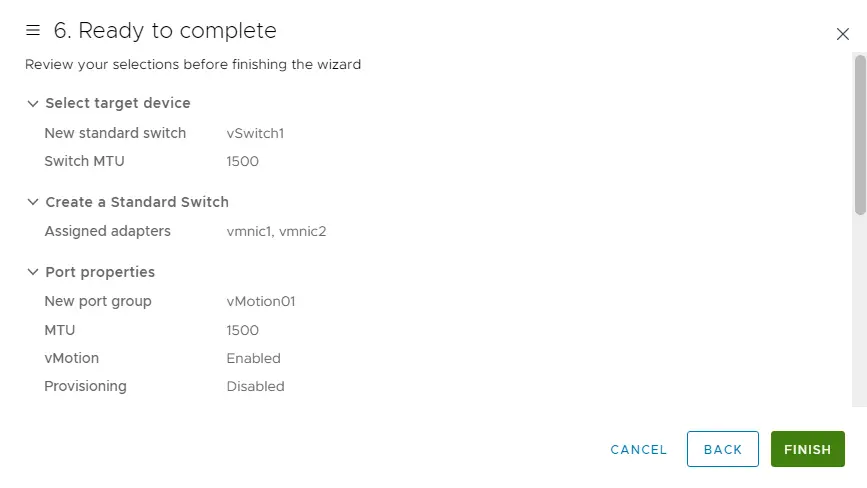
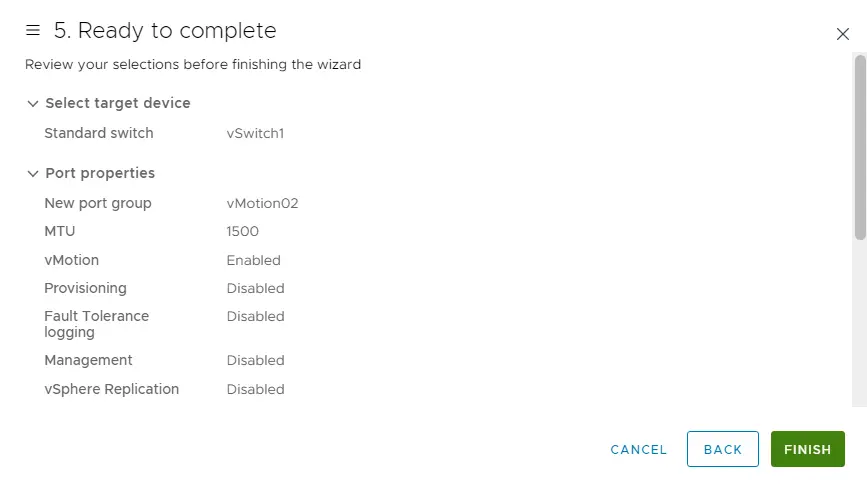
Review the new vSwitch configuration, and then choose the finish.
Create Second VMkernel Port – Multiple NIC vMotion
Now we need to create one more VMkernel port and click on Add Networking.
The VMkernel wizard will start again. Choose the VMkernel network adapter, and then click next.
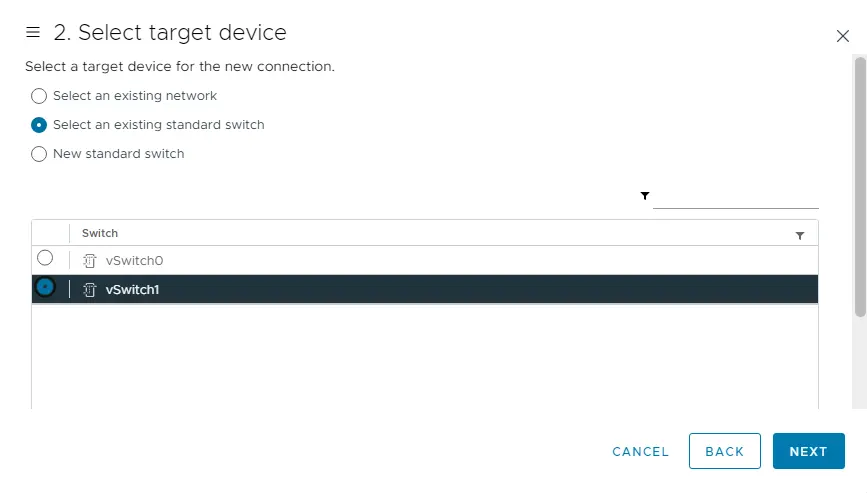
Tick the box and select an existing standard switch.
Select vSwitch1 and then choose OK.
Enter vMotion02 as a network label, choose vMotion services, and then click next.
Specify VMkernel IPv4 settings, Type the IP address, and then choose next.
Review the vSwitch1 settings and then click next.
Configure Active and Standby Adapters for Multiple NIC vMotion
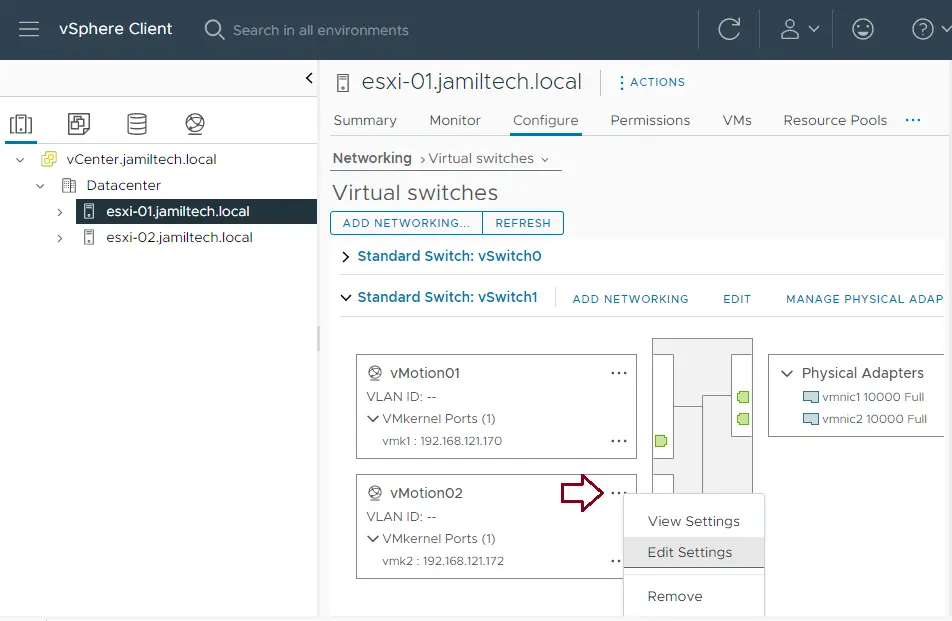
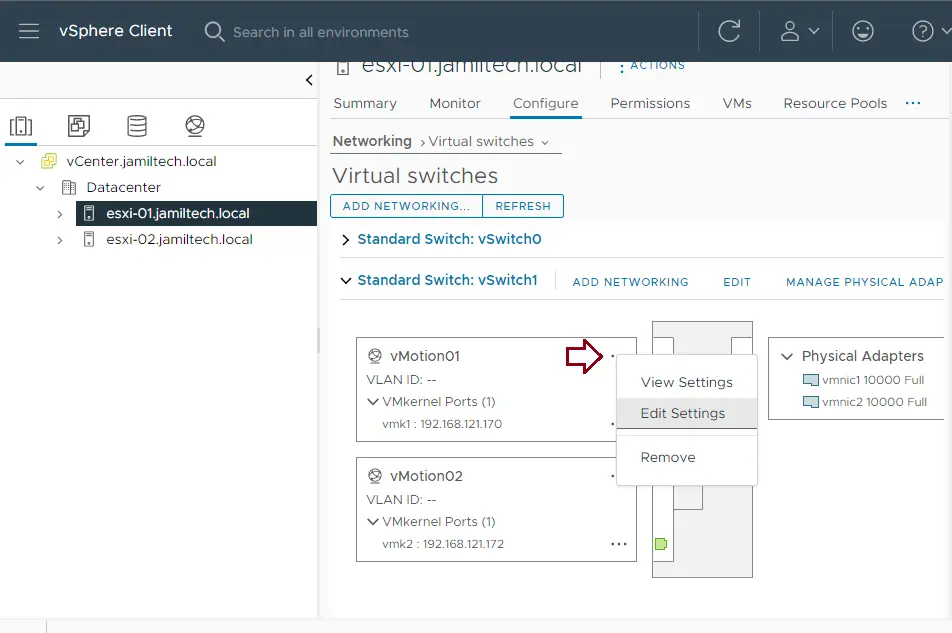
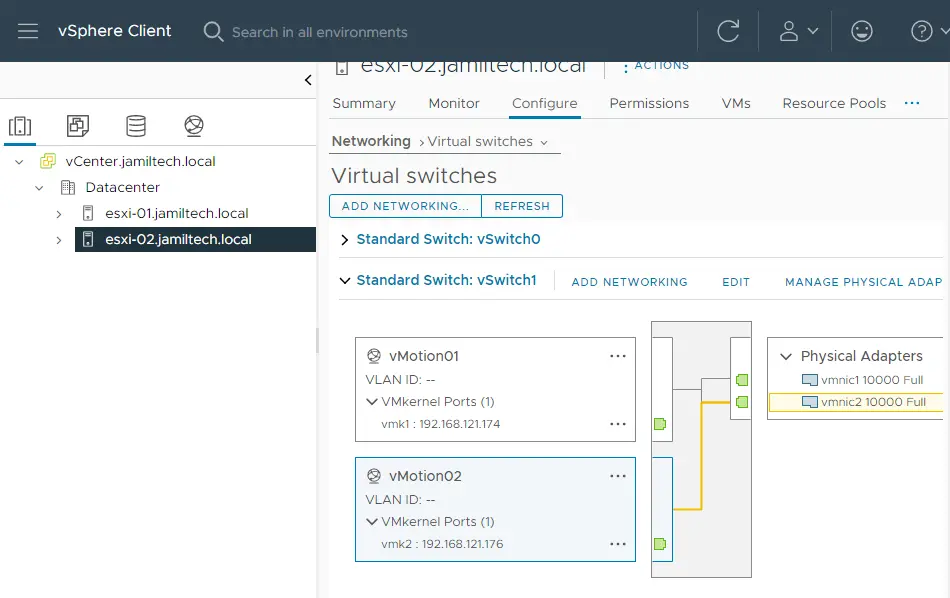
Once you finish the vSwitch wizard, keep vSwitch1 selected. Select the vMotion02 port group, click on… dot, and click on Edit Setting to edit the Teaming and Failover section.
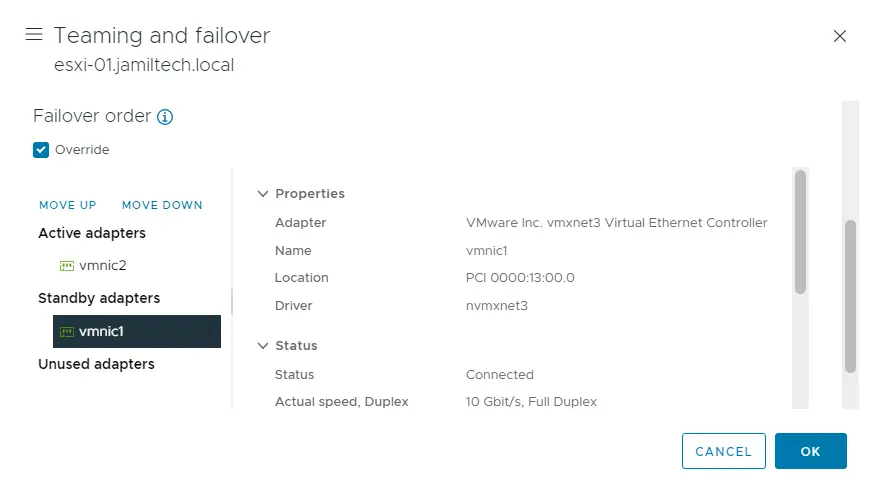
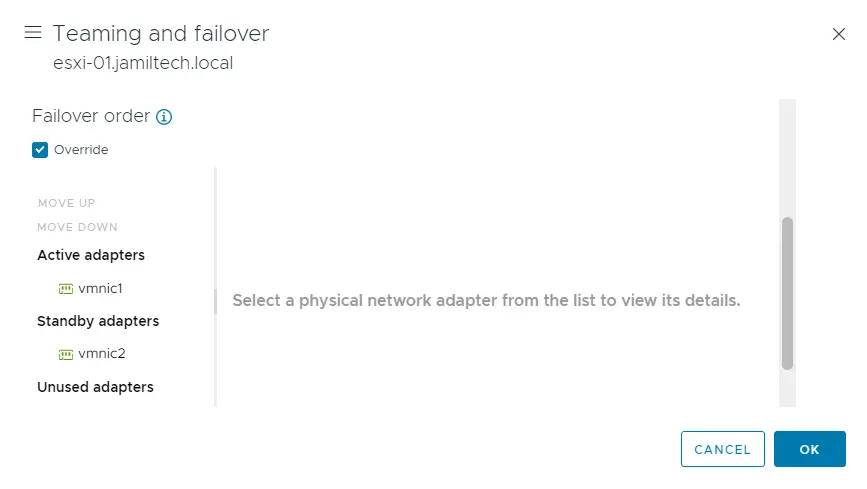
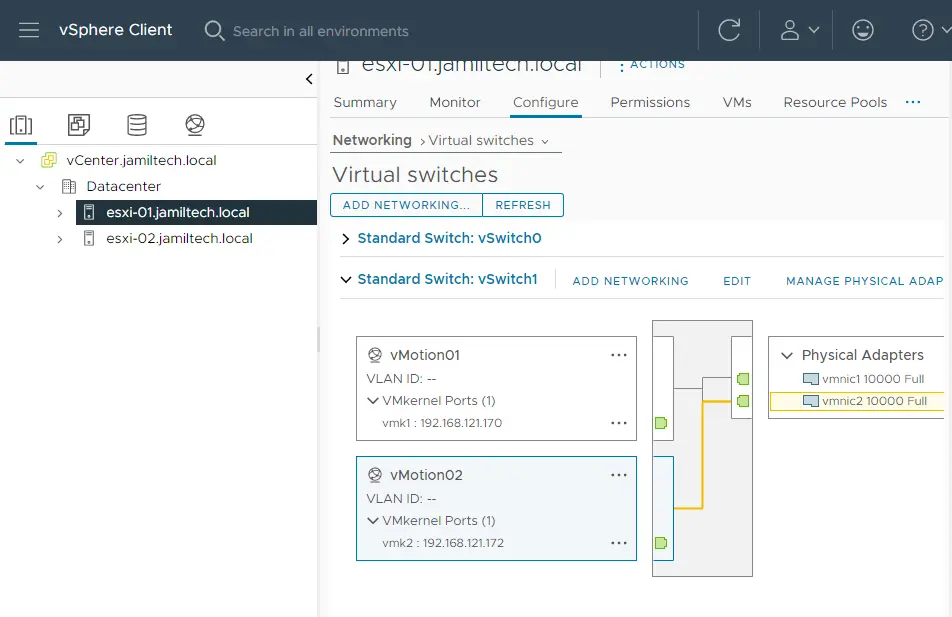
Click on the Teaming and Failover section, tick the box Override, select vmnic2 Active and vmnic1 Standby, and then choose OK.
We need to set up the same for the second NIC: select vMotion01, click on…, and then choose edit settings.
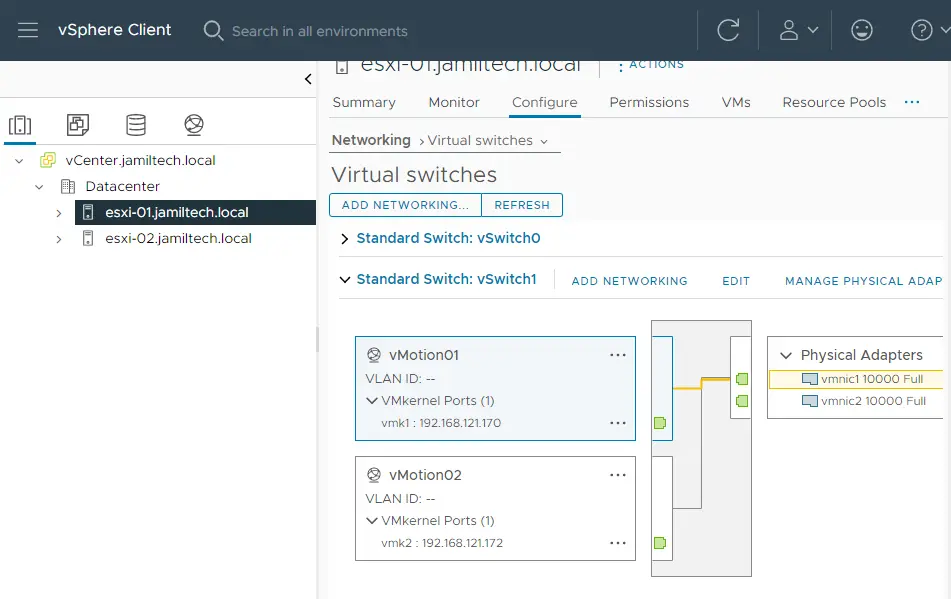
Click on the Teaming and Failover menu, tick the box Override, select vmnic1 Active and vmnic2 Standby, and then click OK.
vMotion01 (Vmnic1 active and Vmnic2 standby).
vMotion2 (Vmnic2 active and Vmnic1 standby).
VMware Active and Standby Multi-NIC Configuration for 2nd Host
Follow the above steps for the second ESXi host with your center.
Test Multi-NIC vMotion
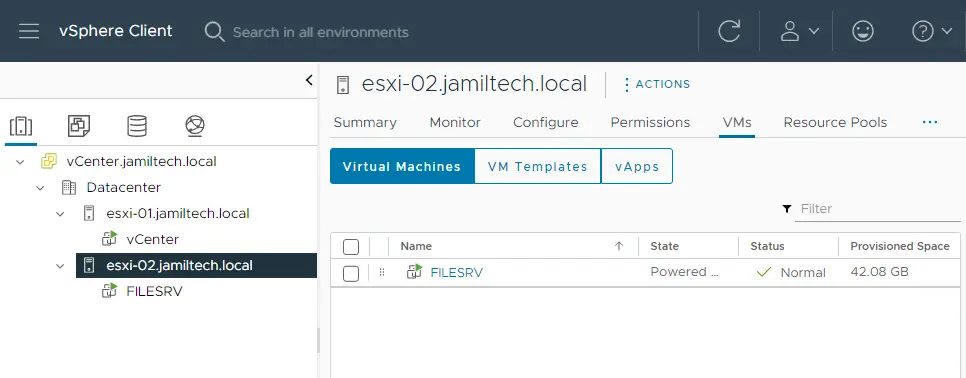
We need to test our Multiple NIC vMotion, FILESRV virtual machine, on ESXi-01.
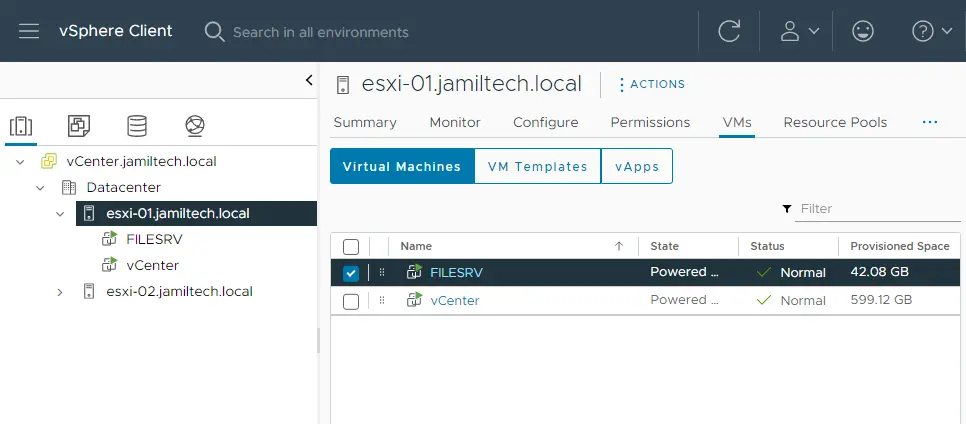
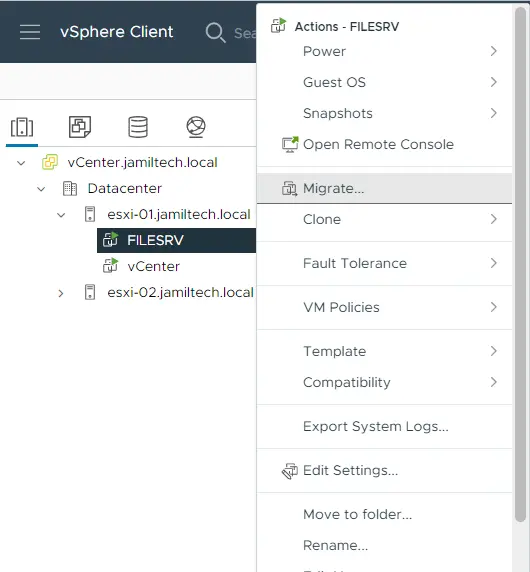
Right-click on the FILESRV VM, and then click on Migrate.
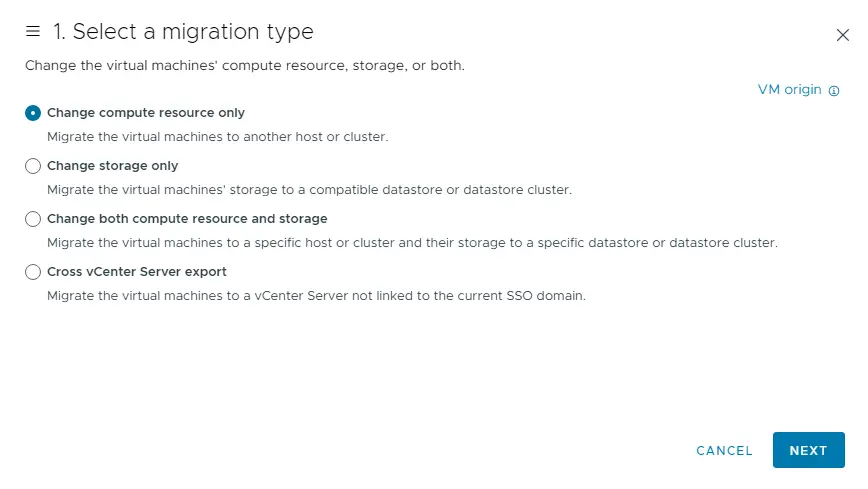
Choose a migration type, and then click Next.
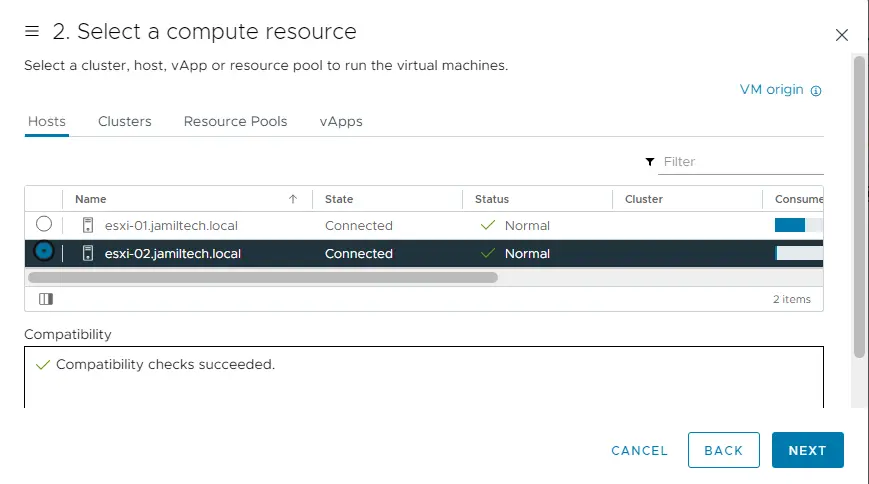
Choose the host where you wish to migrate the virtual machine, verify compatibility checks have succeeded, and then choose next.
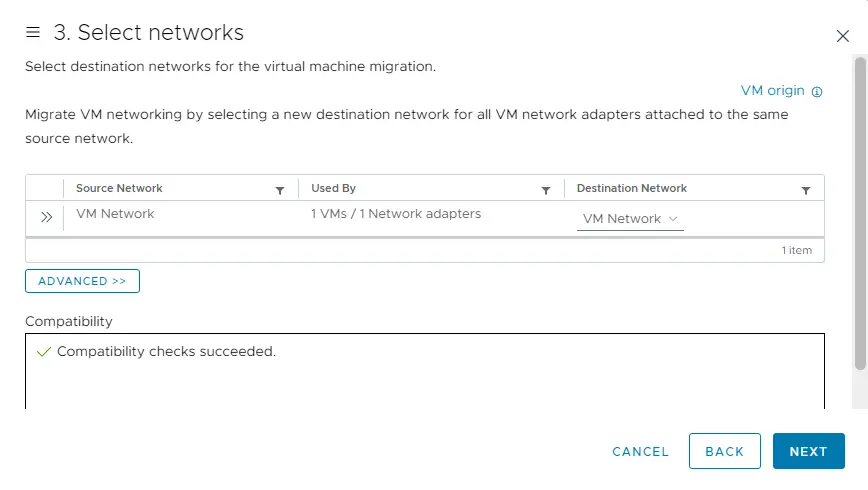
Network settings: choose next.
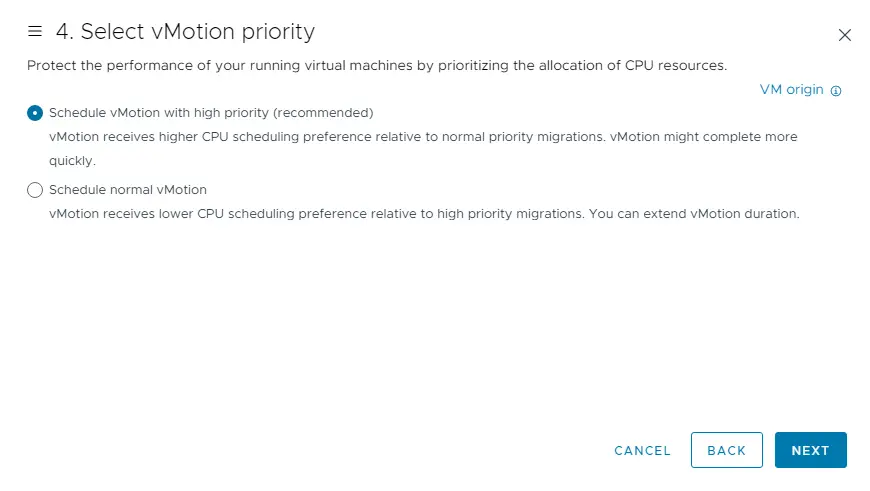
Choose vMotion priority and click next.
Verify the VM migration information, and then click next.
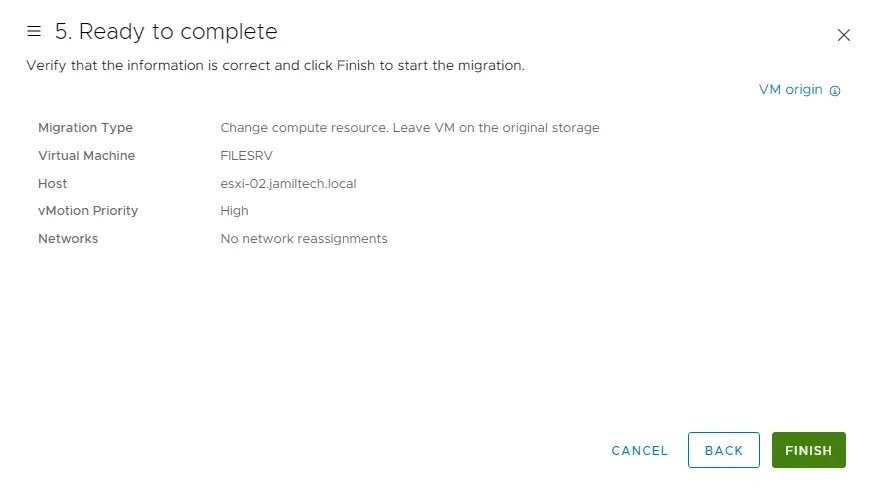
Now the FILESRV VM successfully migrates to ESXi-02.