In this article, we explore how to create an email alias in Microsoft 365, Office 365 and Outlook are discussed. Are you looking to add an alias to the Microsoft 365 email? Whether you’re in charge of several different business identities or require your customers to manage their email more easily, Microsoft 365 offers an easy and quick solution. In this informative article, we will teach you how you, as a managed service provider, can add an alias to their Microsoft 365 emails.
Note: We’re trying to fix an issue with aliases. If you see an error message, please wait an hour and then try again. Or your IT admins can create aliases in the Exchange admin center. Sign into your account with an email address and password. Let’s learn how you can add an email address (as an alias) from Microsoft.
Table of Contents
What is an Email Alias?
Before we get into the how, let’s define what an email alias is. Simply put, an email alias is an alternative email address linked to your primary Microsoft 365 email account. Email aliases are ideal for receiving emails sent to multiple addresses and saving them in the same mailbox.
To Create an Email Alias Address for Microsoft 365 User in Microsoft 365 Admin Center
Creating a new email alias for a Microsoft 365 user in your tenant requires a few fast steps, as described below.
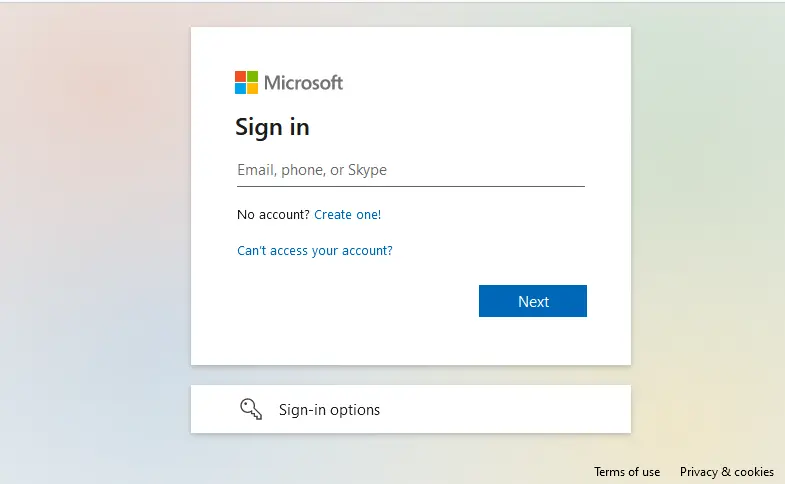
Open your favorite browser, go to admin.microsoft.com and sign in to the Microsoft 365 admin center with your administrator account.
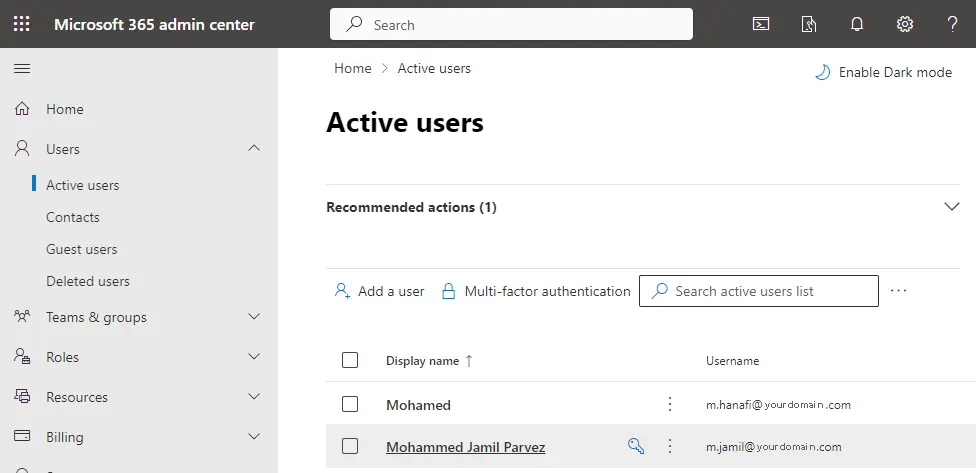
On the left side of the page, expand the Users menu, and then click Active Users.
The Active Users operation pane will appear on the right side of the window.
Select the active user to whom you wish to add the new email alias.
Click on Manage Username and Email.
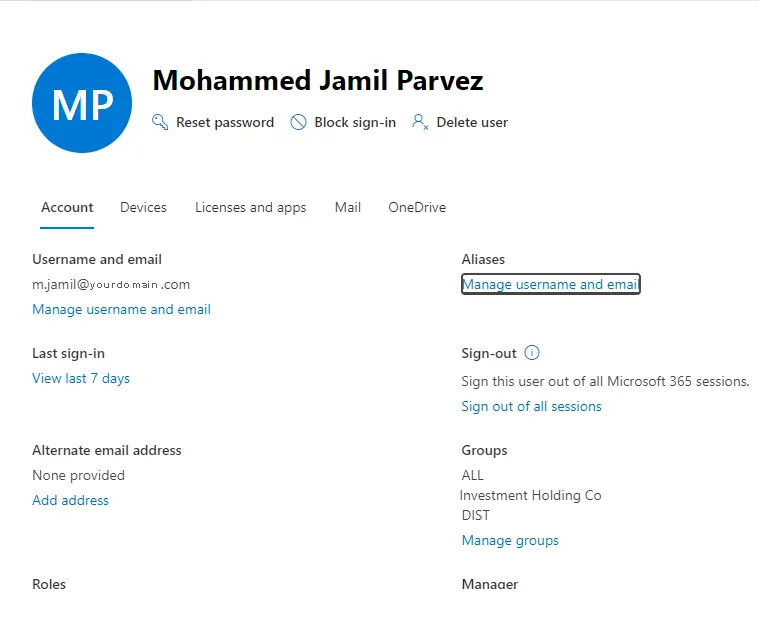
If the person does not have a license, you will not see this option.
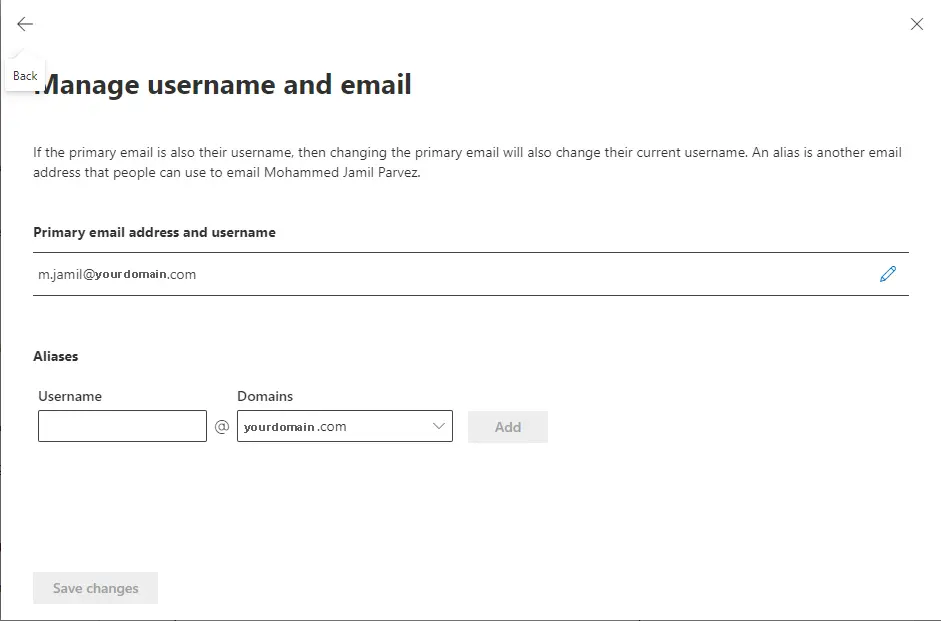
Under Aliases, type a new alias address you want to add, and then the drop-down menu allows you to select the domain for the email address.
Click Add and choose Save Changes.
Changes were saved successfully.
People can now send emails to the alias address, which will be displayed in your Microsoft email inbox.
The user will now have both a main address and an alias. For example, all messages sent to Jamil’s primary address, [email protected], and his alias, [email protected], will go to Jamil’s inbox. Sometimes you have to wait for some time for the new aliases to populate across Microsoft 365.
You can also use the Exchange Management Shell and the Exchange Admin Center to add a new email alias address to your Exchange Online.
Add a New Email Alias Address in Exchange Admin Center
Access your exchange admin center via the URL exchange admin center and sign in using your credentials.
In your Exchange admin center dashboard, expand Recipients and click on Mailboxes.
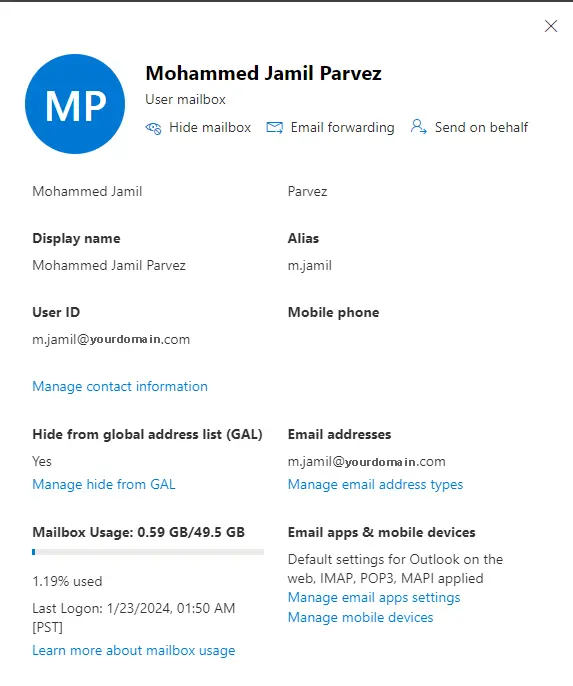
Click on the user to whom you would like to add the new email alias, and then choose the email address.
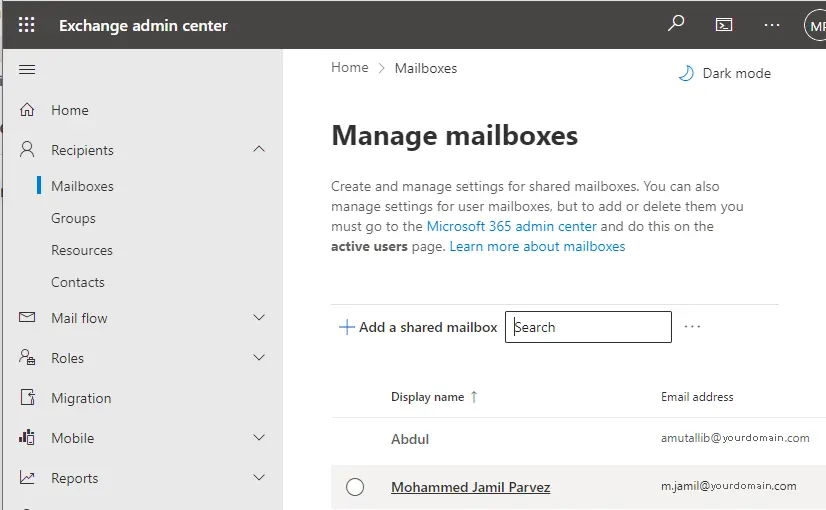
Click on the manage email address type link.
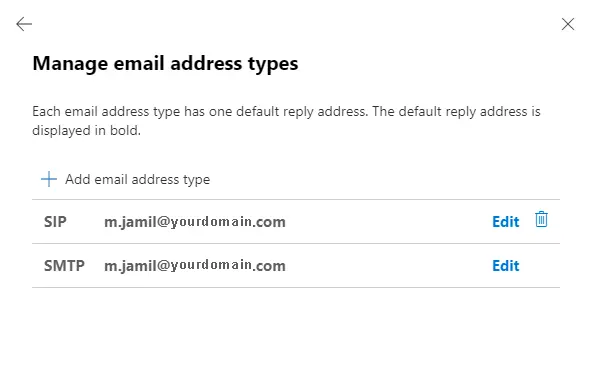
Click on Add + to add a new alias email address.
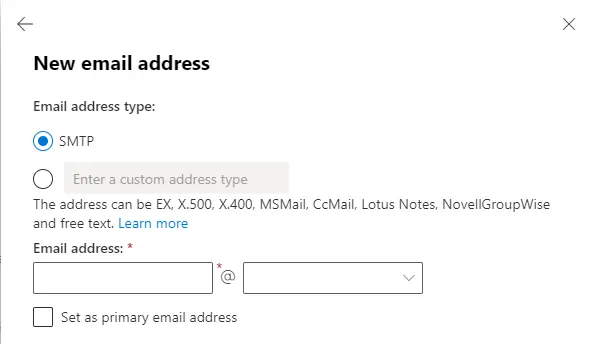
Keep the SMTP selected and type a new email address for your user.
When complete, click OK and save.
Wait for some time for the new aliases to populate throughout Microsoft 365.

