
In this article, we will learn how to create and delete checkpoints in Hyper-V. Virtualization has substantially changed the way businesses lead their operations and provide services to customers. One of the most remarkable virtualization technologies is snapshots. This VMware technology has transformed the way data is secured in virtual environments. In the steps below, we will cover the snapshot technology used in Microsoft Hyper-V and explain how you can configure and manage Hyper-V checkpoints in your virtual environment.
Table of Contents
What Is a Hyper-V Checkpoint?
Hyper-V checkpoints permit you to save the virtual machine’s state at a particular point in time. Virtual machine checkpoints can be very useful if you plan to make a few new changes to your system, such as app installation or software updates. If an unexpected error takes place, you can revert a VM to its previous state, thus discarding all the changes made.
How to Create and Delete Checkpoints
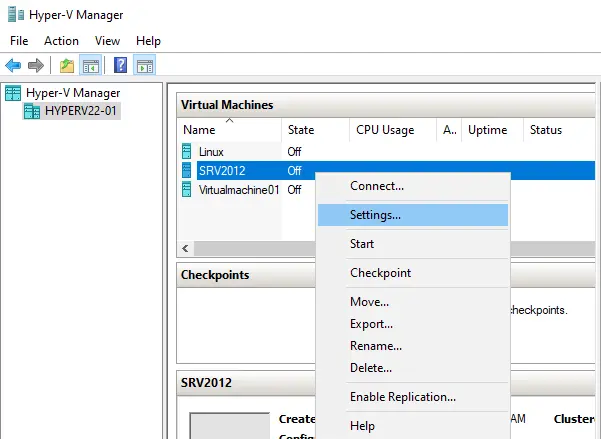
Through Hyper-V Manager, you can manually set up whether you need checkpoints to be taken off this virtual machine or not. In the Hyper-V Manager, right-click the name of the desired virtual machine, and then click Settings.
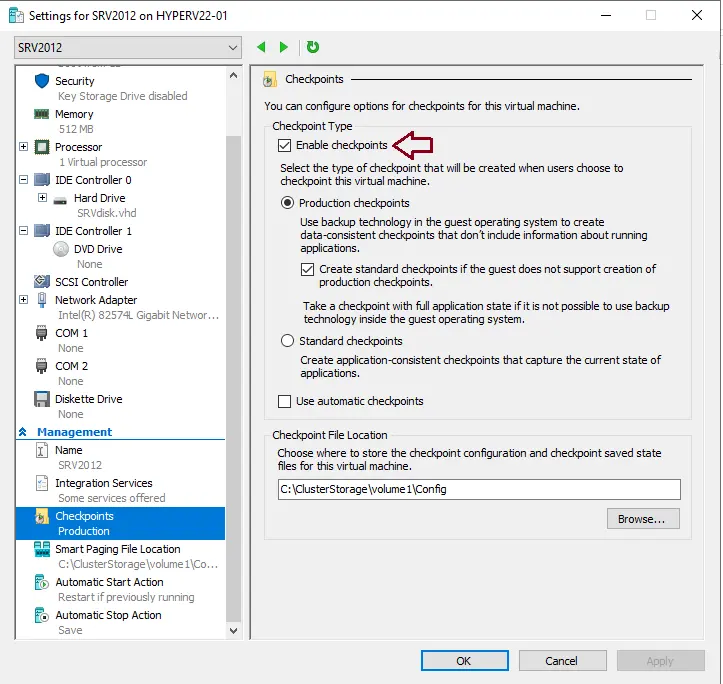
Under the Management section, click on Find the Checkpoints. In the right pane, you can either enable or disable checkpoints.
How to set up a checkpoint location
Hyper-V permits you to configure checkpoints, and checkpoint saved state files will be stored.
Find the Checkpoint File Location option and then click Browse, or manually type the path to the folder. Click Apply, and then OK.
How to Create Checkpoints in Hyper-V
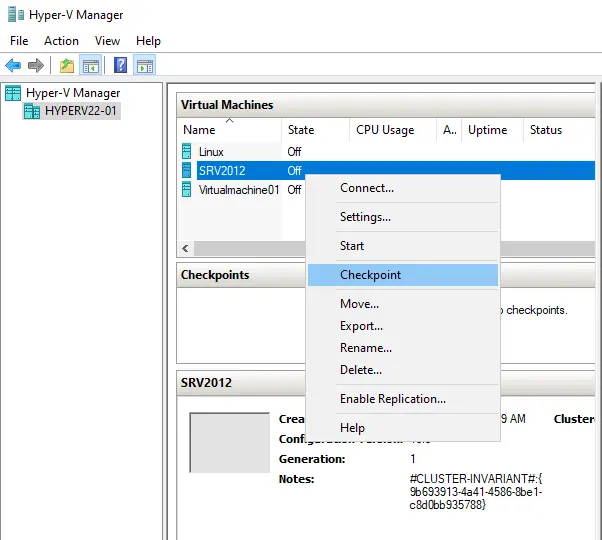
Choose the virtual machine for which the checkpoint will be created.
Right-click on VM, and then select Checkpoint.
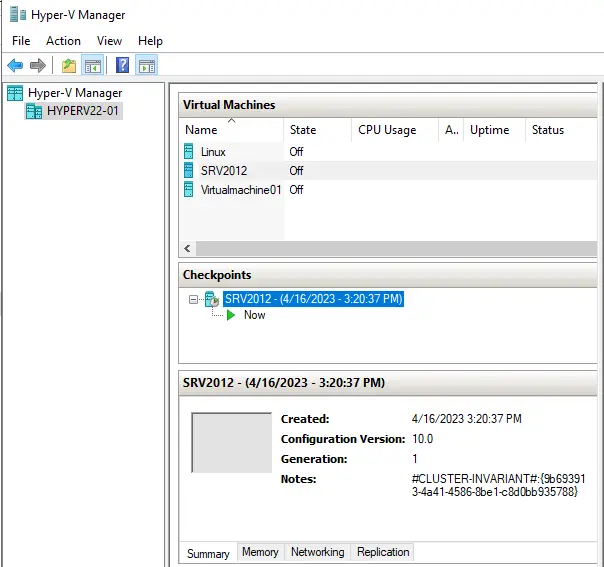
The checkpoint has been successfully created and can be accessed under the Checkpoints section.
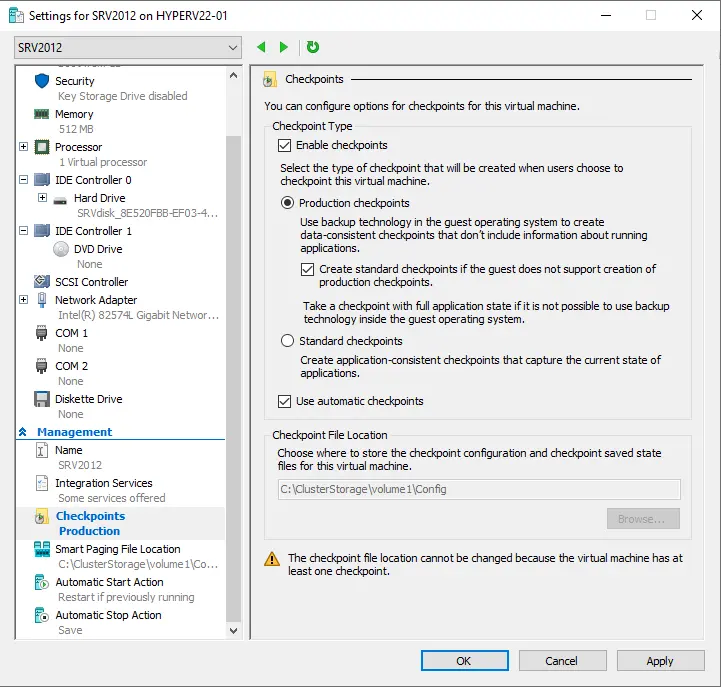
How to Change the Checkpoint Type
Right-click on the virtual machine that you want to change and select Settings.
Find the Management section and choose Checkpoints.
Select the checkpoint type. If you have chosen production checkpoints, select the box below in case your guest VM does not support the creation of production checkpoints. This permits you to capture checkpoints in a full-application state.
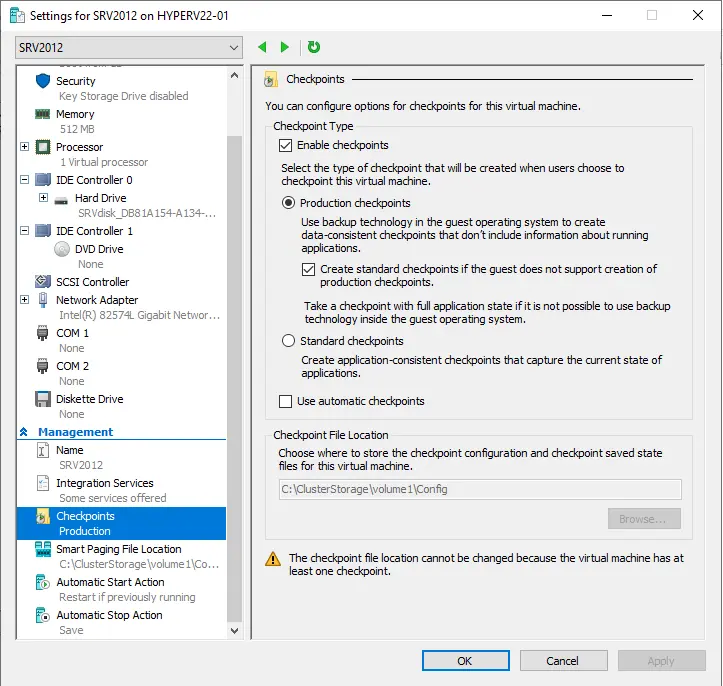
If you select standard checkpoints, you will be able to enable the feature of automatic checkpoints, which automatically creates checkpoints for virtual machines when they are started and then deletes them as soon as they are stopped.
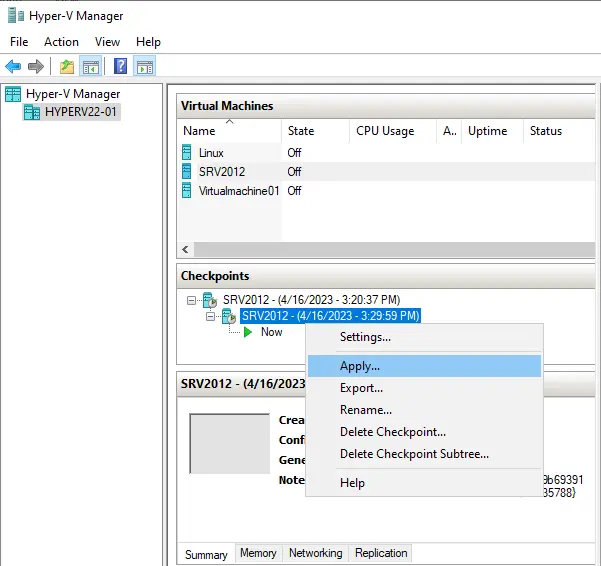
How to Revert a Virtual Machine to its Previous State Using Checkpoints
Choose the VM to which you want to revert.
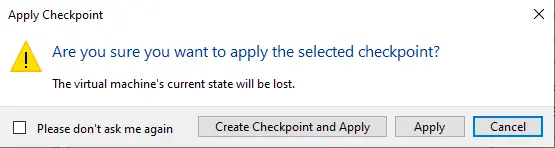
Right-click on the checkpoint that you wish to use, and then click Apply.
Only the selected checkpoint is applied. Please bear in mind that this action can’t be undone.
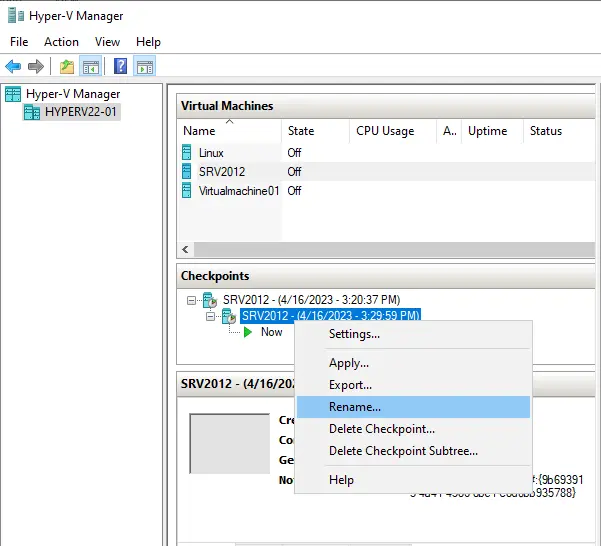
How to Rename Checkpoints
The standard checkpoint name contains the name of the virtual machine and the date/time when the checkpoint was created (Virtual Machine name: 4/16/2023 – 3:29:59 PM).
Right-click on the checkpoint and then choose the rename option, which appears in the drop-down menu.
How to delete checkpoints
In the Hyper-V manager, checkpoints are saved as .avhdx files in the same location as the .vhdx files of the virtual machine. As an outcome of deleting a checkpoint, the .avhdx and .vhdx files will be merged so as to save space and assure that no critical data is lost. After that, the checkpoint’s .avhdx file is totally deleted from the system file.
Right-click on a checkpoint that you wish to delete, and then click Delete Checkpoint.
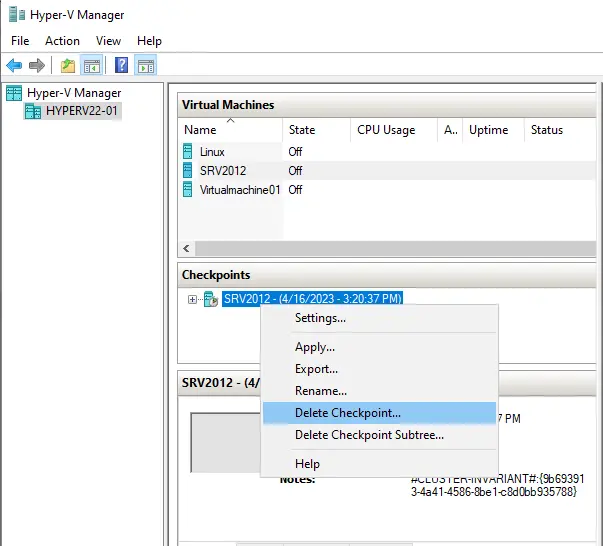
Click ok.
Read this article to find out more about using checkpoints.

