This article describes how to fix CPU over temperature error on Windows 11. No one likes it when their computers get too hot. Also, the internal parts didn’t last as long when they were exposed to high temperatures. The “CPU over temperature” error is an example. Luckily, the mistake doesn’t mean that your computer is dead, and there are several things you can do to make sure that the CPU temperature doesn’t get too high.
Table of Contents
What is CPU Overtemperature Error?
As the name suggests, a CPU temperature error happens when the temperature of your CPU goes above the highest temperature it can handle. That high of a temperature can harm the CPU core, and it might even stop functioning.
There are different reasons why your computer keeps showing you this message. Here are a few of the most well-known.
You can fix this issue on your computer in more than one way. Many of the solutions are software-based and easy to do on your computer. However, some hardware-based solutions might require professional help or some knowledge.
Fix CPU Over Temperature Error
Offer Appropriate Ventilation
Laptop users are more likely to have issues with air flow. If you use your laptop a lot and keep it on the bed, couch, or any other rough surface, that could be a big reason why it gets too hot because the cooling system can’t get enough fresh air to get rid of the heat properly.
Always use your laptop on a hard, flat surface, as this permits appropriate air collection and ventilation.
Turn Off CPU Overclocking
A CPU that is overclocked operates at its utmost capability while also requiring more voltage. Increasing energy consumption and clock speed raise CPU temperatures. If you are experiencing CPU overheating issues, it is strongly advised that you disable overclocking.
Clean Air Fans
If the fans on your computer’s CPU cabinet or laptop have accumulated a great deal of grime, it can hinder their ability to draw in fresh air. You can dislodge and remove the dust using compressed air, a vacuum cleaner, or a brush.
Find Out Which App is Using Most of the Resources
There could be programs that use a lot of resources for a long time, which could also cause the CPU to get too hot. You can use Task Manager to monitor all processes and determine which one may be causing the issue.
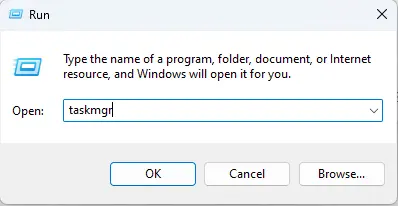
Open the Run box, type taskmgr, and hit OK to open the Task Manager window.
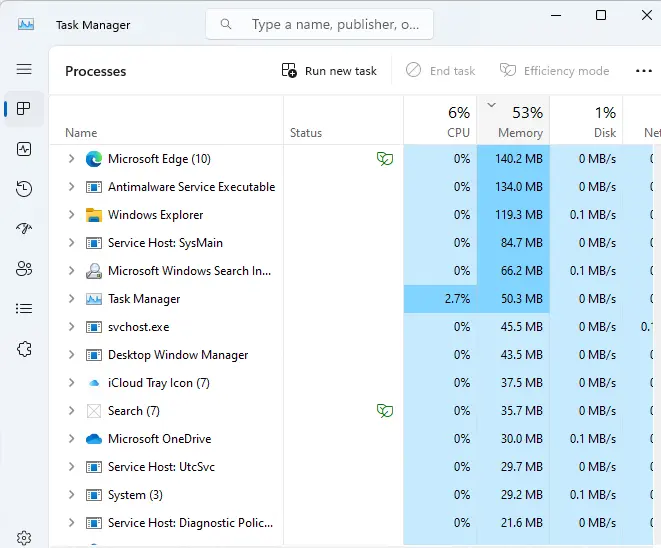
On the Task Manager interface, examine the CPU consumption of the processes. On a modern computer, a process utilizing more than five percent of the CPU is a red flag. On an older PC, it is recommended that you eradicate all processes associated with unnecessary applications and programs.
State of Processor Throttling
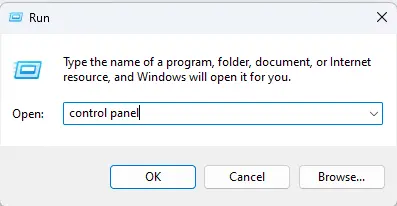
Type Control Panel in the run box to open the control panel.
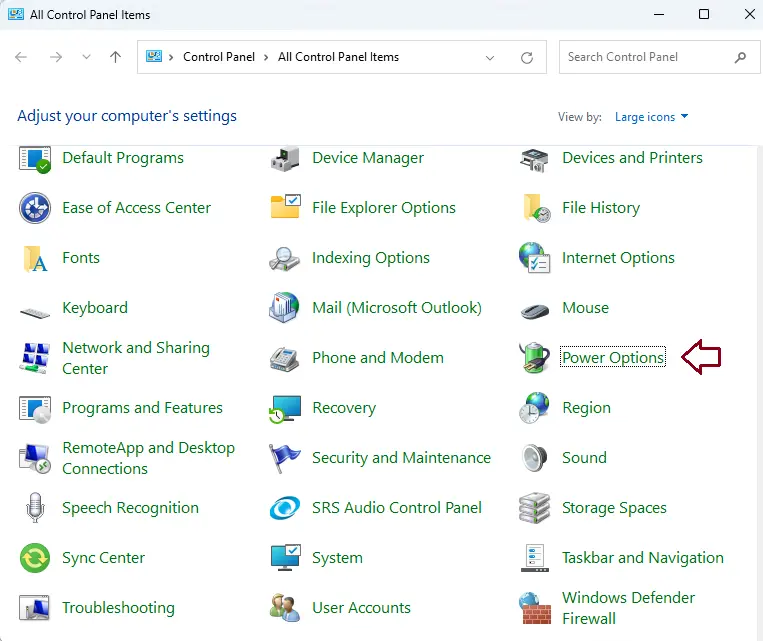
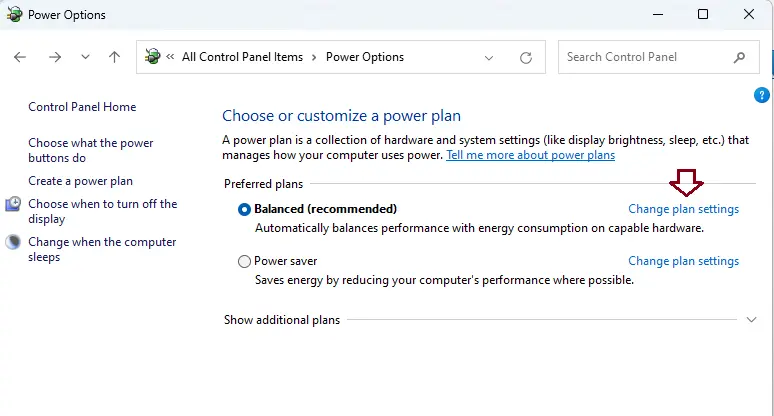
On the Control Panel, click on “Power Options”.
Select “Change plan settings”.
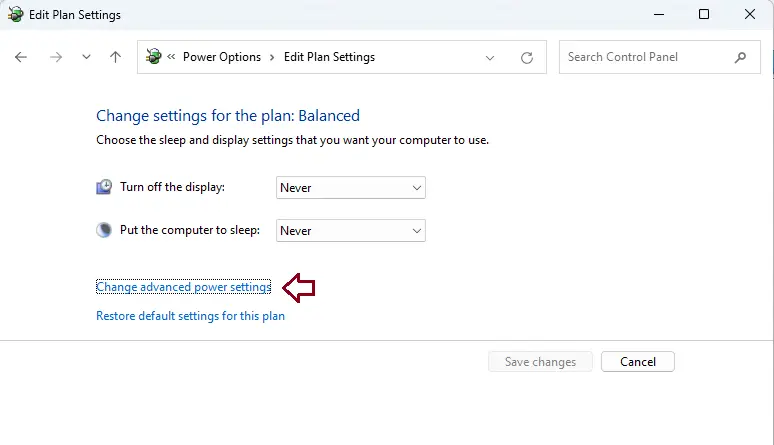
Select the “Change advanced power settings” link.
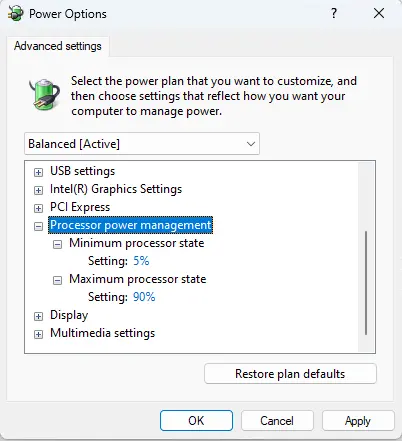
Expand “Processor Power Management”. Increase the “Minimum processor state” and decrease the “On battery” and “plugged in” values to low.
Update or Roll Back Windows Update
A PC update can include patches for crucial system files, BIOS and driver updates, and general bug fixes. If you haven’t updated your computer in a while, it’s possible that an obsolete system is causing the heating problem. If the error appears after a recent Windows update, you can attempt to resolve the issue by uninstalling the update.
Right-click the Windows start button and click on the settings.
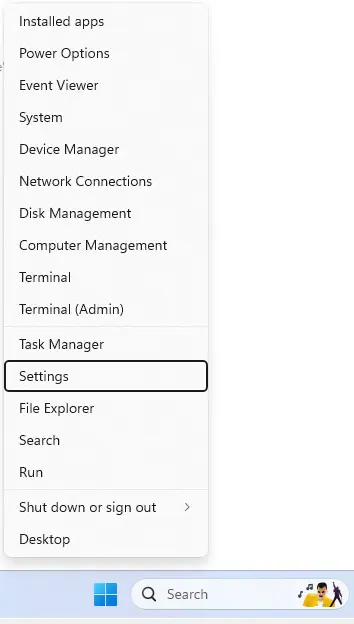
Afterwards, ensure that the “Windows Update” tab is selected from the left sidebar.
Click on the “Download and install or Restart now” option to install pending updates.
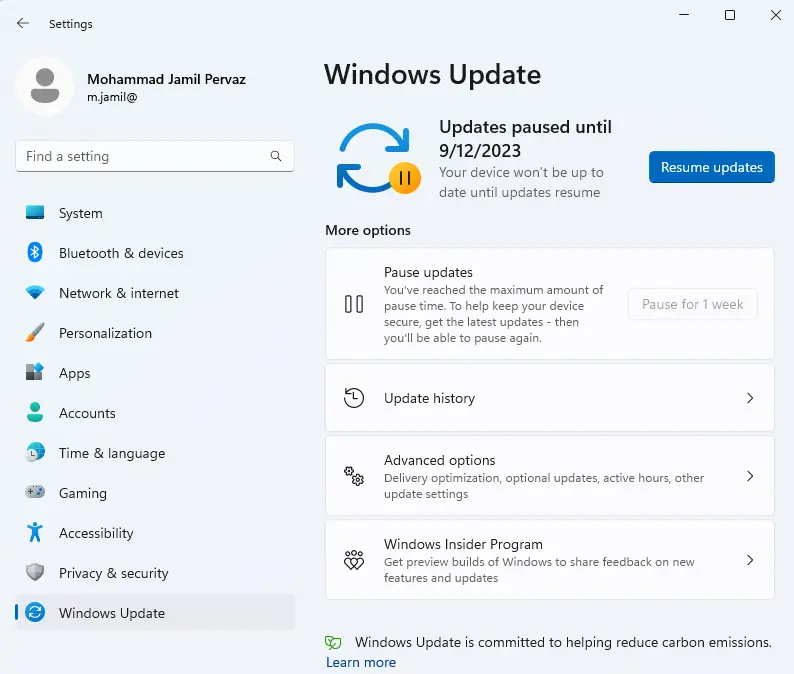
Click on the Update History button.
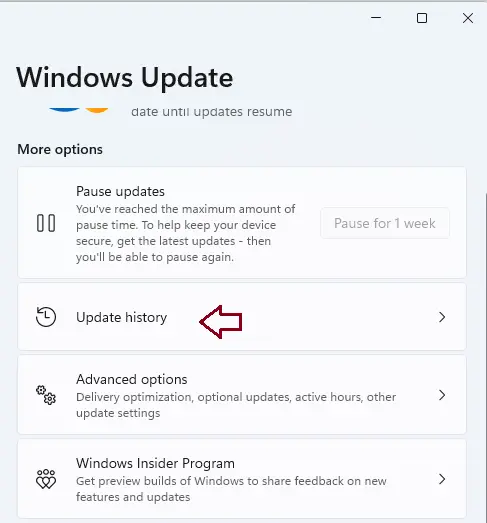
Scroll down and click “Uninstall Updates” to proceed.
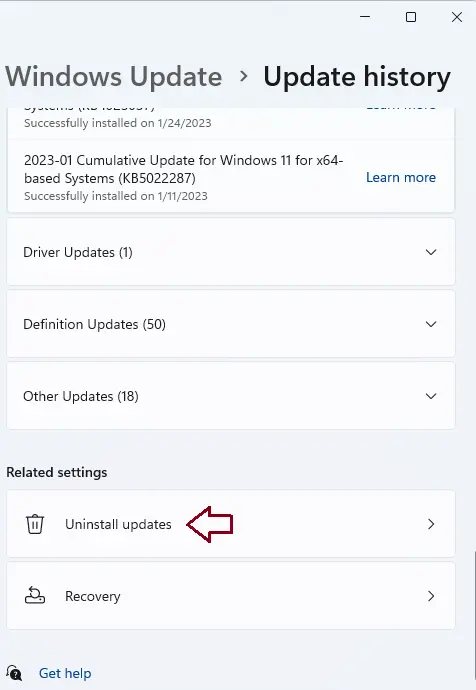
You will be able to view the timestamps of all recently implemented updates. Choose Uninstall on the most recent update.
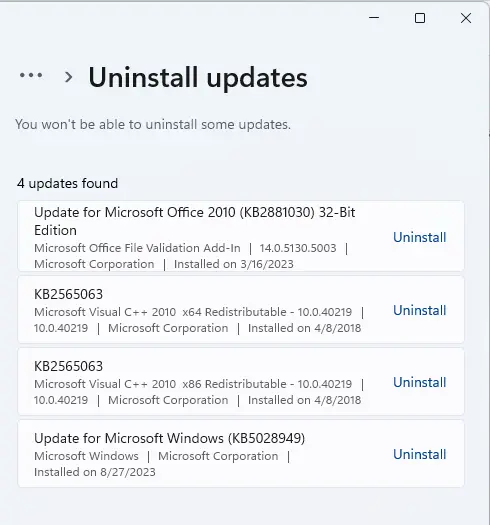
Click “Uninstall” to validate your choice to remove the update, restart your computer, and check if the issue has been resolved.
Roll Back to a System Restore Point
If you have reason to believe that the issue is related to the operating system or an application, restoring your computer will resolve the issue. To turn back, however, you must have an existing restore point from before the error happened.
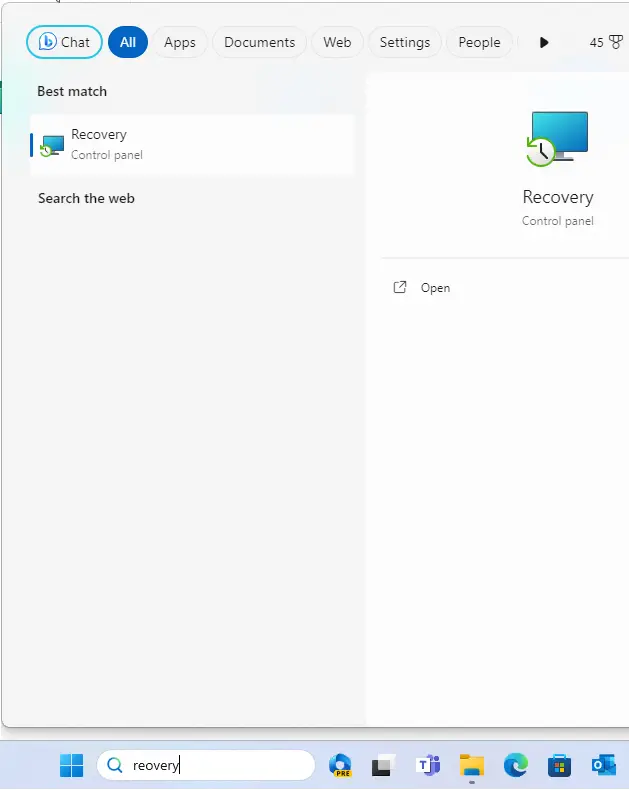
Search for recovery in the search box and open it.
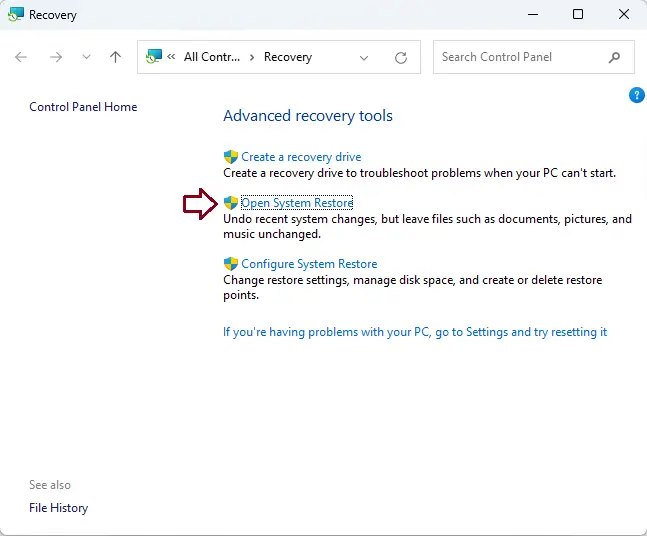
Click on the “Open System Restore” link from the list.
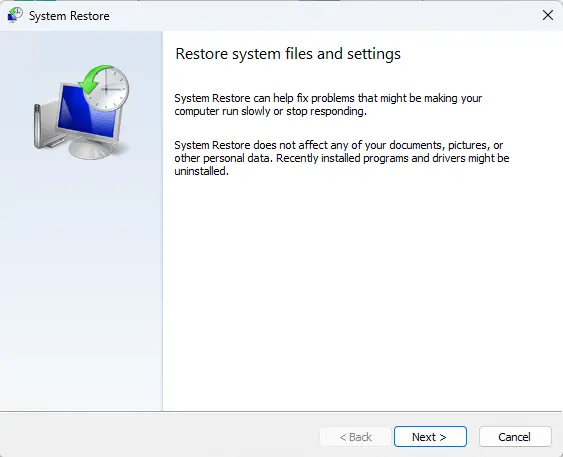
In the Restore System Files and Settings Wizard, click Next.
Select the desired restore point, and then click Next to initiate the rolling back process.
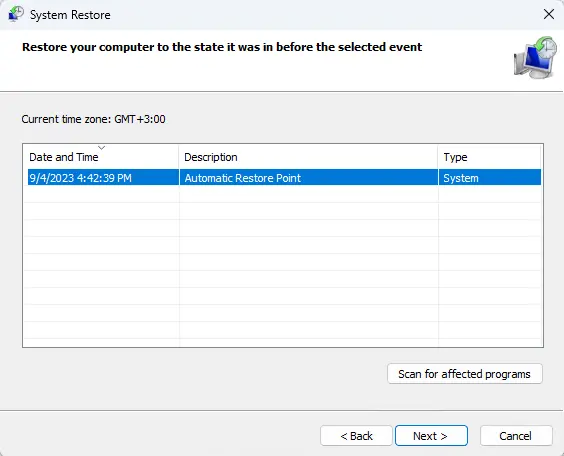
The restore point’s time stamp and a list of the drives that the rollback will affect will appear on the following screen. To view a list of affected applications, click the “Scan for Affected Programs” link.
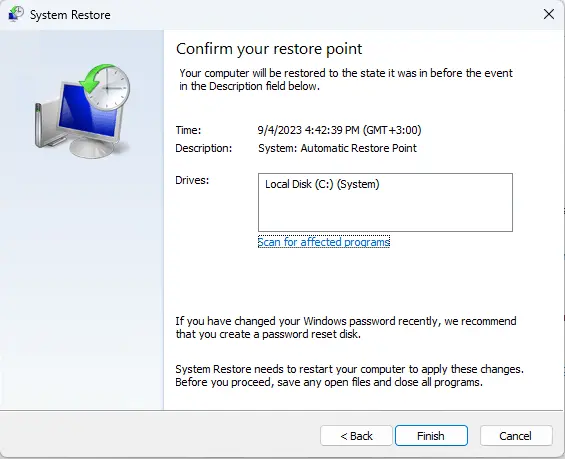
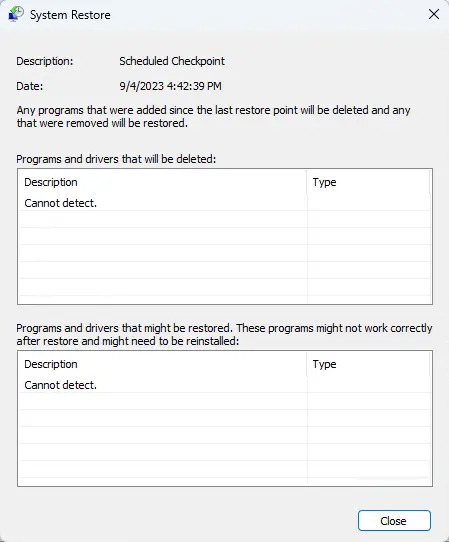
You can view the apps that will be deleted and the ones that will be restored. Click on the close button.
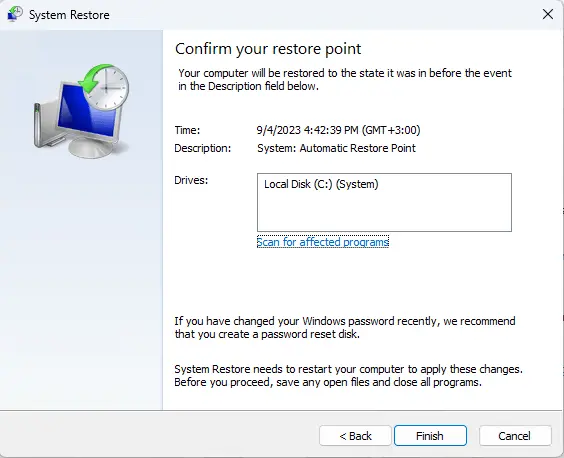
Click on the Finish button to initiate the rollback process.
Refer to this article to learn more about high-temperature CPU errors.


