In today’s article, I will explain how to fix this PC Cant Run Windows 11 in VirtualBox. Let’s learn how to create a Windows 11 Virtual Machine via VirtualBox and debug the error “This PC can’t run Windows 11”. I will explain it: even a non-technician person can install Windows 11 as a virtual machine.
If you attempt to install Windows 11 on an Oracle VM VirtualBox and see the error, “This PC Can’t Run Windows 11,” this article will help you. When you see this error, it means your system doesn’t meet the Windows 11 installation requirements. For instance, we were unsuccessful when we attempted to install Windows 11 on an Oracle VirtualBox with 2 core CPUs, 2GB of RAM, and a 40 GB HDD configuration.
Windows installation failed with the error “This PC Can’t Run Windows 11.”
Throughout the Windows 11 installation, just once I selected the edition, I experienced a “This PC can’t run Windows 11. This PC doesn’t meet the minimum system requirements to install this Windows version.” error message. Because of the message, I couldn’t install Windows 11 on VirtualBox until I bypassed the system requirements check.
You can use the official Microsoft PC Health Check App to check if your PC meets the Windows requirements.
Table of Contents
How to fix the Windows 11 VirtualBox error
When you receive this error, “This PC cannot run Windows 11”. Now close this error window. You will receive the Are you sure to quit? Click Yes.
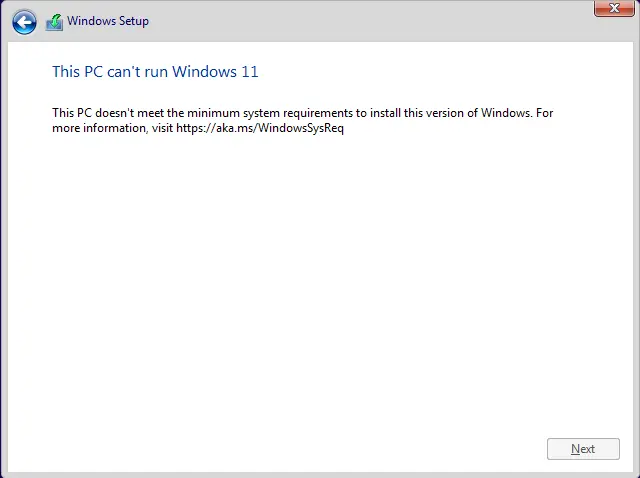
This PC Can’t Run Windows 11 in VirtualBox
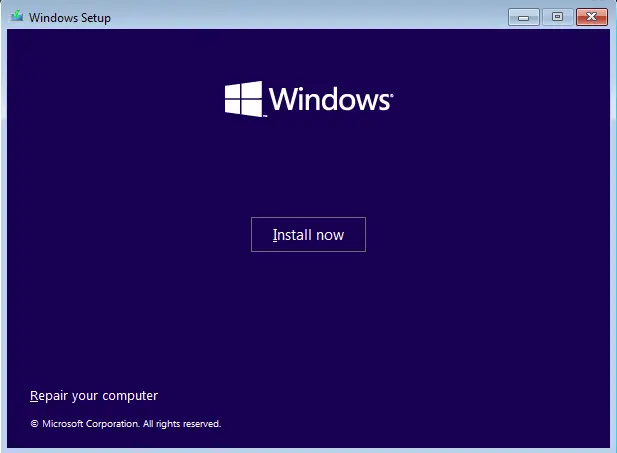
You will see the “Install now” window. Press the Shift + F10 keys to launch the Command Prompt window.
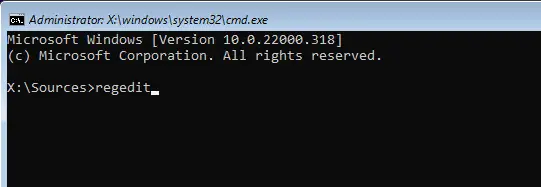
In the Command Prompt, enter Regedit, and then hit enter to launch the Windows Registry Editor.
On the left side of the Registry Editor, go to the following key:
Computer\HKEY_LOCAL_MACHINE\SYSTEM\Setup
On the right side of the empty space, right-click, select New, and then select the Key option.
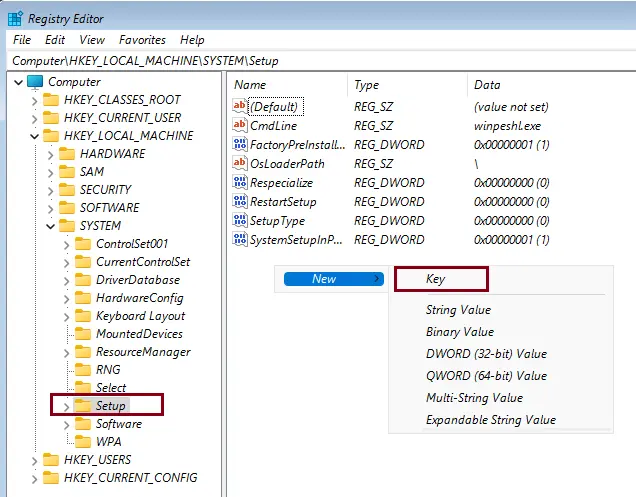
Type a new key name, LabConfig.
In the left pane, click on the LabConfig key.
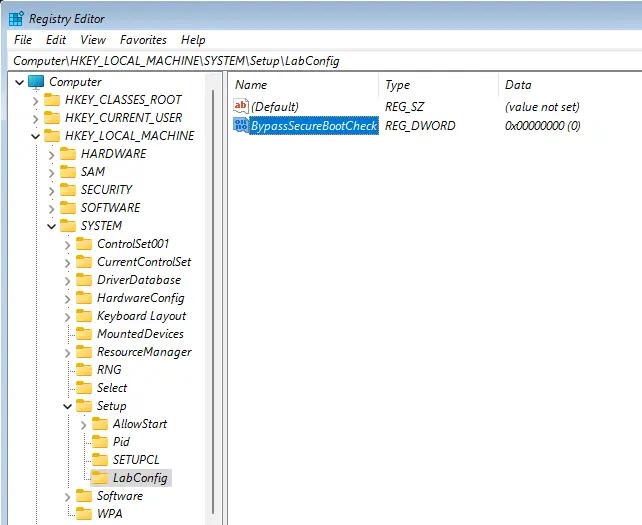
On your right side, right-click on any empty space, select New, and then choose the DWORD (32-bit) Value option. Name it BypassSecureBootCheck.
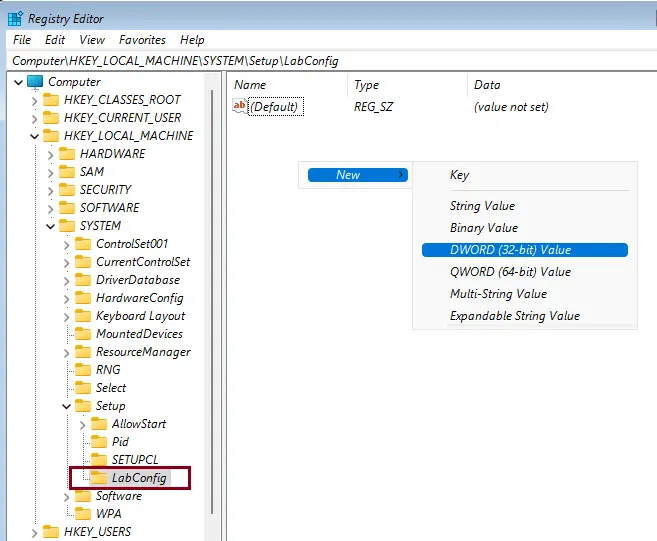
Now double-click on the BypassSecureBootCheck value.
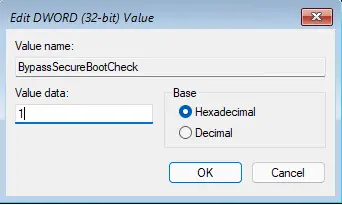
Change the value from 0 to 1. This will make sure that the Secure Boot check is bypassed during the installation.
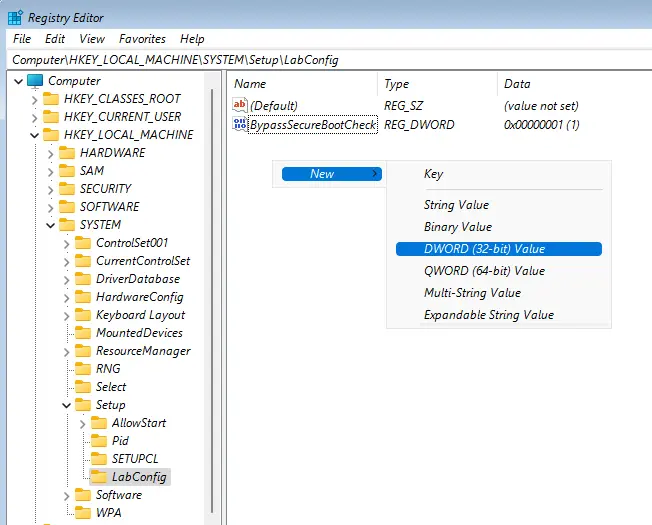
Once again, right-click, select New, select DWORD (32-bit) Value, and then type BypassTPMCheck.
Double-click on it and then also change its value data to 1 to skip the TPM 2.0 requirement check.
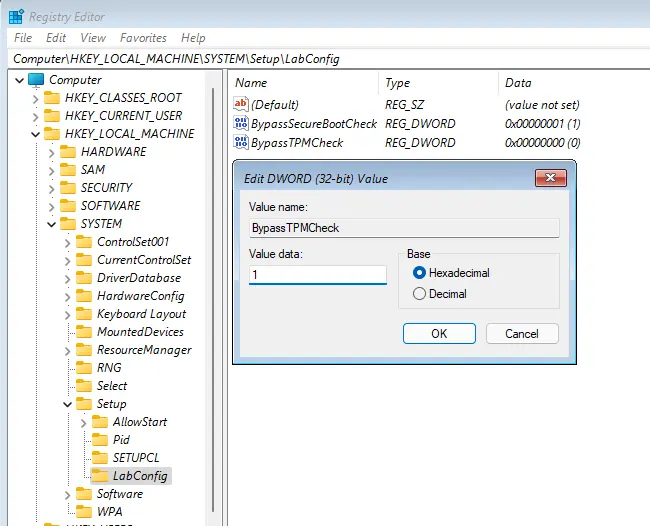
Right-click again, select New, and then select DWORD (32-bit) Value and type the new value as BypassCPUCheck. Double-click on it and set the value from 0 to 1.
Do a right-click again, choose New, and then click on DWORD (32-bit) Value and type as BypassRAMCheck. Then, open it and set the value to 1.
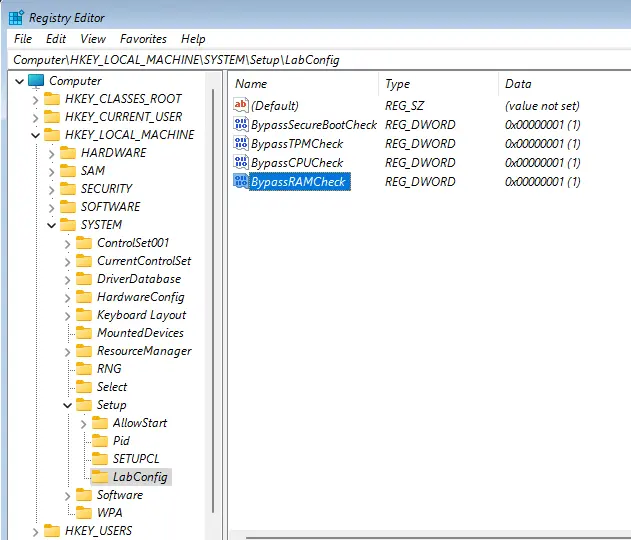
We have successfully configured the Windows Registry to bypass TPM 2.0, Secure Boot, CPU, and RAM. Now you can resume the Windows 11 installation.
Close the Registry Editor window. Select the Install Now button to continue installing Windows 11 without the error. Follow the further steps to complete installing Windows 11.


