This article will explain how to configure Autodiscover in Exchange Server 2019. You can follow these steps to learn how to configure and edit the default Autodiscover service and virtual directory URLs in Exchange Server 2019 and newer versions via the Windows PowerShell command and using the EAC (Exchange Admin Center).
The Autodiscover service is an Exchange Server service that helps users, such as Microsoft Outlook, automatically solve and find the EWS (Exchange Web Services) URL. The service was launched with Exchange 2007 and Outlook 2007 releases to help users automatically set up the connection with the Outlook user mailboxes on Exchange Server and configure the user profile in Microsoft Outlook clients in “Windows, macOS”, or supported mobile devices with minimum steps.
Refer to this article to learn more about Autodiscover in Exchange 2019.
Once the user is connected to the Microsoft Exchange messaging system, The Autodiscover service permits the user to access the Exchange Server features, such as unified Messaging, Offline Address Book, Cached Exchange Mode, etc. If the Autodiscover virtual directory URLs aren’t configured properly, users may experience connectivity problems and fail to configure their email accounts in the Outlook client.
Table of Contents
Configure Autodiscover Service in Exchange Server 2019
When we install and set up our Exchange Server, it automatically generates an auto-discover virtual directory in the Internet Information Store (IIS). At the same moment, an SCP (Service Connection Point) thing is also created in the Active Directory including the Autodiscover Service URL.
In the following, we have discussed the steps to configure the namespace, “internal and external URLs”, and the “internal Autodiscover URL” in Microsoft Exchange Server.
Configure the Autodiscover URL
Using the “Get-ClientAccessService” and “Set-ClientAccessService” commands. You can update the internal Autodiscover virtual directory URL.
Now you can perform the following command by replacing the FQDN you added as an A record in the earlier step.
Configure Autodiscover in Exchange PowerShell
Set-ClientAccessService –Identity EX2019-01 –AutodiscoverServiceInternaluri https://autodiscover.jamiltech.com/autodiscover/autodiscover.xml

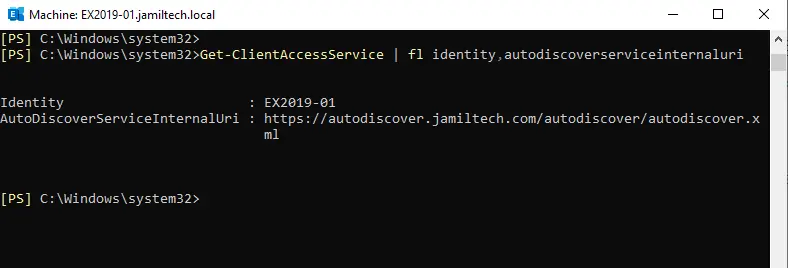
Then you can verify if the AutodiscoverServiceInternalUri has changed or not by typing the following command:.
Get-ClientAccessService | fl identity, autodiscoverserviceinternaluri

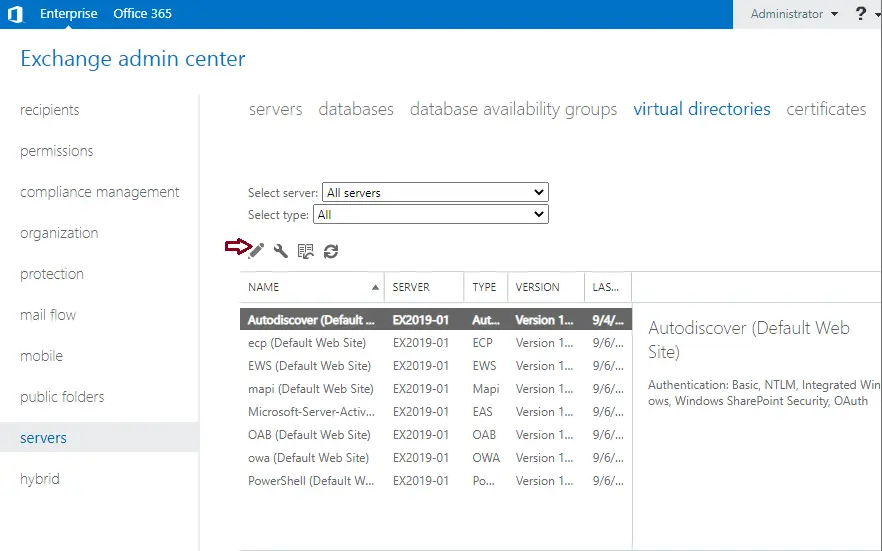
Go to the Exchange admin center, under the virtual directory.
Select Autodiscover (default website) and then click on the edit icon.

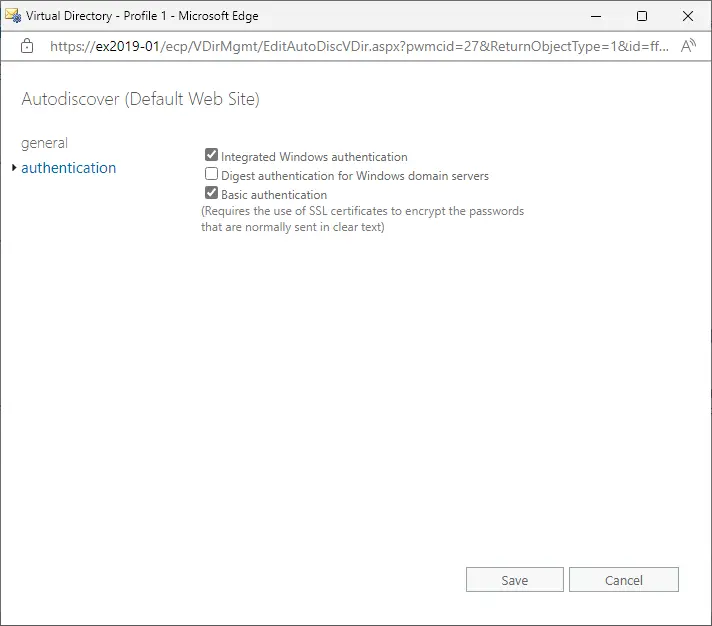
Select authentication, select these options, and then click save.

Related: How to Backup and Restore Exchange Database


