Let’s have a look at how to create send connector in exchange server 2019. By default, the send connectors are configured to send e-mails to others within the company. Although administrators want to set up a send connector on the Exchange server to send emails outside the company,.
You can configure internal, Internet, custom, and partner send connectors in Exchange Server to permit users to send e-mails to other non-exchange mail servers, route e-mails through the Edge transport server, send e-mails to the Internet, or third-party servers via SSL authentication and TLS encryption, respectively.
Follow the below steps to create the Internet Send Connector.
Table of Contents
Create Send Connector
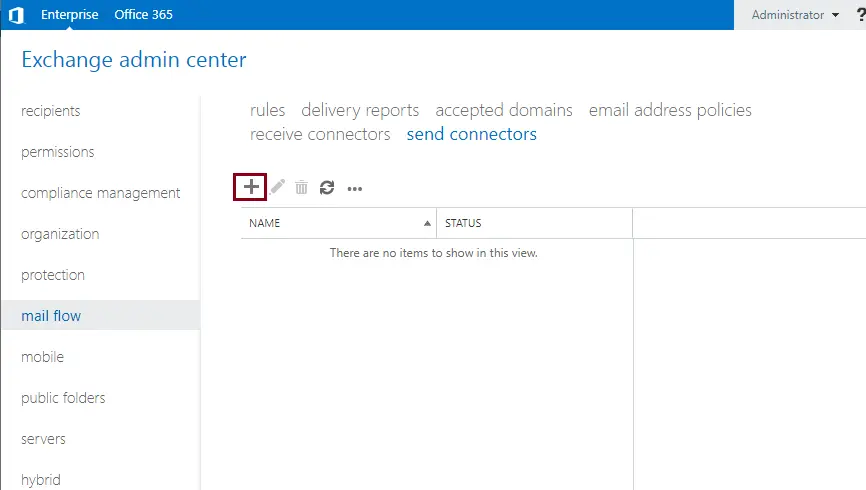
Log in with the Exchange Admin Center and then go to the mail flow option.
Select send connectors
Click on the + (add icon) to create a new Send Connector.
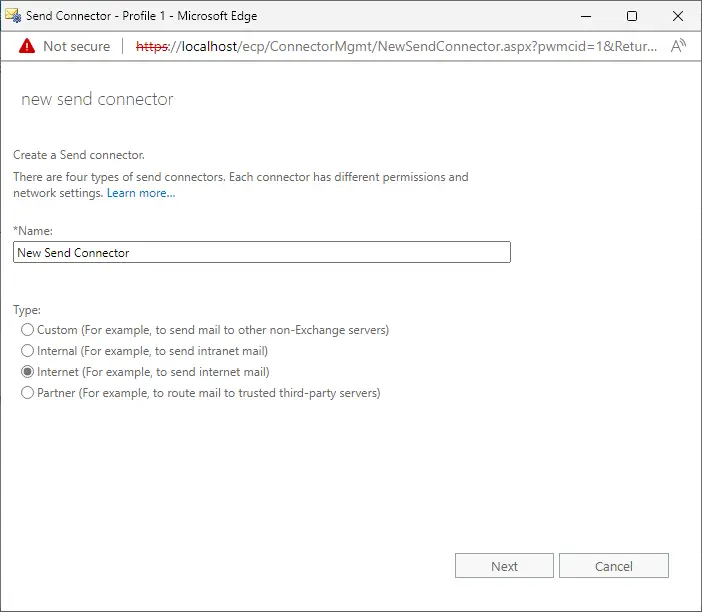
Type the send connector name.
Choose Type: Internet, and then click next.
You must select Internet Send Connector to permit users to send emails to the Internet (outside the organization).
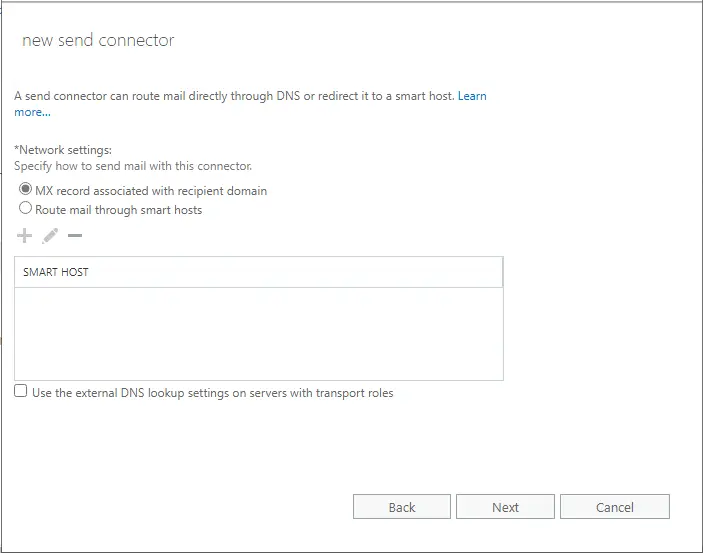
In the new send connector wizard, leave the default settings on the network settings page, and then click next.
Under Address, space selects the + icon.
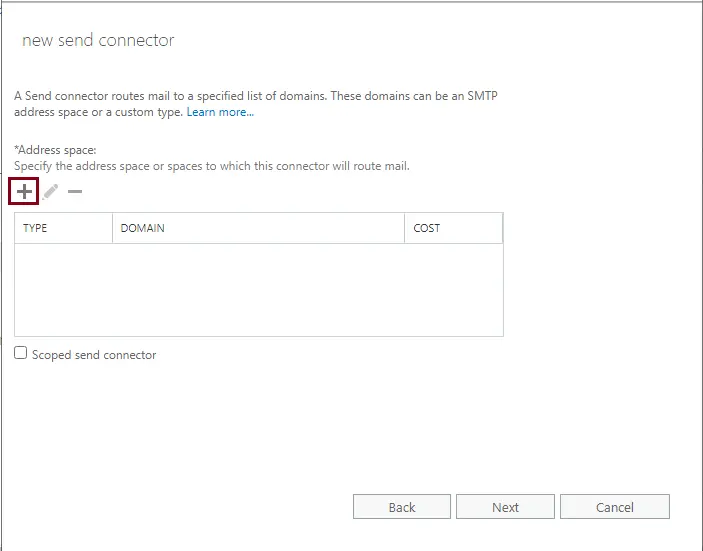
You can select the default “MX Record” associated with the recipient domain, a “DNS Send Connector”, and click next.
You may also select “Route mail” through smart hosts, which is essentially an “SMTP server” that belongs to your “service provider (ISP)” or “third-party SMTP provider” (emails are delivered on your server’s behalf).
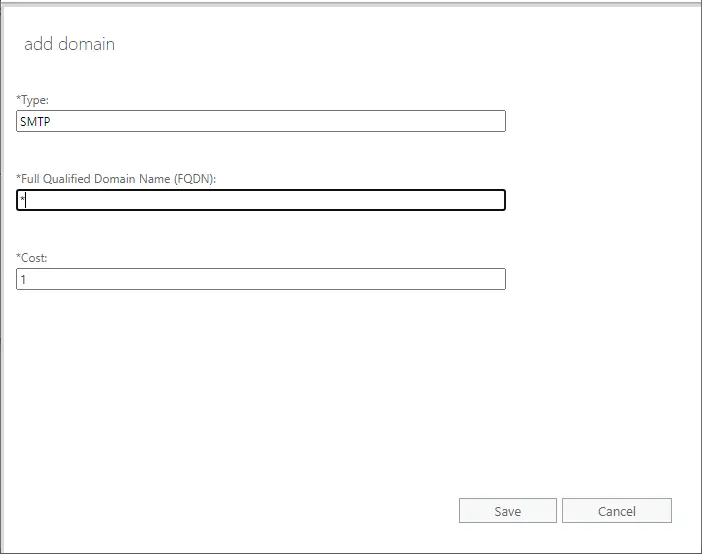
After selecting the + icon, add the SMTP send connector.
Type SMTP in the Type option.
Add * in the FQDN if you need to permit all outgoing mail from this send connector.
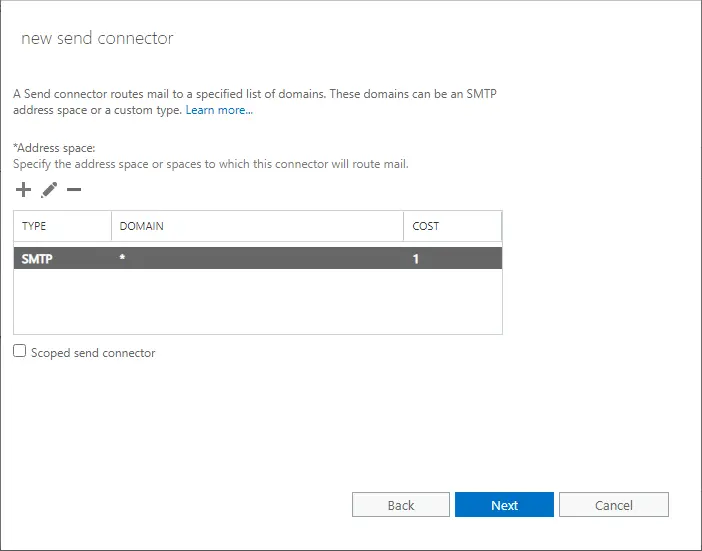
Select save.
Click next
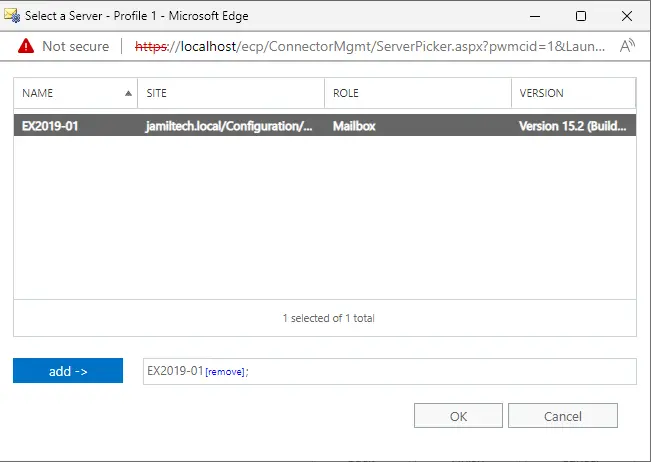
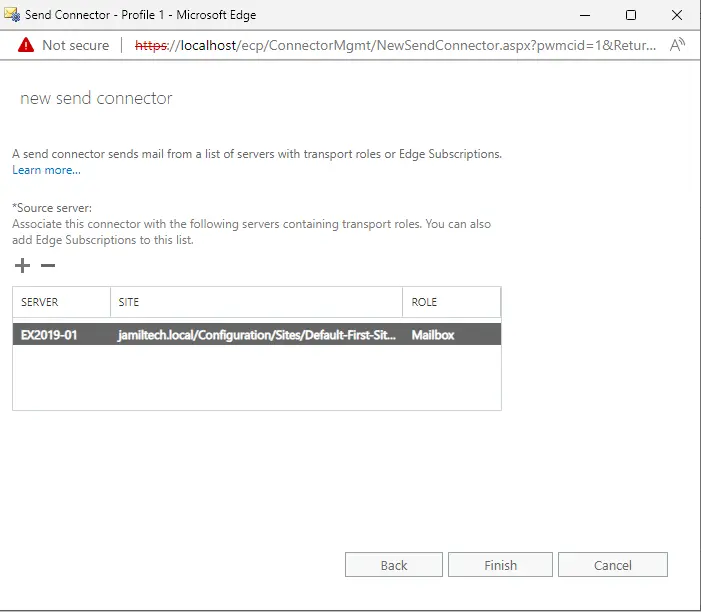
Under the source server, select the + icon.
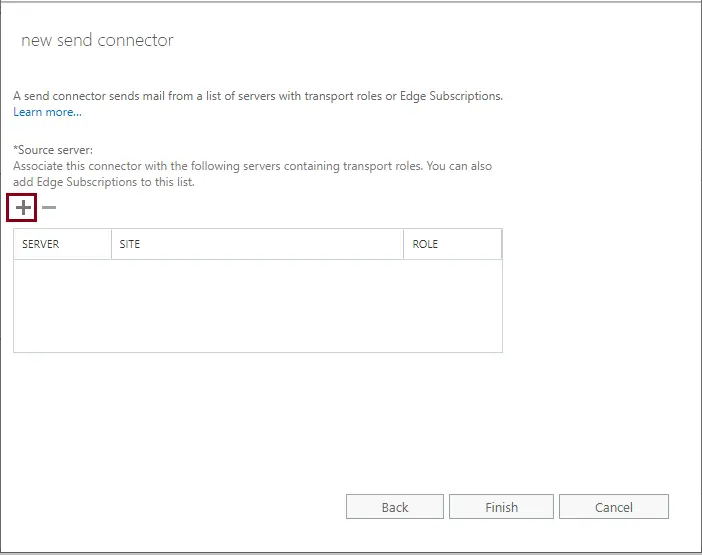
Select your Exchange Server, click Add, and then click OK.
Click Finish
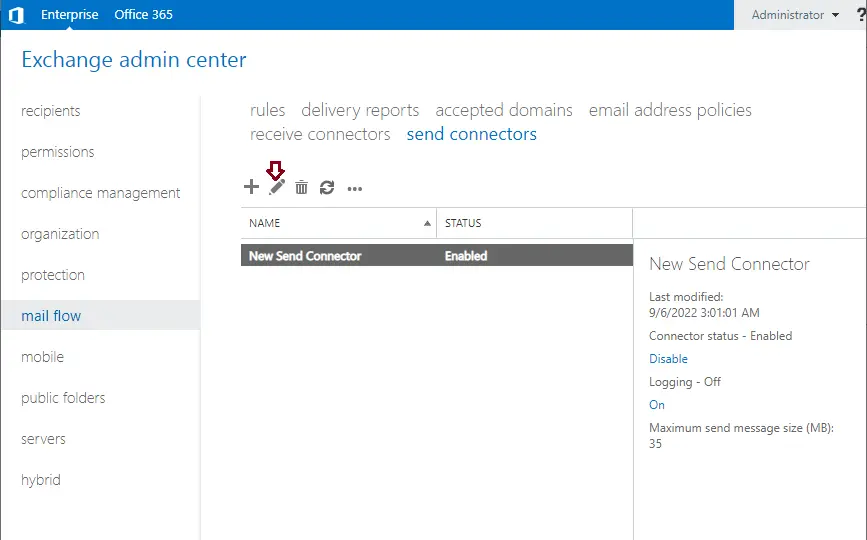
Verify Send Connector
Now you can see your new send connector created under send connectors. One final setup change we need to make is to add the FQDN for the connector. Select the connector, and then click the edit icon.
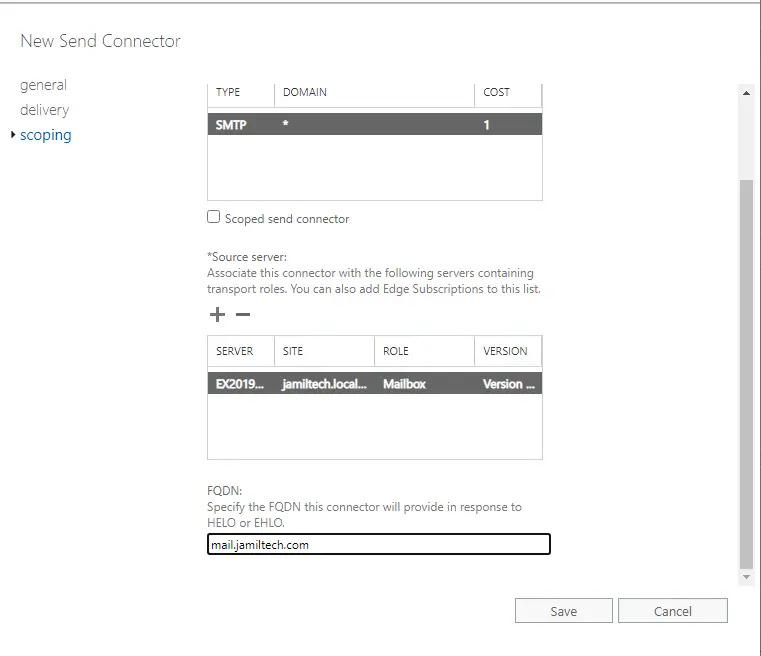
Select scoping from your left-side menu, and then scroll down to the bottom.
Enter the FQDN for your mail server and click Save.
Also, read this article: How to Setup a Receive Connector in Exchange Server 2019.
Related: How to Create Offline Address Book
Visit Docs.Microsoft to get more information about creating a send connector on the Exchange server.

