This article will explain how to setup accepted domain in Exchange Server 2019 with step-by-step instructions. How do we add an accepted domain to the Exchange 2019 Server, and why do we need to configure accepted domains in the Exchange server? If you don’t configure an accepted domain on the Exchange server, you won’t be able to receive emails from that domain. In this article, we will learn how to add an accepted domain to Exchange Server.
In this scenario, we will register the domain jamiltech.com. Next, we will configure a mail exchanger (MX) record in the public DNS for jamiltech.com. Now we want to set up jamiltech.com as an accepted domain in our Exchange organization to accept messages addressed to @jamiltech.com recipients.
Add accepted domain in Exchange Server
Log in to your Exchange Admin Center as an administrator or with an account with the rights to set up the accepted domain in Exchange.
Go to the mail flow option, click on the accepted domains tab, and then select the + icon.
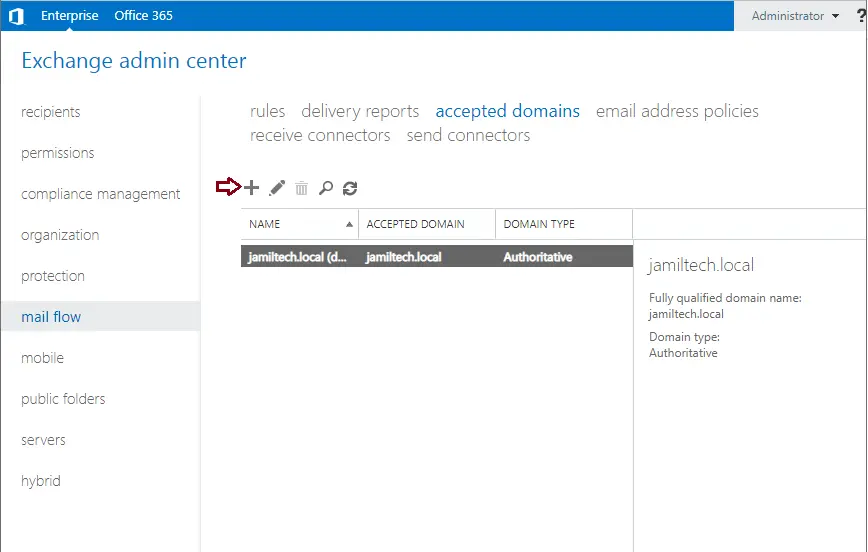
Setup Accepted Domains
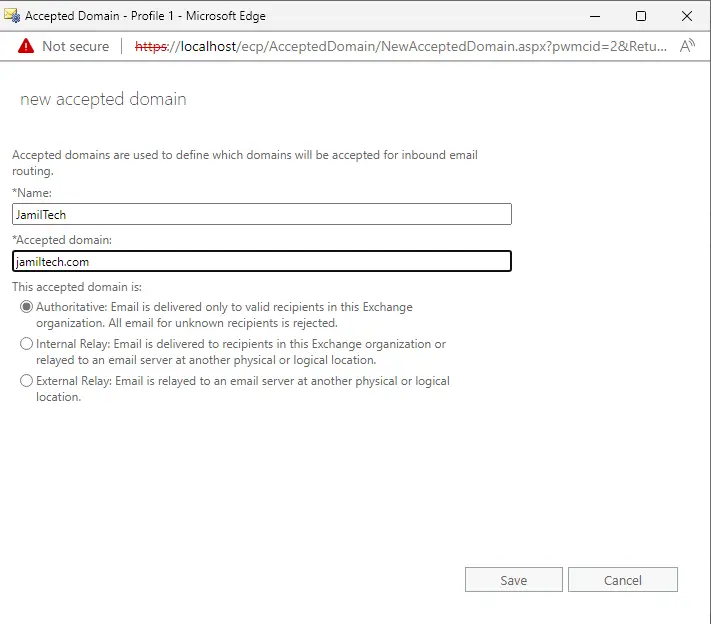
In the new accepted domain page, enter a name in the Name field. Type your domain name in the accepted domain field, and then click save.
Note: You cannot make the domain default when setting up a new domain. You need to make the domain default once you create the newly accepted domain.
In our instance, it’s the domain jamiltech.com.
Now we have a new accepted domain.
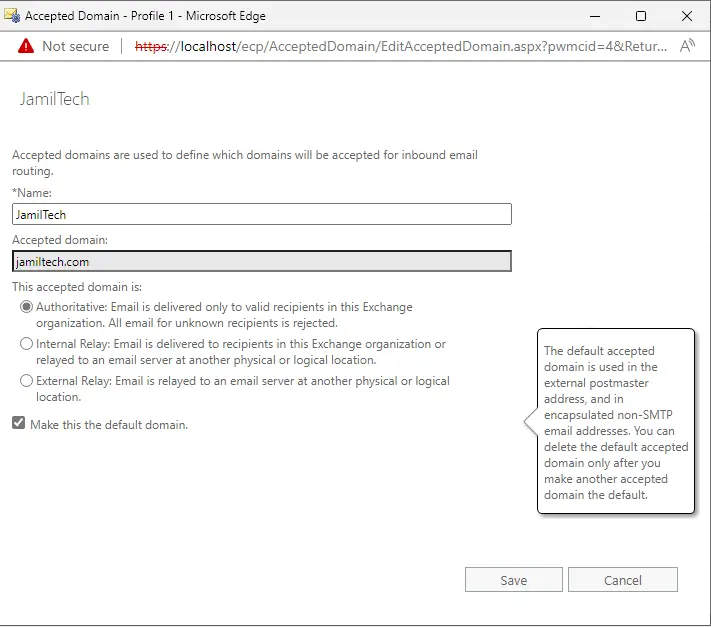
To make it the default domain, select the new domain, and then click on the edit icon.
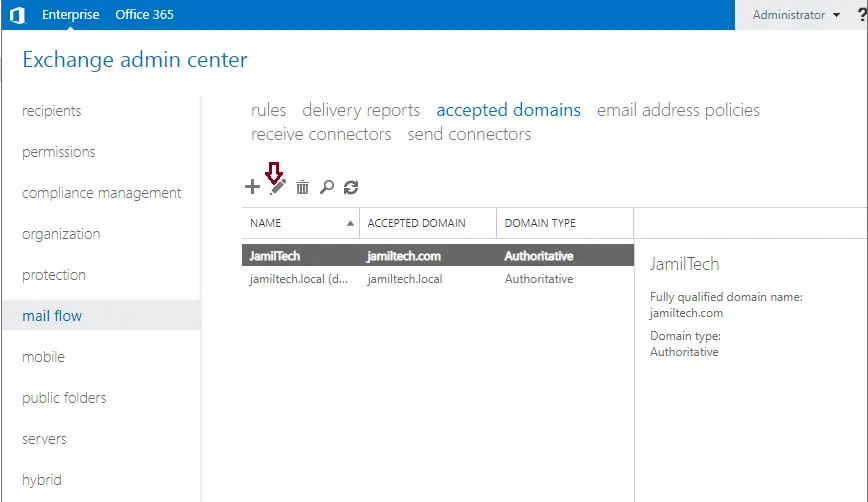
Choose the Make this the default domain checkbox, and then click Save.
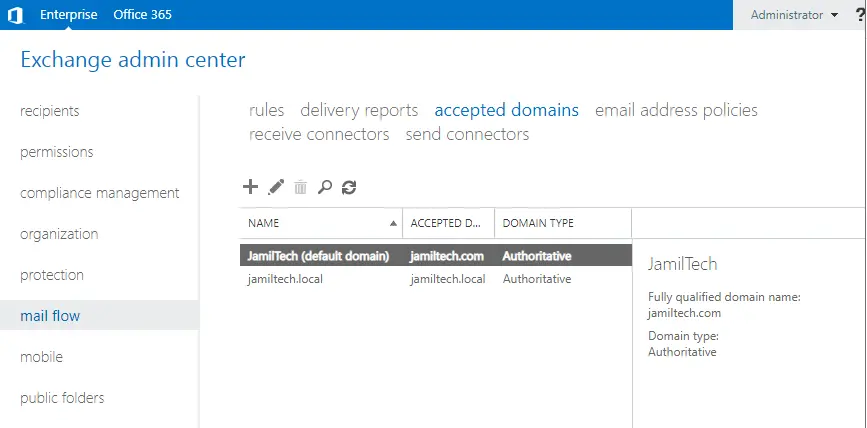
Now we can see that the default domain has been changed.
Get Accepted Domains with PowerShell
Sometimes you have to get a list of your accepted domains.
Get-AcceptedDomain

Configure Accepted Domain in Exchange using PowerShell
Type
New-AcceptedDomain -DomainName jamiltech -Name jamiltech.com -DomainType Authoritative
Set-AcceptedDomain
Set-AcceptedDomain -Identity jamiltech.com -MakeDefault $true
Get-AcceptedDomain
Conclusion:
In this article, we learned how to add an accepted domain to Exchange Server 2019. Would you like to make the domain the default? First, you need to add a domain. After that, edit the domain and then make the domain default.
Read Microsoft Documents to get more information.
Related: How to Configure Outlook Anywhere

