
In this article, you will learn how to install FreeNAS Storage OS version 13 or higher on a system using a USB or hard disk drive to share files and media across the home or work network. Actually, the FreeNAS installation process is simple; you only need agreeable hardware and a USB bootable installation media. After the installation, you can follow these instructions to share a folder with Windows devices and VMware vCenter.
Table of Contents
Download FreeNAS OS
You can visit the TrueNAS website to download the FreeNAS OS ISO image.
You can create a FreeNAS bootable USB or CD/DVD.
Install FreeNAS Storage OS
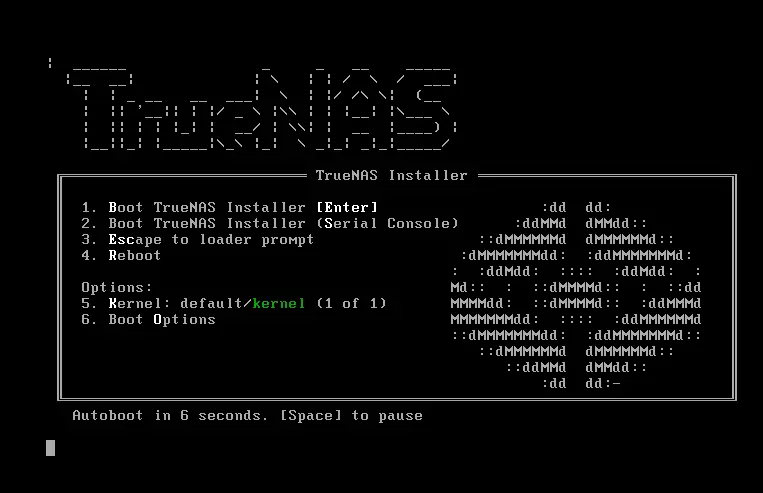
Boot the device from a bootable USB or CD/DVD.
A boot screen should appear; hit enter to select the FreeNAS installer.
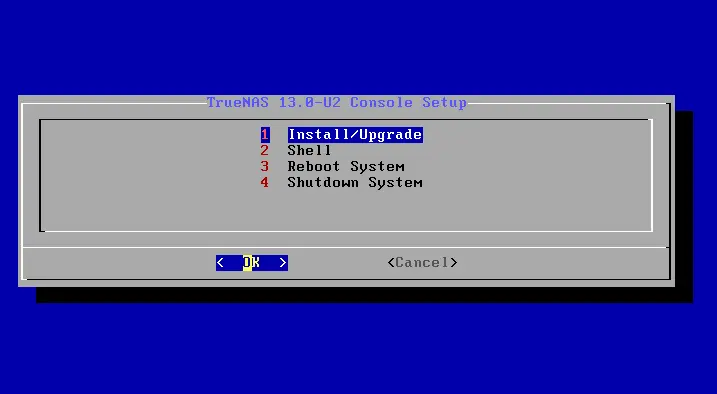
Once entered into the setup, choose Install/Upgrade and then press OK.
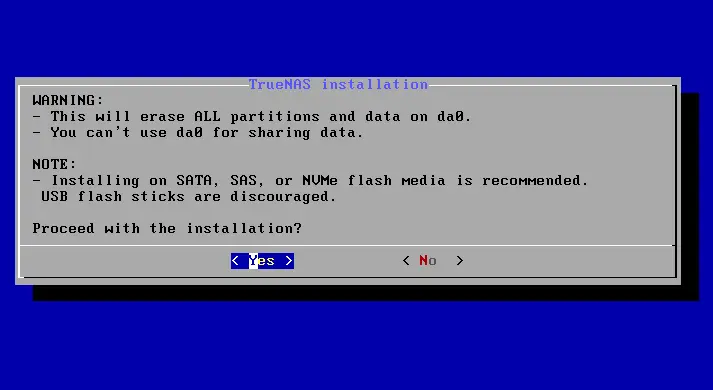
Choose a drive to install the FreeNAS OS on, and then click OK.

On the TrueNAS installation page, a warning will appear that everything on the drive will be erased; just choose yes.
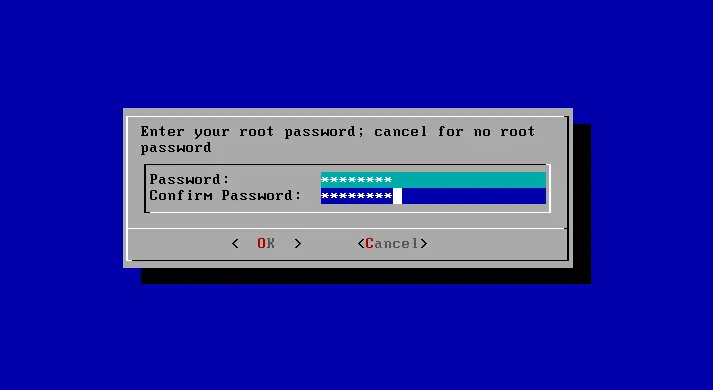
Enter your root password to log in to the FreeNAS Web interface later, and then click OK.
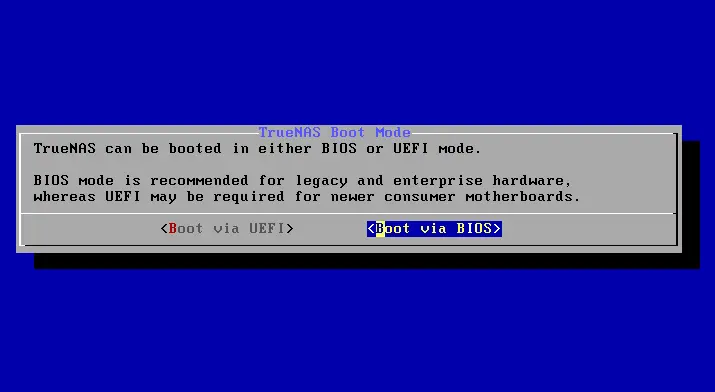
Click on the boot via BIOS option, and then press enter.
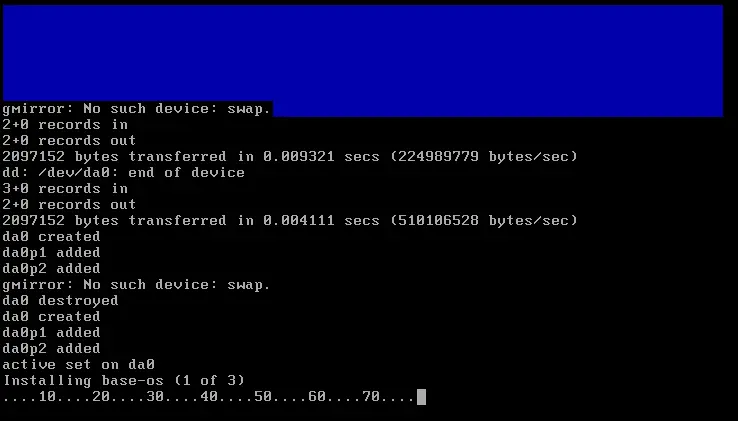
Installing FreeNAS is in progress.
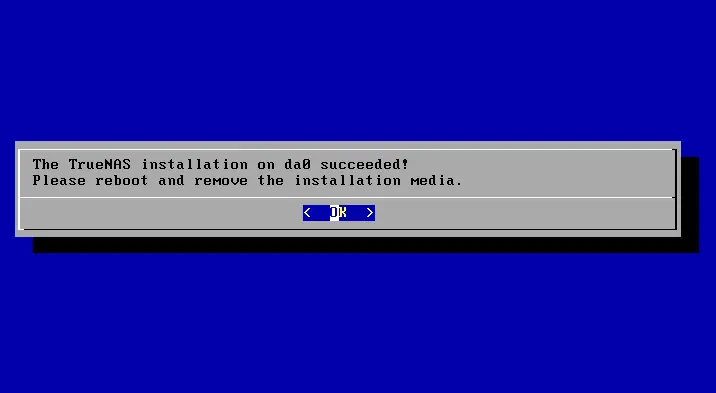
Select ok
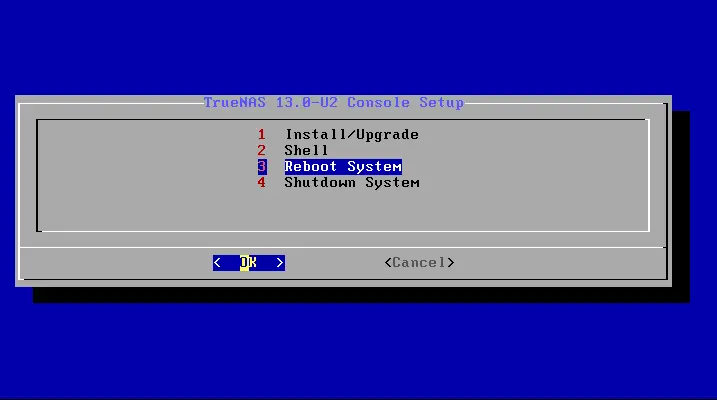
Choose Reboot System, and then click OK.
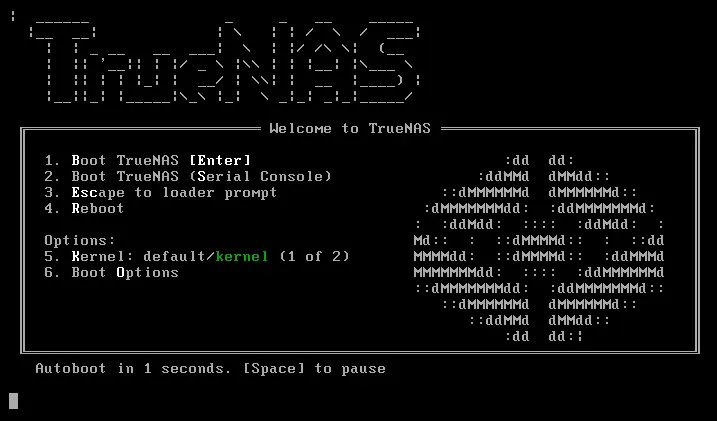
FreeNAS OS is booting up.
FreeNAS Configurations
Insert your Ethernet cable for the internet, which can be accessed via the Web interface.
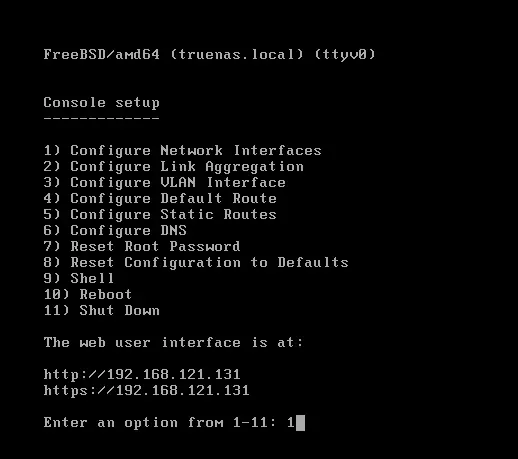
Ethernet Configuration
Type 1 to configure the network, and then press enter.
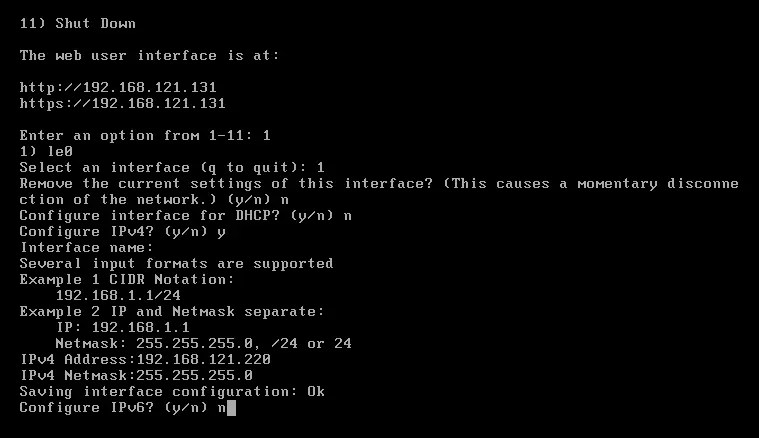
Choose an interface, type 1, and then hit enter
Remove current settings, type n and press enter
Type n and hit enter
Configure the interface for DHCP, enter n, and hit enter
Configure IPv4, press y, and press enter
IPv4 Address, Netmask, Configure IPv6, enter n and enter
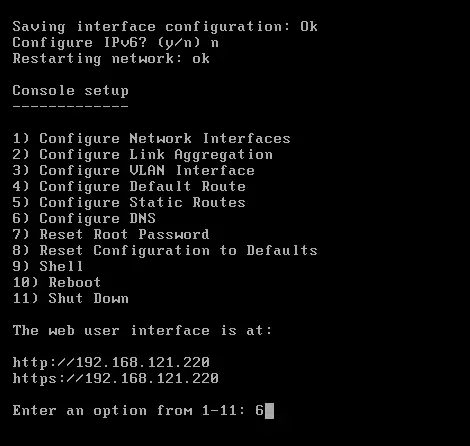
Configure DNS
Type 6 and press enter.
Type DNS and press enter.
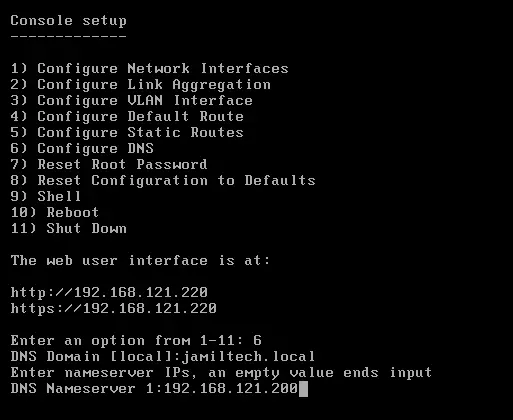
Go to another computer using the same LAN, type the address into the browser, and hit enter.
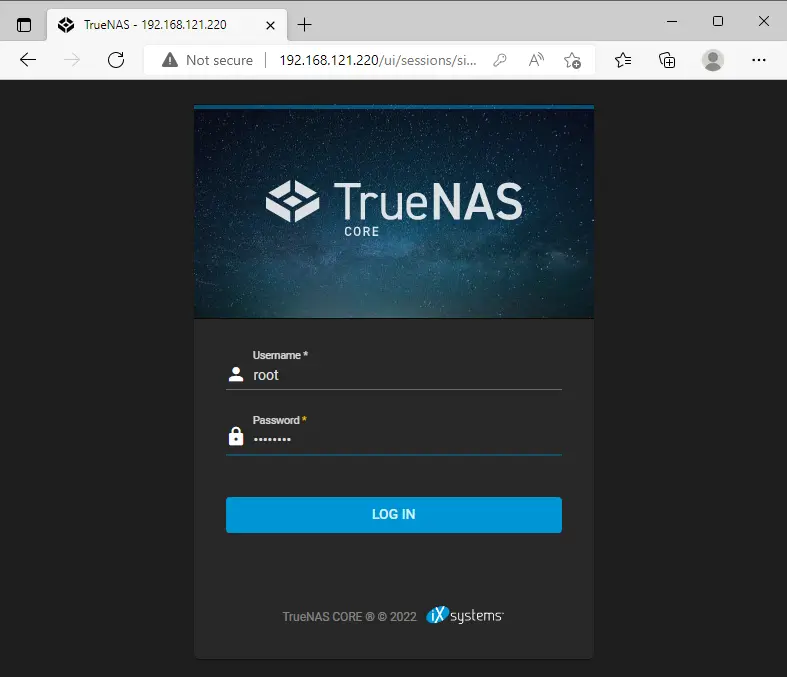
The root is the user name, and the password is the one set during FreeNAS installation. Then click on login.
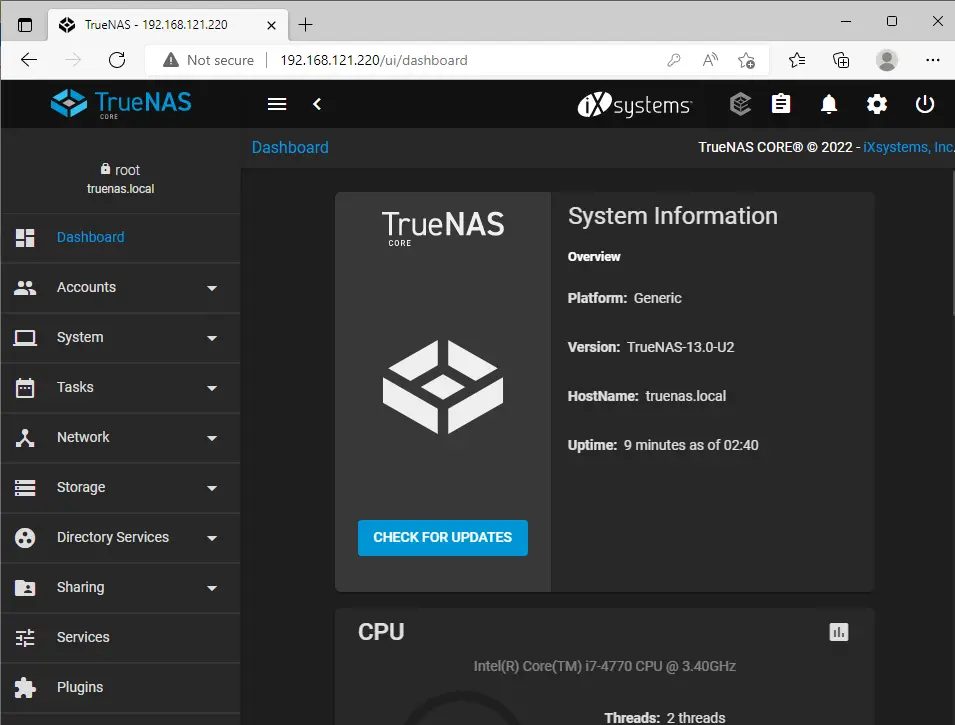
Now you can see the FreeNAS dashboard.
Refer to this article to learn in detail about FreeNAS installation.
Related: How to Install TureNAS Core

