In this article, we will learn how to Integrated Active Directory Authentication into vCenter Server 8.0 and how to obtain the Use Windows session authentication box to work with the enhanced authentication plugin. The VMware vCenter has an internal user database that permits you to add and manage users very simply. User management and single sign-on are granted by the embedded platform service controller that has been available since VMware vSphere 6.0. In a large environment, you may need to connect the virtualization infrastructure to a centrally managed Active Directory. Visit VMware to get more details on the integration of Active Directory.
Table of Contents
Integrated Active Directory Authentication vCenter Server 8.0
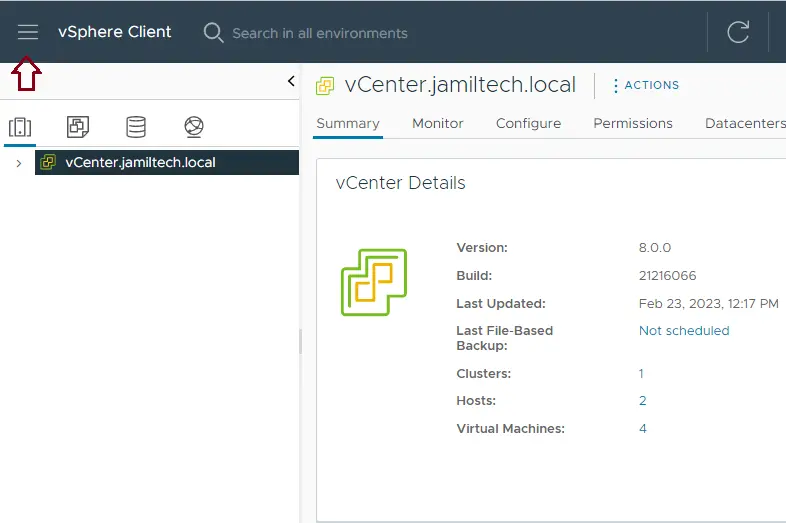
First, we need to log in to VMware vSphere Client via a user account that has a system configuration administrator group in VMware vCenter Single Sign-On. You need to log in via the SSO administrator account [email protected], credentials, and then click login. Click on menu
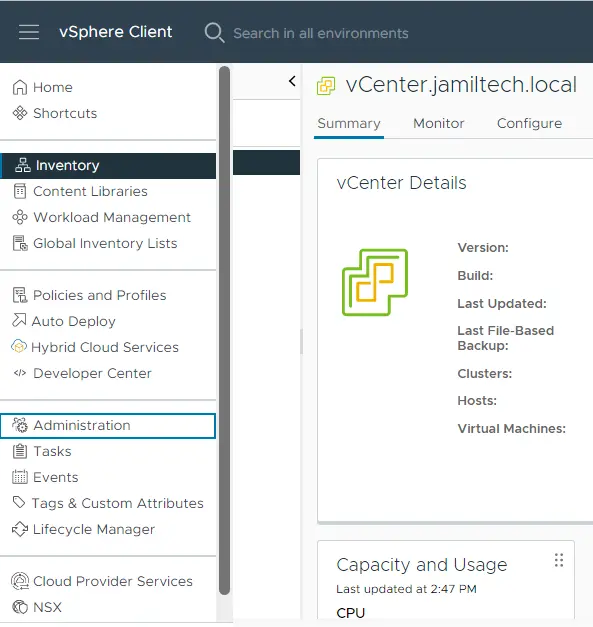
After selecting the menu, click on the Administration option.
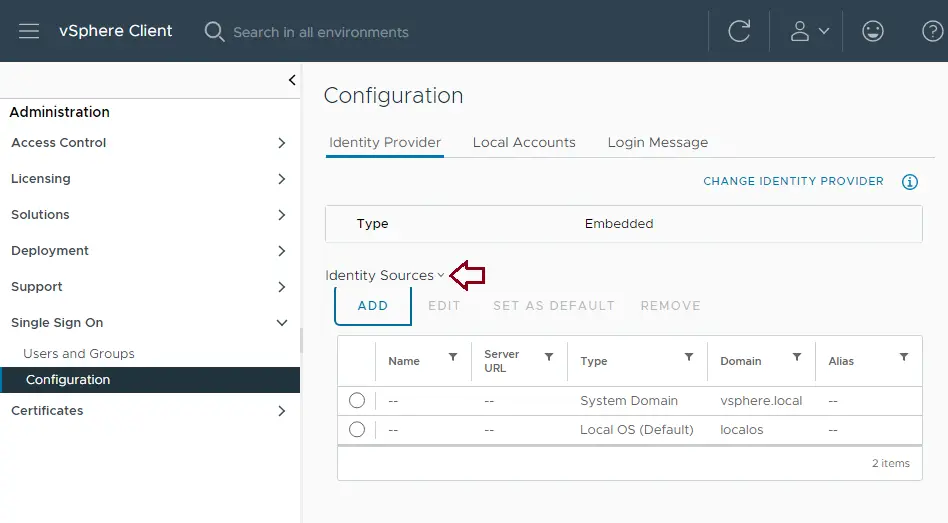
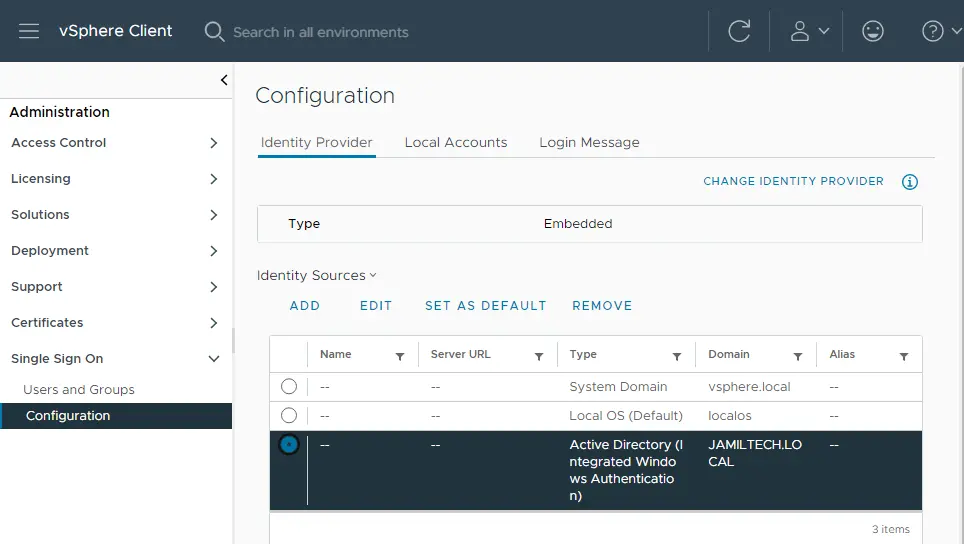
From your left side, expand Single Sign-On, and then click on Configuration. In the identify provider tab, click on identity sources, and then click on the ADD tab to add the Active Directory.
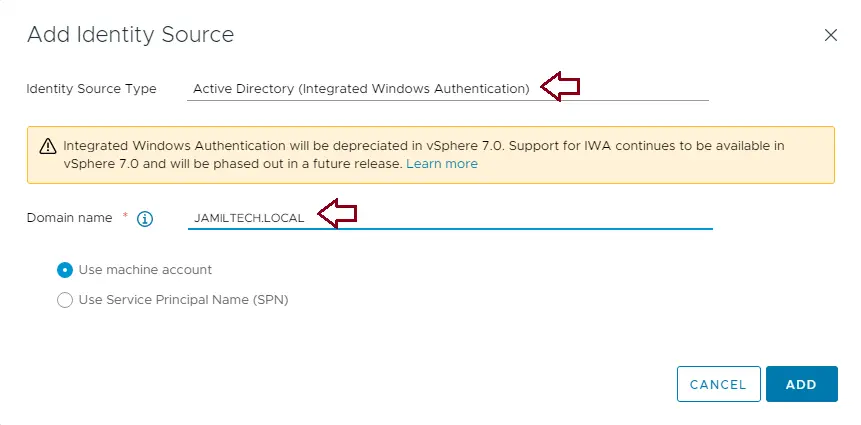
(If you would like to use “Integrated Windows Authentication”, follow the link to the Active Directory Domain window to join the node to an Active Directory domain. If the VMware vCenter server is joined and the sources are added, no additional configuration is required.
Enter your FQDN domain name; do not put an IP address in this domain name area. Choose the option to use the machine account or the local system account, and then click on the add button.
Under the Identity Sources tab, you can see your FQDN domain jamiltech.local has started appearing with the type of AD (Integrated Windows Authentication).
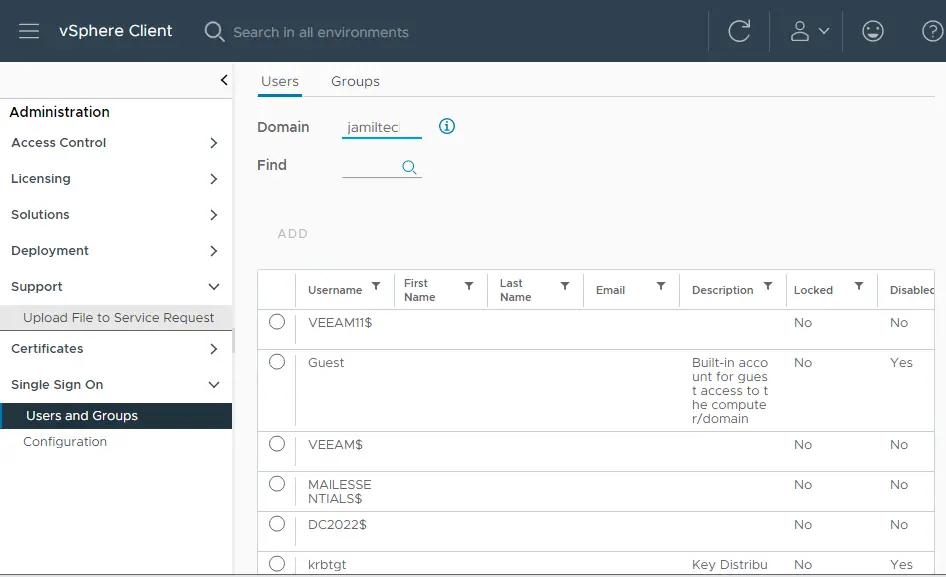
Users and Groups
Once the Active Directory Authentication for VMware vCenter Server is. You can see the Active Directory domain (jamiltech.local) under the Domain drop-down menu and then choose your local domain (jamiltech.local).
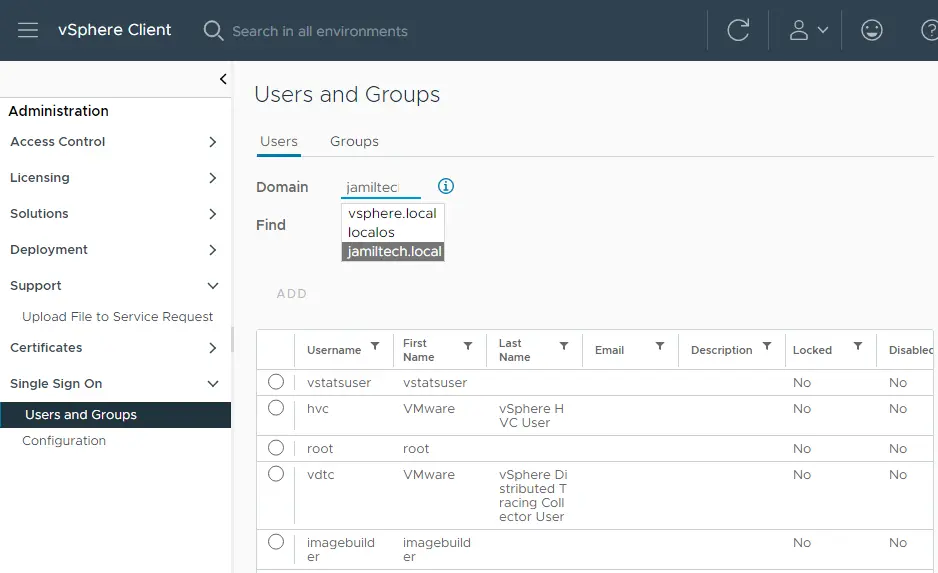
In the users and groups options, you can see your Active Directory objects under vCenter server users and groups. Now you can add AD users and groups to give them permission to access and manage vCenter server inventory objects.