This article explains how to login automatically in Windows 11. Whenever we start Windows 11, you need to select a user account on the login screen and then sign in. If you have a personal system with Windows 11 installed and you are the only user using it,. You may need to eliminate the password requirement every time you start Windows 11.
Table of Contents
Login Automatically in Windows 11
Making Windows 11 automatic log-on is for your advantage only. It is beneficial when you have a long password assigned to your local account and don’t need to enter it every time you start your device. If your system has multiple users or if it isn’t physically secured, you aren’t advised to enable automatic log-on. Follow the below steps only if you have physically secured your computer and you are the only user using it. Read this article to learn more in detail.
To Enable Automatic Login using Settings,
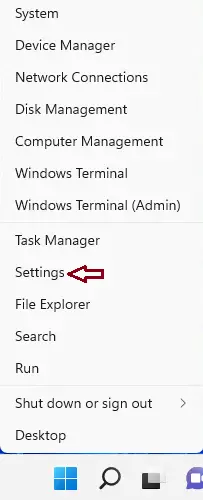
Right-click on the Windows Start button and then select Settings, or press the Windows + I key to open Settings.
Click on account settings, and then select sign-in options on your right side.
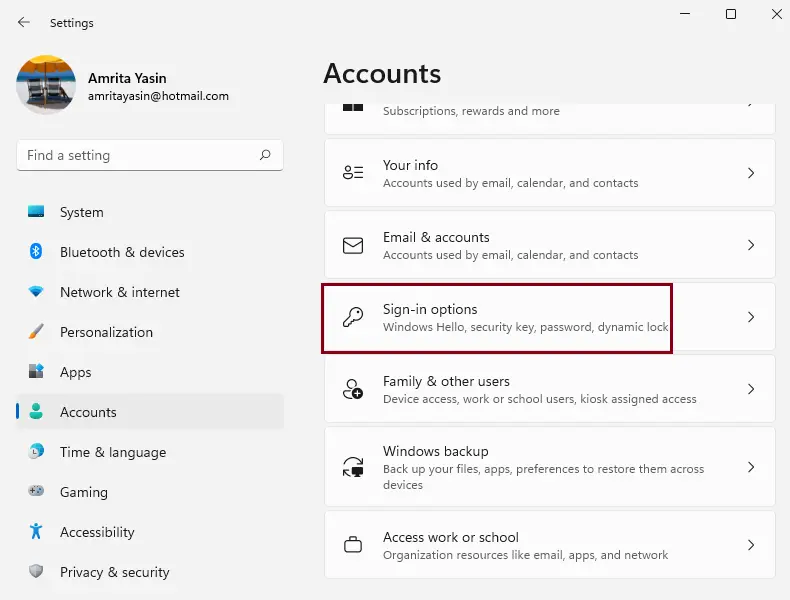
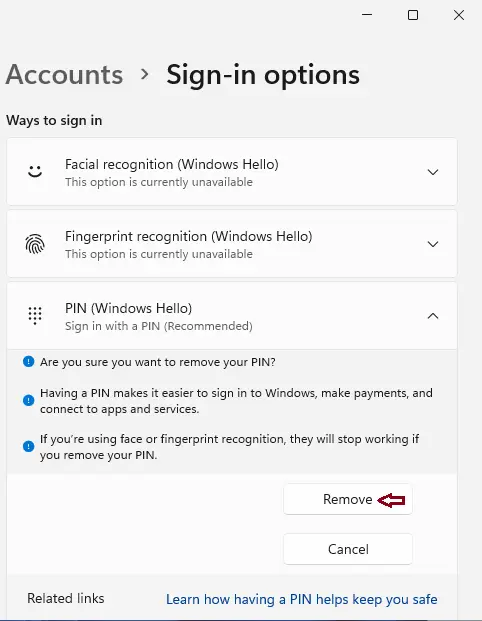
In some cases, automatic login won’t work if any of the Windows Hello sign-in options (PIN, facial recognition, or fingerprint) are enabled. So, you might want to disable Windows Hello before enabling auto-login. First, you can try to enable automatic login with Windows Hello. If it does not work, then you can come back to the sign-in options in Windows settings and remove Windows Hello.
Under accounts, sign-in options, select your current sign-in method, and then select Remove.
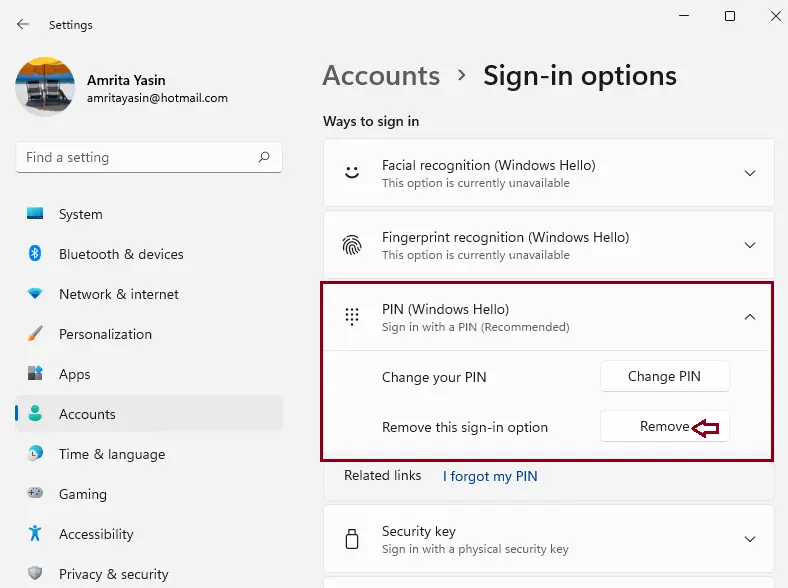
To sign in, select the Remove button.
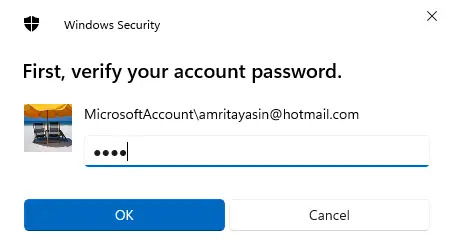
Confirm your identity by entering the password and then clicking OK.
Note: If you need to use passwordless sign-in by typing the Windows Hello PIN/Face/Fingerprint sign-in option, you can leave this setting on and skip the next steps mentioned here. Passwordless sign-in supplies improved security, but you have to use the Windows Hello PIN/Face/Fingerprint sign-in option to log in.
Remove Windows User Password
Click on the Windows search button, type computer management, and then open it.
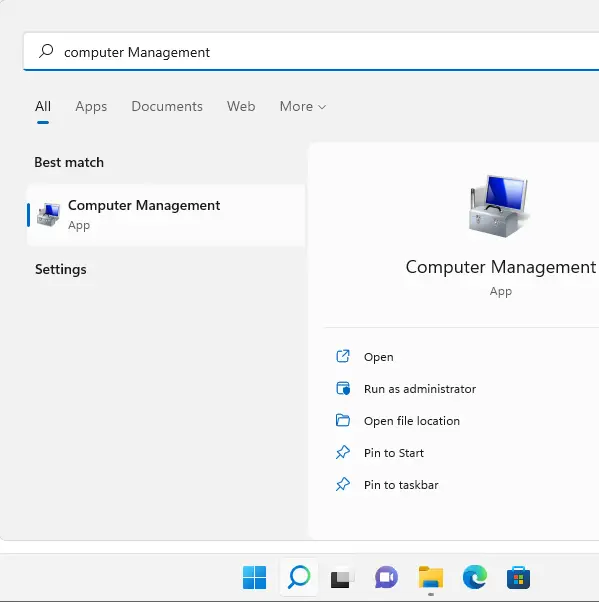
Additionally, type compmgmt.msc in the run command and then select OK.
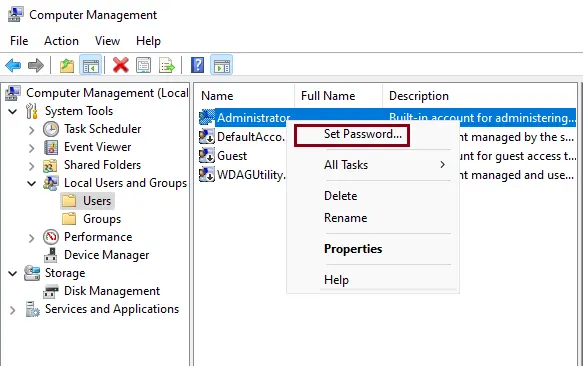
Expand “local users and groups” and select Users
Right-click on the user you wish to log in to automatically, and then click on set password.
Select Proceed
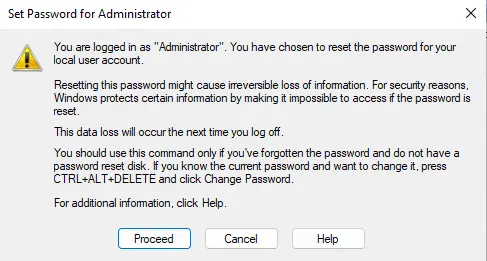
Choose ok without typing passwords
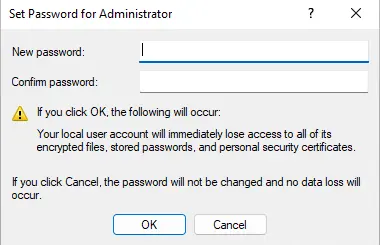
Click ok
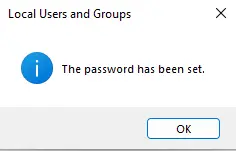
Allow Automatic Login using User Accounts
Press the Windows + R key to open the run box, enter “control userpasswords2” or enter Netplwiz to sign in to a user account automatically, and then choose OK. Select yes if you receive a User Account Control warning message that appears.
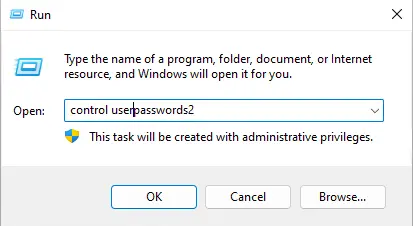
The user account page will open. Untick the box “Users must enter a user name and password to use this computer” and then choose OK.
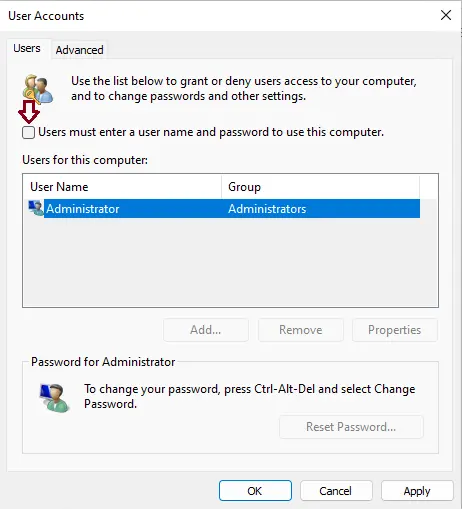
Click ok
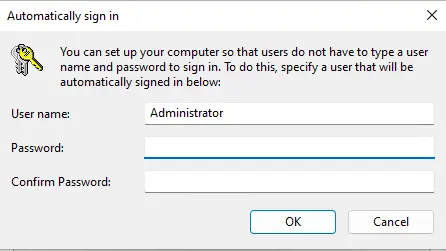
Restart your system, and you will find that it no longer asks for a password.
Using Registry to Log in to a User Account Automatically
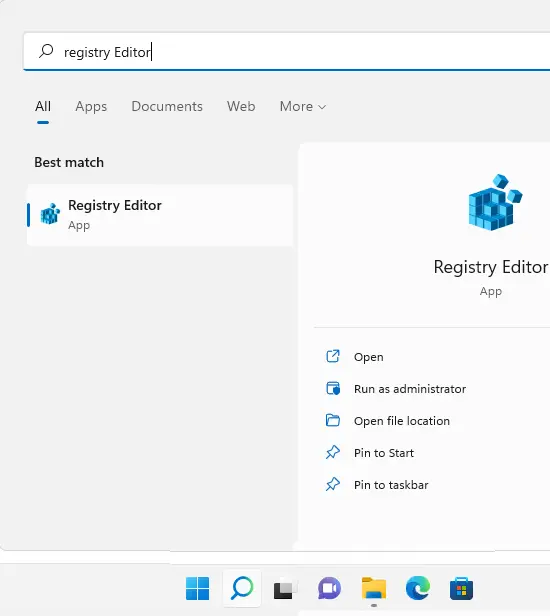
Search the registry editor, and then open it.
In the Windows Registry Editor, follow the below path.
HKEY_LOCAL_MACHINE\SOFTWARE\Microsoft\Windows NT\CurrentVersion\Winlogon
From your right side, find AutoAdminLogon, and then double-click to open it.
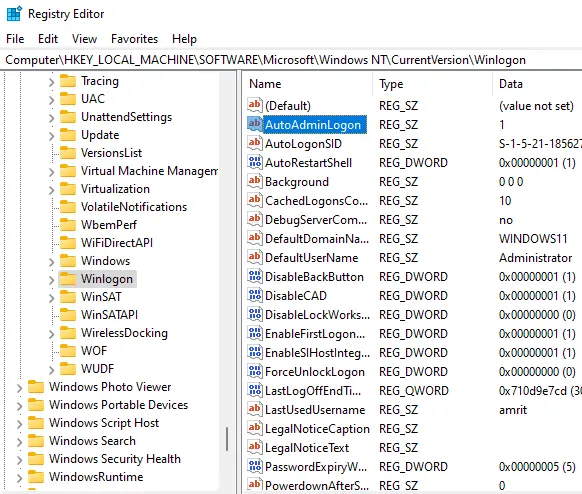
Enter 1 in the Value Data section, and then choose OK.
Close the Registry Editor
Reboot the computer
We have set up the account to log in without entering a password. Reboot the computer, and you will notice Windows will sign you in without entering a password.
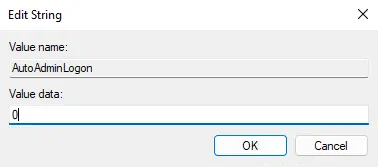
To disable automatic login, replace the value of AutoAdminLogon to 0
Conclusion:
This article explained how to sign in automatically in Windows 11 without typing a password every time.

