In this article, I will show you how to create media pool in Veeam backup and replication. We need to create a media pool after adding the tape server without the media pool, it will not work on tape. The tape media pool for writing once reads many tapes in Veeam Backup and Replication, which will be used as a target for the file-to-tape jobs or backup-to-tape jobs.
Media pools are reasonable containers created in Veeam backup and replication to organize and control tapes. They are the target destinations for files to tape jobs and backup to tape. As the tapes can’t be overwritten, you need to handle them differently when using Veeam. These tapes can’t have a retention interval, and for this reason, you can’t place them in the same media pool as the overwritable tapes.
Create Media Pool in Veeam
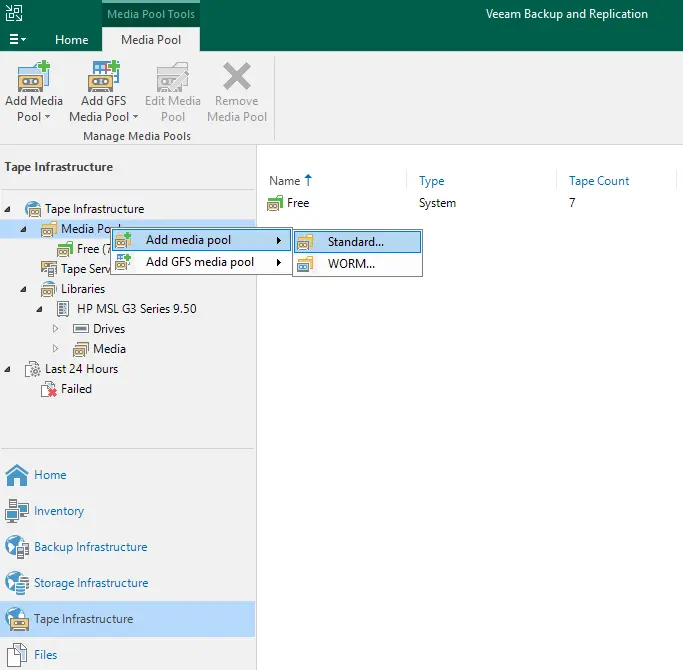
Right-click on media pool, choose to add media pool, and then select the standard option.
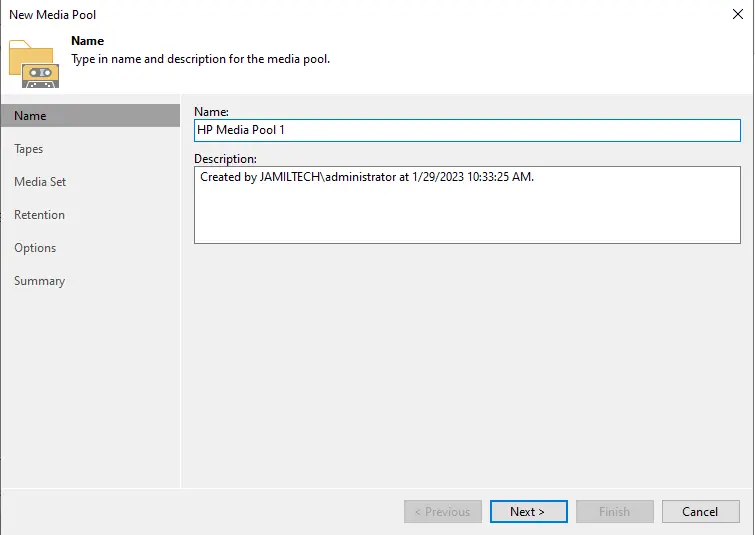
In the new media pool wizard, enter a media pool name and description, and then click on the next button.
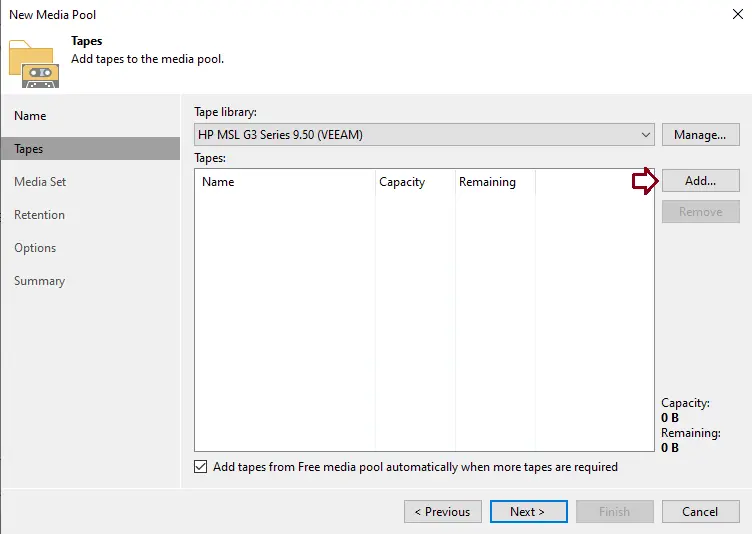
To add tapes to the media pool, click on the Add button.
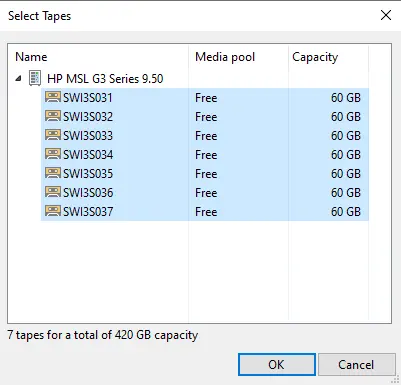
Select tapes and choose the OK button.
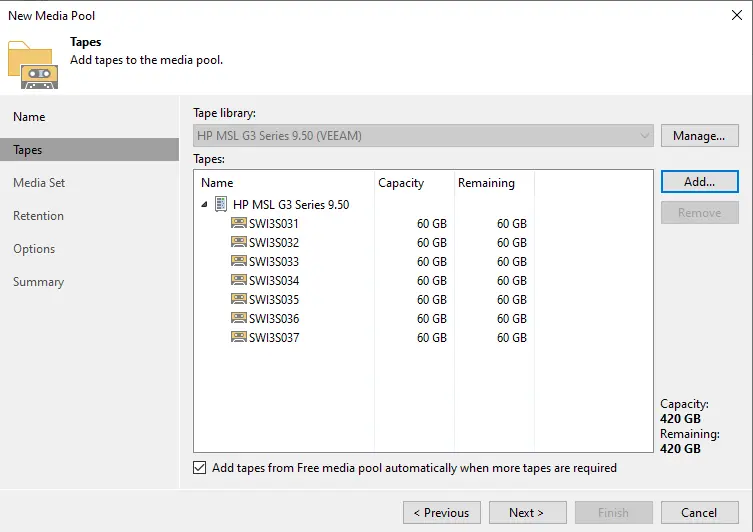
Verify the tapes, and then click on the next button.
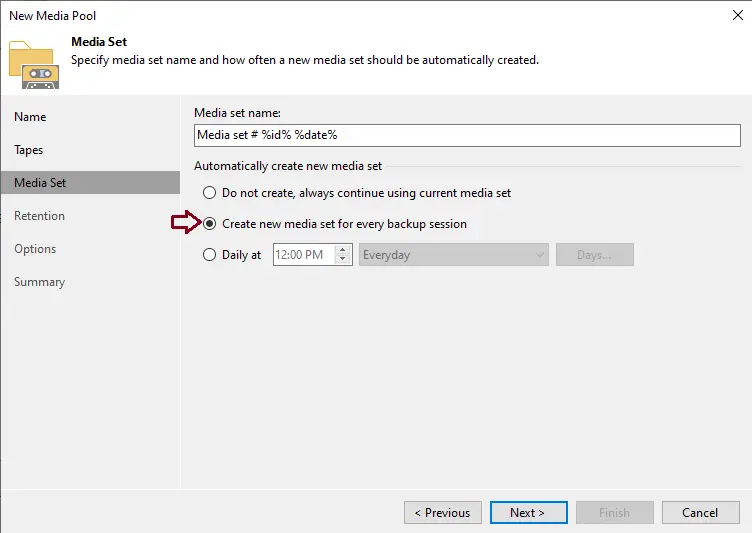
Tick the box “Create new media set for every backup session” This option will assist you in determining the backup time/date and click on the next button.
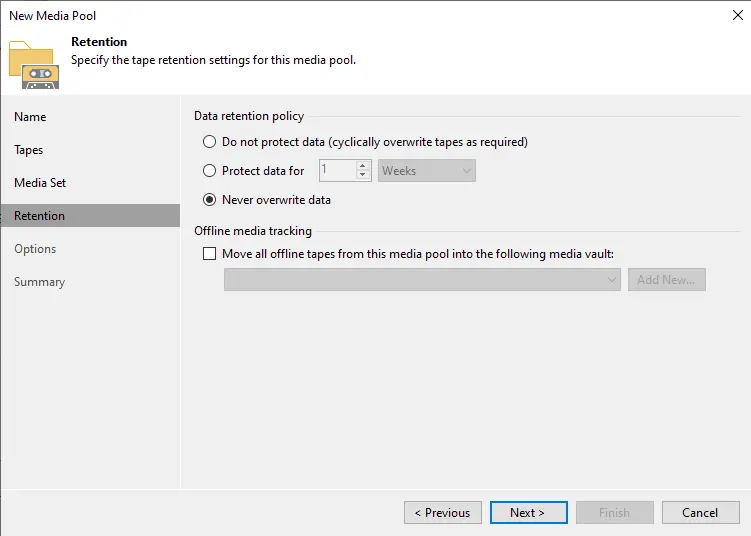
Verify the tape retention setting, tick the box to never overwrite the data, and then click on the next button.
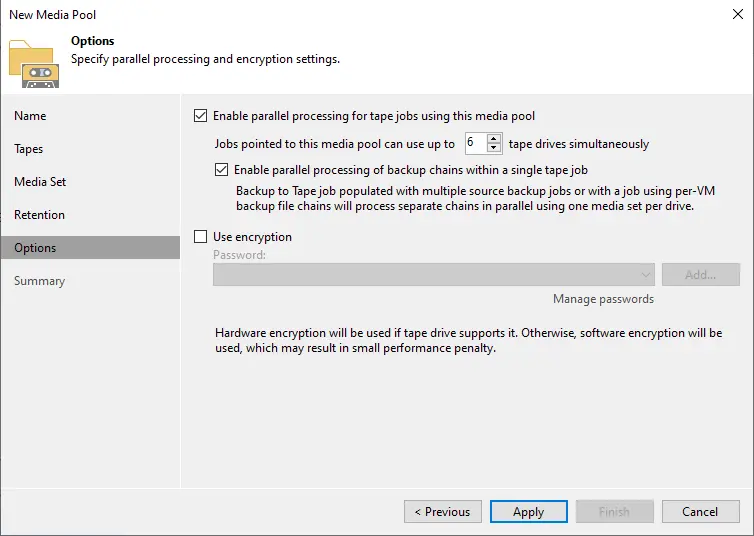
Specify parallel processing and encryption, and then choose the apply button.
Review the settings, and then click on the finish button.
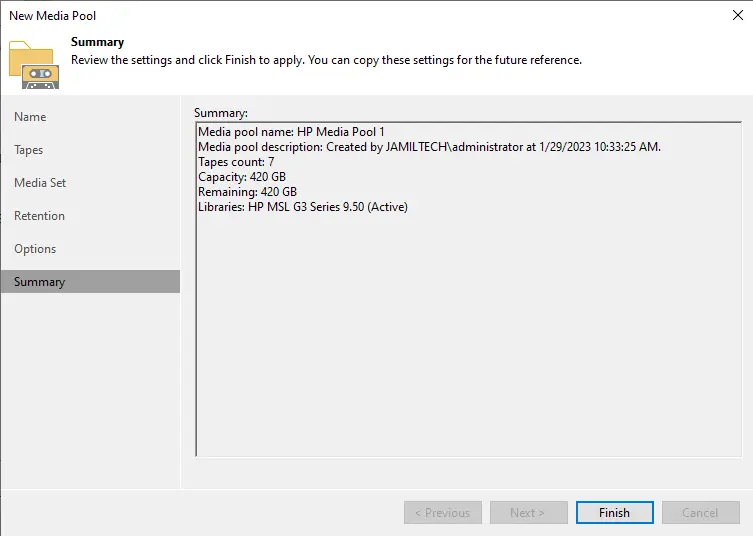
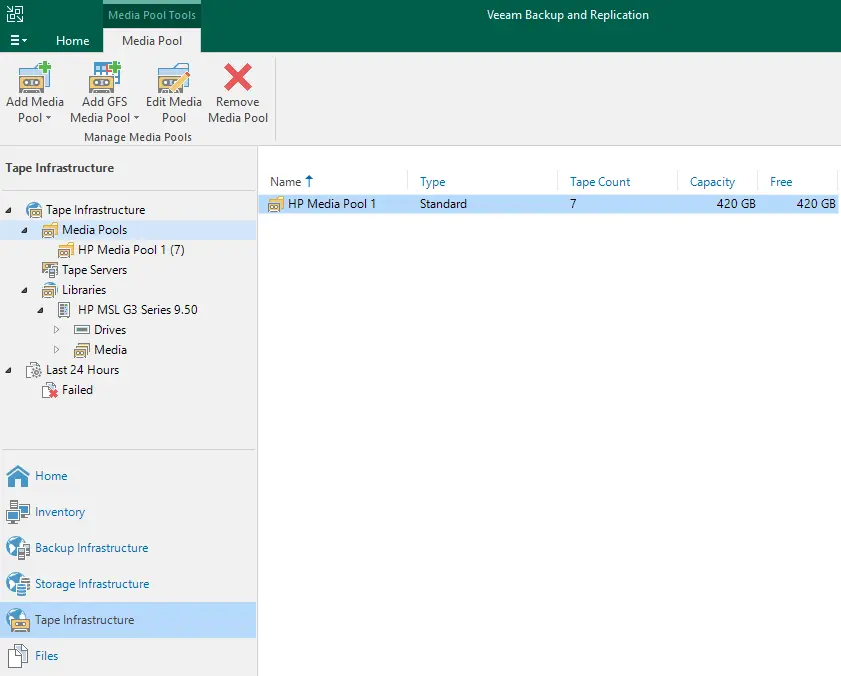
We have successfully created the media pool in Veeam Backup and Replication. In this article, I have used the StarWind VTL application. Now you can see a new media pool.
