In this article, we will see how to setup receive connector in exchange server 2019 to allow devices (copiers and firewalls) and applications to send e-mail addresses to mailboxes that are hosted on Exchange. Set up an SMTP Receive Connector, and e-mail messages are transmitted to the Exchange Server for processing.
Table of Contents
Setup Receive Connector
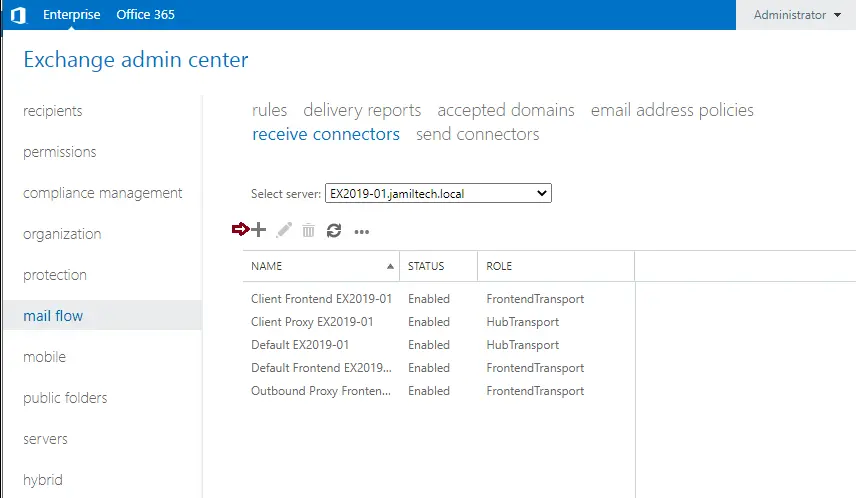
Login to the Exchange admin center and navigate to the mail flow.
Select the Receive Connector tab, and then click the + icon.
The new Get Connector window box appears to configure the exchange connector.
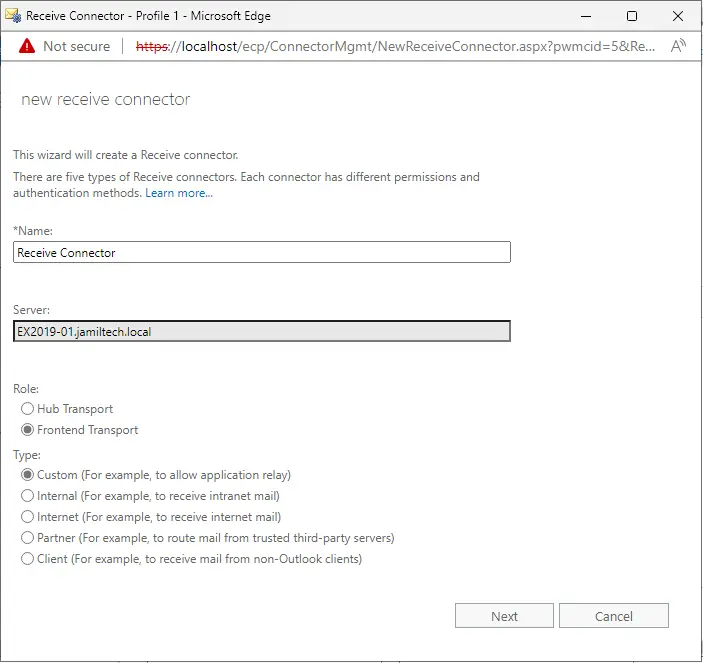
Type a receiving connector name.
Select the checkbox “Frontend Transport” as your role, as you aren’t creating a hub transport receive connector, and then click the next button.
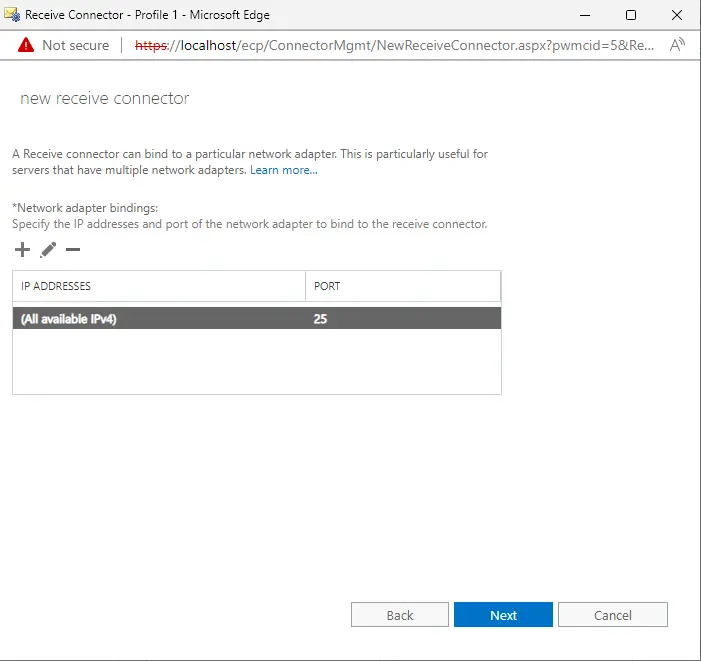
As you can see, by default, it permits all IPv4 addresses on port 25.
Click next.
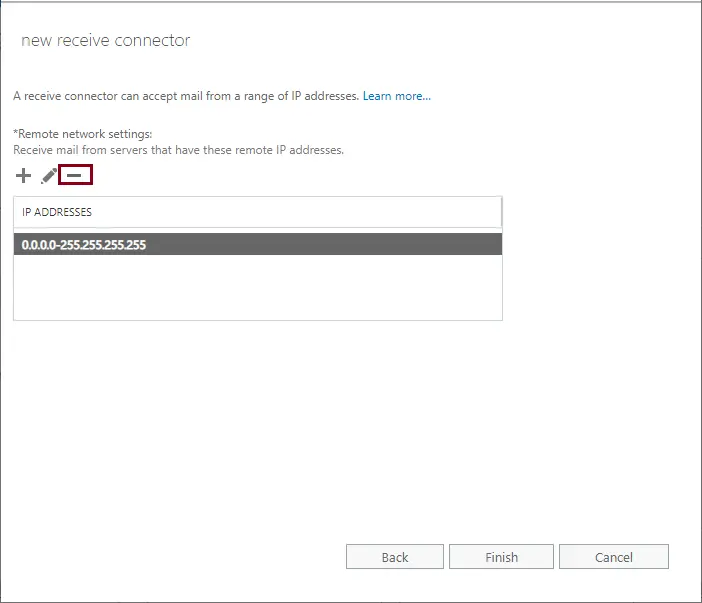
The Remote Network settings
By default, it permits everything (0.0.0.0–255.255.255.255) that we need to change.
Now select the – button to remove this entire range.
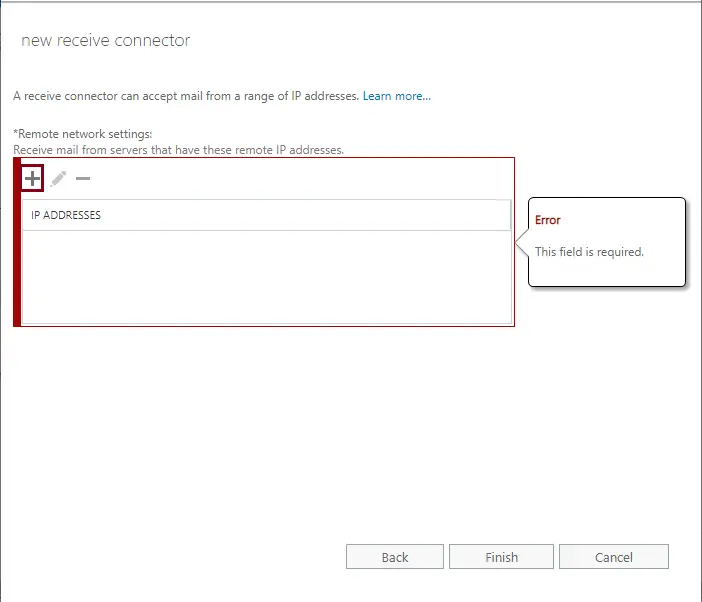
You will see the red bar; do not worry.
Select the + button to add the IP address. In this instance, it was for an internal application
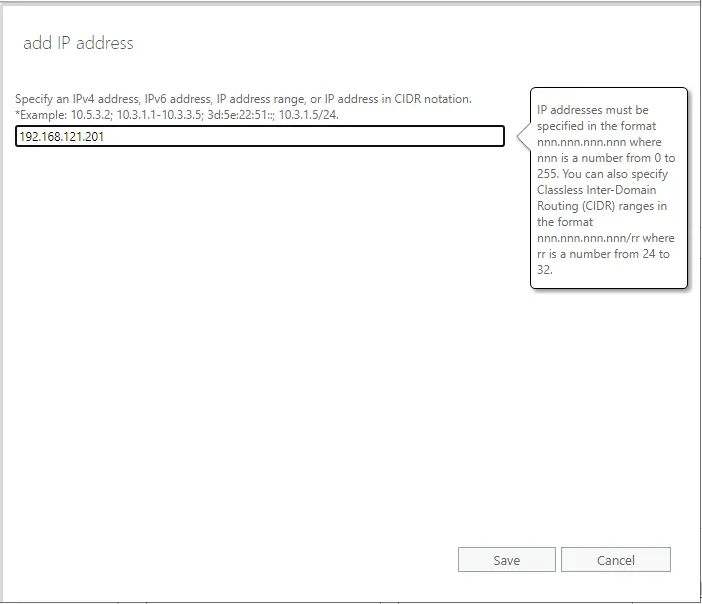
Type the IP (192.168.121.201) (exchange server) and then click the save button.
Click Finish, and your connector will be on the list under that server.
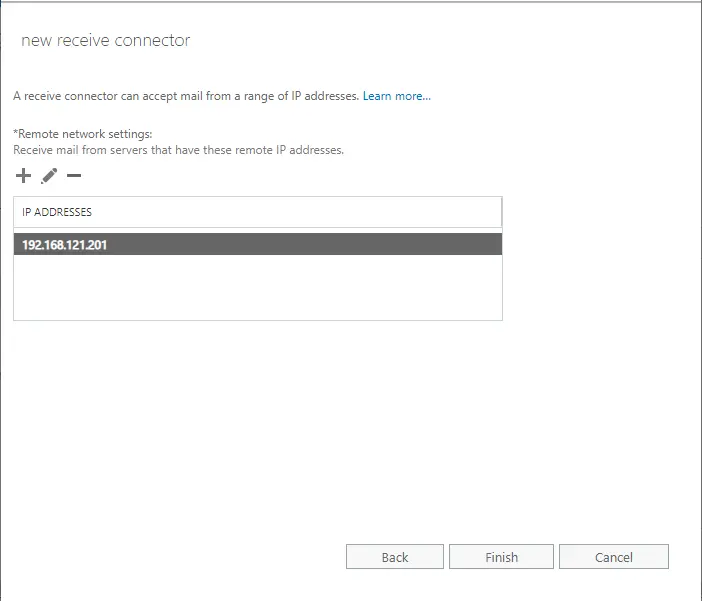
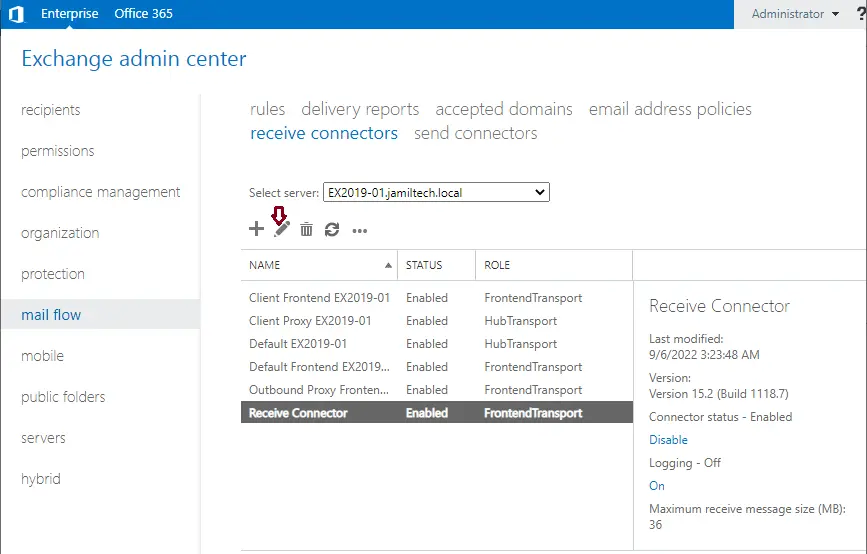
Verify Exchange Receive Connector
If you want to permit mail from the Internet, you need to go to the default frontend [ServerName] and then select the pencil button or double-click the receive connector.
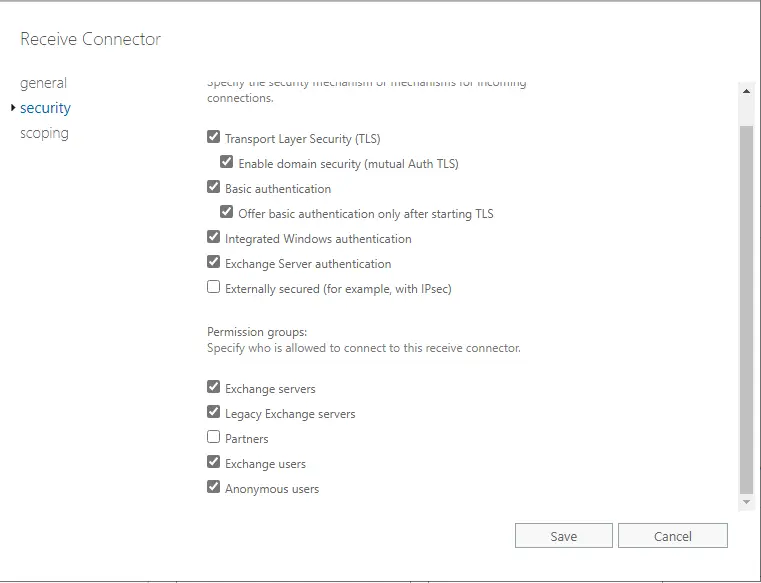
Select the Security tab on the left to see the permission groups.
I have enabled anonymous users, as it isn’t enabled by default. Choose the checkbox, and then choose the save button.
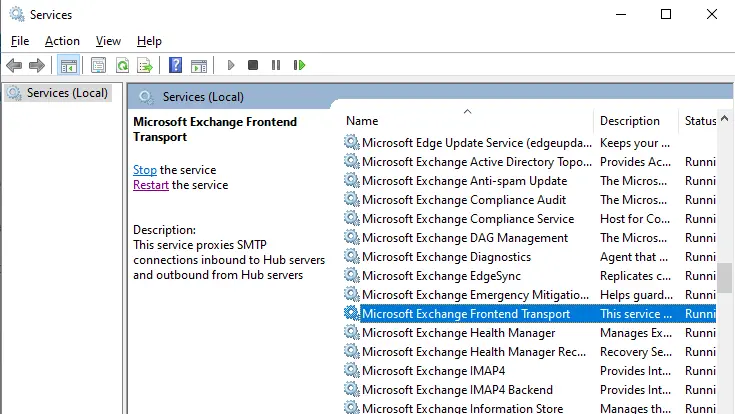
Restart Microsoft Exchange Frontend Transport Service
Once you have finished editing your connectors and opening services, you can restart the Frontend Transport Service.
If this is a brand-new forest with a brand new Exchange server, you will also want to set up your send connector with the information provided by the ISP, and you need to inform them to permit your Exchange Server IPs only to send and receive emails. Remember, the applications will send emails internally. But you don’t need them to send e-mails externally, as they need to go through the correct send-and-receive connector to the Internet and vice versa.
Related: Configure Outlook Anywhere
Refer to the Microsoft Documents for more detail about receiving connectors in Exchange Server.

