In the article, I am going to show you how to create Veeam File Copy Job in Veeam Backup and Replication. To copy backup jobs to a secondary location, you should configure a backup copy job. The backup copy job specifies how, where, and when to copy backups. A Veeam backup copy job can be applied to process one or several machines. VMs included in the copy job are processed in parallel. If a VM included in the backup copy job has several disks, the disks are processed sequentially, one after another. For more detail on Creating file copy jobs, please visit Veeam
Your backup copy job will run so that it can relocate the data to the cloud repository. Creating a backup copy job will reduce the additional load on your environment’s VMs and your backup infrastructure. That’s because Veeam does not need to write production data over the public network throughout the job, as it copies actual backup data to the cloud repository. Follow the steps below to create a Veeam backup copy job located on the virtual systems’ recommendations.
Table of Contents
Create Veeam File Copy Jobs
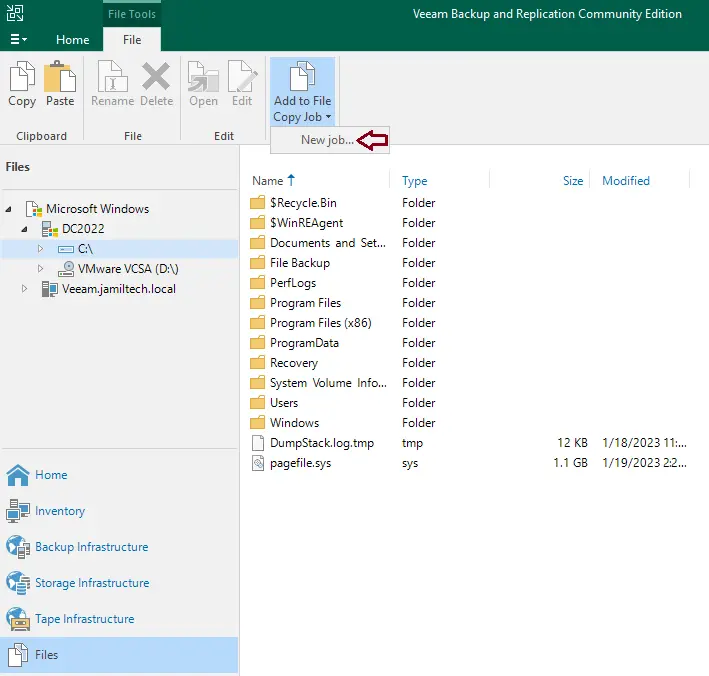
Run Veeam backup and replication, click on the Files option, expand Microsoft Windows, choose the file or folder you wish to copy, and then click on the Add to File Copy Job tab. Click on the new job.
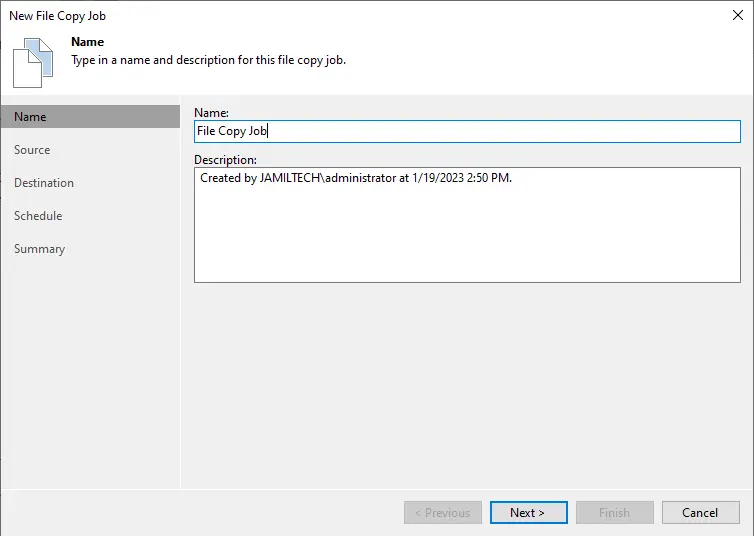
In the new file copy job wizard, type a name in the name field for the file copy job.
Specify a description, and then choose next.
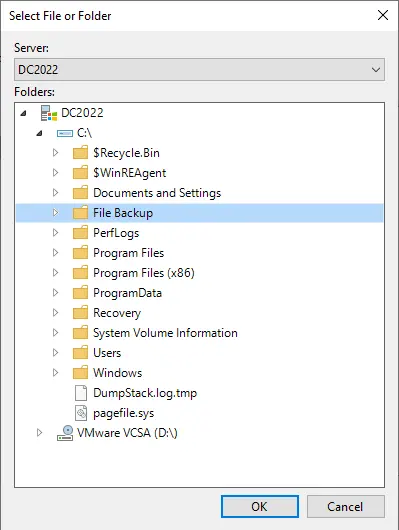
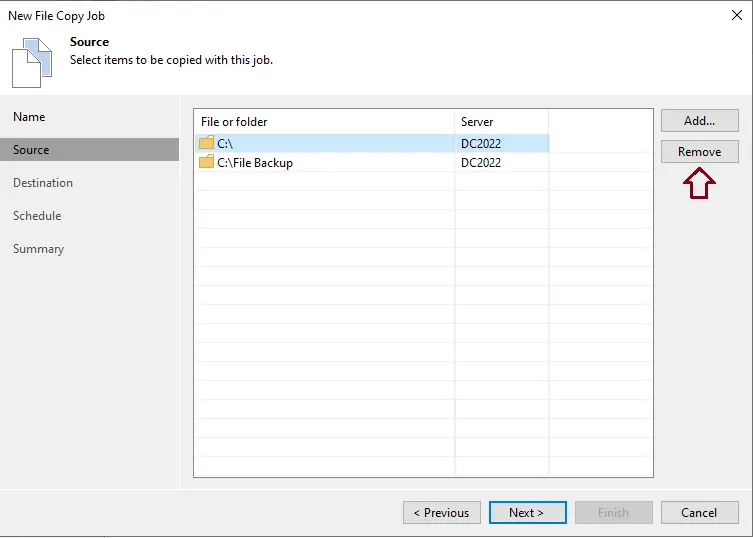
Click on the add button to choose files and folders that you wish to copy.
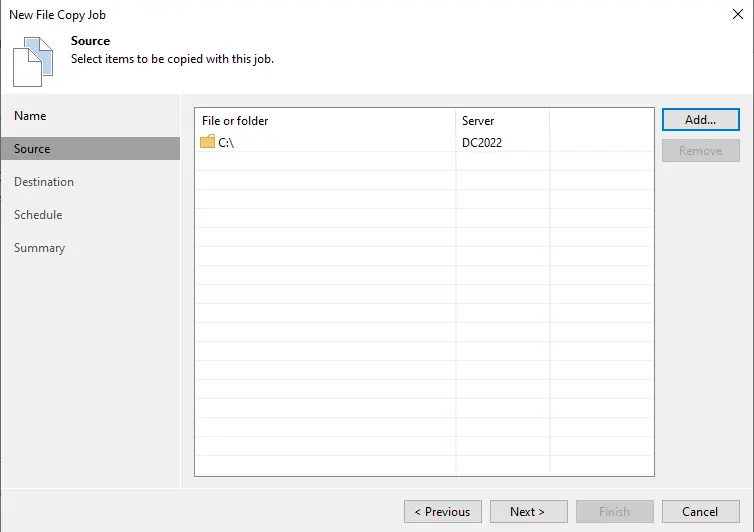
Select files and folders in the window, choose the folders you want to copy, and then click OK.
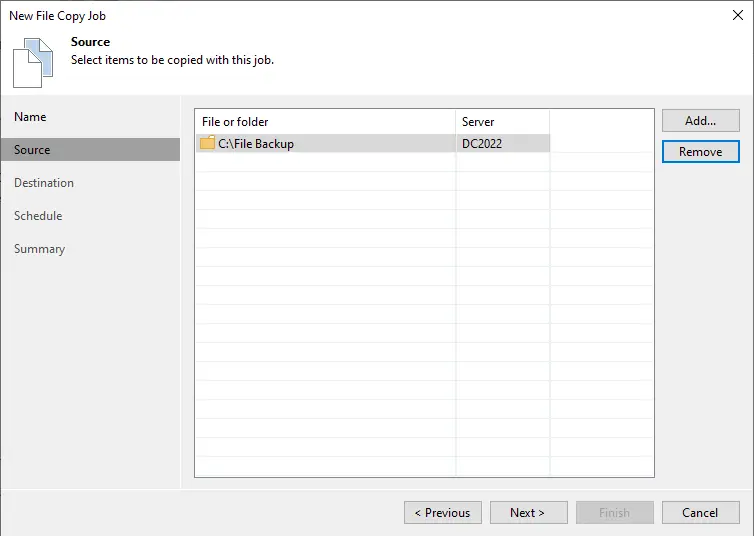
If you want to remove some folders, just click on them and then choose to remove them. Click next.
Click next
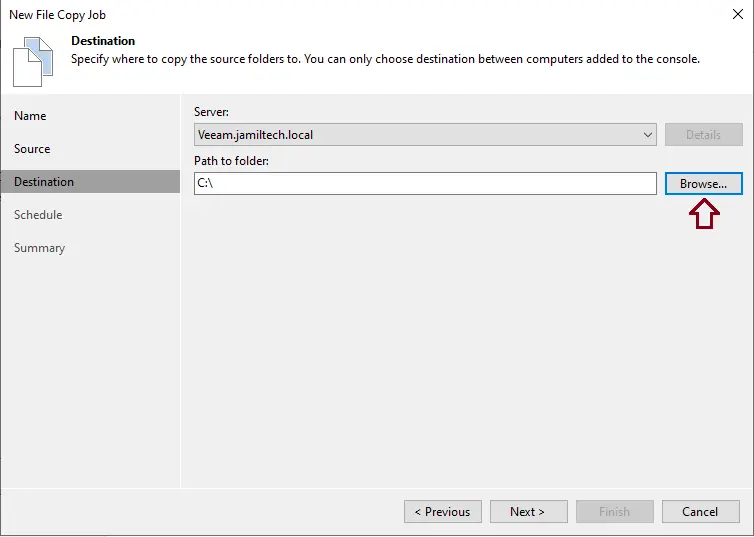
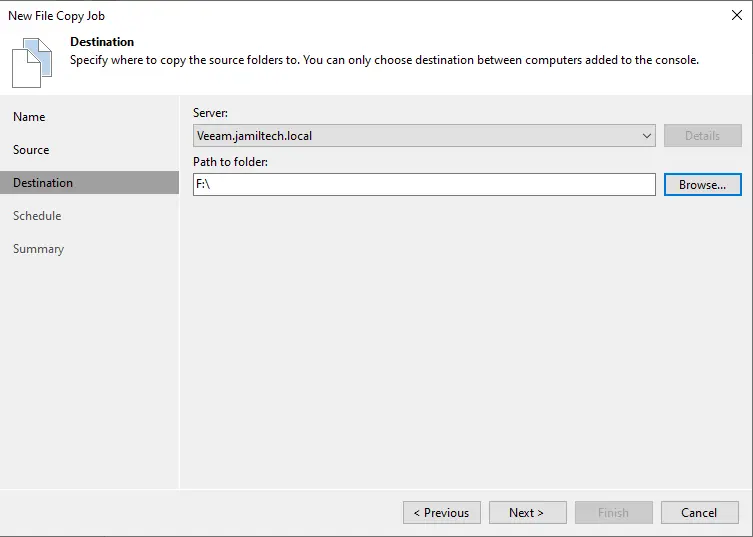
Configure Destination Path to Folder
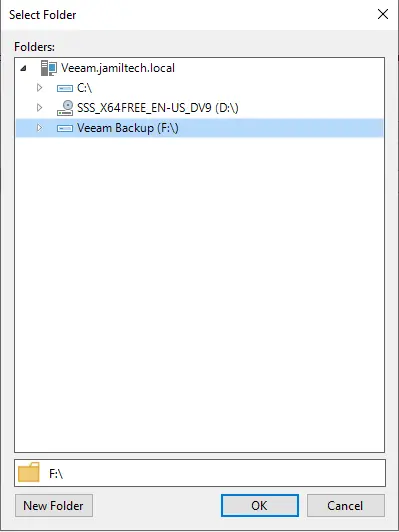
For the destination, under the server list, choose the target server. To enter the path to the folder, click the browse button.
Select a location where you want to save the job, and then click OK.
Click next
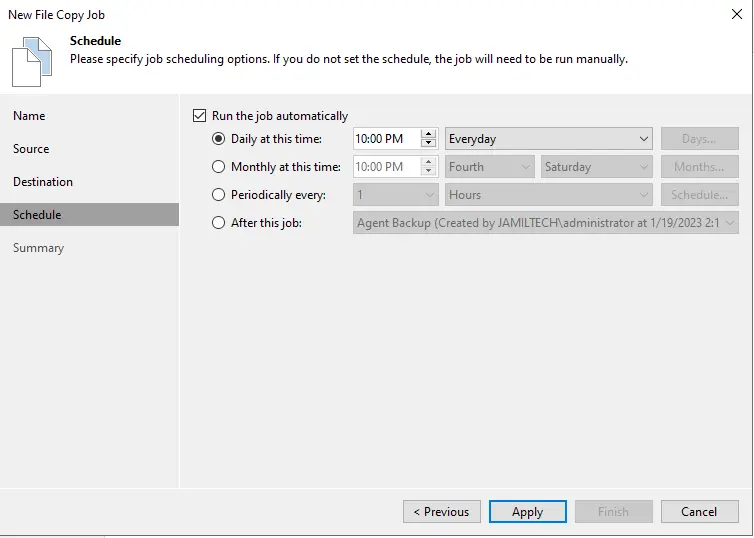
Configure the copy job schedule when you wish to run this job, and then choose next.
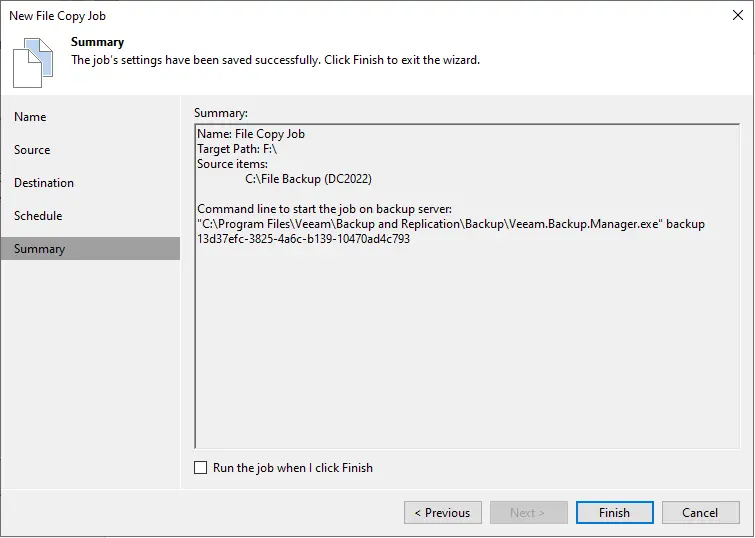
Review the file copy job summary and tick the box “Run the job when I click Finish” if you want to run this job right after you finish.
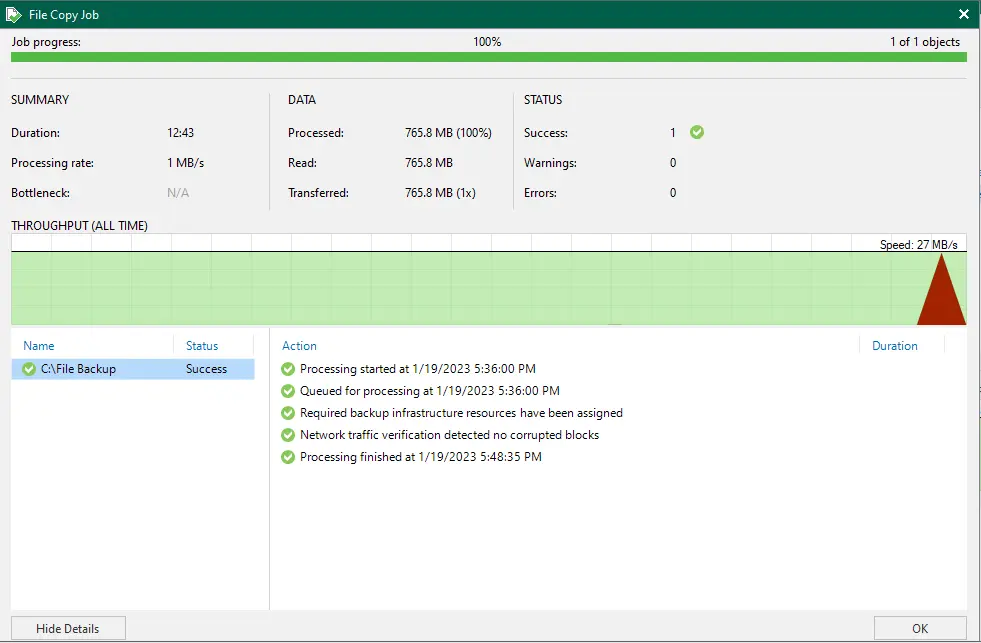
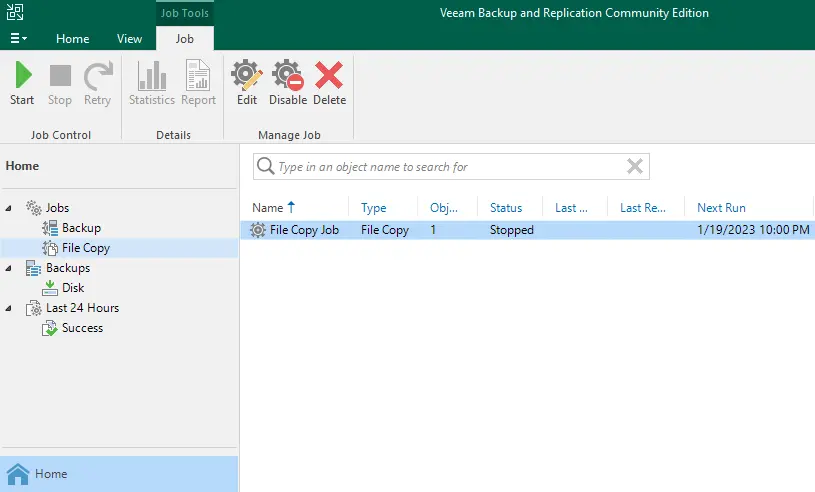
Select the file copy job, and then click on Start.
The Veeam file copy job was successfully completed.