Creating an SMB (Server Message Block) shared folder on Windows Server 2022 allows multiple users to access and share files efficiently within an organization. This guide will walk you through the steps to set up a secure and effective SMB shared environment, streamlining file sharing and collaboration within your business.
Understanding SMB on Windows Server 2022
SMB is a network file sharing protocol that allows applications to read and write to files and request services from server programs in a computer network. In Windows Server 2022, SMB facilitates resource sharing, such as files and printers, making it easier for users to collaborate and share information.
Visit Microsoft to learn in detail how to set up SMB sharing on Server 2022.
Key Features of Windows Server 2022 for SMB:
- Enhanced Security: Advanced security features, including SMB over QUIC, to protect data in transit.
- Performance Improvements: Optimized for better file sharing performance, especially in distributed networks.
- Ease of Management: Simplified management tools to streamline the creation and management of shared resources.
Table of Contents
Step-by-Step Guide to Creating an SMB Shared Folder
Step 1: Open Server Manager
- Launch Server Manager:
- Click on the Start menu and select Server Manager from the list of available applications.
- In the Server Manager dashboard, navigate to File and Storage Services.
Step 2: Start the New Share Wizard
- Navigate to Shares:
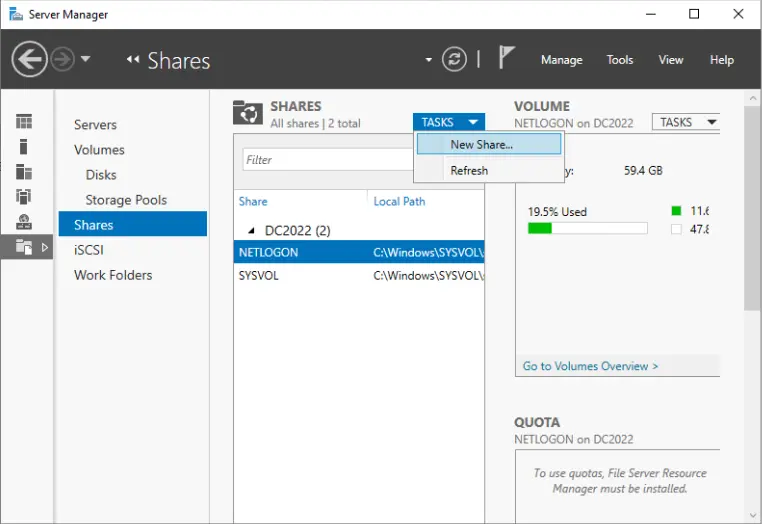
- In the File and Storage Services section, click on Shares to view all existing shared folders.
- Click on Tasks and select New Share to initiate the process.
- Select Share Profile:
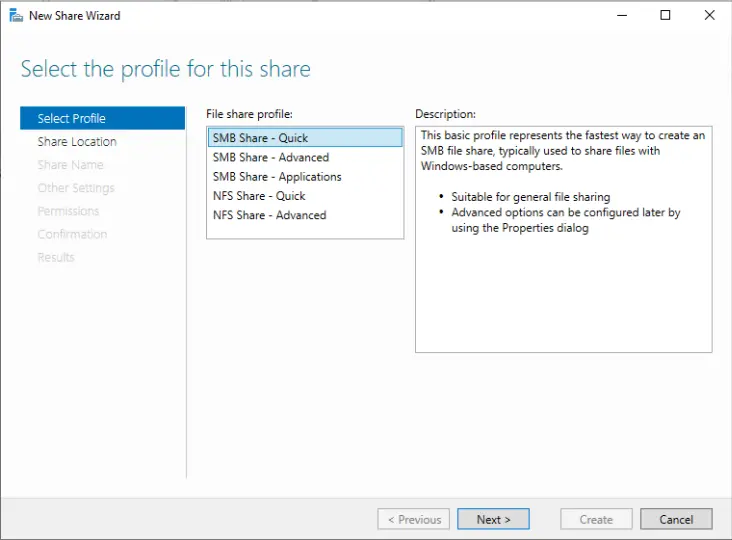
The New Share Wizard will appear. Choose SMB Share – Quick as the profile for creating a standard SMB share and click Next.
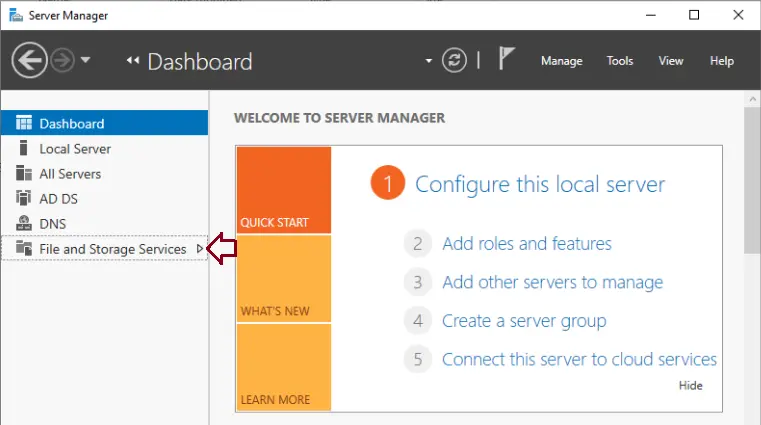
Click on Shared and click on Tasks and New Shared.
The new share wizard will be displayed; select SMB Shared – quick and click next.
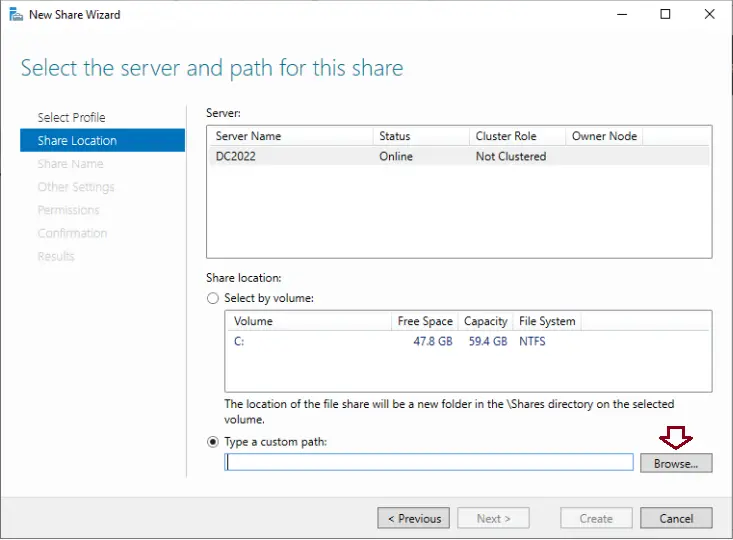
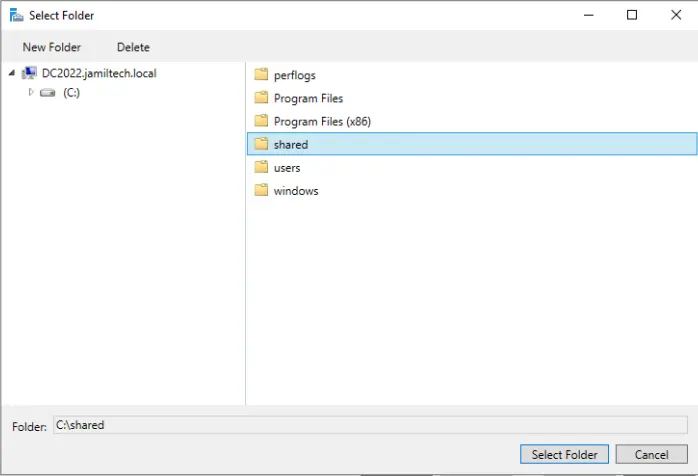
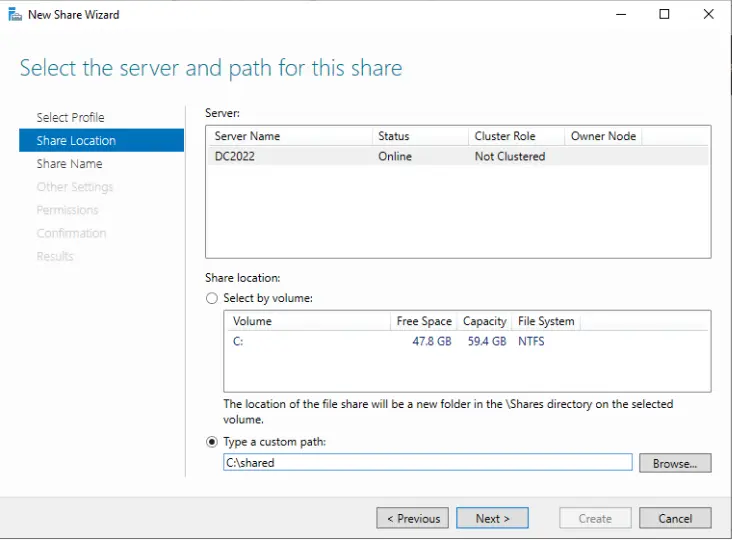
In the share location window, tick the box “Type a custom path” to select the folder to share.
Find your shared folder and choose select folder.
Click next.
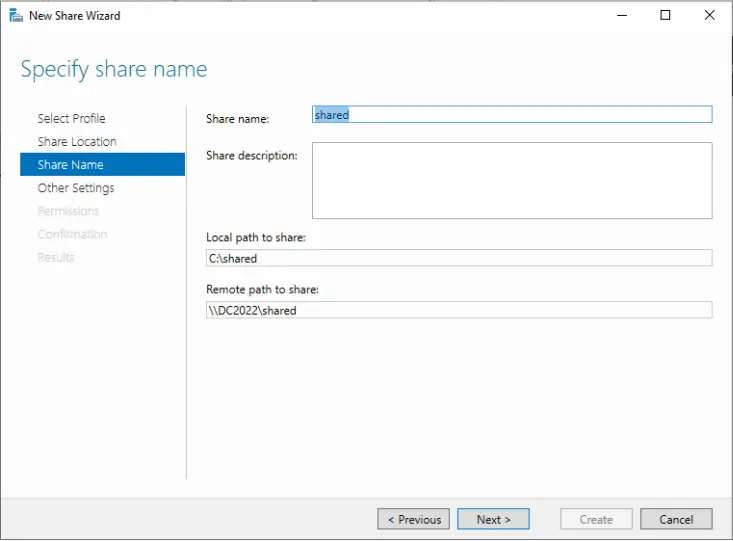
Specify a share name and click next.
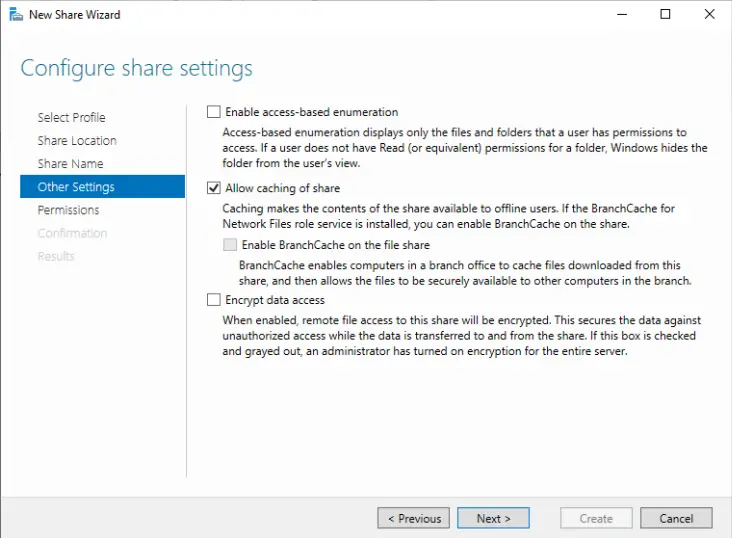
Verify the configured share settings and click next.
Step 3: Choose the Share Location
- Select the Folder to Share:
- In the Share Location window, select Type a custom path to manually choose the folder you want to share.
- Click Browse to navigate to the folder on your server that you want to share. Once selected, click Next.
Step 4: Configure the SMB Share
- Name Your Share:
- In the Share Name window, enter a name for the shared folder. This name will be used by users to access the share over the network.
- Click Next to proceed.
- Review and Configure Settings:
- Review the default share settings. If needed, adjust the settings according to your requirements.
Click Next to continue.
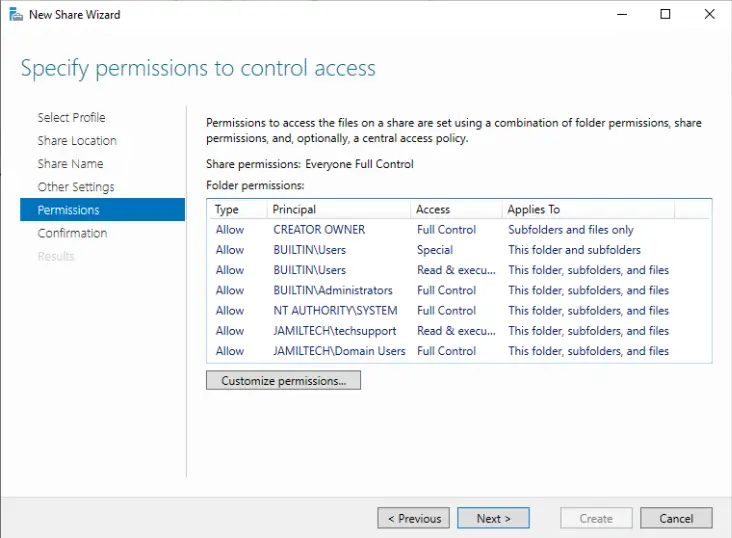
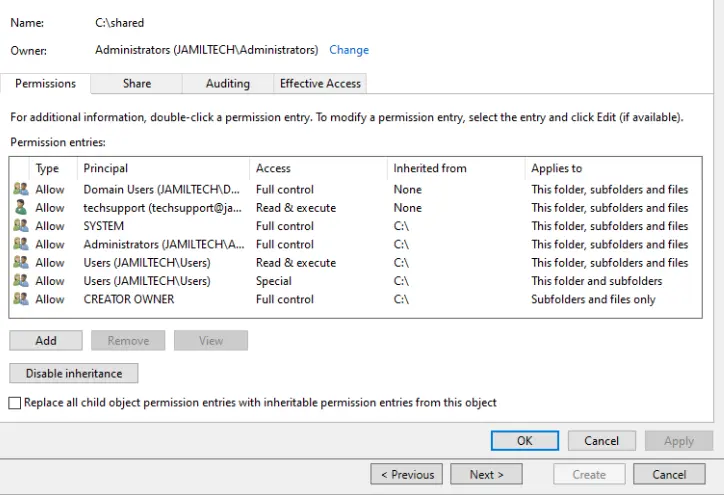
Click on the share tab.
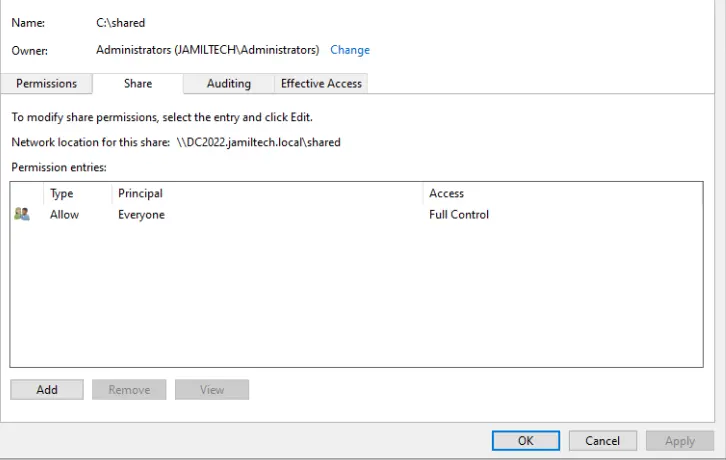
In the Share tab, click on Add.
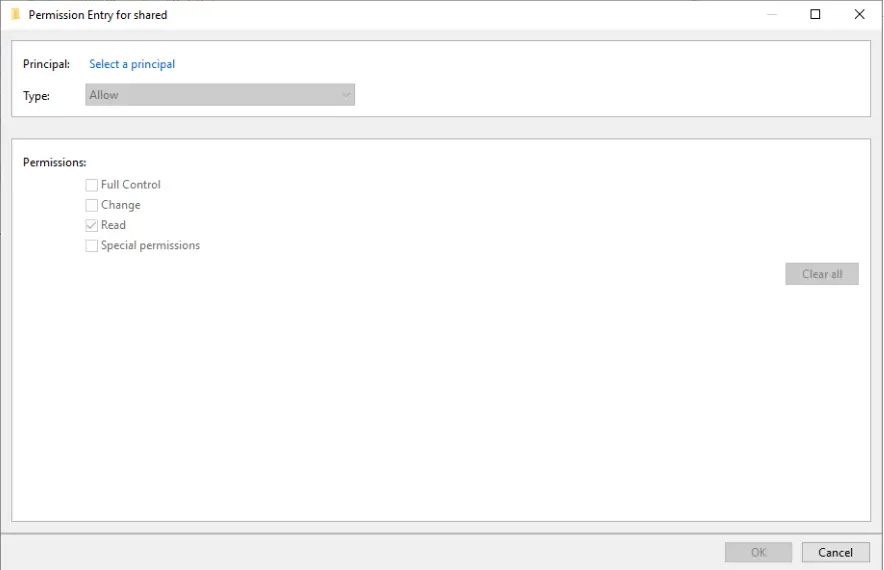
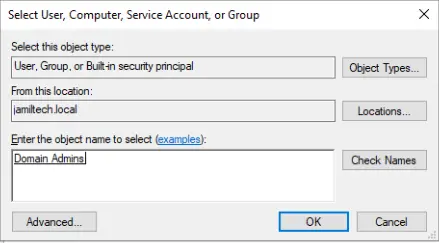
Click on Select a principal link.
Type domain users and click OK.
Step 5: Specify Permissions to Control Access
- Set Access Permissions:
- In the Specify Permissions window, click on Customize Permissions to define who can access the shared folder and what actions they can perform (read, write, etc.).
- Modify Share Permissions:
- Under the Share tab, click Add to include users or groups who will have access to this shared folder.
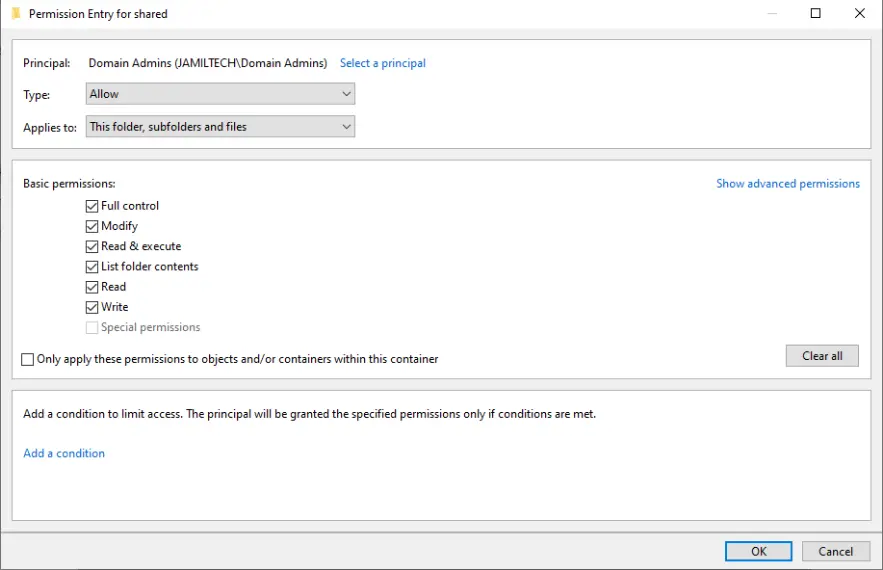
- Click on Select a Principal to choose the users or groups. For example, you might type Domain Users for general access and Domain Admins for administrative control.
- Set the required permissions (e.g., read, write) and click OK to apply the changes.
- Advanced Security Settings:
If you need to set more granular permissions, click on the Advanced Security Settings link. Here you can modify permissions at a more detailed level.
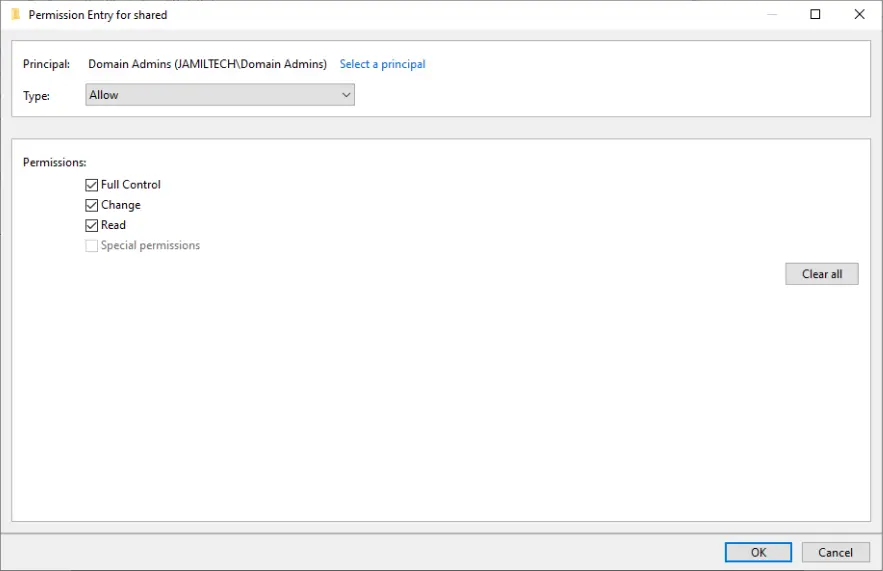
Click on the change link.
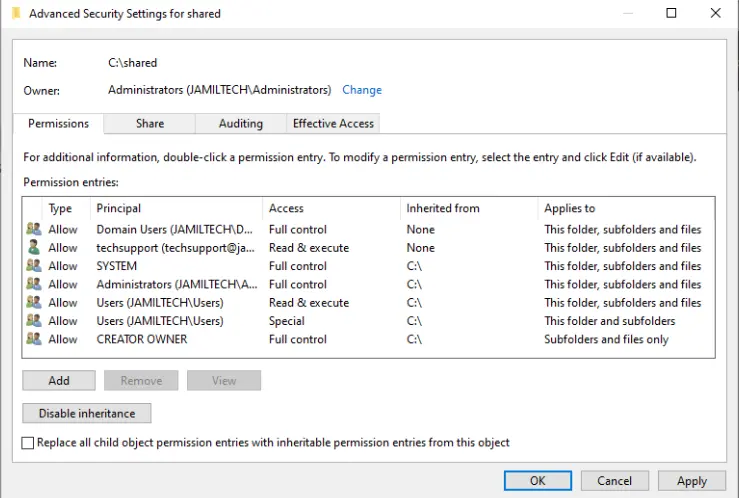
Choose to select a principal.
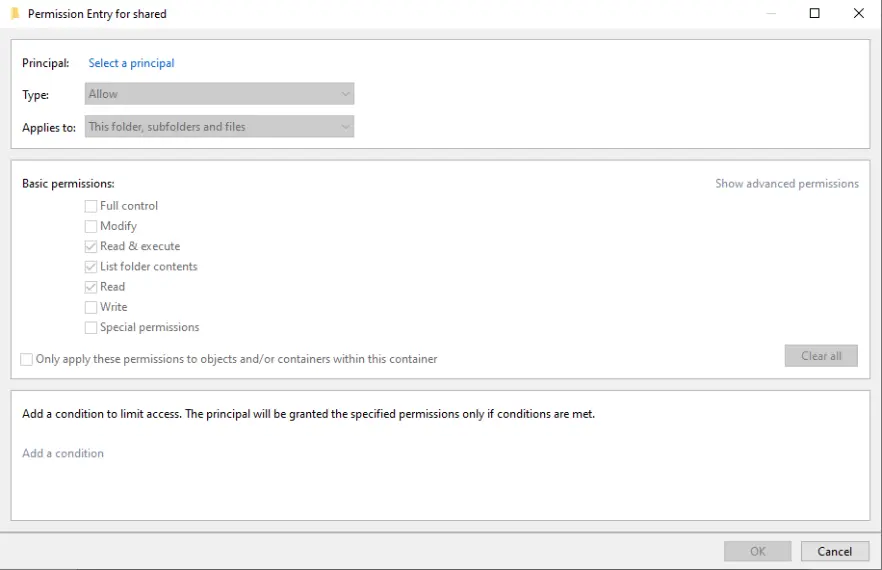
Type domain admins and click OK.
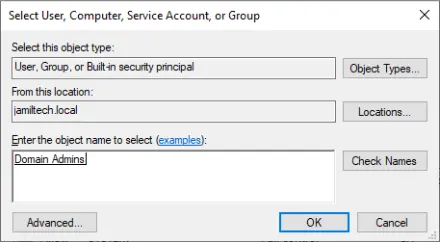
Click ok
Step 6: Complete the SMB Share Setup
- Finish and Create the Share:
- After configuring permissions, review the settings once more and click Create to finalize the setup.
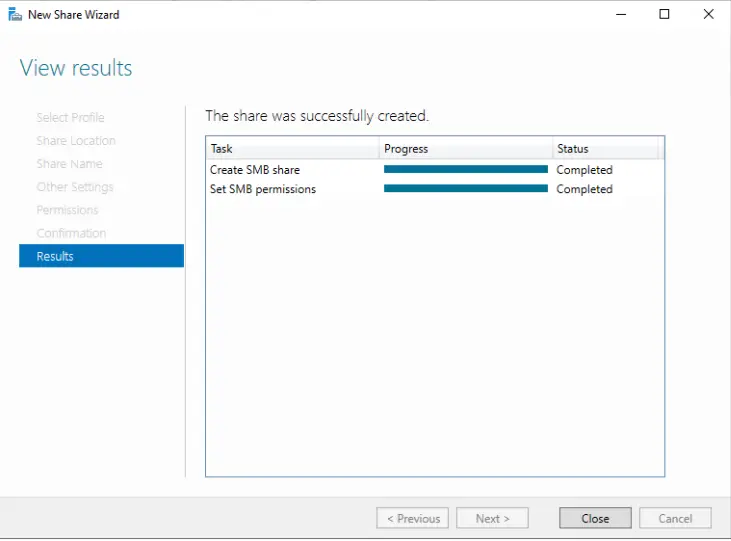
- A confirmation page will appear. Click Close to exit the wizard.
- Verify the Shared Folder:
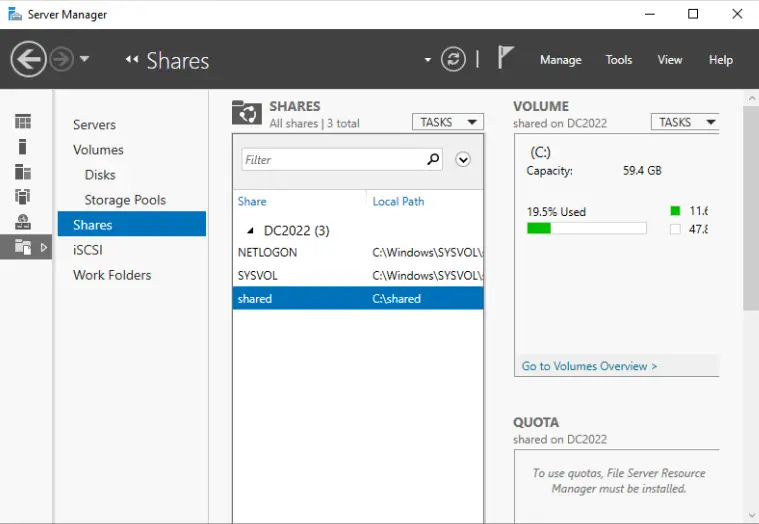
- The new shared folder should now appear under the Shares section in Server Manager.
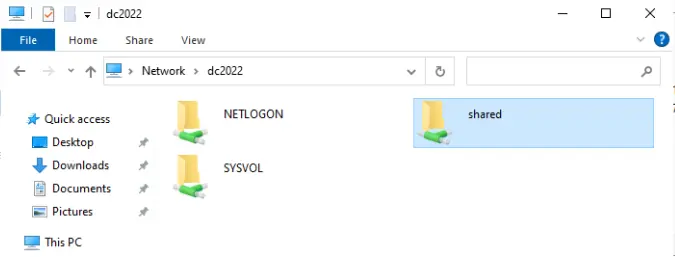
You can also verify its creation by navigating to Network in File Explorer. The shared folder should be visible and accessible to the users you have granted permissions.
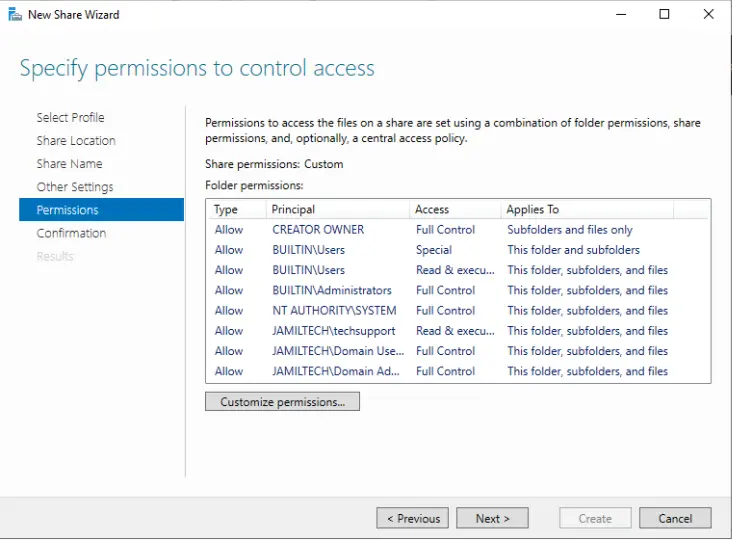
Click Create to complete the process.
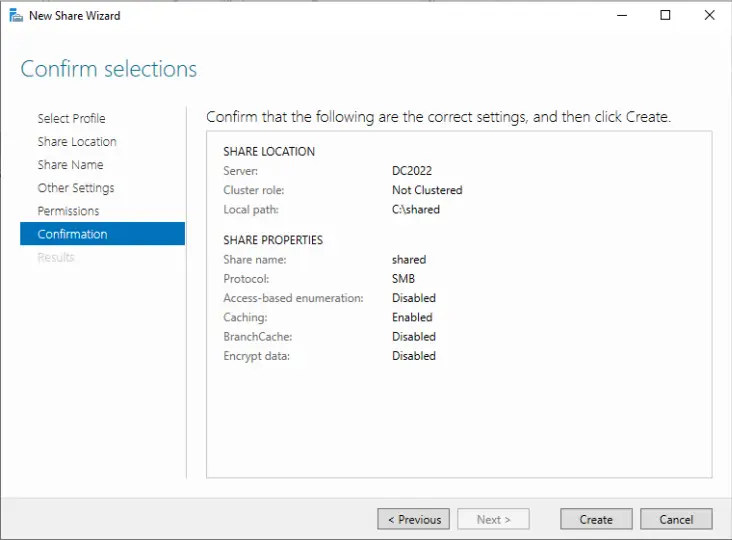
Choose Close.
We see the shared folder.
In File Explorer, go to Network Options, and there you will see the shared folder.
Conclusion
By following these steps, you can create an SMB shared folder on Windows Server 2022, enabling efficient and secure file sharing within your organization. This setup not only improves collaboration but also ensures that your shared resources are managed effectively. For more detailed information on setting up SMB sharing on Windows Server 2022.
With any of the above methods, we are able to create shared folders on Windows Server 2022.


