This article describes how to change reading pane in Outlook on Windows 11. When you use Microsoft Outlook, which is part of Microsoft 365, the Reading Pane makes it easier to read particular messages. You can also change everything about it to make it fit your needs better. Discover more about the reading pane and easy ways to change it in this article.
Outlook also comes with a reading pane style that opens emails on the right when you click on them as well. This layout might not work well on platforms with small screens. In two other versions, the reading pane is hidden and email is opened at the bottom.
Outlook has a lot of different panes. Some of them you see by default, like the Navigation pane, and some you might not use very often, like the To-Do and People panes. Each of these is meant to make it easier to find, see, and manage things in Outlook. We will look at these panes in more than one article and show you how to get to them, work with them, and change how they look. And we’re starting with the reading pane.
Table of Contents
Change Reading Pane in Outlook
Outlook 365 Reading Pane
If you click on the View tab in the Layout group in Microsoft Outlook, you can turn on or off the reading bar. Pick out the reading pane from that point on. There is no need to turn on the reading pane. To change this setting, do the following:
Open Microsoft Outlook 365 and click on the View tab.
Click the Layout group and select Reading Pane.
From here, you can move the reading pane to the right or bottom, or you can turn it off.
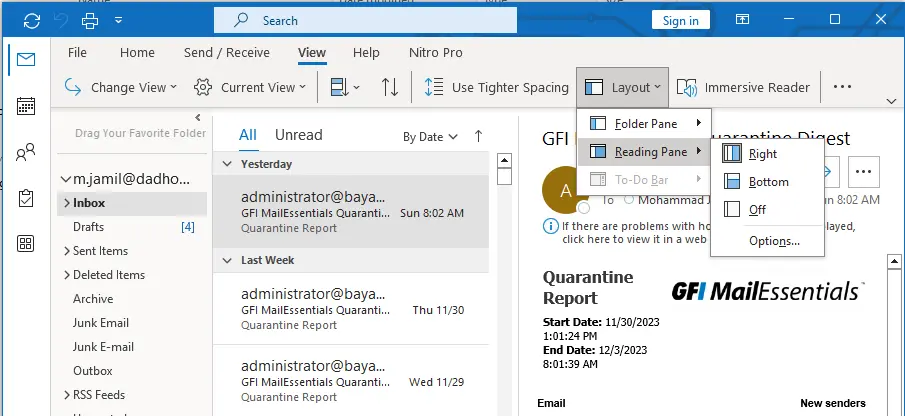
When you disable the reading pane, only the folder you are presently in is affected. To disable the current view for multiple folders, select Change View > Apply Current View to Other Mail Folders from the View pane. Select folders from the Apple View dialog window thereafter.
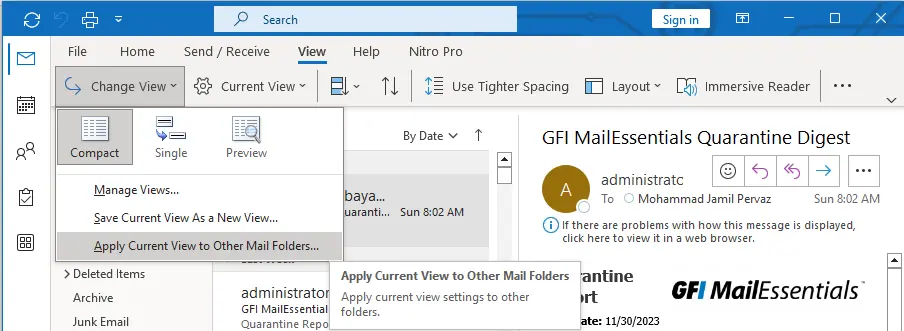
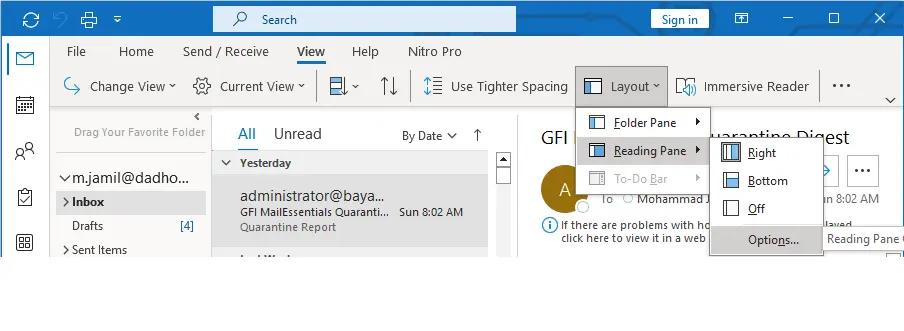
Microsoft Outlook Reading Pane Settings
In the Microsoft Outlook reading interface, there are multiple settings that can be modified for the purpose of personalization. Move to Reading Pane > Options from the View menu within the Layout group in order to modify the settings.
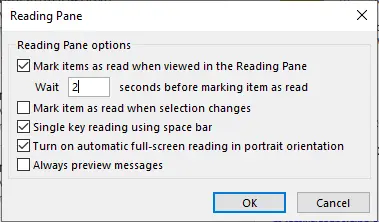
Mark Items as Read
The items in the reading pane can be marked as read automatically while the user is reading them. To turn on:
Under the reading pane options, check the box “Mark items as read when viewed in the Reading Pane”.
Input the duration in seconds required for Outlook to mark the message as read.
By deselecting the checkbox, the feature is by default disabled.
Preview Messages When Switching Folders
When enabled, the Always view messages option will cause the reading pane to contain the most recent message while navigating to a different folder. Selecting an item to read will be displayed in the navigation pane the initial time you navigate to a folder after launching Outlook if it is deactivated (the default setting).
Under the reading pane, select or deselect the “Always preview messages” check box.
Use Space Bar to Move Messages
When enabled (the default), single-key reading permits you to navigate through your messages in the reading pane using the space bar. One page can be scrolled down with a single touch of the space bar in the reading pane.
Select or deselect the “Single key reading using the space bar” check box.
Change Size in Reading Pane
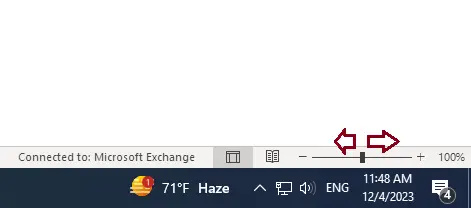
Two methods exist for temporarily adjusting the magnification level in the reading pane of Microsoft Outlook.
First, the Zoom control is located at the bottom of the Outlook interface. Modifications to the zoom level solely impact the present message.
Second, while in the reading pane, spin the scroll wheel on your mouse while pressing CTRL on your keyboard. When the wheel is rolled away, the content enlarges; when rolled backwards, it contracts.
Display a Message Preview in the Message List
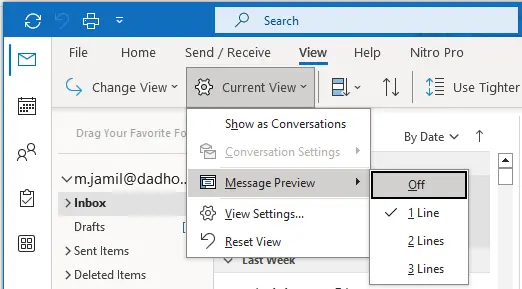
In situations where your Microsoft Outlook 365 Inbox is overflowing with numerous messages, you have the option to restrict the message list to the initial one, two, or three lines. In doing so, the subject line and sender’s name will also be displayed.
To make adjustments:
Click on the View tab in Microsoft Outlook 365.
Select Current View, and then click Message Preview.
Choose from the drop-down menu (off, 1 line, 2 lines, or 3 lines).
As mentioned previously, the Outlook reading pane is customizable in accordance with the user’s screen size and personal preference.
Change the Reading Pane in Outlook App
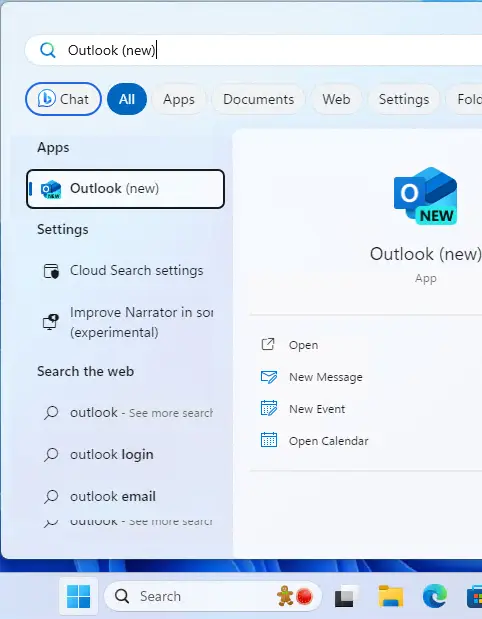
Open the Outlook app on Windows 11.
Search Outlook in the search box and open it.
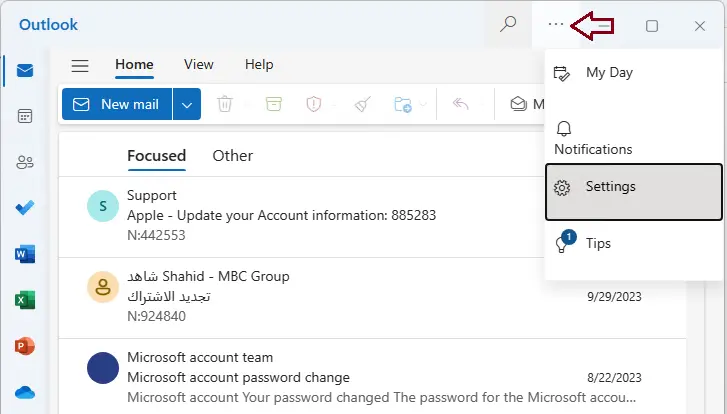
When the Outlook app opens, click on the three dots and select Settings on the top right.
On the Settings interface, select the Mail tab and select Layout on the right.
On the Layout setting interface, scroll down to the Read pane section. Select one of the options available:
Save your modifications after making your selection.
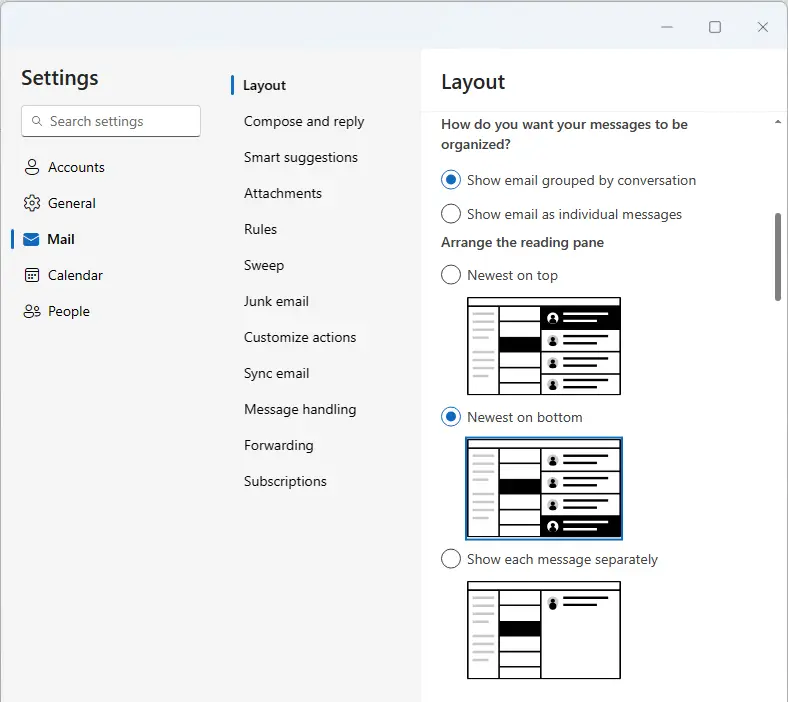
Return to your inbox after making your selection and determining whether the revised reading pane layout is to your liking. If not, return to the Settings page and select an alternative.
This article showed you how to change the reading pane layout in Microsoft Outlook 365 and the new Outlook app on Windows 11.
Visit this link to learn more about how to change reading pane in Microsoft 365.


